How to change the DNS server used by your iPhone and iPad
 Malcolm Owen
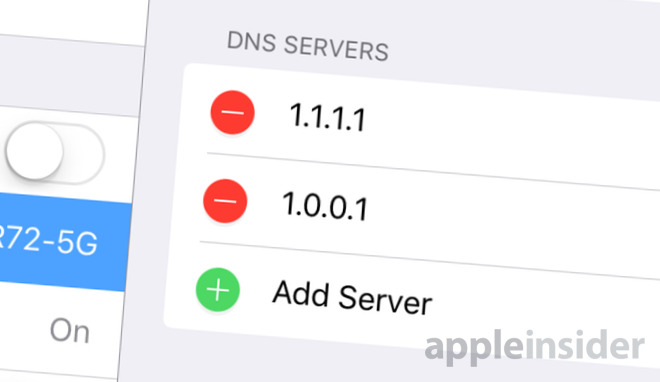
At times when websites take longer than needed to load up on an iPhone or iPad, the problem could be caused by your Internet provider's slow DNS server. AppleInsider advises how to update your iOS device's network settings to use a different DNS service than the one provided as part of the Wi-Fi connection settings.
The Domain Name System (DNS) is a way for computers to find where it can find specific websites and services online. Effectively acting as a directory enquiries service or a phonebook for the Internet, the DNS takes the domain name requested by a browser and returns the IP address, which is then used by the browser to connect to what it needs to access.
Generally, the DNS server is defined to a device automatically when they connect to a network, and is usually a server operated by the Internet Service Provider for the connection. For most users, this is fine, but there are a number of other DNS servers online that can be used instead.
Why change DNS servers?
Depending on your Internet Service Provider, the DNS server may not update to reflect domain name changes as others, leaving the site inaccessible in some cases with users being directed to the wrong IP address. Some DNS servers update at a faster rate than others, and so are more likely to have the latest address information after such a change.
Depending on the size of the ISP and the resources it puts into running its DNS server, the reliability and speed of the service could degrade if too many requests are made to it at a time. Extremely large third-party DNS services are usually better equipped for massive loads from its users.
Using a DNS service that you trust is also handy in cases where some sort of intervention makes an Internet provider's server unusable, such as during the 2014 elections in Turkey, when governments blocked access to social media for a number of weeks. Details for Google's DNS service started spreading between citizens as a workaround for the block, but only for a brief time.
In the case of public Wi-Fi hotspots, it is also good practice to use a DNS service you are familiar with as there is no guarantee that the DNS offered by the connection will provide correct results, or even the possibility the company running it has taken steps to prevent access to certain sites and services by its users.
While there are many plusses for using a third-party DNS, it can also cause some problems. In some cases, the use of a centralized DNS service can slow down media access to content delivery networks.
For example, using a centralized DNS could cause a content delivery network for a service to use the same, and potentially lengthy, connection path between the server and the user as others using the same DNS provider. By comparison, ISP-level DNS services could inform the content delivery network of its location, allowing for a more local server to be used instead.
Wi-Fi: Changing DNS details
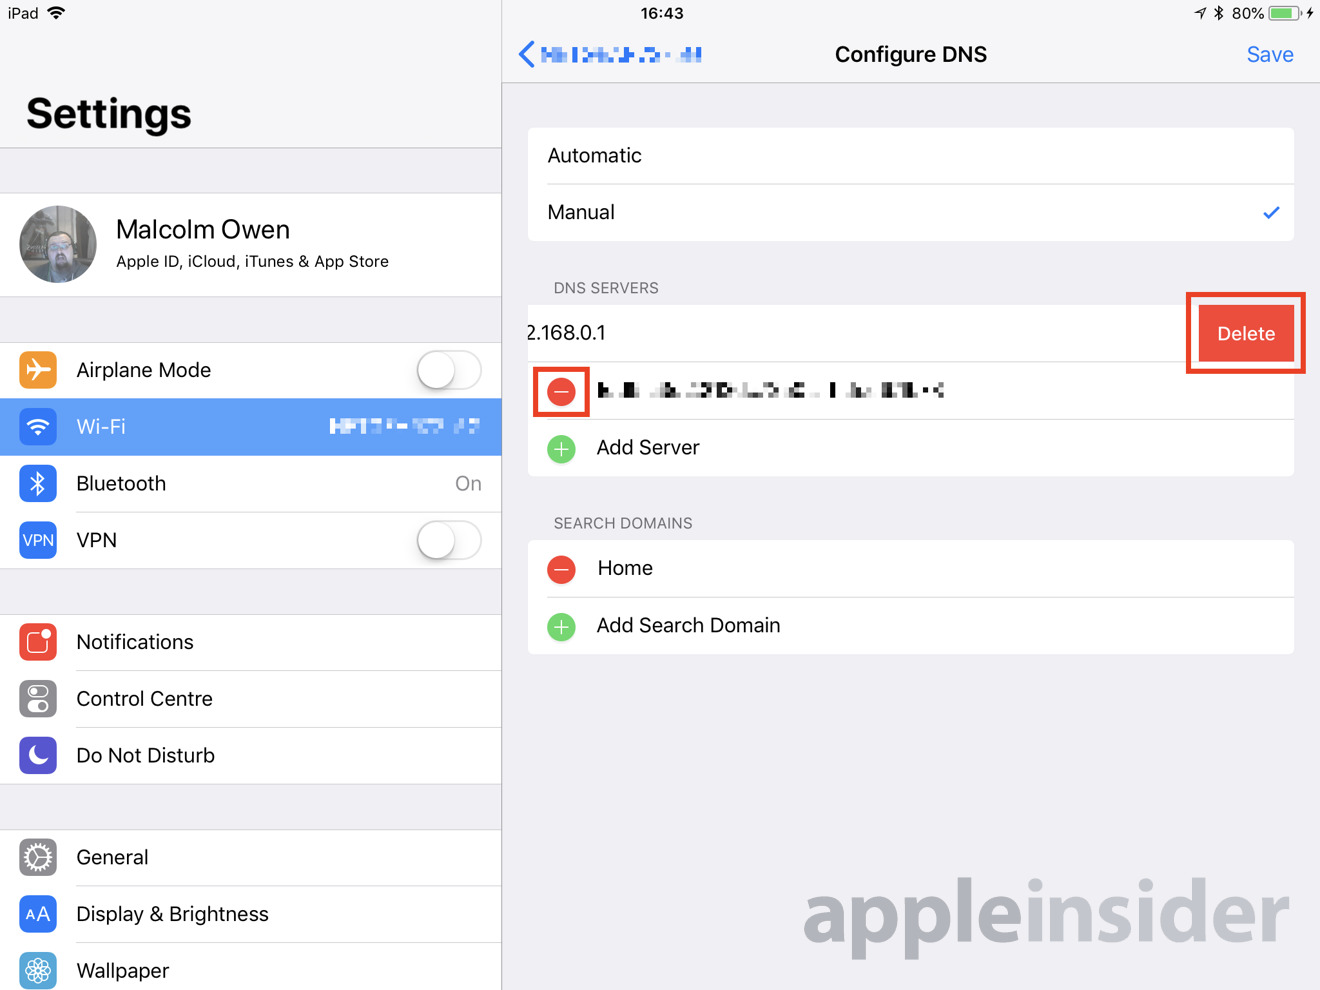
Enter the Settings app on your iOS device, and select Wi-Fi. Tap the small "i" icon next to the name of the network that needs the DNS server details changed, scroll down, and tap Configure DNS.
At the top, change the setting from Automatic to Manual. In the section below, tap the red minus circle next to the DNS servers followed by Delete to remove them.
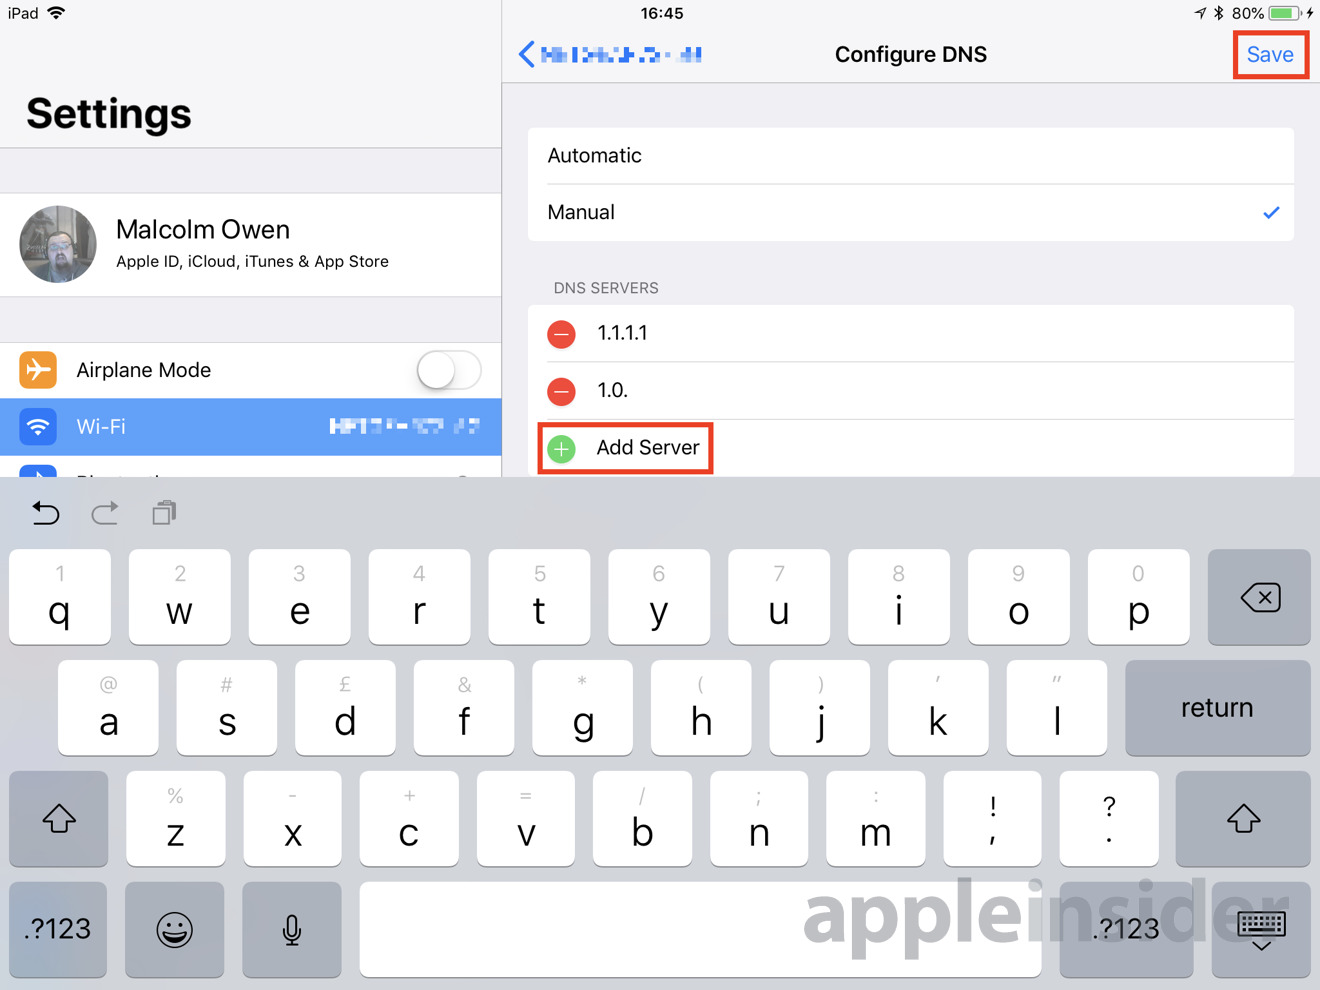
Tap Add Server, then in the new empty listing, type in the DNS server IP address you wish to use, and repeat for a second listing if a redundancy option is available. Once finished, tap Save in the top-right corner.
The same process can be used to change the servers again at a later time, or to revert back to the connection's default. To use the DNS server the Wi-Fi network specifies, change from Manual back to Automatic.
Note that this change will only apply to a specific Wi-Fi network, not for all networks. This setting needs to be changed on all Wi-Fi networks you wish to use a specific DNS server through.
Cellular: Workarounds required
Apple has not included the ability to change the DNS details for cellular connections in iOS. By default, users are stuck connecting to whatever DNS server is set up with their carrier.
It is possible to make changes to the cellular DNS, but only through the use of third-party applications.
One option is DNS Override, a tool for easily changing the DNS details for Wi-Fi connections, but is also capable of working around Apple's restriction. Once unlocked with an in-app purchase, the app effectively creates a dummy Virtual Private Networking (VPN) profile that isn't actively used, but does allow for the app to set the DNS server, including for cellular networks.
Another alternative is to set up a VPN on the iOS device. As this creates a connection with a remote server before accessing the wider Internet, it can be used to bypass your carrier's DNS server completely.
Various VPN servers are available, both in paid and free forms, though if you have a good connection at home, it is also possible to set up your own.
Further Notes
There are lists of publicly-accessible DNS servers online, giving you a wide variety of options to choose from. Two major third-party DNS services that are also easy to remember are offered by Google and Cloudflare, with both boasting speed and security improvements compared to ISP versions.
Google's public DNS IP addresses are 8.8.8.8 and 8.8.4.4. Cloudflare's version, in association with APNIC, is located at 1.1.1.1 with the backup 1.0.0.1.
If you have control over your home network's router and want to change the DNS for all of your devices, the best option is to attempt to change the DNS on the router itself. Making the change here means any device connecting to the Wi-Fi network with the DNS set to automatic will use the updated details.


 Andrew Orr
 Sponsored Content


 William Gallagher
 Mike Wuerthele
 Christine McKee