How to create custom Quick Actions in macOS Mojave
 Malcolm Owen
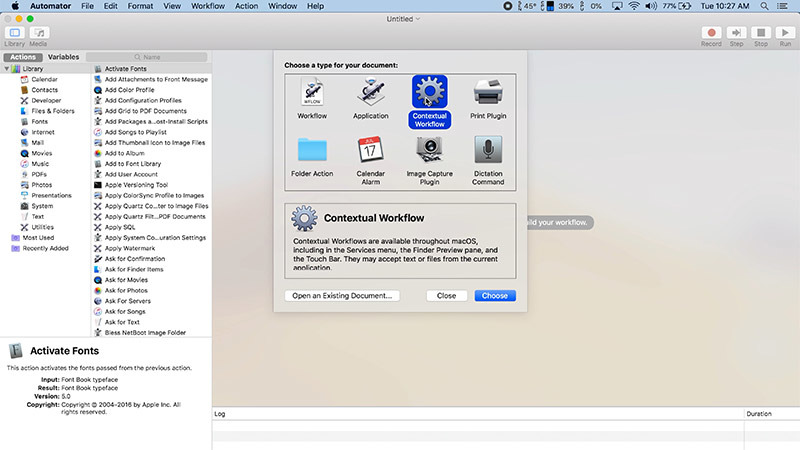
The Quick Actions of macOS Mojave show promise, but there's more that can be done with them than what Apple demonstrated during the WWDC keynote. AppleInsider explains how to get started producing custom workflows that can save you time.
At WWDC 2018, Apple announced macOS Mojave, which is due for release this fall. As part of the keynote demonstration of its features, Quick Actions was shown as a way to perform simple commonly-performed activities with minimal effort required by the user.
The list of things Quick Actions offers include image rotation, accessing Markup, turning bulk images into a PDF File, adding a password to any document, and even the ability to instantly add a watermark to multiple image files, all within Finder's new Preview window.
Quick Actions are also available when you right-click on a file, even when you're on the desktop and not using the Preview pane.
We tried them all out and they worked perfectly, with the exception of watermarking, which requires quite a bit more work to perform.
This article will explain how create your own custom Quick Actions in macOS Mojave.
Getting Started
To start producing a 4K-to-1080p image resizer, open the Automator app by using Spotlight search, then click New Document. Select Contextual Workflow and click Choose.
This is a new option in Mojave that allows the workflow to work in the Finder Preview pane as well as the MacBook Pro Touch Bar.
There is a large library of actions in the sidebar that can be used, but here we will outline how to use some of the options as examples.
Instant Image Resize
Go into Files & Folder and add the Duplicate Finder Items action. By using this, we won't be editing any of our original image files.
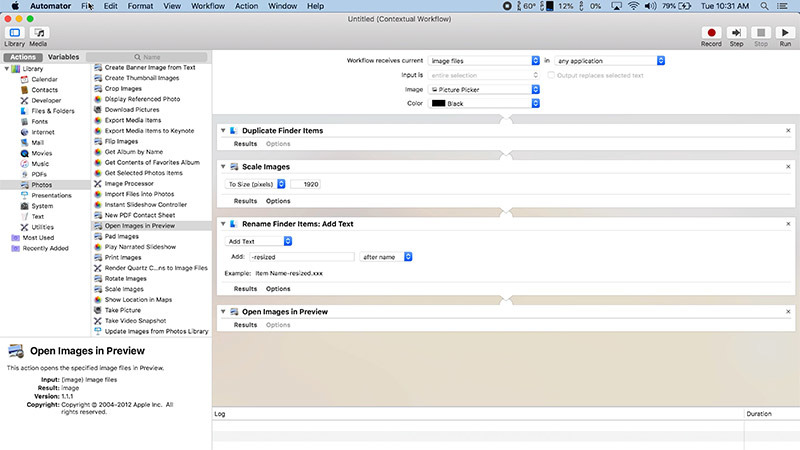
Next head into Photos and add the Scale Images action. There will be a prompt asking if the Copy Finder Items action needs to be added. Since the Duplicate action is already included, decline the prompt.
Since the source consists of 4K-resolution images for this example, the size will be set to 1,920 pixels, which will result in images resized to 1,920-by-1,080 pixels. Other resolutions can also be entered, depending on your needs.
Access the Files & Folders section and add the Rename Finder Items action. It defaults to Add Date or Time, but in this case it will be changed to Add Text, with the instruction to add "-resized" at the end of the filename.
Back in the Photos section, add the Open Images in Preview action.
At the top of the page are Workflow options. In this section, we can change what the Workflow receives to Image files, since we only need to resize images.
Below this section, the icon image for the Workflow can be customized to something other than the default action icon.
Lastly, select File in the menu and save the workflow. Give it an appropriate name, such as "Resize" or a related title.
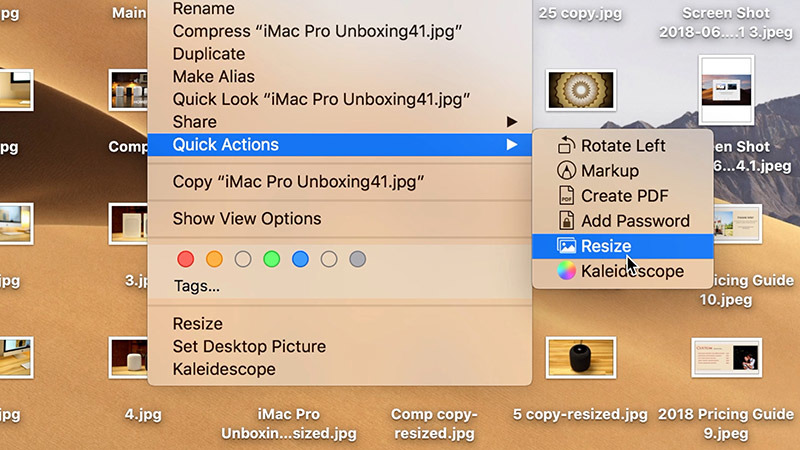
To test, enter the Finder and select an image. Right-click the image and select More within the Preview section, and the new Resize Quick Action will appear.
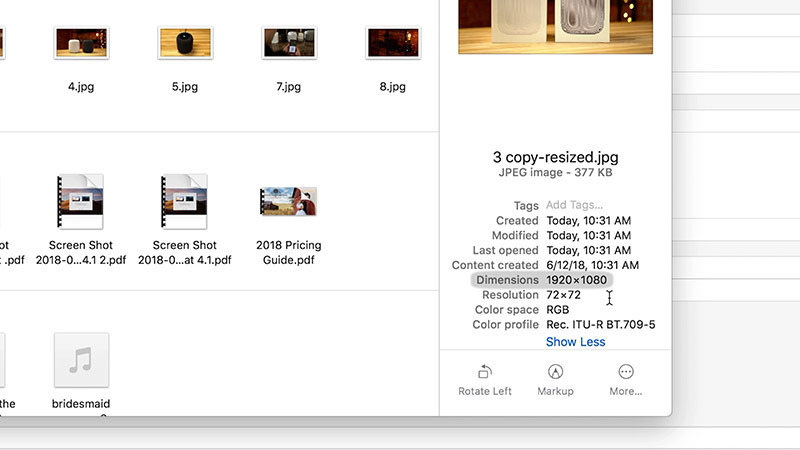
Click the Resize Workflow. A few seconds later, the image opens in Preview, complete with the "-resized" suffix in the title. On closing the image, the metadata will reveal the image's new resolution, showing it had been resized correctly.
Extending Resize
It's possible to get more done with the Resize command. For example, new actions can be added to the Workflow that automatically sends resized images by email to a selected contact.
On adding the New Mail Message action, there are options to input the recipient, Message and Subject for the email. Within the subject line, variables from the Variable tab can be included to show specific information about the file. It is also possible to change the format of the variables by clicking an arrow in the section.
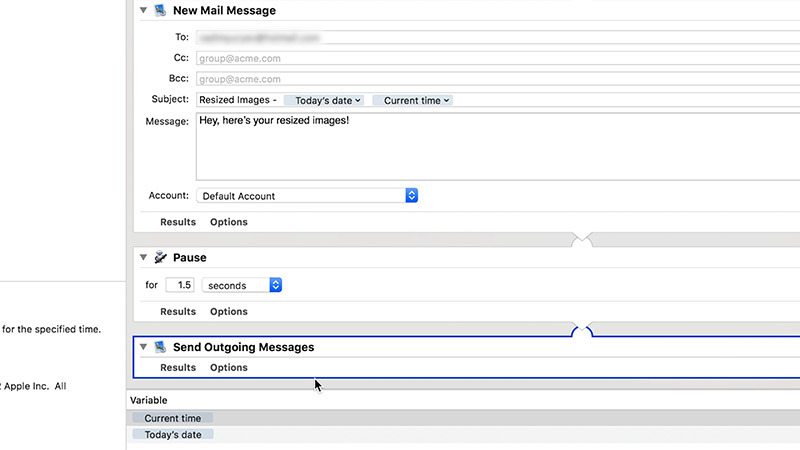
At the end of the list, there needs to be a simple Send Outgoing Messages action, that will dispatch the emails. Just before it should be a Pause action, as sometimes there isn't enough time for the workflow to attach the images to the messages before sending them off. For large bulk processes, a longer pause period may be desired.
Our bulk test of the command on 15 images resulted in an email with the date and time in the subject line, and with all 15 resized images.
Alternative Actions
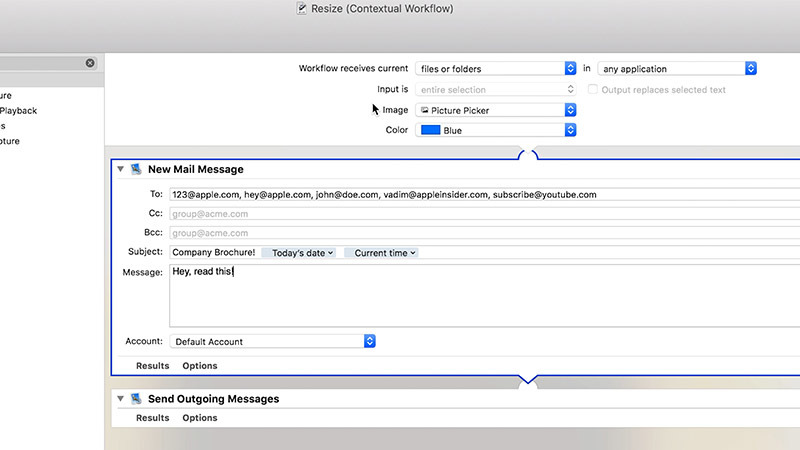
While the above could be used to send emails to a specific address, the workflow could potentially be combined with a mailing list for multiple people in a business, and not just for photographs and illustrations. For example, a company mailing list could be used by the workflow to instantly send brochures and documents to everyone in a company, all by switching the Workflow input from images to files and folders.
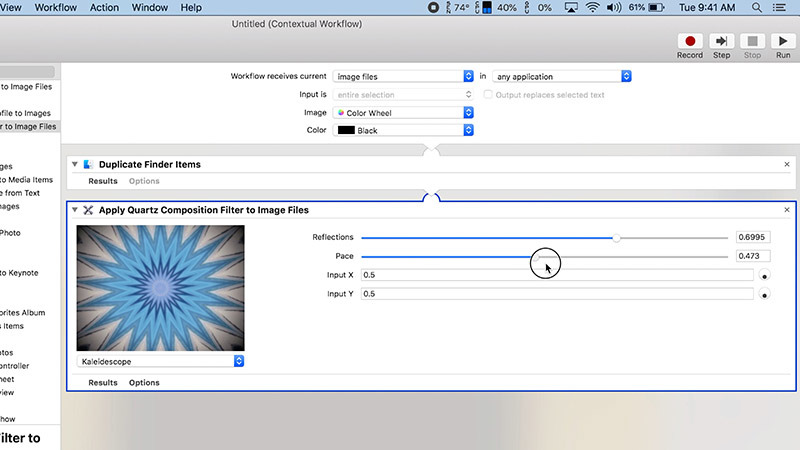
Another unique Quick Action we were able to produce can instantly produce a kaleidoscope-style image from any source picture. The reflections, pace of animation, and offset can all be customized, and can produce some pretty sweet results.
This action also has a ton of options, like an image resizer, color controls, and many other filters.
Another example is a Quick Action that can automatically extract images from PDF files, a function that would normally require an image editing tool like Photoshop to perform. The color mode, resolution, compression, and the file formats for the images can be set up.
For images, there's other actions that include things like converting the file type, flipping the image, scaling, and printing. For PDFs, you can add a Grid, add a filters, extract text, and much more.
Those examples are just the tip of the iceberg of the Quick Actions users will be able to produce when macOS Mojave is released this fall.


 William Gallagher
 David Schloss
 Amber Neely