How to turn Live Photos into animated GIFs in iOS
 Malcolm Owen
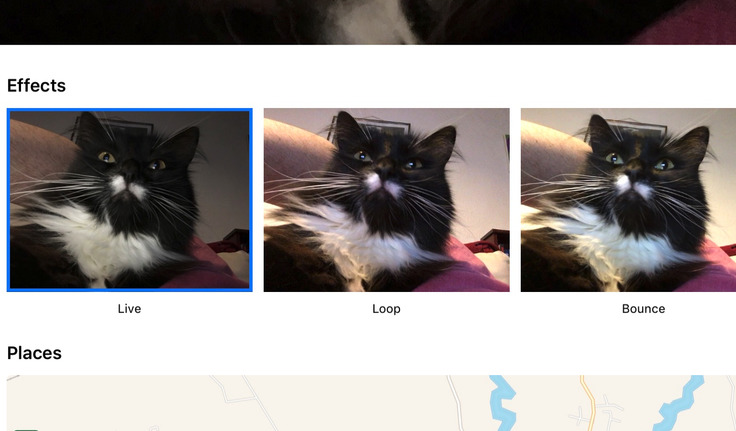
Taken a Live Photo on your iPhone or iPad and want to share it around on social media as a GIF, potentially creating a meme in the process? AppleInsider shows how to convert the clip into one of the most commonly used animated image formats found online.
Introduced in 2015 in iOS 9, Live Photos is a feature of the iOS camera that records the period of time surrounding the moment when the user takes a photograph. Along with the still image, Live Photos can also play the 1.5 seconds before and after the shot as a 15fps video, telling viewers the story about the shot.
Shortly after its creation, various apps and services started to support the image type, enabling them to be shared with other users. There are also options in the Photos app to share the Live Photo with others on social networks and messaging apps, and for most people, that's more than enough for their needs.
In cases where an app or service simply won't accept a Live Photo as an image or animation, or if you want to slightly change how it appears, the best option is to create an animated GIF.
Creating the Image
Load up the Photos app and select the Albums tab. In that section, select the Live Photos folder, then tap the specific Live Photo you want to use to bring it fullscreen.
Swipe upwards in the middle of the screen to bring up extra information about the shot. The main element we are interested in is the animation effects selection.
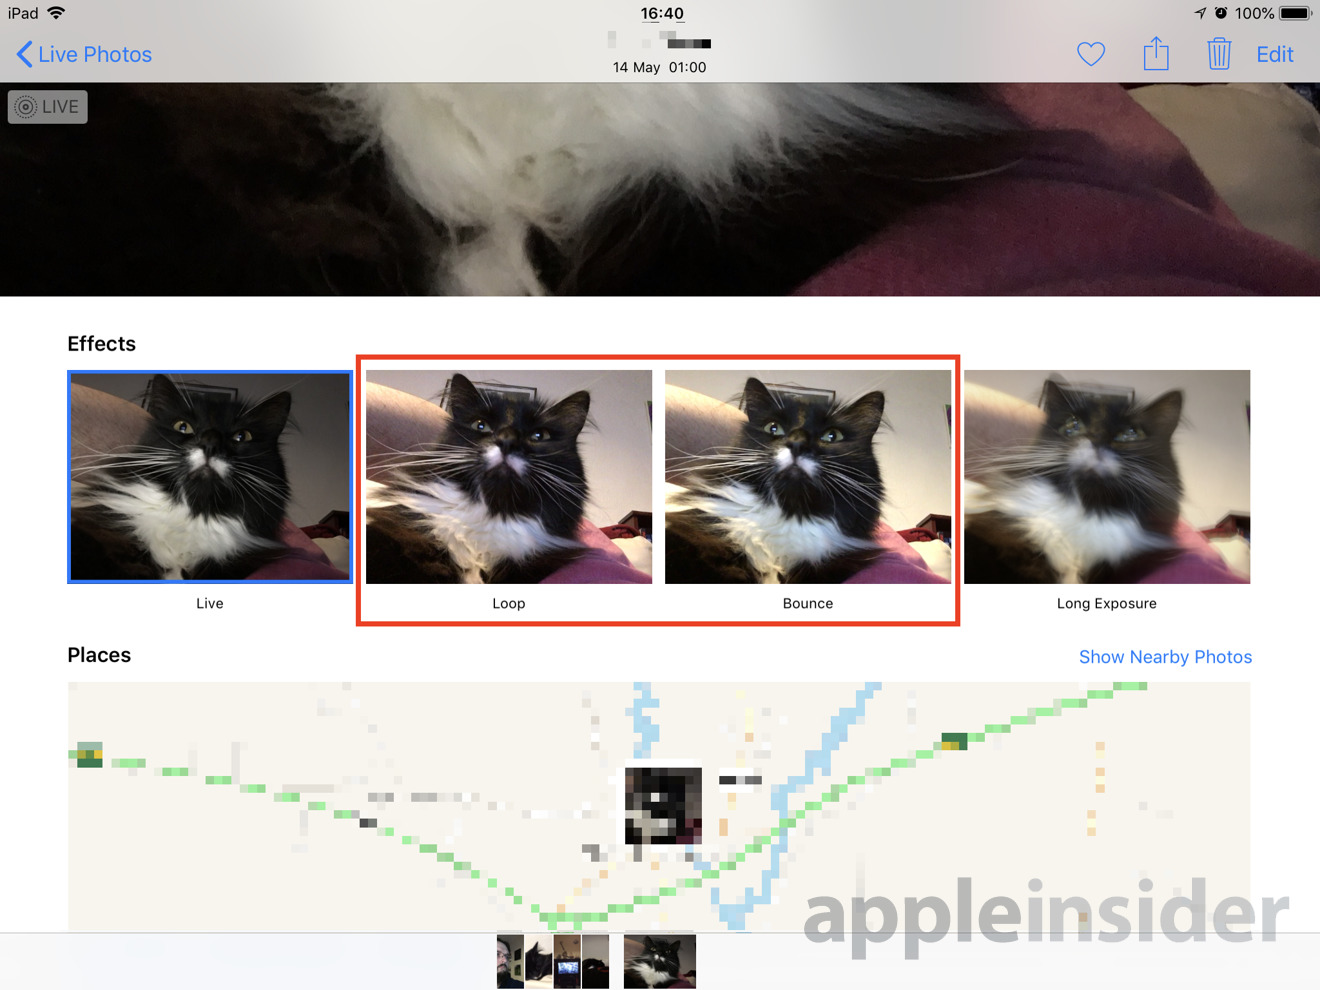
There are four options here, with Live effectively leaving the image as it is, playing just once. Another is Long Exposure, which combines all the frames of the Live Photo into a single image, which can create some artistic effects. Ignore both of these options.
For this, we are interested in the Loop and Bounce options. Loop continuously plays the animation, while Bounce will constantly play the clip forwards then backwards. Select one of these two options.
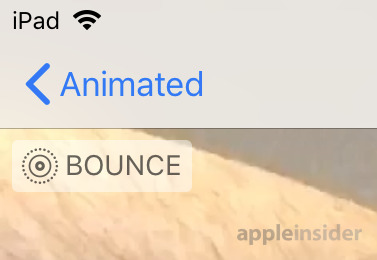
Navigate back to the Albums tab and select a folder called Animated, which contains any and all animated GIF-style content created on the iPad. If the folder didn't exist previously, Photos will automatically create it.
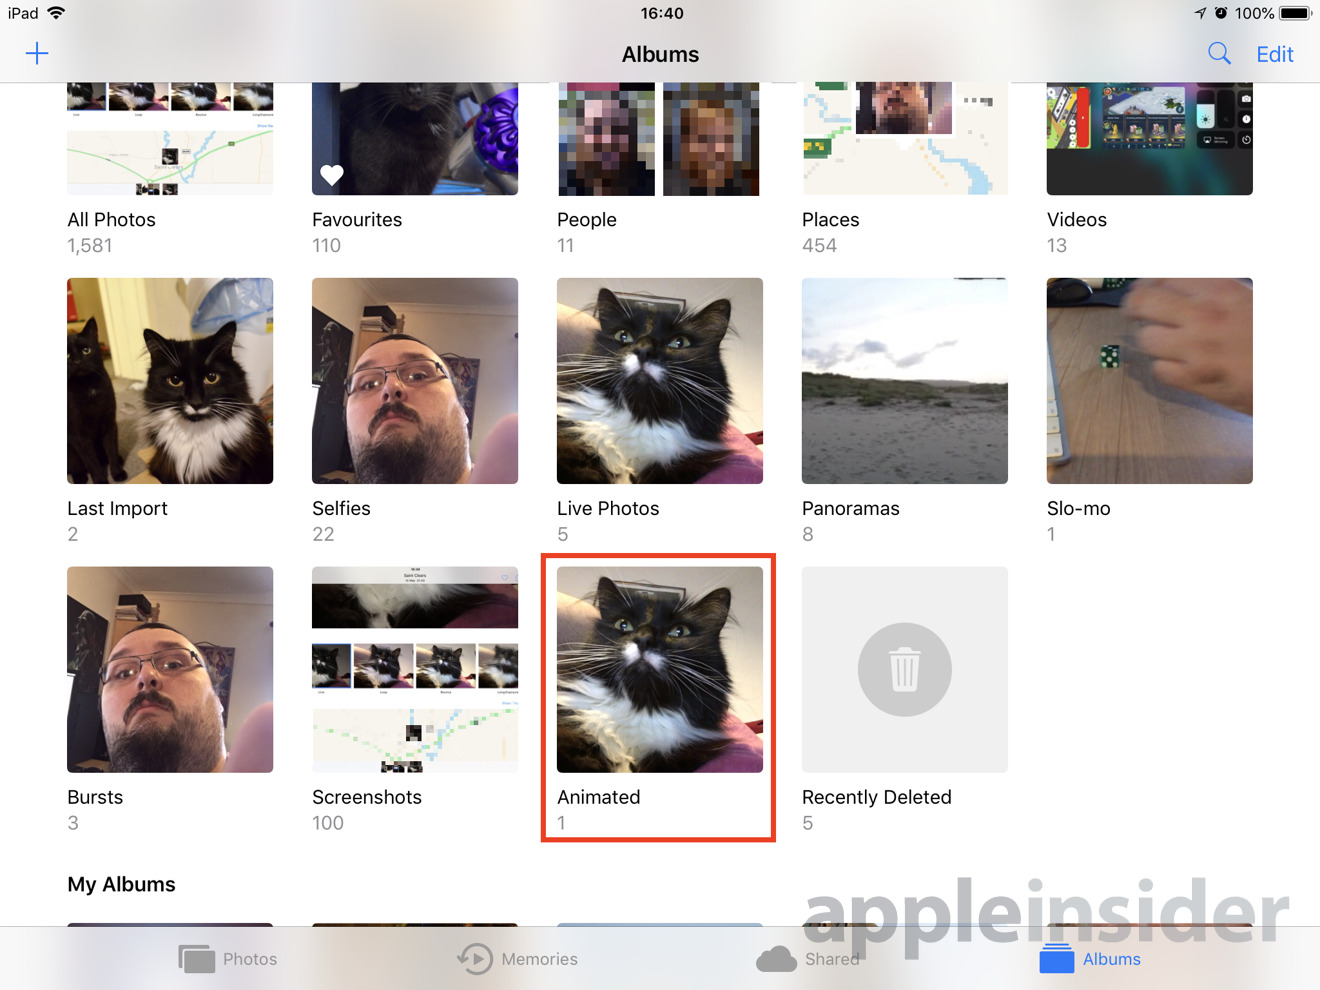
Opening the animation in the folder will display the created GIF file. Photos will also display in the top-left corner what kind of animation option was selected for the image.
At this point, the image can be shared via the normal sharing options, or you could email it to yourself as a GIF file.
Further Notes
While this may be seen as a waste of time creating a GIF rather than directly sharing, creating the animation before sharing can help prevent some issues. Not all apps will accept a Live Photo directly as an animation
For example, adding a Live Photo as an attachment in Gmail will result in a JPEG file instead of a GIF, while sending the version from the Animation folder returns the intended GIF.
There is also the added benefit of being able to control how it will be displayed on other platforms, as there's no guarantee that it will automatically loop on your chosen service.
Users wanting more control over how GIFs appear, or to create GIFs from video clips, can find a wealth of apps in the App Store for the task.


 Andrew Orr
 William Gallagher
 Mike Wuerthele
 Christine McKee

 Amber Neely