How to use Continuity Camera in macOS Mojave and iOS 12
 Andrew O'Hara
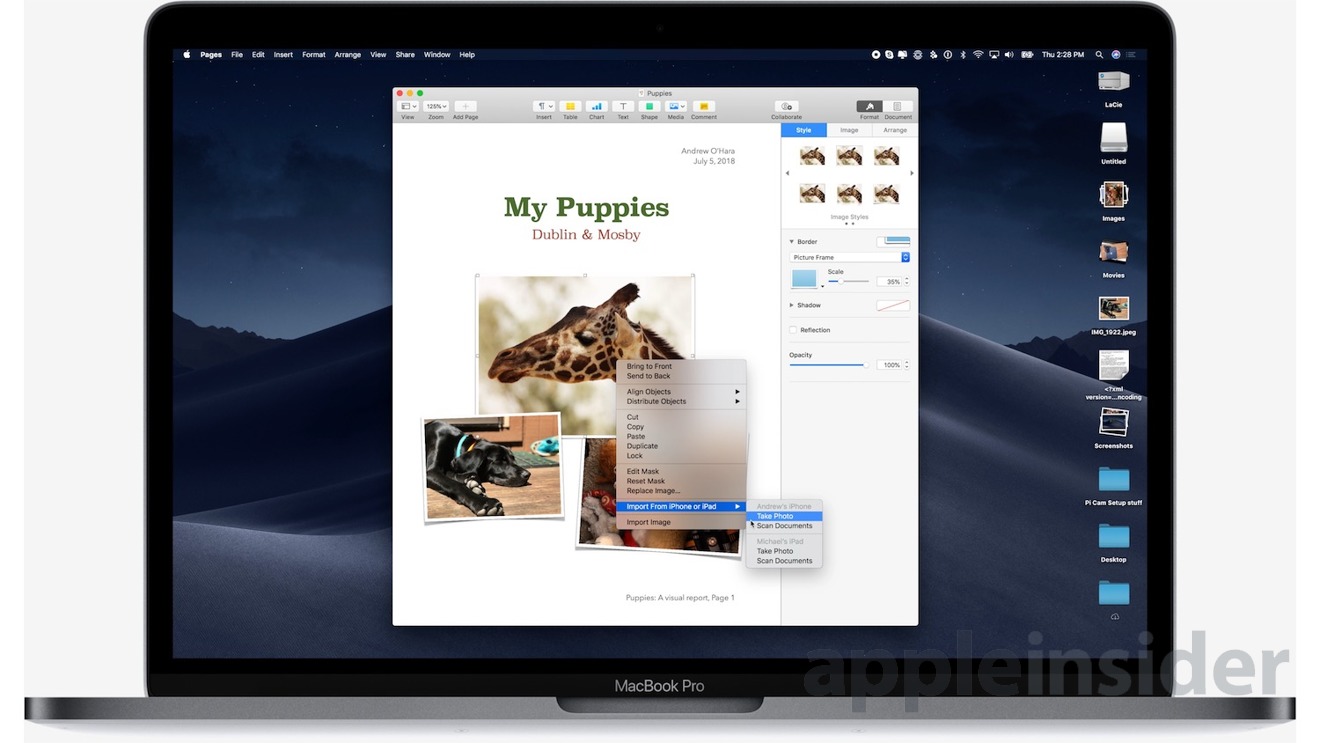
Continuity Camera is a new feature in iOS 12 and macOS Mojave that allows users to easily insert photos and scans into documents on their Mac from their iPhone or iPad. AppleInsider shows you how to use the image-capturing function.
To use this handy new feature, you need both an iOS 12 device and Mac running Mojave.
There are two options when using Continuity Camera; inserting a photo or a scan. When inserting a photo, it looks just like a photo that would be snapped on the phone. Scans, on the other hand, get converted to grayscale and flattened, looking just like it was uploaded through a scanner.
Many apps on Mac work with Continuity Camera including Pages, Keynote, Numbers, Notes, Bear, TextEdit and many more. To get started, open a document in an app that supports the feature.
Right click and select Insert from iPhone. Now choose between Take Photo or Scan Documents.
When shooting a photo, you will have the option to retake it if it does not look right, and when scanning, you will have the option to add additional pages to the scanned document. Scanning also lets you change the filter of the document, including greyscale, black and white, color, or photo.
Users have been able to scan documents on their iPhone and iPad since iOS 11 using the Notes app, though Continuity Camera takes that feature to a new level.


 William Gallagher
 Malcolm Owen
 Sponsored Content


 Christine McKee