How to give a guest control of your HomeKit devices
 William Gallagher
Guests can access your HomeKit devices through their own Home app, if you choose

Home automation with HomeKit is great for the homeowner, but not as good for guests or visitors. Here's how to give a house guest control of all your HomeKit devices — and how to lock them out again when they leave.
Sometimes it does seem as if the Home app were built to be used by one person. And it's highly possible that Apple has noticed how there tends to be just one person interested in any family.
But automating your home is meant to have benefits for everyone in the household, so giving each person the ability to control the lights is key. Being able to quickly and easily share your home devices is essential.
You can share this access whetheryou have finally persuaded your partner to give it a go, or if your kids are now old enough too, or even if you just you have a guest coming. There are ways around it if, for instance, you just want that guest to be able to open the front door.
Yet there are times when you want them to have all the access you do. In which case, you have to invite them to control your home, and they have to accept the invitation.
And do you do have to have set some things up in advance.
What to do in advance
You won't be surprised to know that sharing your home rather leans on you all having updated to the latest version of iOS, or macOS. If someone is on an older version than you, it's possible the invitation won't work.
There is more, however. Everyone — that's you and your invitees — must be signed in to iCloud on their device. They must also have an Apple device, this isn't going to work on Android.

Assuming that they do, then on those Apple devices, they need to go to Settings. Tap on their name at the top, then from the page that appears, tap on iCloud. Then they, and you, must have Home switched on.
This is all you need if you're currently sitting at home and deciding on a guest list. Set up everything like this, then proceed to inviting people.
However, if you're away from home, there is something else you have to do. In fact, it's something you have to have done before you left.
You've got to set up a device as a home hub. With a HomePod, HomePod mini, Apple TV, or iPad, set up as a home hub, you can control your home remotely. And you can invite people from anywhere you are.
How to share control of your home
- While you're at home, open the Home app on any of your devices
- Tap the house-shaped icon at top left on iOS, toward the middle on Mac
- Choose Home Settings
- On the screen that appears, tap Invite People...
- Select from the Family members that appear, or start typing an email address
- Click Send Invite
- Click Done
There is more that you can do, but this all you actually require to share your home. You're sending out an invitation, and then waiting for a response.
Curiously, there is a small difference between the Mac and iOS devices here. On iOS, when you go to invite people, you can type an address but you could also use the + icon that you can tap to see all your contacts. On the Mac, you don't get that icon.
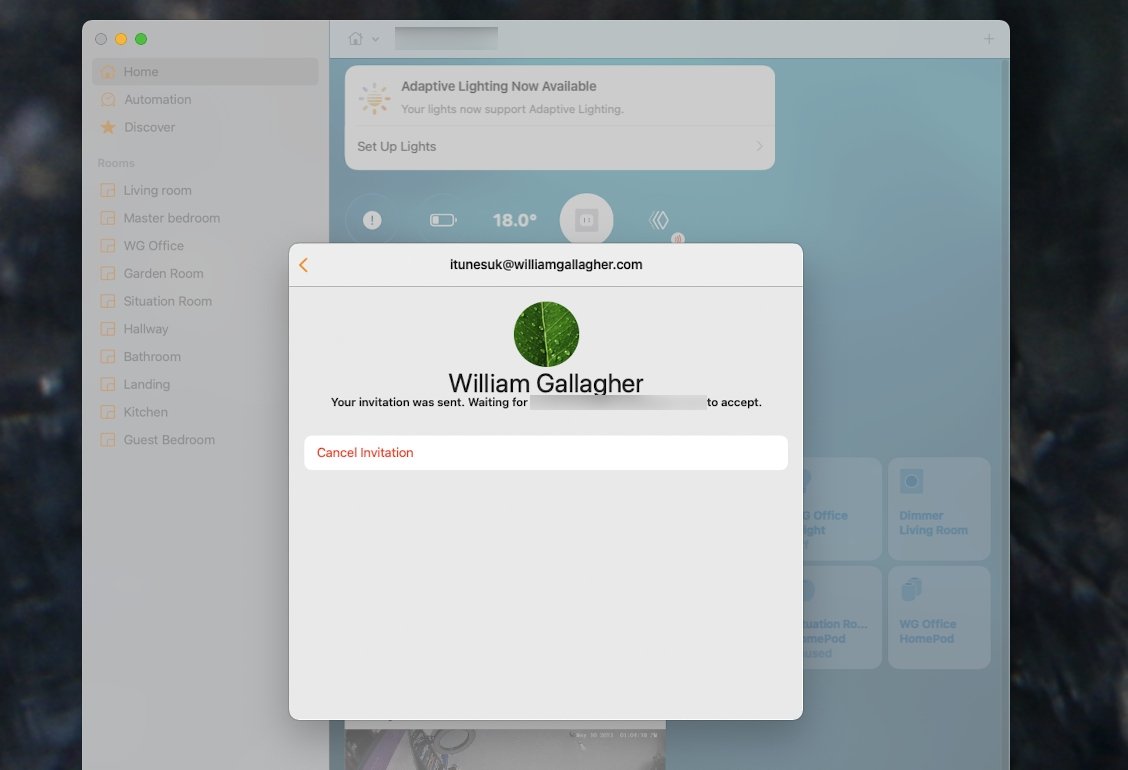
Whether you tap or type, though, you can enter more than one email address during this, and so send invitations to multiple people at once. While you're waiting for them to respond, they are listed in the Home Settings panel with "invitation pending" written under their name.
That's the case both on the device you invited them from, and all of your other devices. Until they've accepted, though, their "invitation pending" does not appear on the devices of anyone else already in your home.
So you might get away with planning that surprise party, just for a while.
What more you can do with sharing
In the Home Settings panel, scroll toward the bottom. Beneath all the various Home app settings, and above Remove Home, there is a section for Home Notes.
Apple says that this is where you can "add notes for people who are sharing your home." For instance, if you've set all of your outside lights to be part of the downstairs group, you could tell everybody that here.
This is just a scratchpad for notes, it isn't automatically sent out to your invitees. Which means you can invite them all and then make your notes afterwards.
Frankly, you're going to have to tell them this stuff verbally too, unless they check their Home app. But at least it's an aide memoire for you.
What happens when an invitee accepts
When someone accepts your invitation, you see that they have done so because the "Invitation Pending" text disappears. From now on, this person appears on your Home app's Home Settings screen the same way that you do.
What they see is that your home is now listed in their Home app, along with all of your devices. You do still have further controls, you can limit what someone can do.
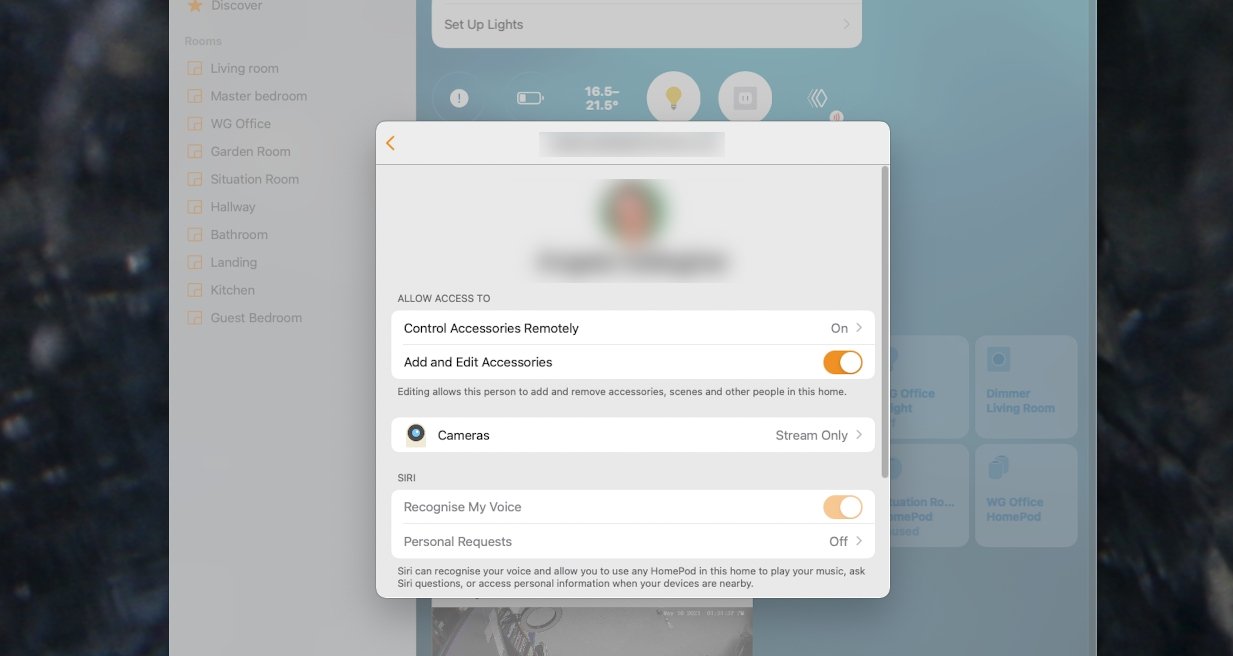
How to limit sharing your home
- Once someone has accepted the invitation, open the Home app
- Click on the house icon and choose Home Settings
- Tap or click on their name
- Select what features they can use
The kinds of options you've got here are to do with security cameras, such as whether they can watch the cameras or also play back recordings. You can allow them to add or edit accessories, too.
When either of you wants to stop
If you've invited the wrong person, if you decide you were wrong about that person, or if it's just that they're leaving, you can undo the sharing. Equally, if they never want to darken your doorstep again, they can either refuse the invitation or back out later.
To cancel an invitation you've sent that hasn't been accepted yet, do this. Go to Home, Home Settings, click or tap on their name, then choose Cancel Invitation.
There's no confirmation prompt, no "Are You Sure?" message, they're just instantly gone.
When they have already accepted the invitation, the process is pretty much the same. Except this time you click or tap on their name to bring up the home sharing options, then if you scroll to the bottom, there's a Remove Person button.
There isn't a way to allow, say, full access for a week. But you do remain in charge and you can elect when the party's over, so to speak.
Stay on top of all Apple news right from your HomePod. Say, "Hey, Siri, play AppleInsider," and you'll get latest AppleInsider Podcast. Or ask your HomePod mini for "AppleInsider Daily" instead and you'll hear a fast update direct from our news team. And, if you're interested in Apple-centric home automation, say "Hey, Siri, play HomeKit Insider," and you'll be listening to our newest specialized podcast in moments.


 William Gallagher and Mike Wuerthele
 Christine McKee

 Malcolm Owen
 Marko Zivkovic


 Wesley Hilliard