How to get the 'Hello' screensaver running on your Mac
 Malcolm Owen
The signature 'hello' used in Apple's 24-inch iMac marketing is viewable in a screensaver.

Apple introduced its new "Hello" screensaver as part of macOS Big Sur to coincide with its 24-inch iMac lineup, but it's not immediately available to all Mac users. Here's how to make macOS use the screensaver.
Apple's update to the iMac lineup introduced color alongside a major physical design overhaul. To go along with the seven color options, Apple also took the opportunity to pay homage to the first Mac by using an animated cursive version of "Hello" in its promotion of the iMac.
As part of the launch, Apple created a new screensaver, aptly called "Hello," which displays the greeting in a bright 3D animation, and in a variety of different languages.
The sticking point is that the "Hello" screensaver is easily available within the usual screensaver configuration options in macOS Big Sur, if you're using the 24-inch iMac. Though it may appear as an option for other M1-based Mac models, there's a good chance that it won't.
However, the screensaver is included within macOS, albeit not immediately accessible. To get it working when it's not available, you will have to trick macOS into installing the screensaver again.
To do this, you will need a Mac running macOS Big Sur 11.3 or later. It will work on both Intel-based Macs and Apple Silicon versions.
How to activate the "Hello" screensaver in macOS Big Sur
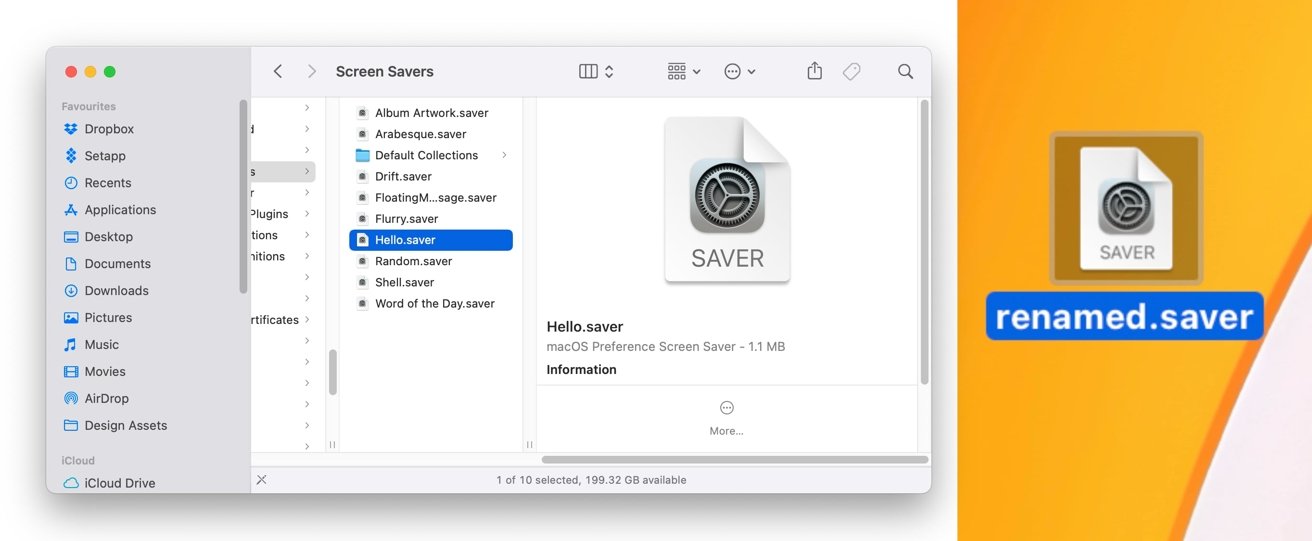
- In the Finder, open the directory System/Library/Screen Savers.
- Copy the screensaver named Hello.saver and paste it to the desktop.
- Rename the screensaver to something else, while retaining the .saver extension. The name of this copy isn't important, so you can name it whatever you want.
- Double-click the renamed screensaver to start the installation.
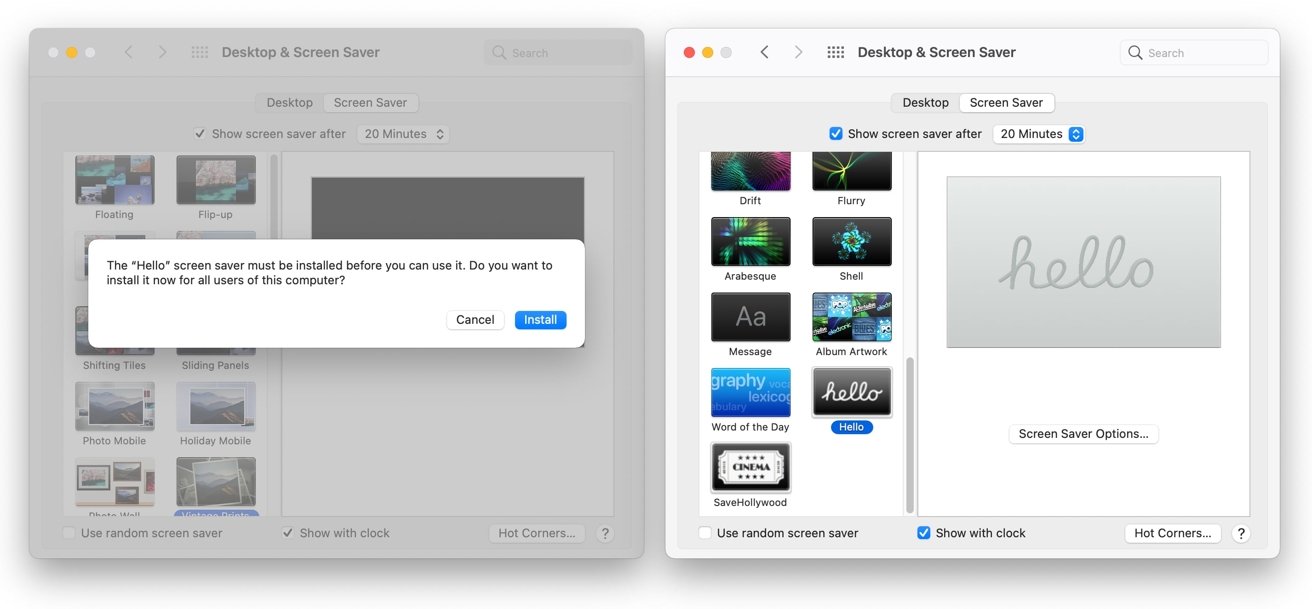
- In the pop-up within Desktop & Screensaver, click Install.
- Authenticate yourself by entering your Mac account password.
Once authenticated, "Hello" will be visible within the screensaver menu, found within System Preferences under Desktop & Screen Saver.
Screensaver options
If you click Screen Saver Options with the "Hello" screensaver selected, you will have the opportunity to adjust the screensaver in a number of ways.
The top box is Theme, which includes four options that changes how the text and the background appears when the screensaver runs. All use semi-randomized color selections, which the screensaver cycles through for each greeting.
- Spectrum uses colors similar to the color options available for the iMac range. The cursive text uses an almost white color, slightly tinted to match the background.
- Soft Tones is similar, but as the name suggests, the color scheme is more pastel in nature. The text also uses a darker color than the background, to allow it to stand out.
- Minimal exchanges the colors for shades of grey, with a different shade used for the text.
- All cycles through all three screensaver options.
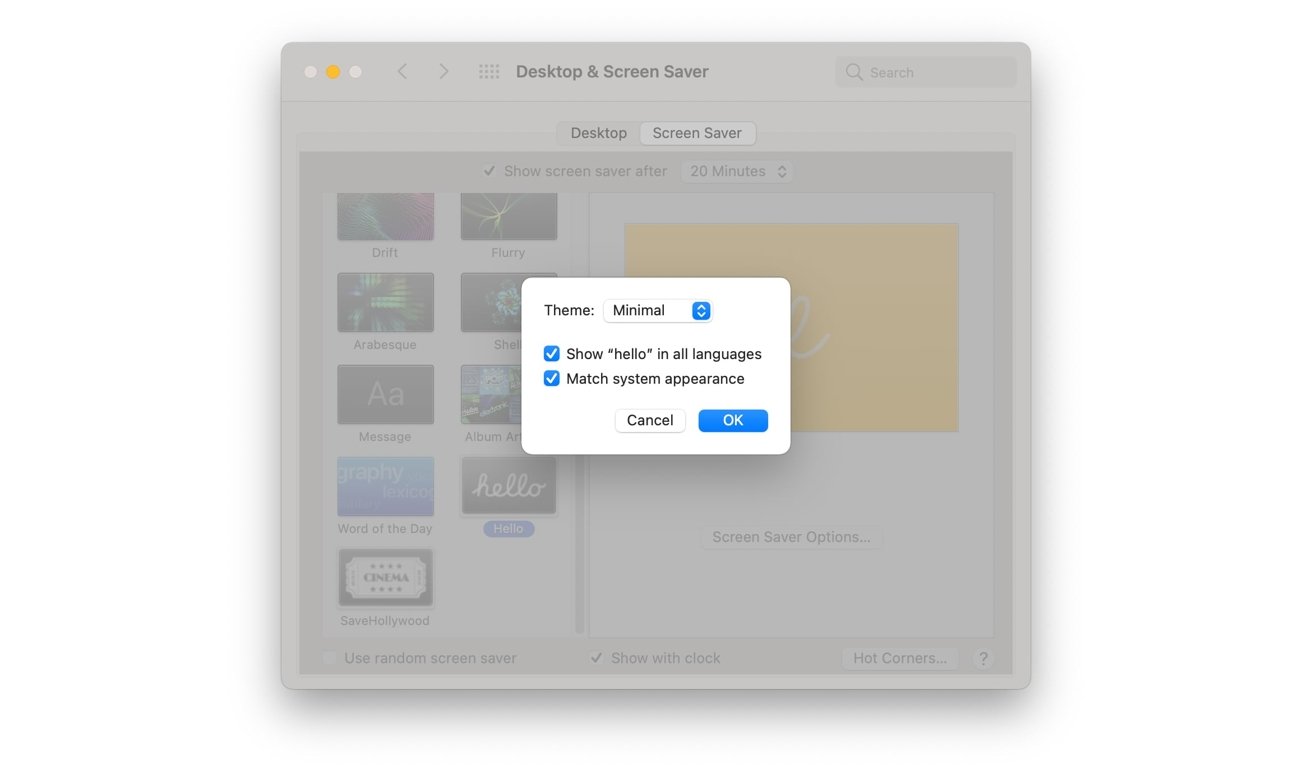
There are two tickboxes below the theme, which also affect how the screensaver appears.
"Show hello' in all languages" allows users to select whether they only want to see the word "hello" being written out, or if they want the screensaver to cycle through multiple languages.
"Match system appearance" takes advantage of the system properties for the general UI, namely whether it is set up in light or dark mode. If enabled, the screensaver will try to stick to colors and combinations that are generally lighter or darker in tone, depending on the setting.
Disable the option to see all possible variants of color within each of the themes, regardless of whether dark mode is enabled or not in macOS.
Deleting "Hello"
While you can typically delete a third-party screensaver that you've installed onto macOS by right-clicking on it in the Screen Saver options and selecting "Delete," there is no option to do that for Hello, as it simply displays "Show in Finder."
Typically, macOS doesn't show the delete interface for any system screensavers. Since "Hello" is a system screensaver, albeit not one that is working properly for all users, the option simply isn't available.
If you manually install "Hello," you can still delete it, but you have to take a few more steps.
How to delete the manually-installed "Hello" screensaver from macOS
- Right-click the screensaver in the Desktop & Screen Saver menu within System Preferences, and select "Show in Finder."
- Close the System Preferences window.
- In the Finder window, right-click the screensaver file and select Move to Trash.
- Authenticate with macOS by entering your Mac password.
- Re-open System Preferences, select the Desktop & Screen Saver menu, and check the screensaver is no longer visible.
Keep up with everything Apple in the weekly AppleInsider Podcast — and get a fast news update from AppleInsider Daily. Just say, "Hey, Siri," to your HomePod mini and ask for these podcasts, and our latest HomeKit Insider episode too. If you want an ad-free main AppleInsider Podcast experience, you can support the AppleInsider podcast by subscribing for $5 per month through Apple's Podcasts app, or via Patreon if you prefer any other podcast player. AppleInsider is also bringing you the best Apple-related deals for Amazon Prime Day 2021. There are bargains before, during, and even after Prime Day on June 21 and 22 — with every deal at your fingertips throughout the event.


 Wesley Hilliard
 Andrew Orr


 Amber Neely
 William Gallagher