How to share folders and files from Mac to Windows and vice versa
 Malcolm Owen
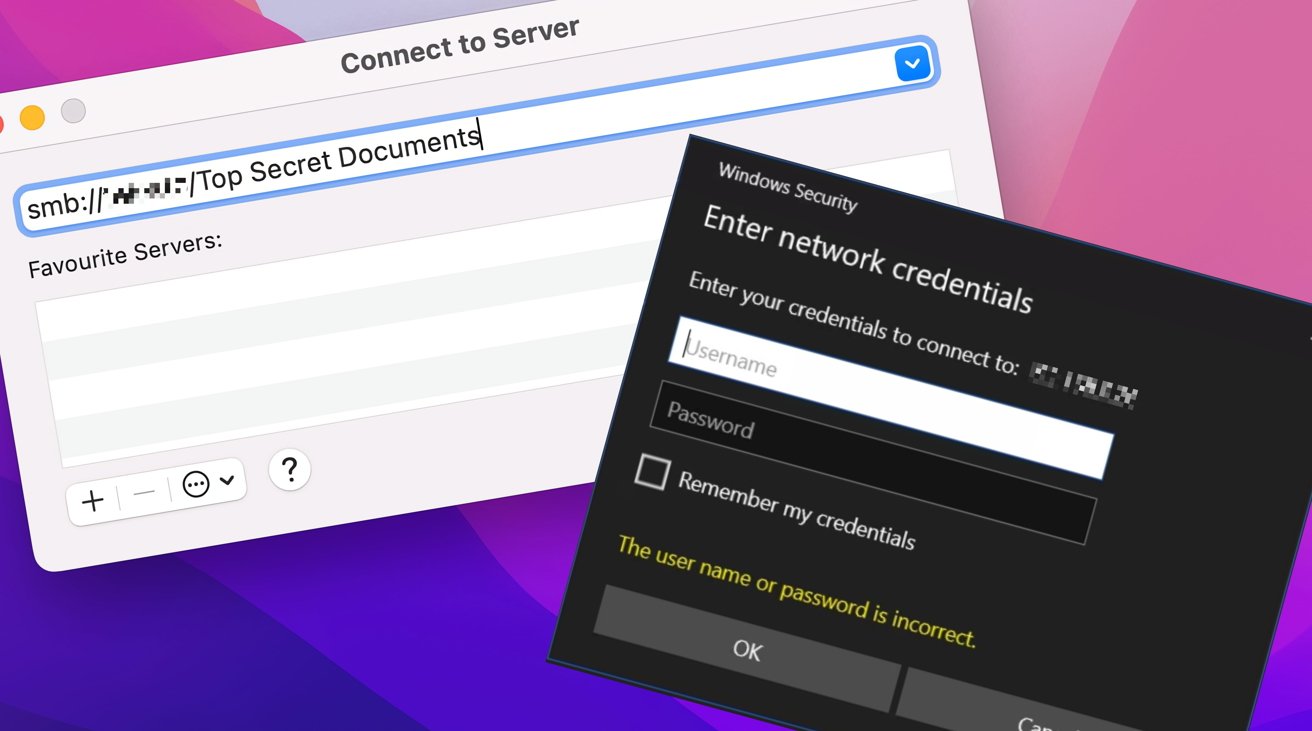
If you have to work on both a Windows PC and a Mac, you probably have to transfer files between the two. Here's how to set up file sharing so you can view select folders on the other desktop over your network.
Mac users are unlikely to be sharing their network with just other Macs, and likewise for Windows PC users. In modern work environments and at home, you can generally expect there to be a need for the two to communicate in some way.
This is undoubtedly the case for power users who may have two desktops at home that they use for tasks. One could easily be a MacBook Pro for portable work while the other is a Windows desktop that stays at home.
Accessing the same files across different workspaces on a network has its benefits, including storage savings. Storing files elsewhere means you're not consuming precious storage on your primary devices, which you could use for other data.
Though you could create a dedicated data store with a network-attached storage device, this could be expensive. A cheaper alternative is to use storage stored on another computer on the network.
This could be either an old computer used as if it's a file server or if you use two or more computers in daily life, by setting up folders that can be shared and viewable by the other desktop.
Getting this set up can be a bit of a chore, but once done, it will become a valuable time and space-saver.
Regardless of whether you want the Mac or the PC to host the files, there are two phases to pass through. First, you set up the shared folders on the host, and then you set macOS or Windows on the other computer to view the files over the network.
Windows sharing to Mac
Of the two, it is a little harder to set up Windows file sharing to a Mac. Given our discussions with users, it's also the likelier of the two scenarios you will run into.
Setting up Windows file sharing
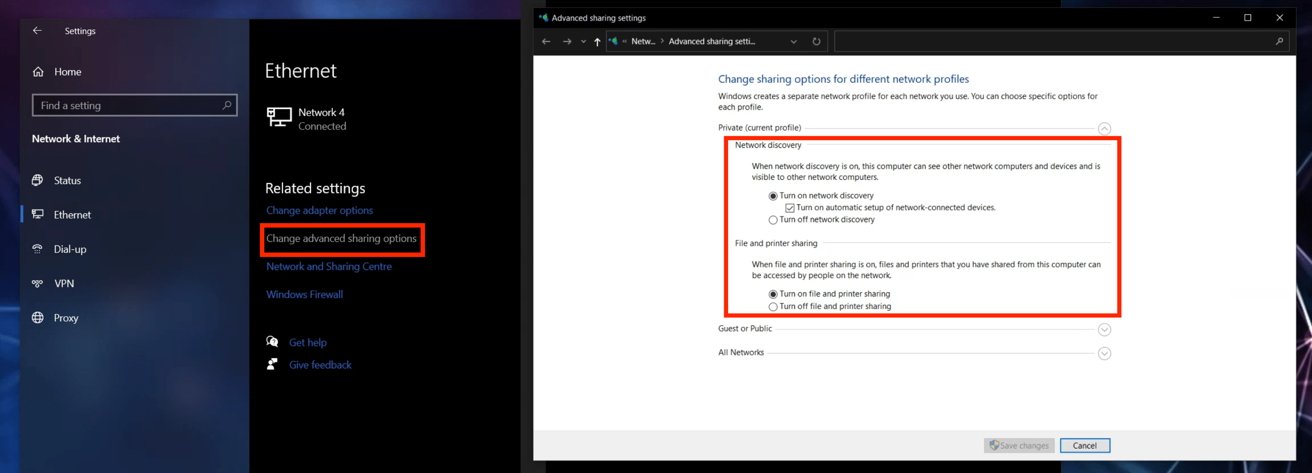
First, ensure that Network Discovery is enabled on the Windows PC. To do this, click Start then Settings, followed by Network & Internet.
Click on Ethernet or Wi-Fi, depending on what is available, then Change Advanced Sharing Options.
Under the Private network section, ensure Network Discovery is turned on, with the "automatic setup of network-connected devices" also ticked. Under File and Printer Sharing, make sure that it is turned on, and click Save Changes.
Reminder: This is for the Private network profile. Do not do this to the Guest or Public profile.
You can close these windows down.
Open File Explorer and navigate to the folder that you want to share. If you need to create a new folder, right-click within File Explorer in the directory you want it located, and select New then Folder before giving that folder a name.
Right-click the folder and select Properties. Click Sharing, then under Network File and Folder Sharing, click Share.
Select user accounts for the Windows PC you want to share the folder with if required, then click Share and Done.
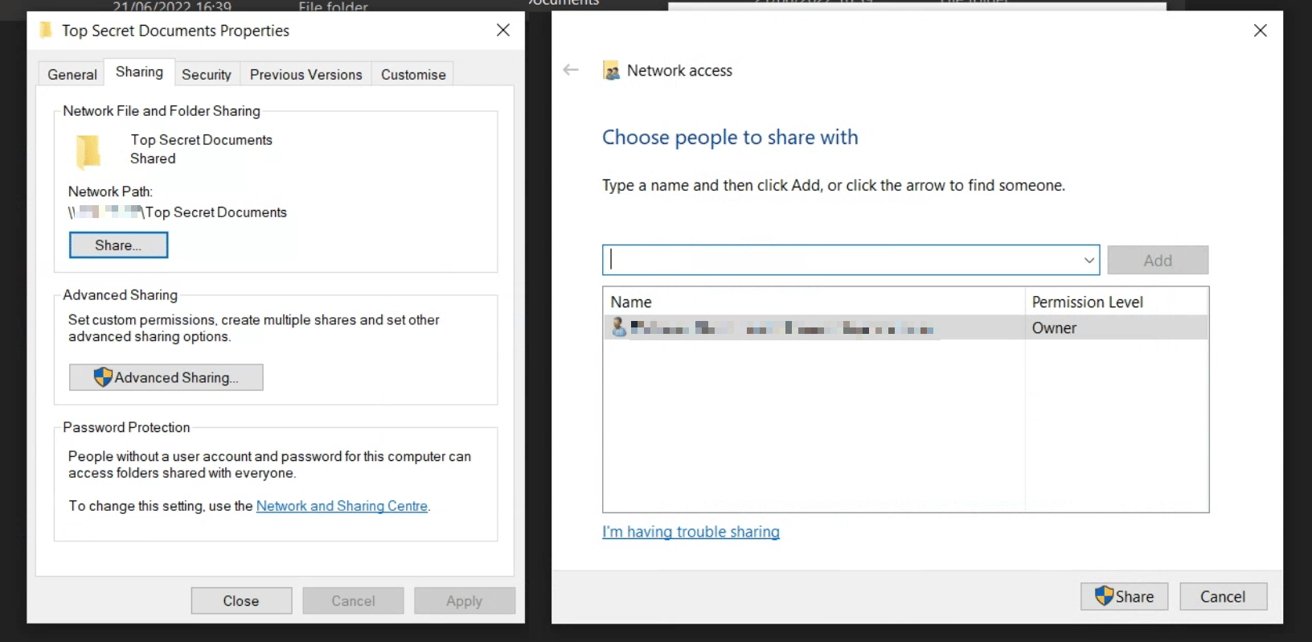
You could use the Advanced Sharing options to make more advanced changes to the folder's permissions, such as making it read-only for some users. If it's just a share for your own usage, there's no need to go into this section.
After getting the folders set up for sharing, the next bit is to get the other computer to access those folders over the network.
Accessing shared Windows folders in macOS
To open up the shared folders, you will need a few details from your PC first. This includes the IP address and Workgroup of the Windows PC, which can be found within the Network & Internet section of Settings.
You may also need your Windows account credentials.
On the Mac, open up Finder, then in the menu, select Go, then Connect to Server.
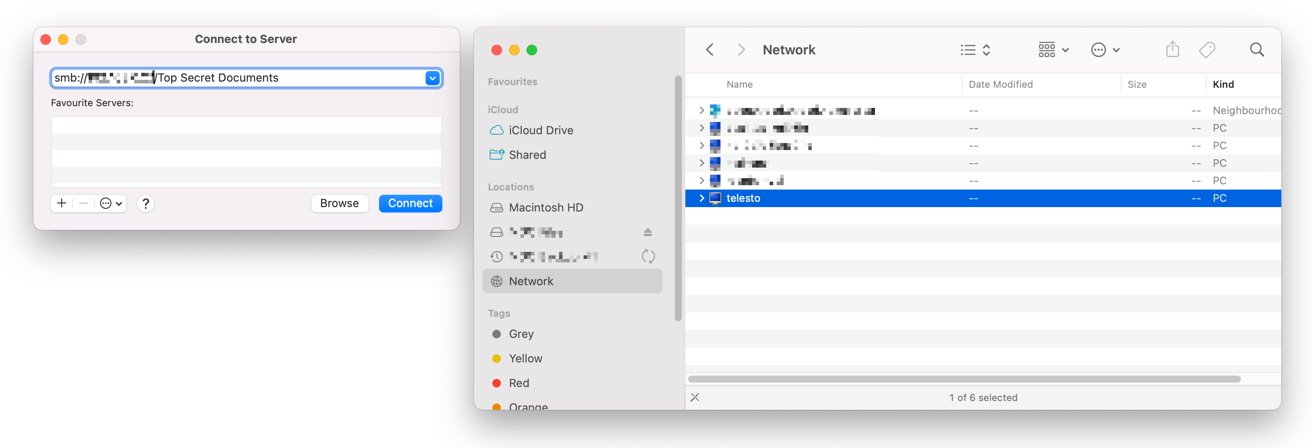
From the Connect to Server screen, you can first try to find the folder by clicking Browse to bring up the Network window, then selecting the Windows PC name from the list, followed by the shared folder.
Alternately, in the Connect to Server dropdown box, type in smb:// then the DNS name of the Windows PC, then / followed by folder (smb://DNSname/folder) or smb:// then the IP address then / followed by the folder name (smb://IPaddress/folder) into the box, then Connect.
You may be asked for your credentials for the Windows PC to be able to access the folder, including the Workgroup name the PC uses and the account you use to log in.
Once authenticated, you can access the files stored in the folders.
Mac sharing to Windows
This is a little easier to get going, as setting up file sharing on the Mac is a bit simpler overall. Accessing it on the PC is a tiny bit tougher.
Setting up Mac file sharing
In macOS, click the Apple logo in the menu, System Preferences, and Sharing.
Click the tickbox next to File Sharing to enable it, then Options. Tick Share files and folders using SMB.
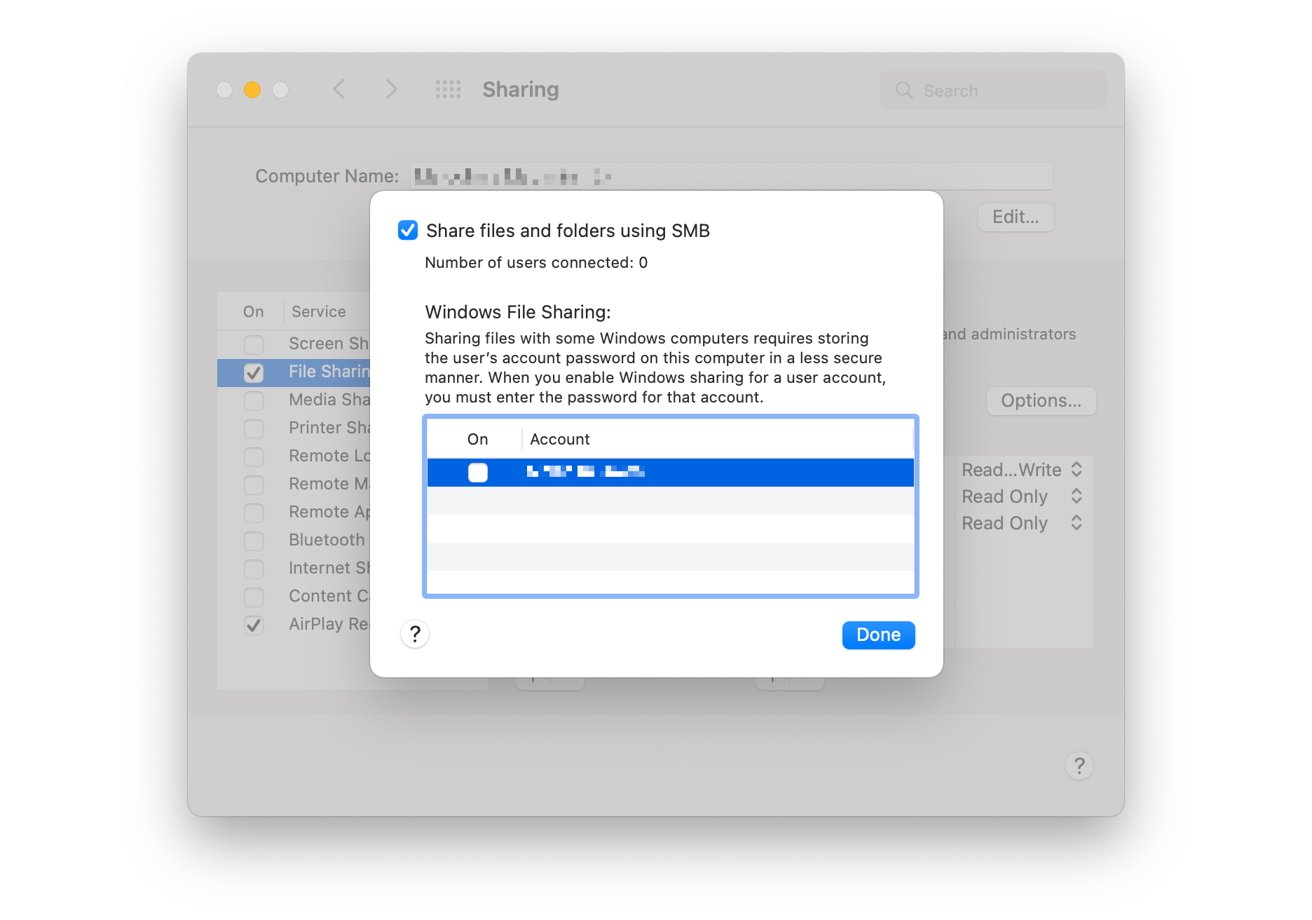
Tick the box next to the user account sharing files to the Windows PC. You will be asked to confirm the user account password. Once accepted, click Done.
Note the information on this page detailing the SMB address you will need in Windows to connect.
Click back to System Preferences, then Network. Select your active network connection, then Advanced.
Under WINS, click Workgroup then the workgroup name for the Windows PC. This will typically be either WORKGROUP or MSHOME by default but can be different for advanced networking setups or at work.
Click OK, then Apply.
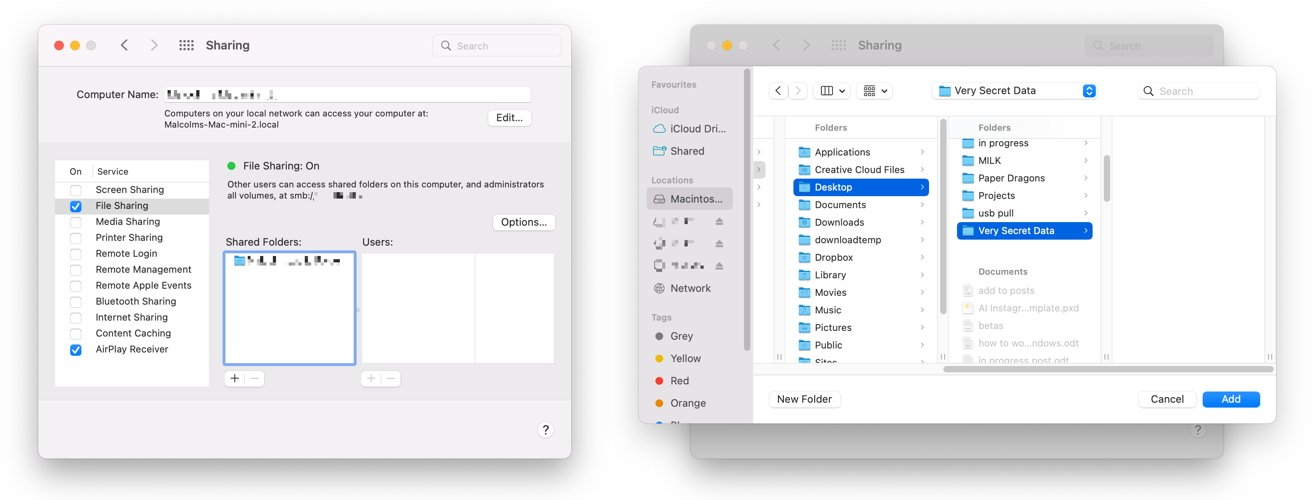
Head back to the Sharing menu and, under File Sharing, click the plus under Shared Folders. Navigate to the folder you want to share, then click Add.
You can change the settings for the folder under Users, including which users and groups can access the folder and what they can do with it. This includes reading and writing, read-only access, write-only access, and denying access.
Accessing shared macOS folders in Windows
Open File Explorer and select Network. The Mac should appear in that list. If so, click it and enter the Mac account name and password to access it.
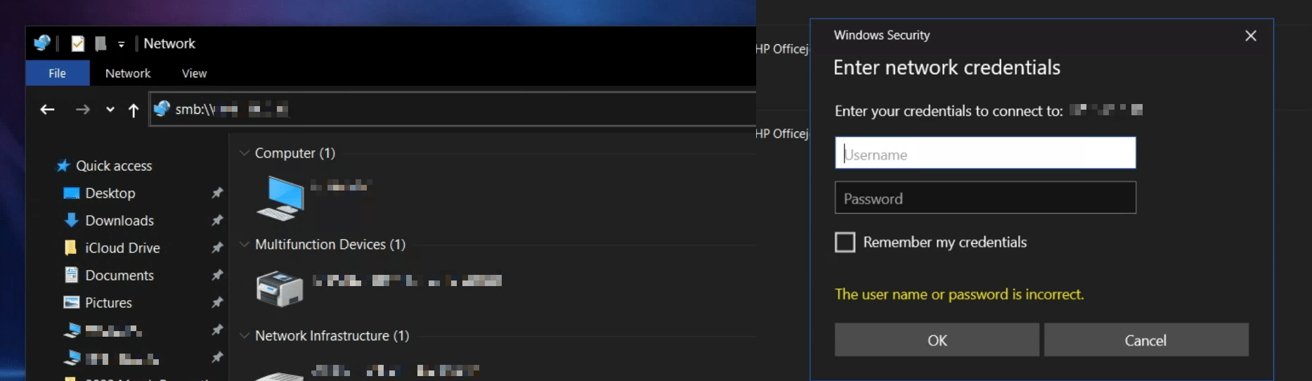
If it doesn't appear, click the address bar, type in \\ followed by the for the Mac, and press Enter. Be aware that you must use backslashes, not forward slashes, for this to work. Under Enter Network Credentials, type in your Mac account credentials and confirm.


 William Gallagher and Mike Wuerthele
 Christine McKee
 William Gallagher

 Marko Zivkovic