How to turn off iCloud's default settings in macOS and iOS
 Chip Loder
When you purchase a new iOS device, most iCloud options are on by default. Here's how to change them if you don't necessarily want to be cloud-connected for everything.
The push towards cloud services continues, and iCloud is Apple's cloud offering which allows you to sync info and documents to its cloud servers.
When you purchase a new Apple device, most iCloud setting are on by default. This includes syncing your photos and most data to iCloud by default.
If this isn't what you want, and you'd like to keep your data and files off Apple's iCloud servers, you'll need to use the Settings app to turn iCloud features off.
iCloud settings on iPhone
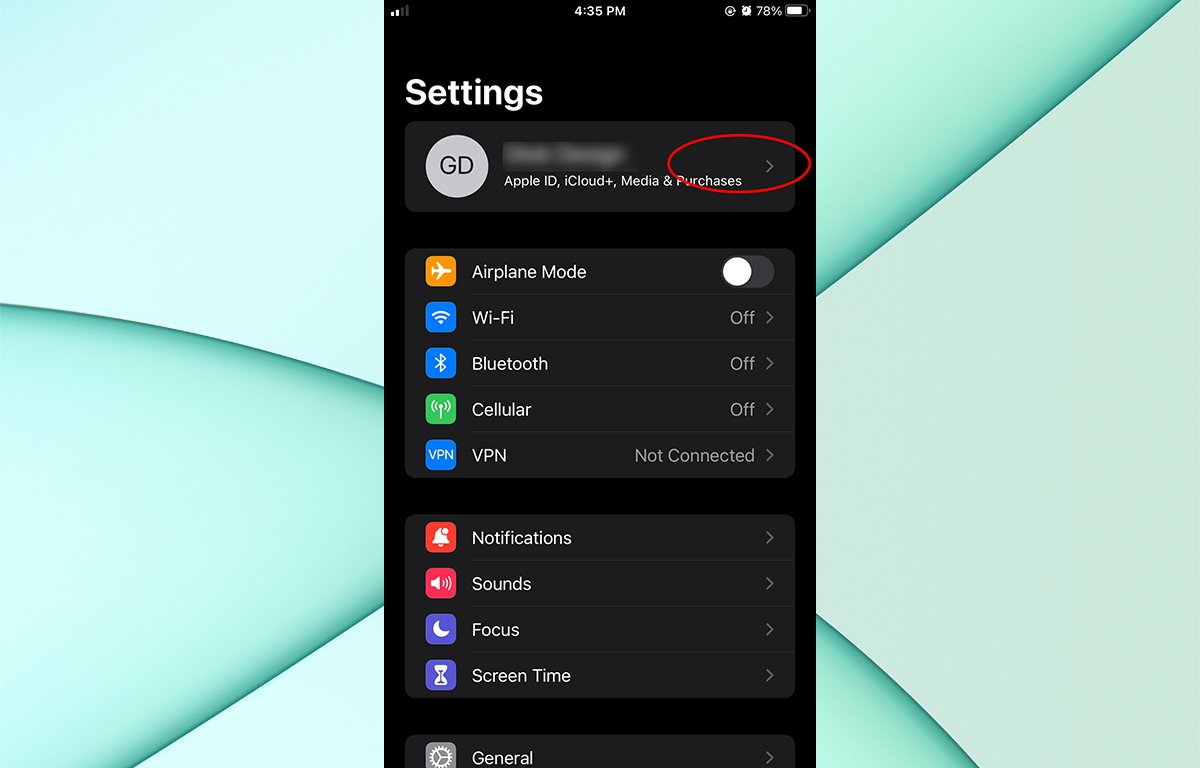
If you're using an iPhone to turn iCloud features off, open the Settings app from the Springboard and log in to your Apple account by tapping Apple ID at the top of the Settings app:
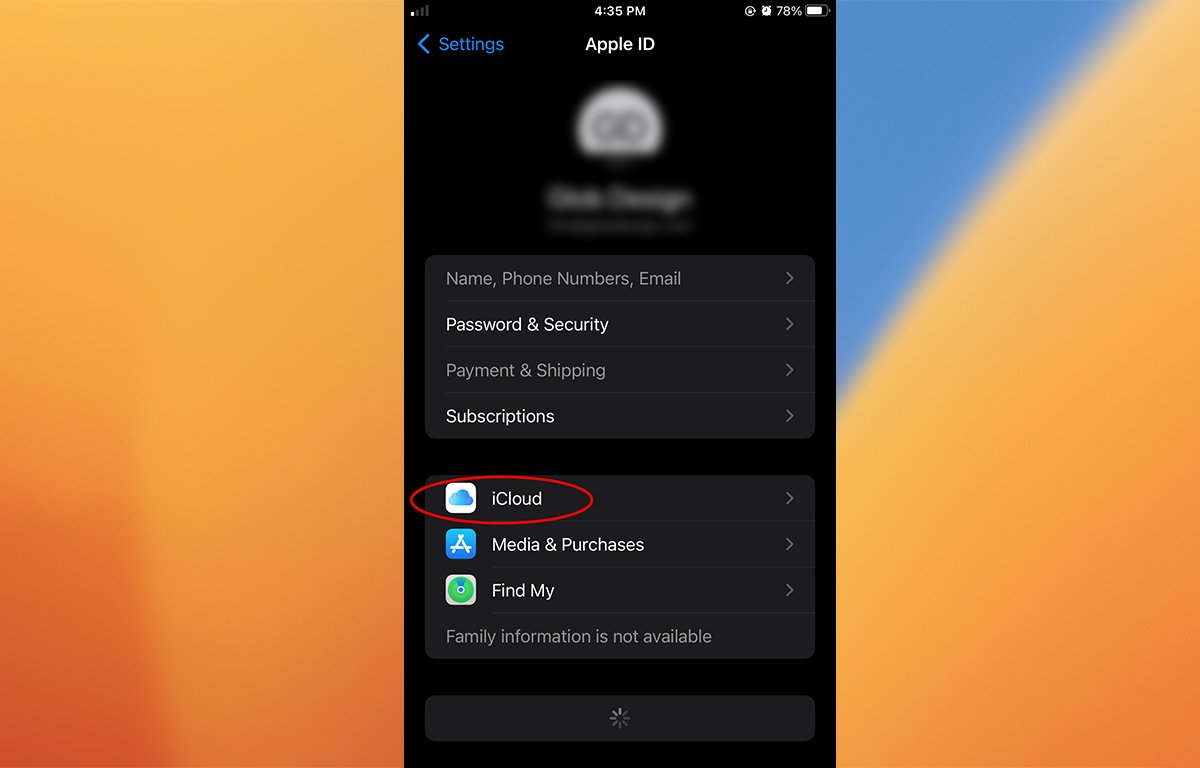
Enter your Apple ID and password and log in to your Apple account. Once logged in, tap the iCloud item to access iCloud settings.
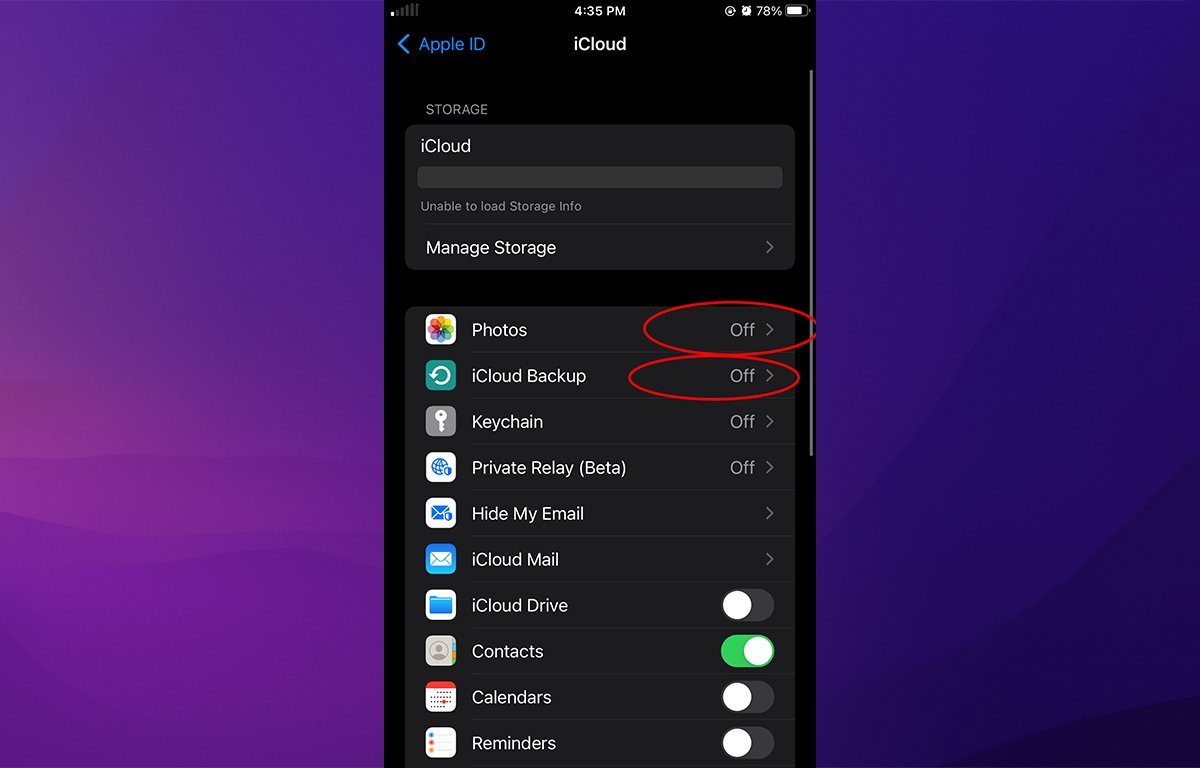
Unfortunately (and perhaps on purpose), Apple doesn't provide an "All" switch for turning iCloud syncing on and off for apps.
You'll have to turn each app on or off one-by-one, which is incredibly annoying. If you have a lot of apps on your iPhone it will take quite a while.
If you have a large number of apps installed, iOS may also display a Show All button. If present, you'll need to tap it to display all apps that support iCloud.
Go down the list of apps and turn off any you don't want to sync to iCloud.
If you've set up an Apple email account such as iCloud mail it will likely be on as well. If you don't want your Apple Mail account synced to iCloud, turn it off too.
Just be aware that if you use multiple Apple devices and Apple Mail on all of them, you'll likely want to leave this option on.
iCloud settings on iPad
Settings for iCloud on an iPad are similar to iPhone with a few minor differences - namely that the apps list is visible in the main iCloud section, also with a Show All button.
To enter settings, tap the Settings app icon on your iPad's home screen (Springboard), then tap your Apple ID at the top left of the Settings window to log in to your Apple account.
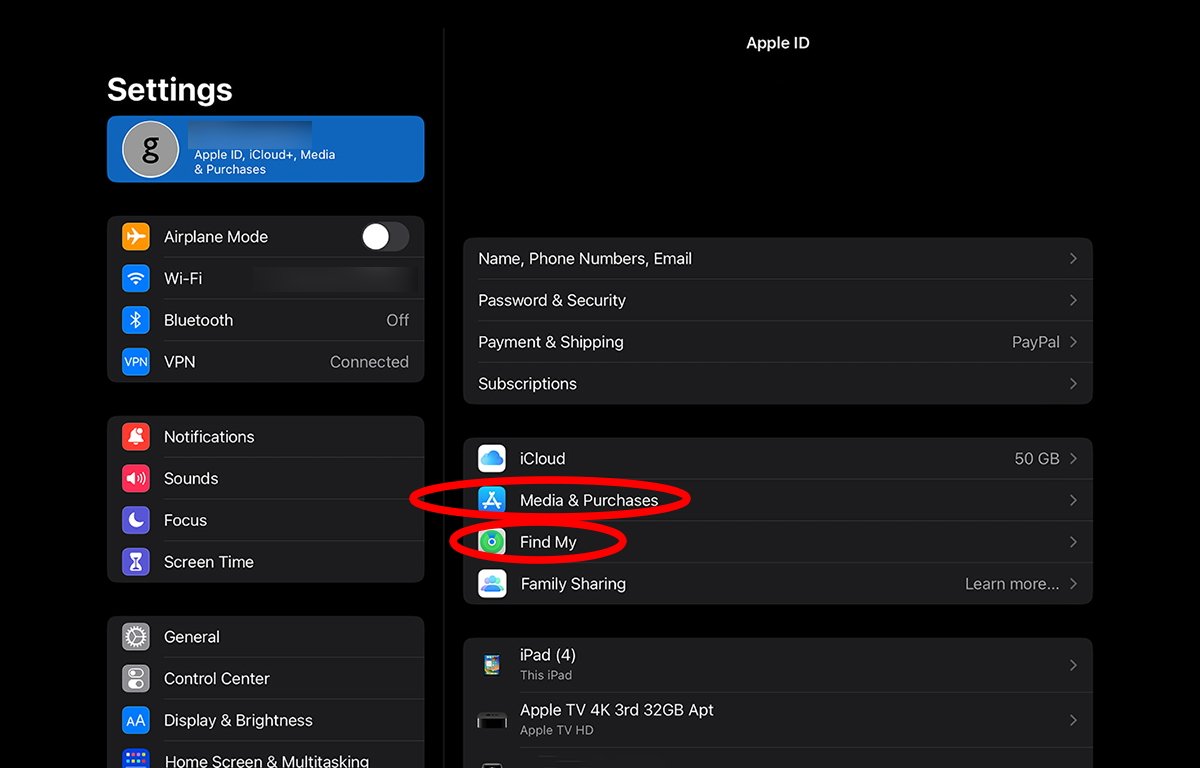
Once logged in, tap the iCloud row located below the account item rows. Later, you can also adjust Media & Purchases and Find My just below the iCloud row:
Apps will be displayed on the iCloud pane. Tap the Show All button to display all apps installed that use iCloud.
You'll have to do the same thing you did on iPhone: turn each one on or off individually:
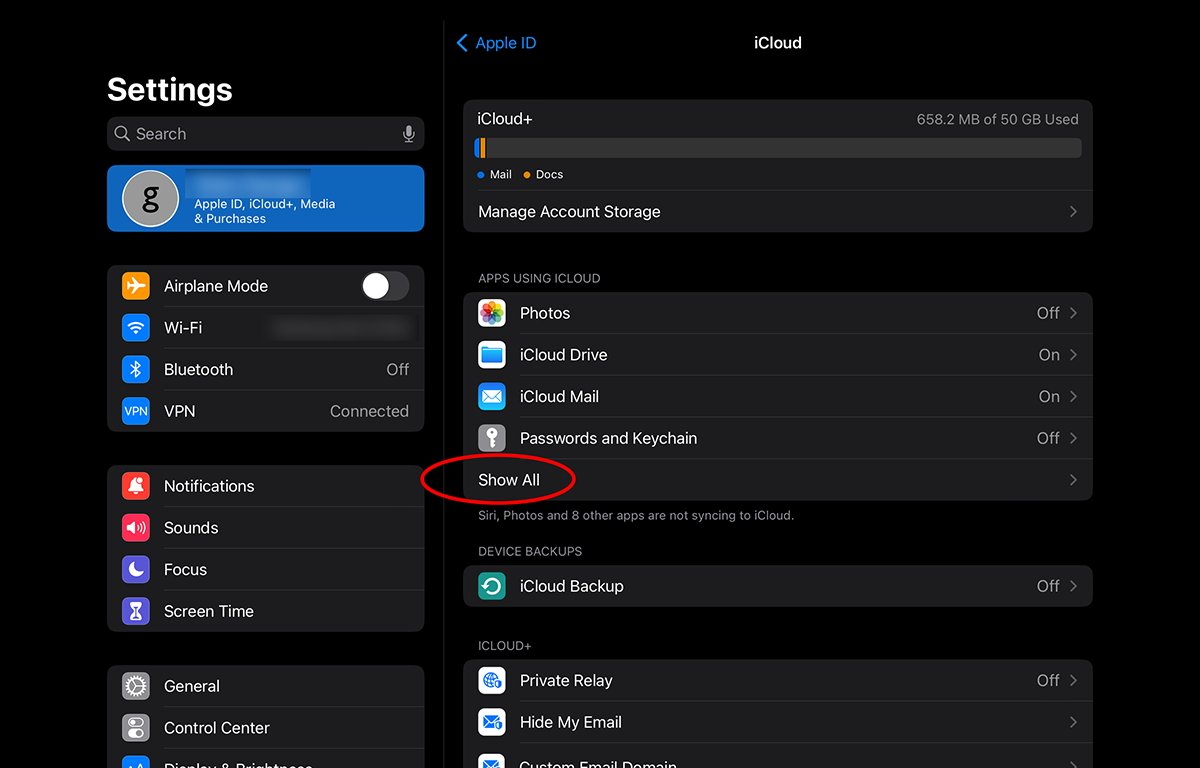
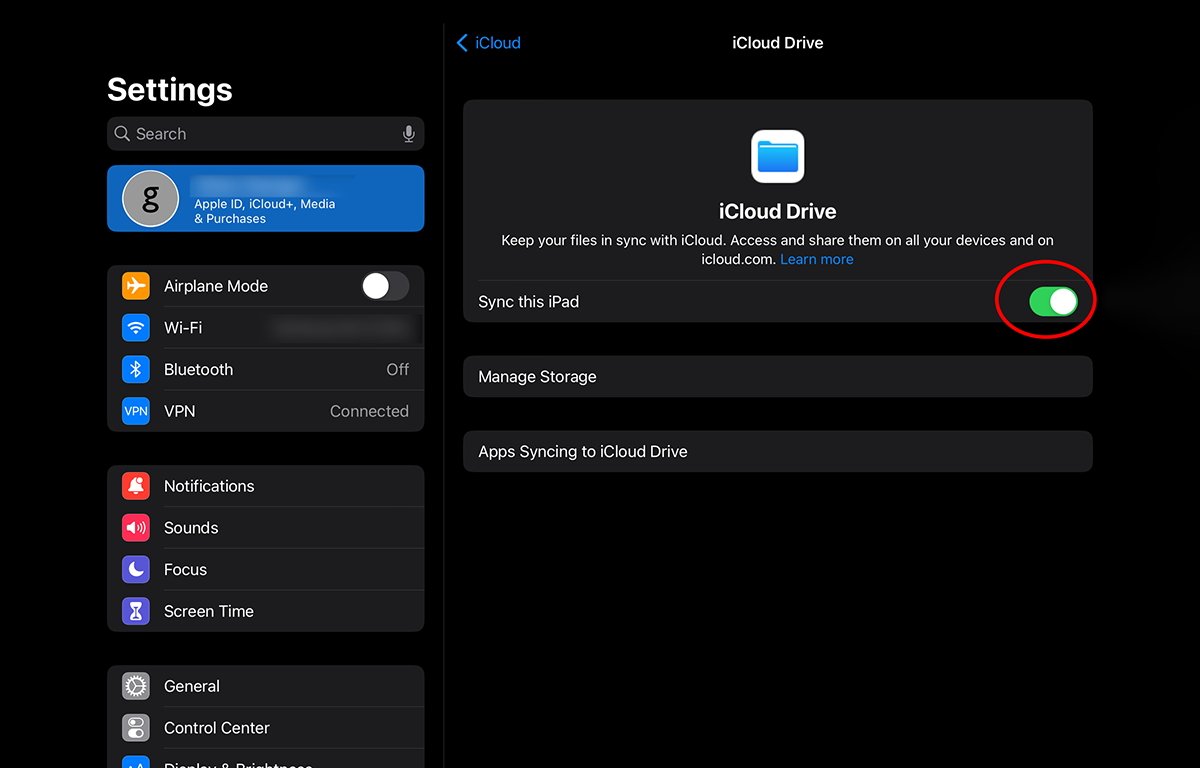
For the iCloud Drive app, you'll need to tap that row to access the on/off switch. This was a rather unnecessary place to put the switch, other than to provide a few other redundant rows such as Manage Storage, which can be accessed elsewhere in the Settings app.
Next, turn Passwords and Keychain and iCloud Backup on or off from their rows beneath the apps rows. Note that iCloud Keychain allows you to store your keychain info in iCloud also - something you may or may not want to do.
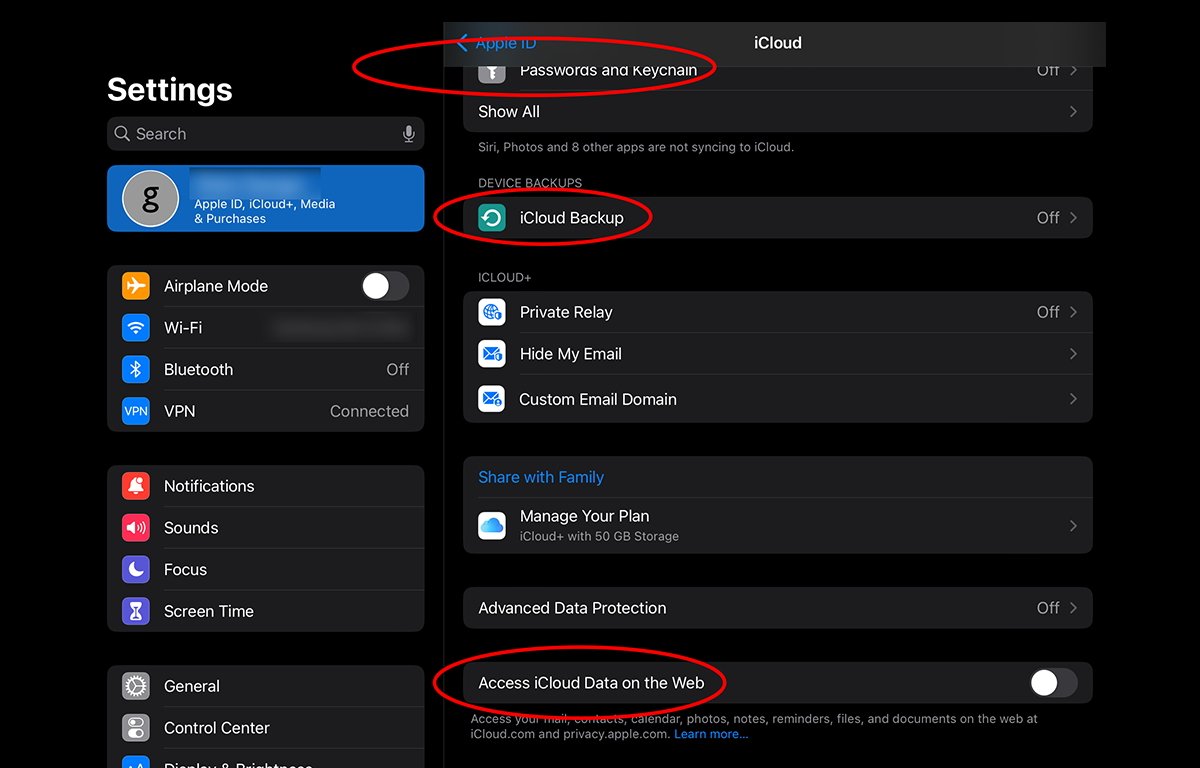
Finally, turn Access iCloud Data on the Web on or off. This is usually off by default and prevents iCloud app access from a web browser unless you turn this on first.
This is to prevent any bad actors who may access your iCloud account from having access to your info on the web unless you explicitly authorize it first.
iCloud settings on the Mac
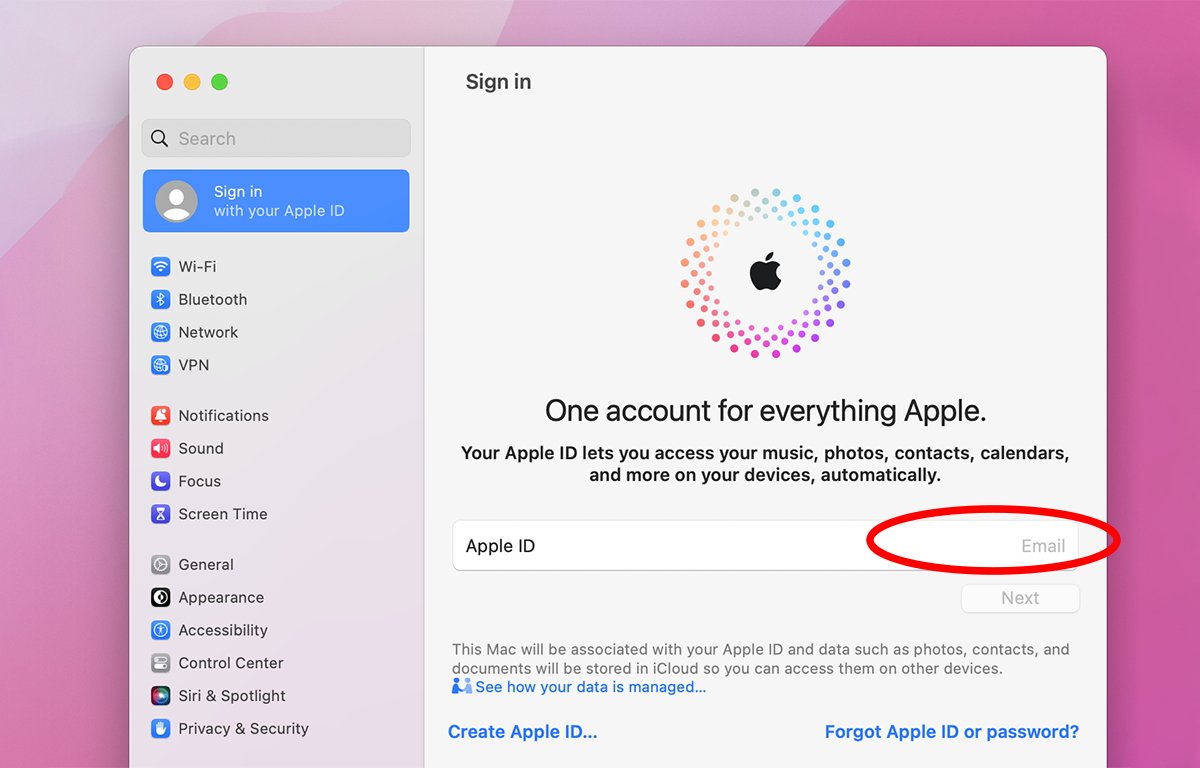
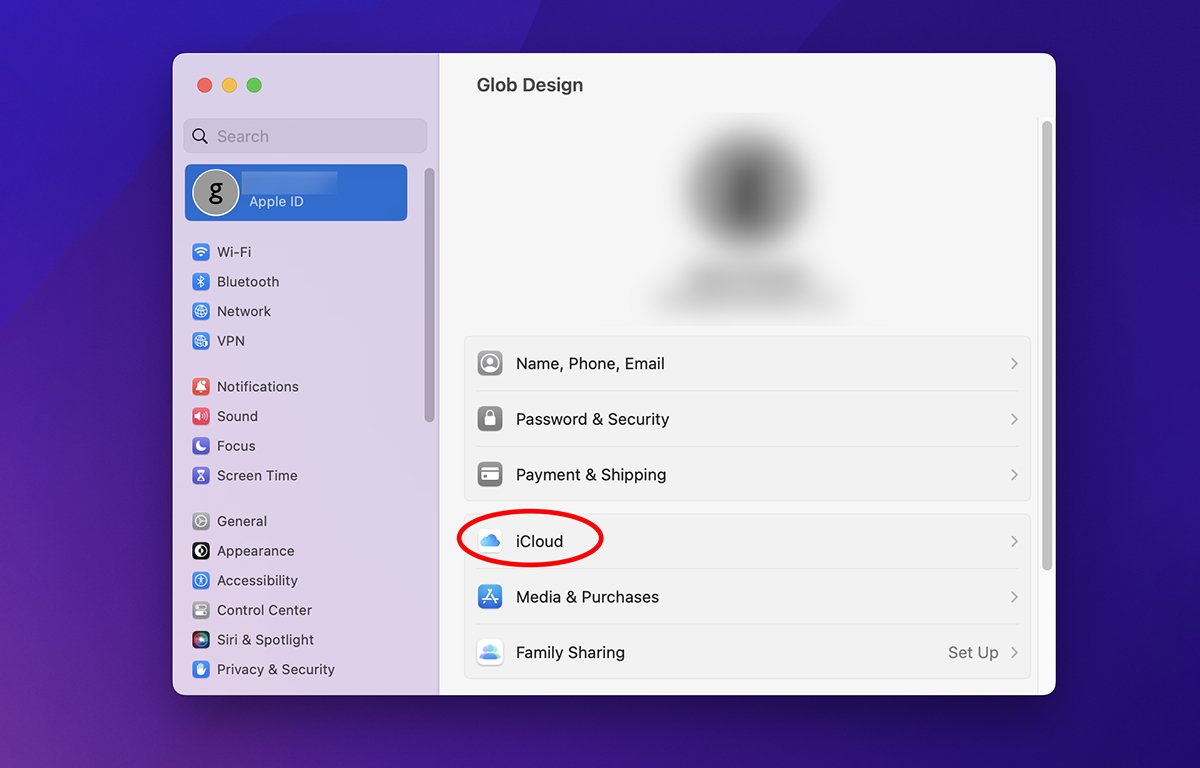
In macOS, open the System Settings app from your Applications folder on your Startup Disk, then click your Apple ID at the top-left corner to sign in.
You'll need to click and enter your Apple ID email first, then your password, and click Log in.
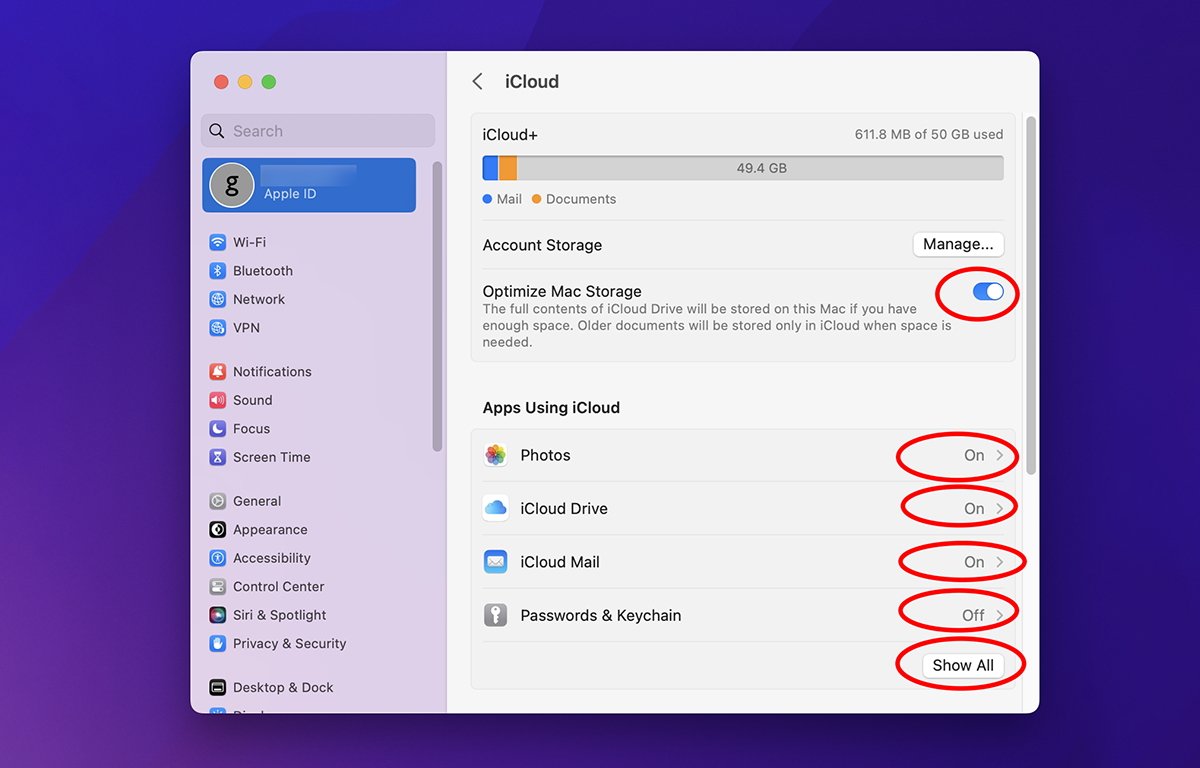
Once logged in, tap the iCloud row to access iCloud settings. The routine is essentially the same as on iOS devices - with each app listed and a Show All button.
There's also an Optimize Mac OS Storage button on macOS. If it's turned on, macOS automatically downloads all iCloud-synced data to your Mac - if your Startup Disk has enough storage space.
If space is running low, macOS will leave large files on iCloud servers, but only download them to your Mac as space becomes available.
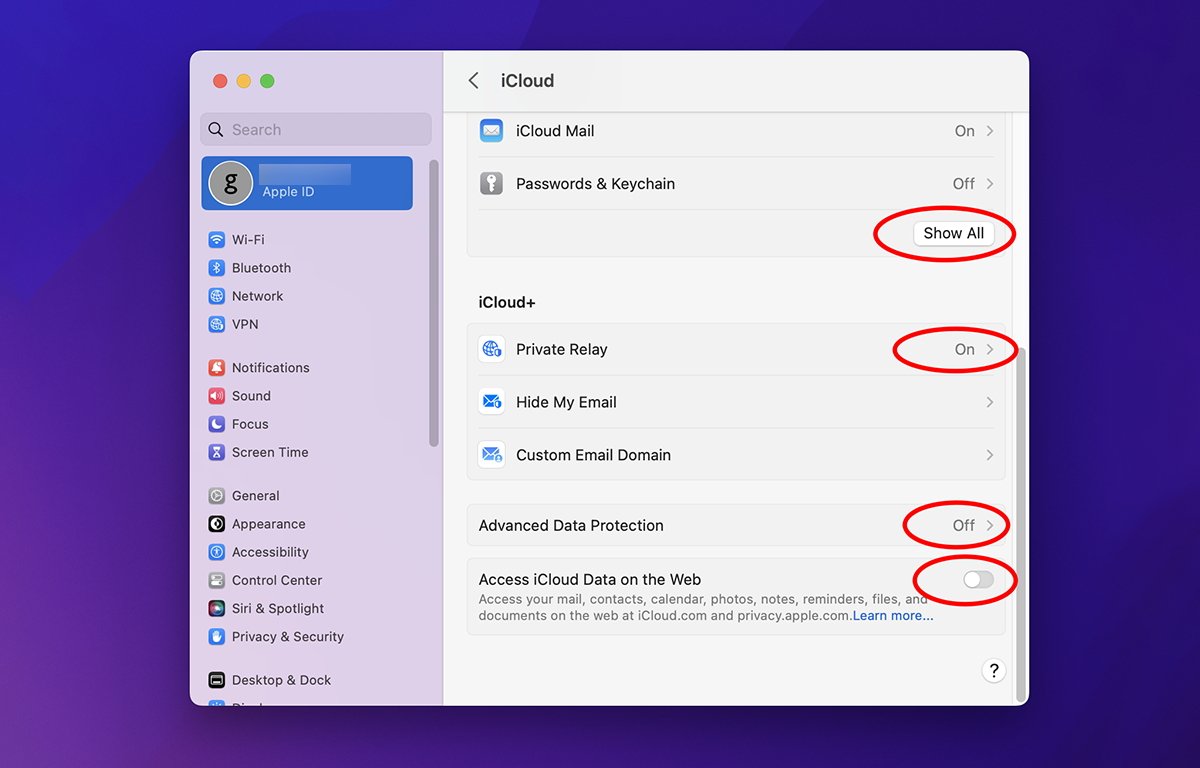
Below that under "iCloud+", there are also Private Relay, Advanced Data Protection, and Access iCloud Data on the Web settings. Enable or disable these as you like.
Hidden Desktop & Documents option
One final gotcha in the macOS version of the iCloud settings is the usually unnoticed "Desktop & Documents Folders" button in the iCloud Drive section. This really should be under a "Finder" row in the apps section along with all the other apps, but it's not.
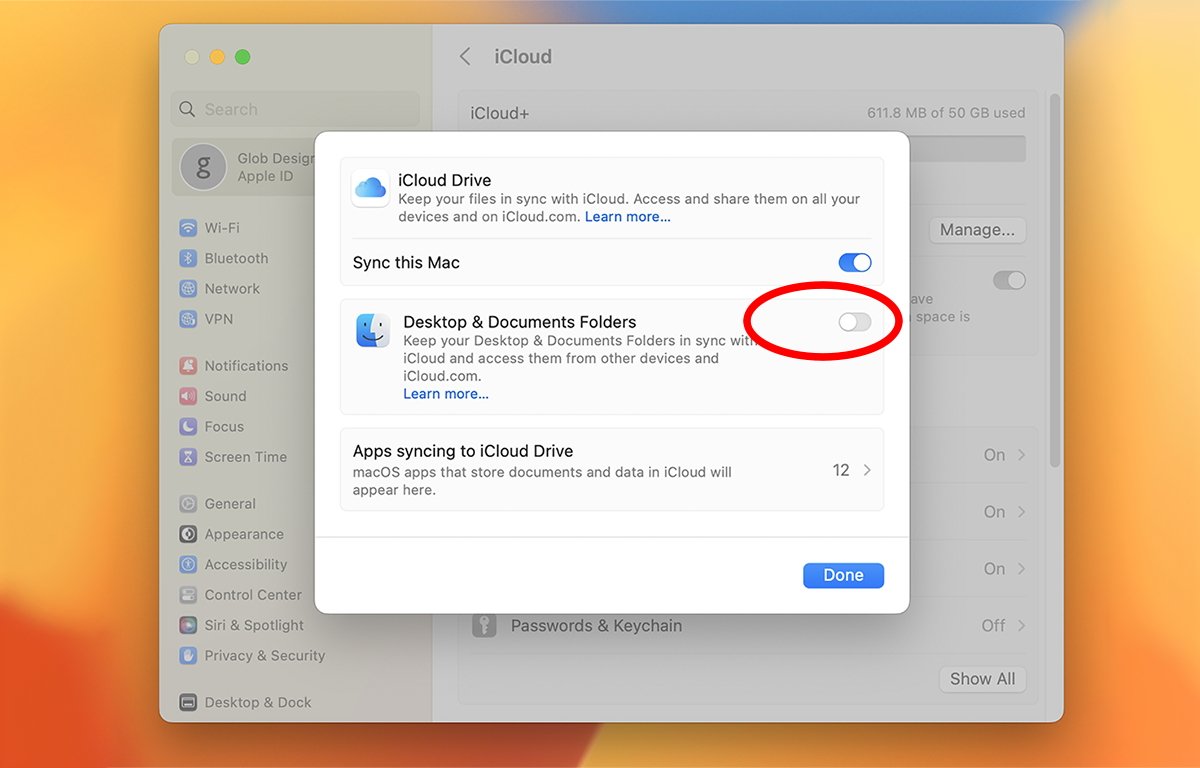
Instead, it's buried away where many users won't ever bother to look. This button and all its subsequent options are on by default.
This setting (out of the box on a new Mac) sucks every file stored on your Desktop or in your user's Documents folder into iCloud Drive.
By default. Without warning you.
If you don't turn all these settings off out of the box, Apple may be vacuuming up all your documents stored in those locations without you even knowing it. So be sure to visit this setting and adjust it to your liking when first setting up a Mac or reinstalling macOS.
Using these settings you can optimize how you want iCloud to store your data - and which apps will and will not upload your files to iCloud servers.


 Marko Zivkovic
 Amber Neely
 Christine McKee
 Malcolm Owen
 Mike Wuerthele and Malcolm Owen

 William Gallagher