How to boot an Apple Silicon Mac from an external drive
 Malcolm Owen
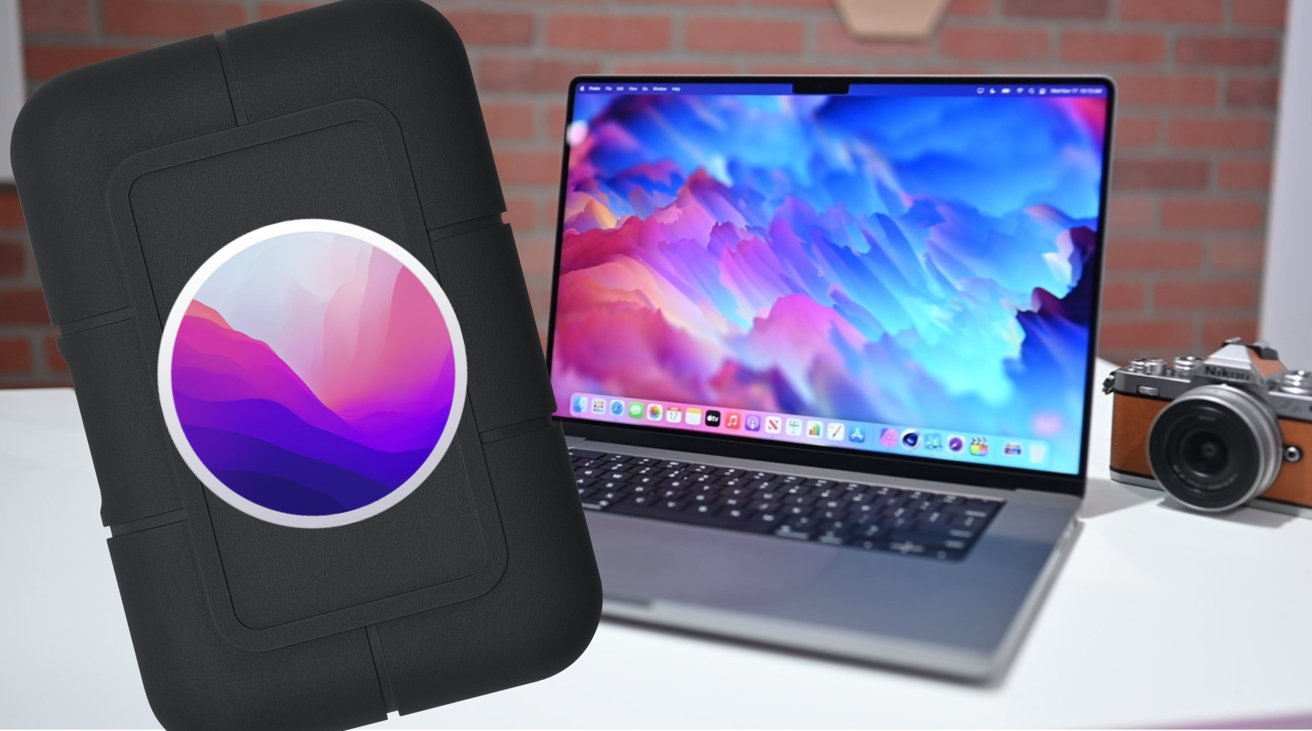
If you have bought an Apple Silicon Mac or MacBook but need to upgrade your storage without buying a brand new device, you can set up your Mac to run from an external drive. Here's how to boot macOS Monterey using external storage on the new Mac lineup.
Buying a new Mac or MacBook is tempting for most people, especially with the introduction of Apple Silicon providing significant benefits over its earlier Intel-based counterparts. However, an ever-present problem for Apple's hardware is storage, something that continues to plague the company's latest releases.
For example, the base model of the M2-equipped MacBook Air has 256 gigabytes of storage. This may seem like a lot for an iPhone or iPad, but for a desktop computer or a notebook, it's not that much at all.
Since you can't add more internal storage to a modern Mac after purchase, unlike some older models, you inevitably have to pay Apple for an upgrade at the time of purchase. That can be expensive, with a shift from 256GB to 512GB adding $200 to the cost, or moving from 256GB to 1TB adds $400 instead.
These storage upgrades ramp up in cost in tandem with the increase in capacity, and can become a very expensive upgrade. In some cases, users will prefer the memory or GPU upgrade than shelling out for even more storage.
A solution to the problem is to acquire the Mac with the GPU and memory upgrades you want, and to use an external drive for storage instead. Modern external drives, including some that use Thunderbolt 3, can provide transfer rates high enough to work from, without any real impact in workflow.
This solution isn't necessarily the best for everyone, as you end up having to carry a secondary drive with you, but it does become a reasonably priced way to add more storage without paying Apple's prices.
Then there's the problem of needing to set your apps to use the external drive for storing data, which can be a fuss. Simply needing to remember to save to the external drive instead of the internal version can be a problem in its own right.
An alternative is to set the external drive to be bootable, so that the Mac uses the larger capacity drive for everyday use instead of the smaller internal one.
While this article is more about making it possible to have an Apple Silicon-based Mac that has more primary storage, the same principle can be used to create a bootable drive for emergencies. If the main macOS installation fails, using an externally-bootable drive will allow a user to quickly get their Mac up and running without touching the internal storage, which can help with file retrieval and backing up before data is lost in a format.
For Intel-based Macs, there are already known processes that can be followed to create the bootable external drive, but the same instructions weren't readily available for M1-based Macs until December 2020, following experimentation by users.
Drive formatting
To create the external bootable drive, you will need a few things to get going. Firstly, you will need an Apple Silicon Mac running on macOS Monterey, though you can do it with older releases including macOS Big Sur 11.1.
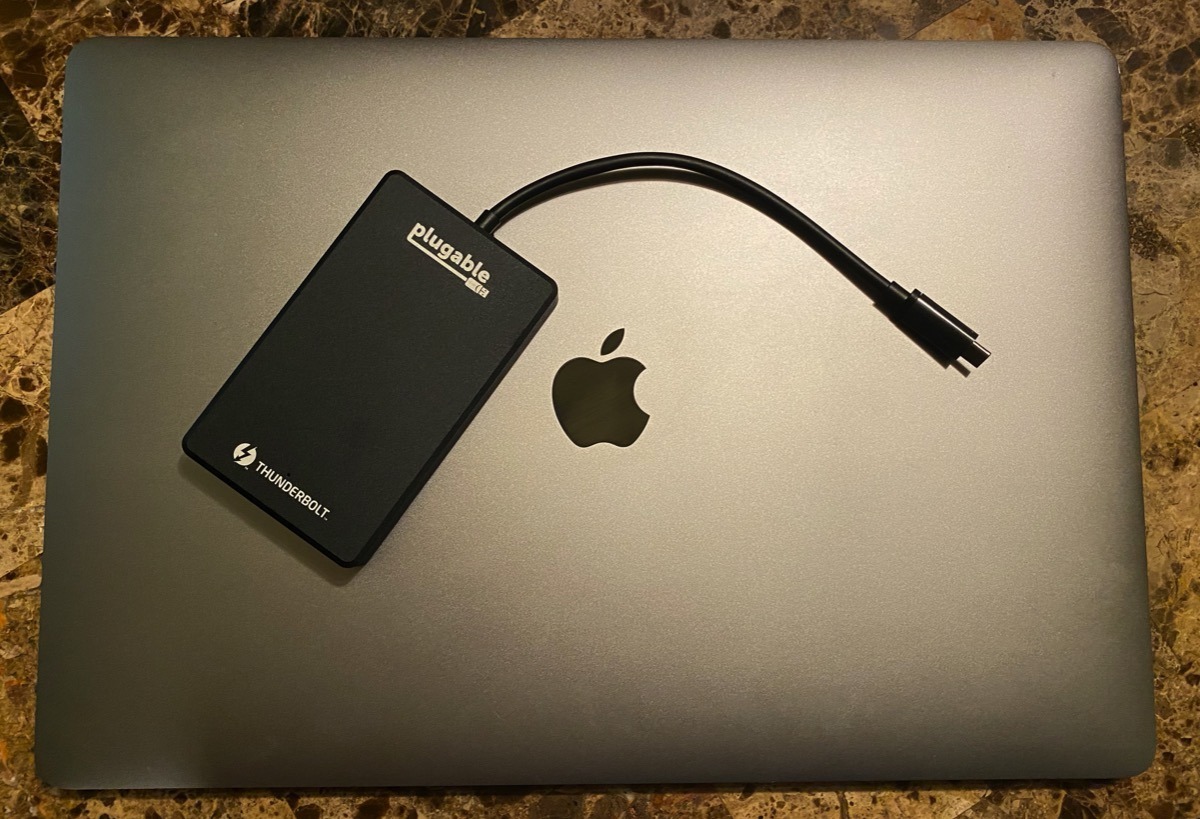
You also need the external drive itself, with it having not only sufficient capacity for your storage needs, but also enough speed to function as fast as an internal drive. For our purposes, that means getting a drive that connects over Thunderbolt 3.
You may have some luck with fast USB-C drives, though your mileage may vary. As for USB flash drives, they may seem to be a good compact option, but they won't work.
Stick with a Thunderbolt 3-based drive to avoid this hassle.
The drive itself can take a few forms, such as an external hard drive that connects over Thunderbolt 3, an external RAID enclosure, or more typically, an SSD or NVMe drive in a Thunderbolt 3 enclosure. The important bit is that it must connect using Thunderbolt 3.
This is a fairly lengthy process, so make sure your external drive is suitable before starting. The last thing you want is to go through all of this and discovering it fails halfway through because you used a USB-C drive instead of Thunderbolt 3, wasting your time and bandwidth in the process.
The first real stage of the process is to wipe the drive, formatting to appropriate settings.
How to format the external drive
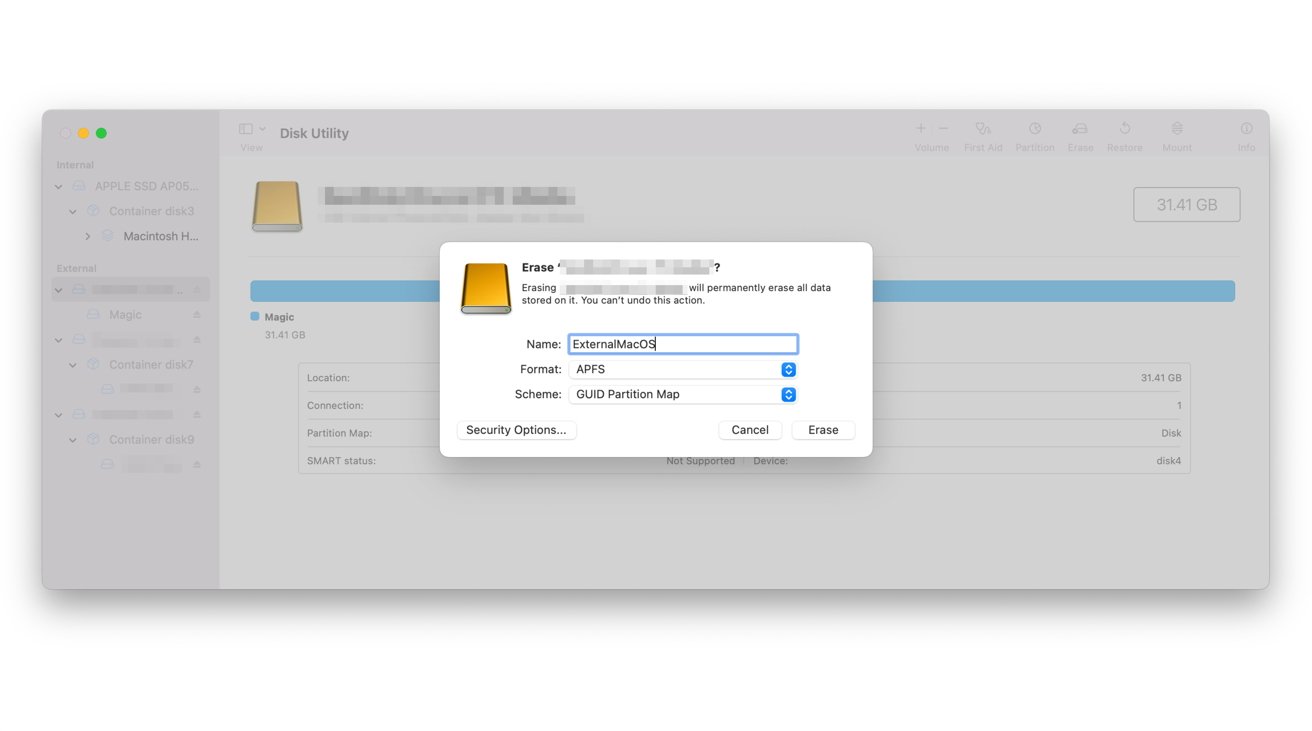
- Open Disk Utility. This can be accessed within the Utilities folder in the Applications list.
- Select the drive you want to use for the bootable external storage. Make sure it is the external drive and not the Mac's internal drive, as this is the last chance to make sure.
- Click Erase.
- Click the Format drop-down box and select APFS. Make sure it is the standard version and not a variant with encryption.
- Give the drive a name.
- Click Erase, then Done.
Installing macOS Monterey to the external drive
There are two ways to install macOS Monterey to the external drive. One method is more suited if you want to download macOS overnight or at a different time to the installation, while the other is better if you have a sufficiently-fast Internet connection to get the download quickly.
How to install macOS Monterey to an external bootable drive (Download first method)
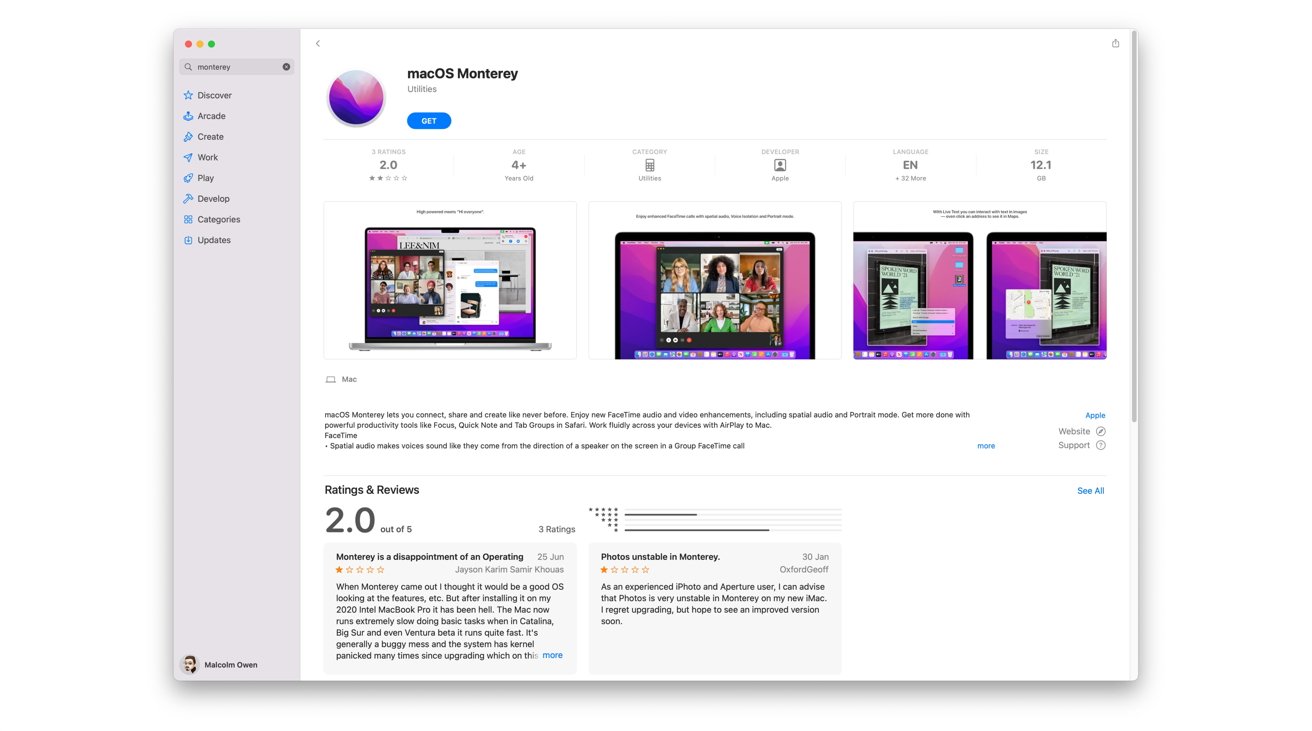
- Open this Mac App Store link. If your browser asks, select to open it in the Mac App Store.
- Click Get or the iCloud download icon to download it.
- Open the Install macOS Monterey app.
- Click Continue in the installer, and follow the onscreen instructions carefully.
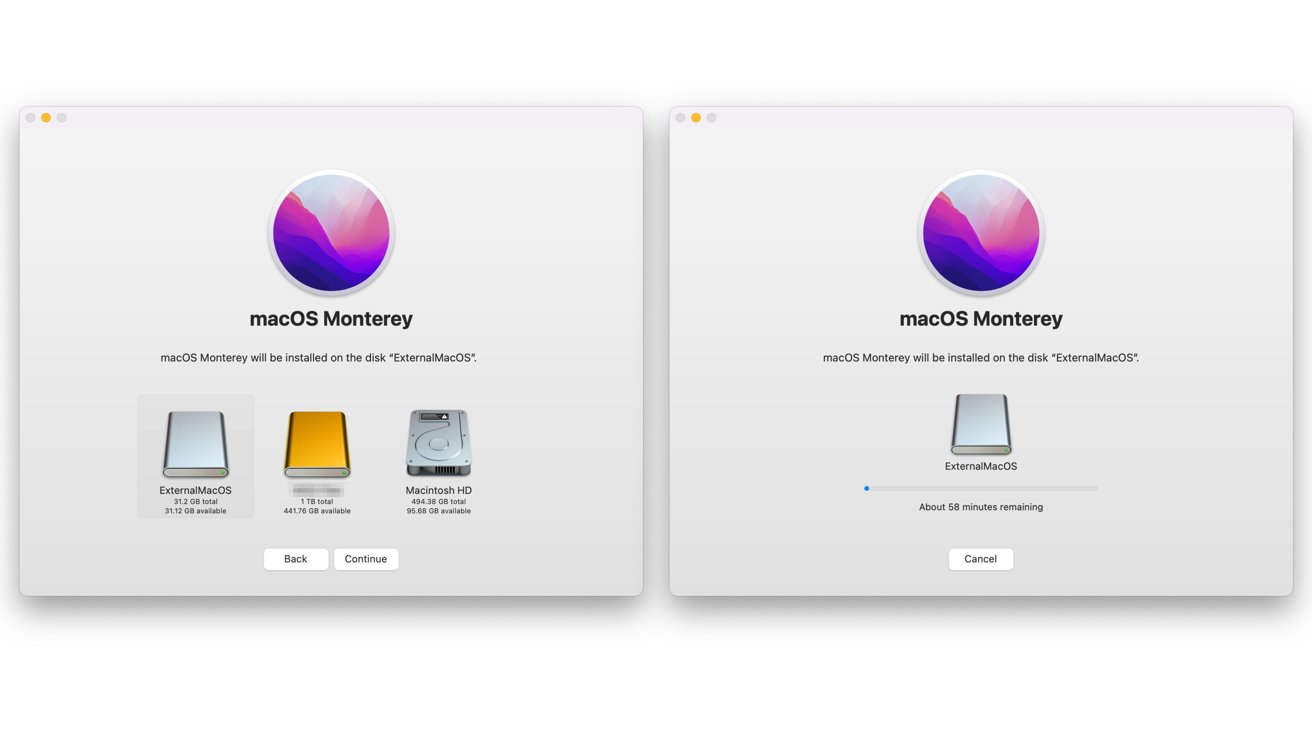
- When the installer asks which drive to install macOS Monterey to, select the APFS-formatted external drive that you want to make bootable, then Continue.
- Proceed through the installer to the end.
- When the Mac restarts, it will automatically boot from the external disk.
This method downloads macOS in one phase, then installs it to the drive as a second phase. This is probably the better option as you could leave the download to run overnight or when the Internet connection isn't actively being used, and continue the process the following day.
The second method instead combines the download and the installation in a single process.
How to install macOS Monterey to an external bootable drive (Download later method)
- With the formatted external drive connected beforehand, turn off your Mac.
- Turn the Mac back on by pressing and holding the power button, until the screen shows startup options.
- Select the Options icon.
- Enter an administrator's user credentials.
- Select Reinstall macOS Monterey and follow the onscreen instructions carefully.
- When the installer asks which drive to install macOS Monterey to, select the APFS-formatted external drive that you want to make bootable, then Continue.
- Proceed through the installer to the end.
- When the Mac restarts, it will automatically boot from the external disk.
After completing either method, you will have a clean macOS installation running from an external bootable drive. You will then have to complete the usual setup process in macOS, before you can shut down the Mac and safely disconnect the drive.
With the external bootable drive disconnected, the Mac will automatically select the internal drive and load normally. If it doesn't, turn it on with a long press of the power button to bring up the startup options, and select the primary drive.
If you boot back into the internal disk's version of macOS, you can eject the external drive as usual. You will probably see a warning that the disk being ejected has multiple volumes, after which you should select Eject All.
Booting from the external drive
If you need to boot from the external bootable drive for some reason, such as if the main macOS installation has corrupted, you can do this in a few steps.
How to boot macOS Monterey on an Apple Silicon Mac from an external bootable drive
- With the Mac powered off, connect the external bootable drive to the Thunderbolt 3 port.
- Turn the Mac back on with a long press of the power button, holding until the screen shows startup options.
- Select the bootable external drive.
- Your Mac will then boot from the external drive instead of the internal storage.
You could set the Mac to boot just from the external drive without even considering the internal version. This can be controlled within macOS itself.
How to set which drive an Apple Silicon Mac boots from
- In macOS, open System Preferences and select Startup Disk.
- Select the drive you want to boot from.
- Click Restart
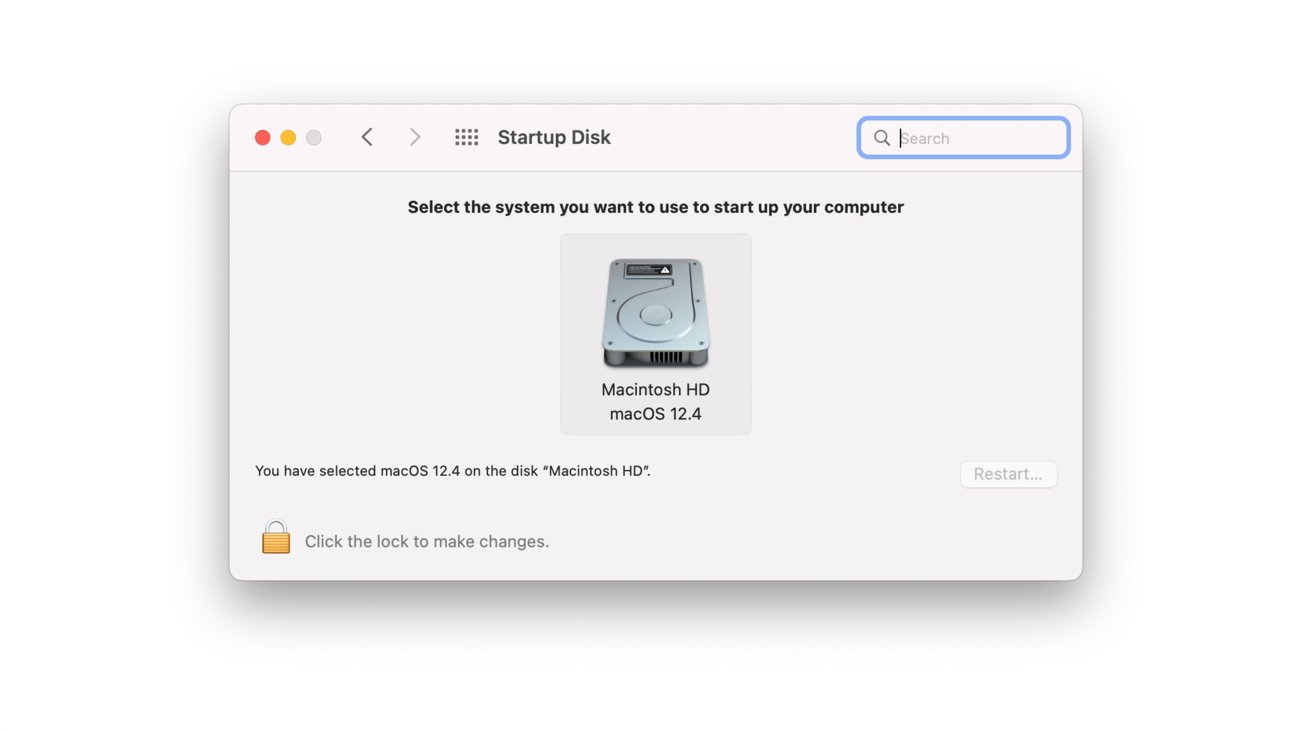
After the reboot, you will be running macOS from the selected drive. In fact, the Mac will continue to boot from that drive specifically, until you change the setting in macOS again, or you disconnect the drive.
Extra Credit
While not quite the same as an externally bootable drive, Apple has published instructions for creating an externally bootable installer for macOS, which works with both Intel and M1-based Macs.
You could also reinstall macOS to the internal drive instead of the external drive using the second method by selecting the internal drive, a method we have covered previously. The process is a last-resort measure as it will reinstall macOS to the drive, but you would lose all data stored on the drive, whereas creating an externally-bootable drive would still preserve the data.


 Wesley Hilliard
 Amber Neely
 William Gallagher