How to use Stacks and Quick Look in macOS Ventura
 Chip Loder
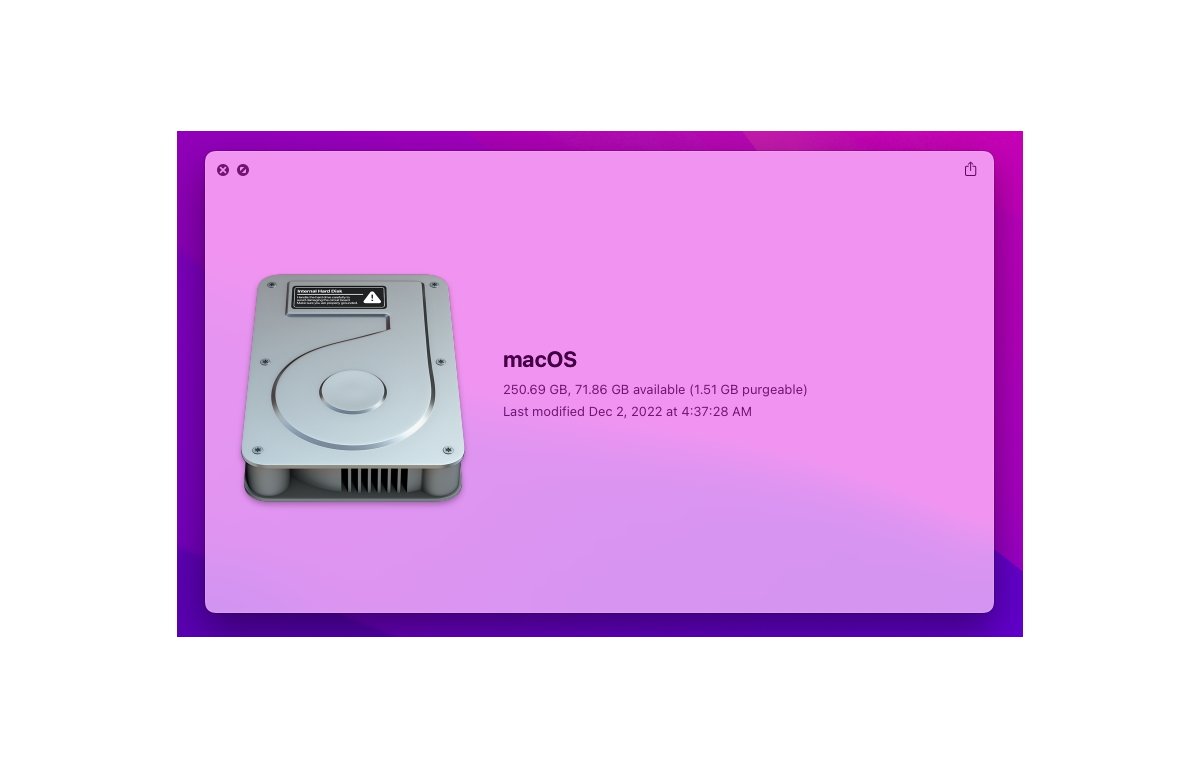
Stacks and Quick Look are handy features in the macOS Finder that can help speed up your workflow. Here's how to get started using them.
Stacks are spring-loaded popups, each containing a set of files in the Finder. You can group stacks by file kind, date, or tags.
You can use Stacks in two ways in the Finder: in the Dock and on the Desktop.
In both cases, you set a view option to use Stacks, which groups items by file type or name, then when you click a Stack it pops up a fan-like list of all items in that Stack. Selecting an item from a Stack opens it just as if you had double-clicked it in the Finder.
Stacks in the Dock
To use Stacks in the Dock, drag any folder from the Finder to the left of the Trash in the far right end of the Dock. This area is reserved for shortcuts to file and folders.
Once a folder has been added to the Dock, Control-clicking it, or right-clicking it pops up a menu which allows you to set options for the folder:
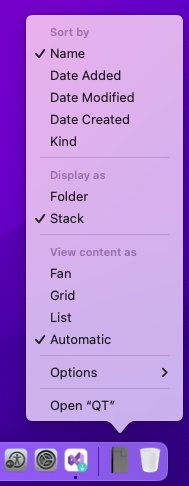
At the top is "Sort by" which has options for sorting by name, date, and kind.
The next section in the popup is "Display as" which has options for "Folder" and "Stack". Select "Stack".
Below that in the popup is a section with options for how you want the items in the Stack displayed when it appears: "View content as". You can view items in the Stack by Fan, List, Grid, or "Automatic" - which lets the Finder decide how to display the items. "Fan" is usually the default in most cases.
Now that you have the Stack's options set, simply single-click it in the Dock. The items in the Stack appear in a large popup overlay based on the view options you set above. The top item in the overlay "Open in Finder" opens the folder normally:
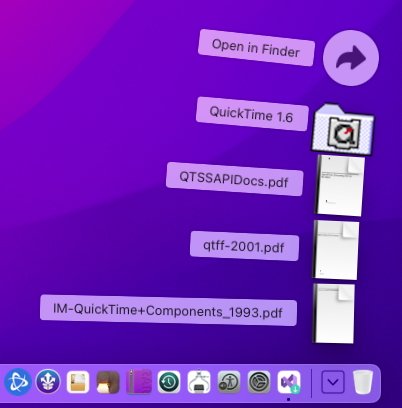
To open any item in the overlay, simply click it with the mouse or trackpad. Note that you have to click an item's icon to open it. Clicking its name in the overlay does nothing.
Stacks on the Desktop
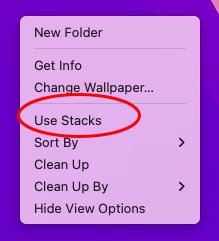
To use Stacks on the Desktop in Finder, Control-click, or right-click anywhere on the Desktop. In the popup menu, select "Use Stacks":
Be aware that doing this will totally rearrange your Desktop without warning. In some cases, deselecting "Use Stacks" won't cause all the items on your Desktop to return to their original positions.
You may want to minimize the number of items on your Desktop before trying "Use Stacks".
Once in Stacks mode, the Finder will group all files into stacks of icons, usually by kind by default. Just as you did in the Dock, clicking any Stack pops up an overlay with the items in it.
Now if you select "Sort By" from the Desktop popup menu when Control-clicking on the Desktop, the Finder will rearrange the Stacks based on what you select.
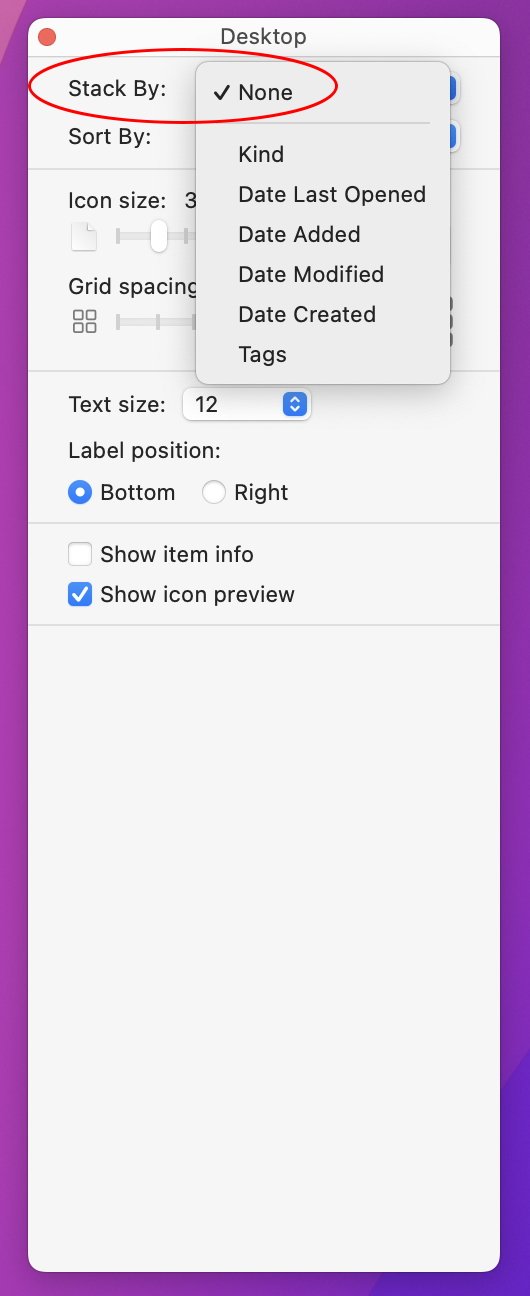
You can also override the "Sort By" behavior from the Desktop popup menu by selecting View->Show View Options in the Finder's View menu, and then setting how you want Stacks sorted by selecting an option from the "Stack By:" popup menu. Current options are by kind, dates, or tags:
Quick Look
Quick Look is a macOS feature which allows you to select a file or files in the Finder, tap the space bar, and quickly peek inside them or display them. Quick Look is built into Finder - which knows how to display text, audio, and most image and PDF files.
To use Quick Look, select a file or files in Finder, then tap the space bar. A preview window will be displayed, with a preview of the first file selected. To advance forward or backwards to the next or previous file, click one of the arrow buttons in the upper left corner of the Quick Look preview window:

You can resize the preview window by click-dragging its edges or corners.
You can fullscreen the Quick Look window by clicking the second of the two round buttons in the upper-left corner, next to the close button. Press the Escape key on your Mac's keyboard to exit fullscreen mode.
If more than one file is selected, a small grid button appears in the upper right corner of the Quick Look window. Click the grid icon to show a thumbnail grid of all selected files:
Clicking one file icon from the grid previews it in the Quick Look window.
You can also click the Share button in the window's upper right corner to send the current file to another application.
To open the current file in its default app, click the "Open with" button in the upper right corner of the Quick Look window.
Editing images
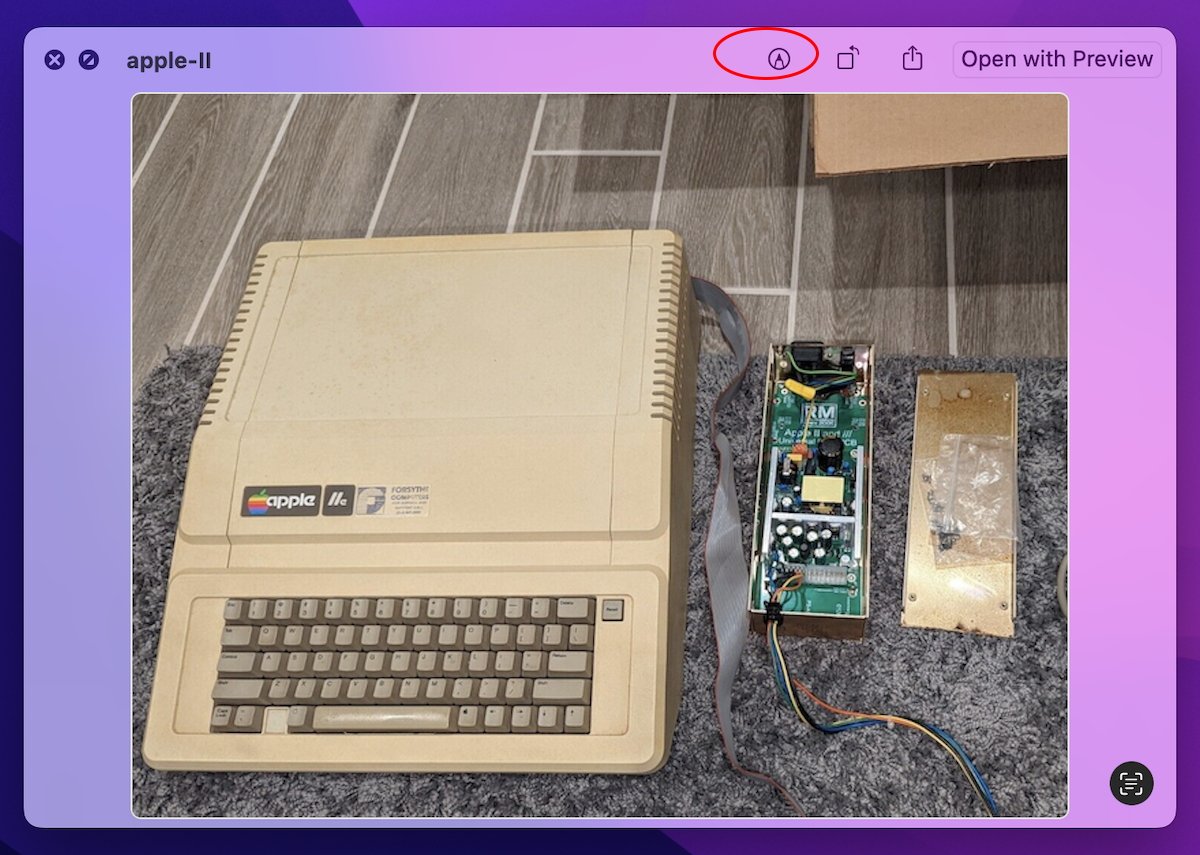
If the current preview is of an image file, two more controls appear in the upper right corner of the Quick Look window: edit, and rotate. Clicking rotate turns the image in ninety-degree increments on each click, and clicking the edit button opens a set of editing tools along the top of the window:
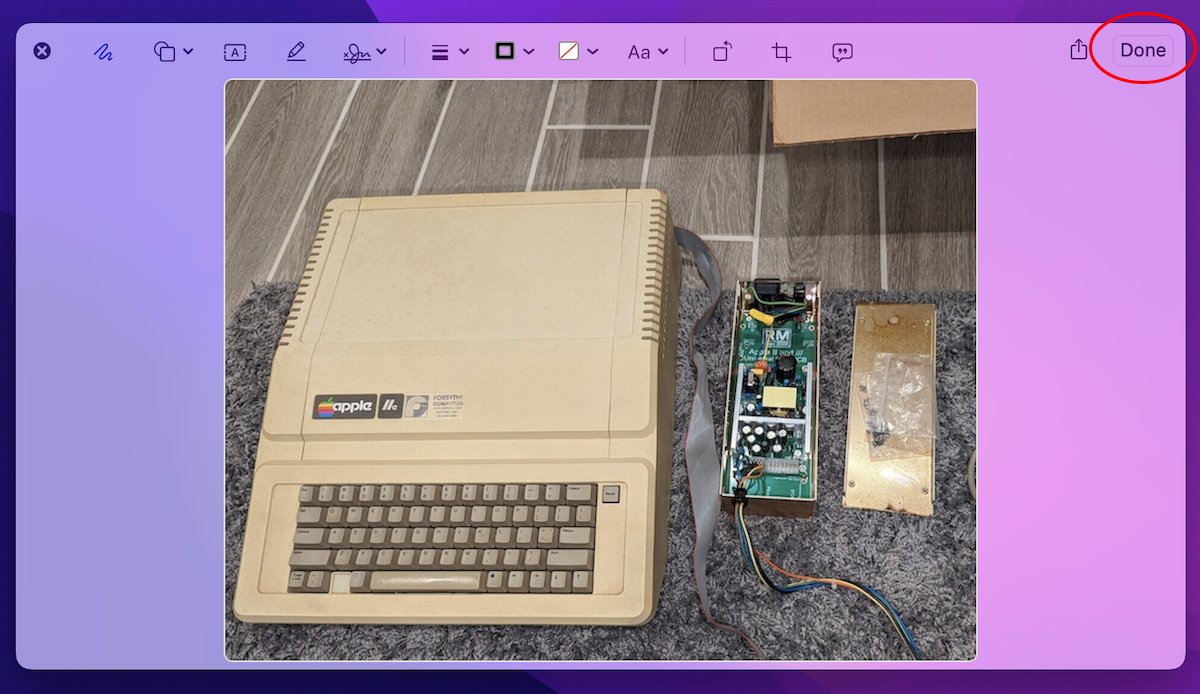
When you're done editing, click the Done button in the upper right corner:
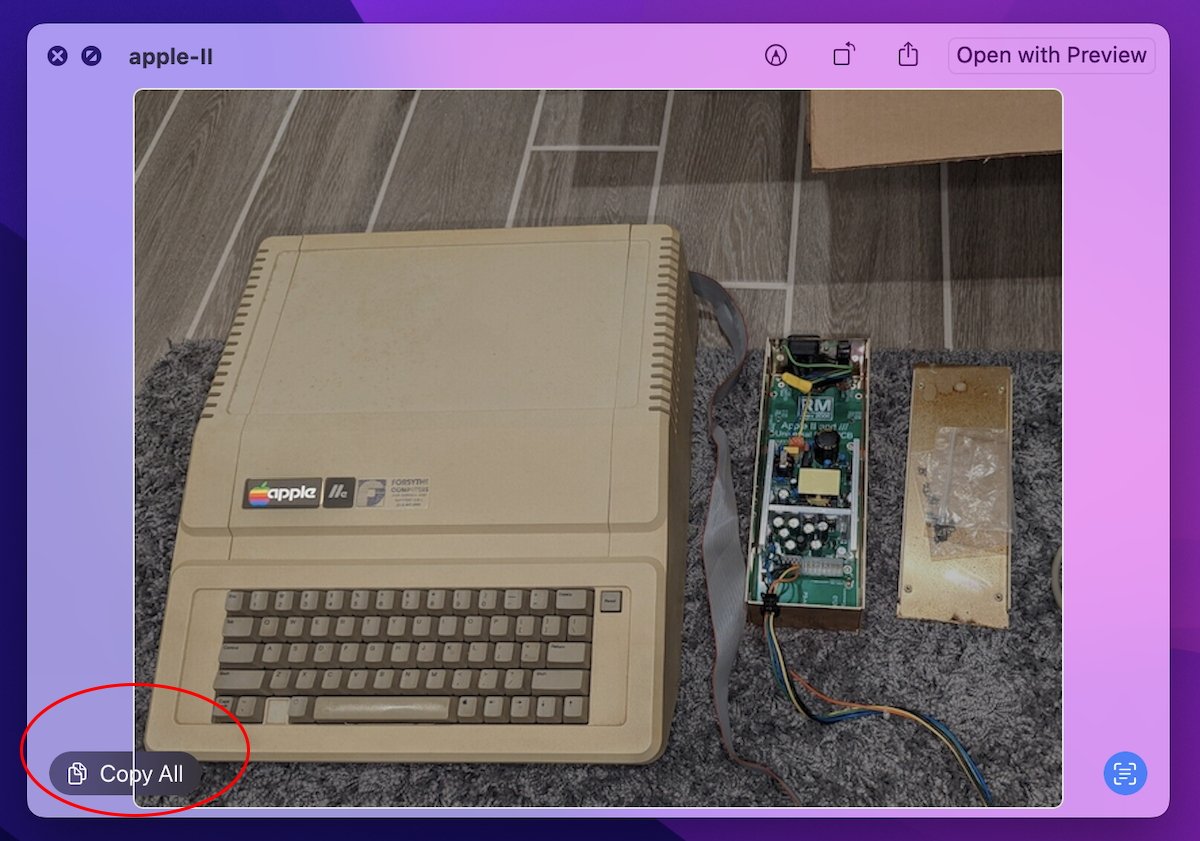
If an image in the Quick Look window has text in it, you can extract the text via AI by clicking the small round button in the window's lower right corner:
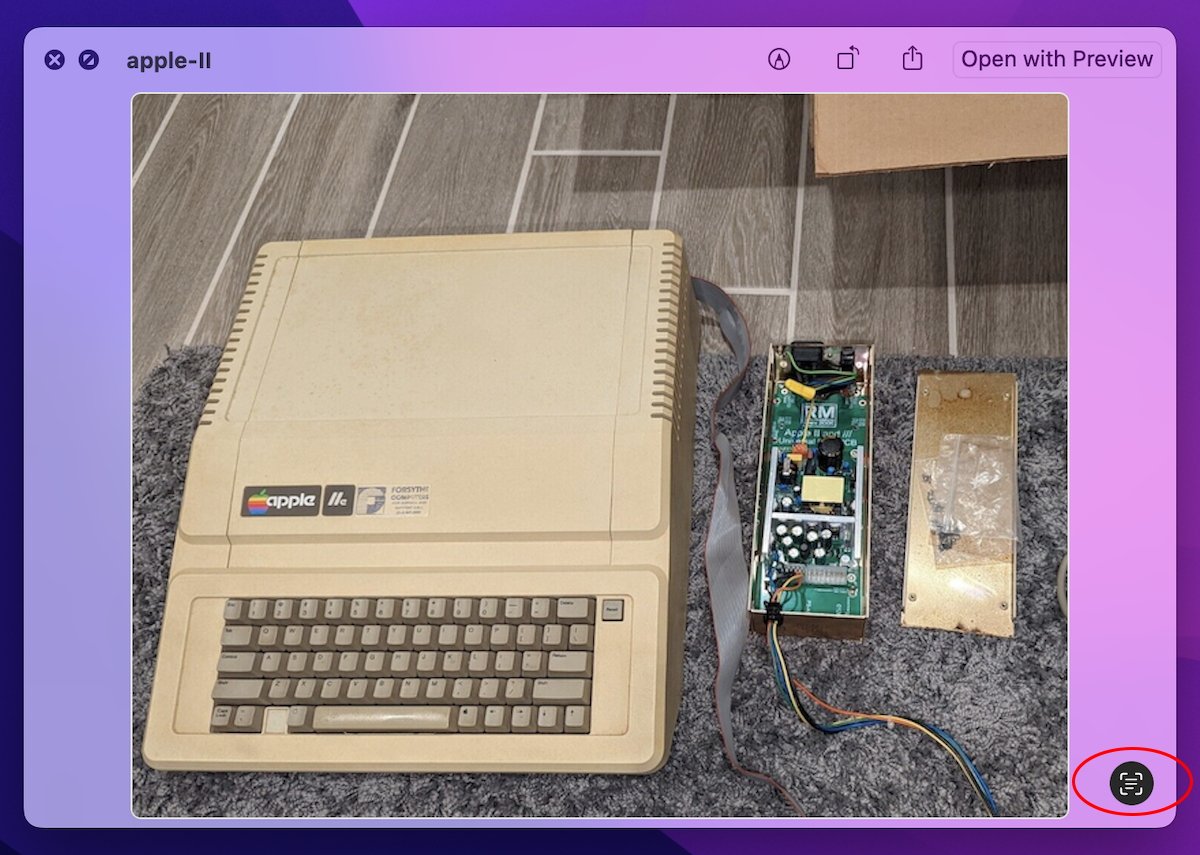
This displays a button in the window's lower left corner titled "Copy All" which, if you click it will copy all the highlighted text in the window - ready for pasting into any app that accepts text.
For PDF and text files, the Quick Look window provides a scrolling preview of pages in the current document on the right side of the Quick Look window:
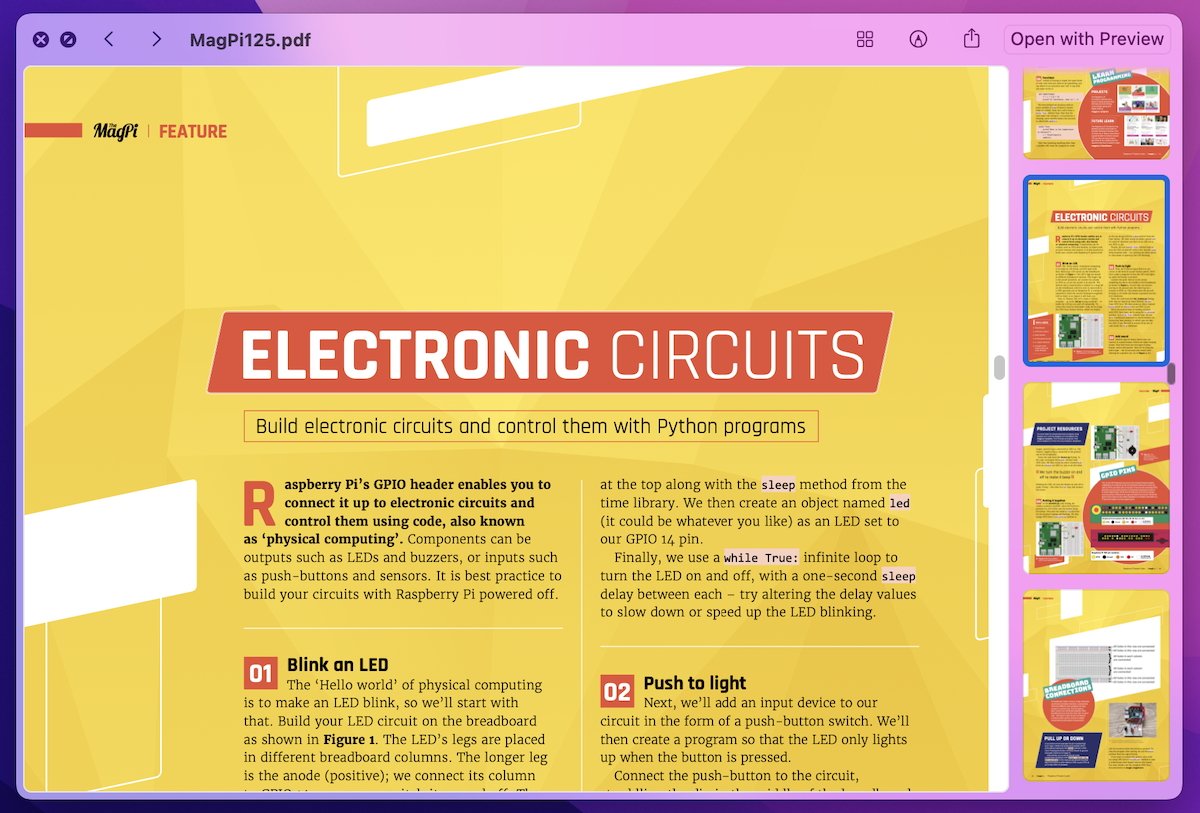
To go to a page in the PDF's page list, single-click any page's icon from the scrolling list.
AV files
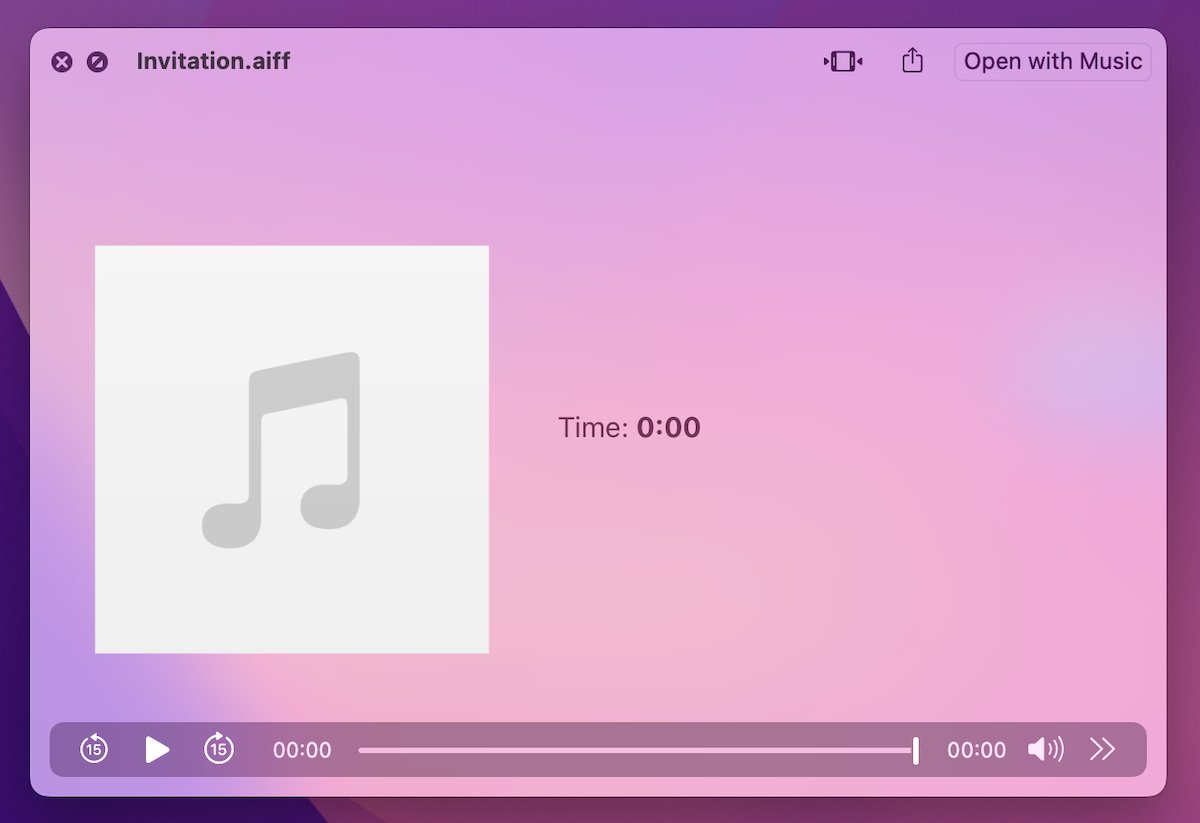
If an audio or video file is selected in Quick Look, playback controls appear allowing you to play the file. A small Trim button also appears in the upper right corner of the Quick Look window:
Clicking the Trim button opens a simple trimming interface right in the Quick Look window:

By using the Trim interface, you can change the start or end point of a media file, insert or remove portions of media, and save the file.
Other file types
Quick Look also knows how to do some cool tricks with certain types of files in the Finder such as .webloc (web bookmark) files: if you select a .webloc file in Quick Look it automatically tries to load and display the web page for that bookmark in the Quick Look window:
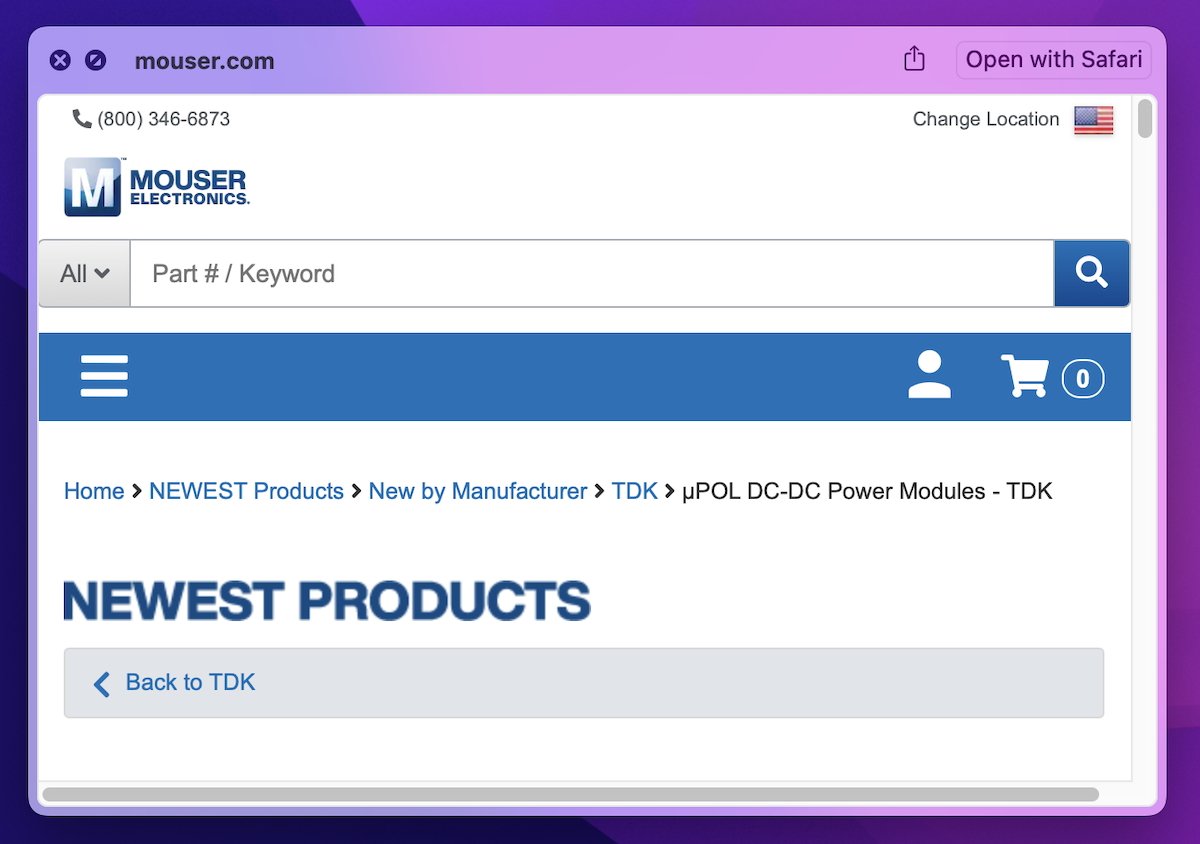
Clicking the "Open with Safari" button in the upper-right corner opens the page in Safari.
If for any reason Quick Look doesn't know how to read a selected file, it simply displays a blank window with the file's icon, name, size, and last modification date:

The same is true for selected folders or volumes.
Some Apple apps included with macOS (such as Mail) also support Quick Look.
Quick Look in third-party apps
Apple does publish an API for Quick Look programming, so any developer can add Quick Look functionality to their app to make it behave like the Finder's Quick Look feature, but it is up to third-party developers to implement Quick Look in their apps - Quick Look preview windows are not provided in third-party apps without adding custom code to implement them.
The macOS User Guide has a section titled View and edit files with Quick Look on Mac which explains more about how to use Quick Look.
Quick Look generators
macOS also supports custom Quick Look plugins called generators which tell the Finder how to read and display file formats it doesn't normally know how to display. Apple's Pages app, for example installs a custom Quick Look generator for Pages file preview in Finder and in Pages itself.
Here are a few examples of third-party Quick Look generators you can install to extend the functionality of Quick Look in the Finder:
A 5-star rated Quick Look generator called Peek ($8 from Big Z Labs) provides searching, highlighting, and more in common text document formats in Quick Look Finder windows.
BetterZip (free) includes a Quick Look generator which allows you to peek inside standard .zip archive files without having to open them. Very handy.
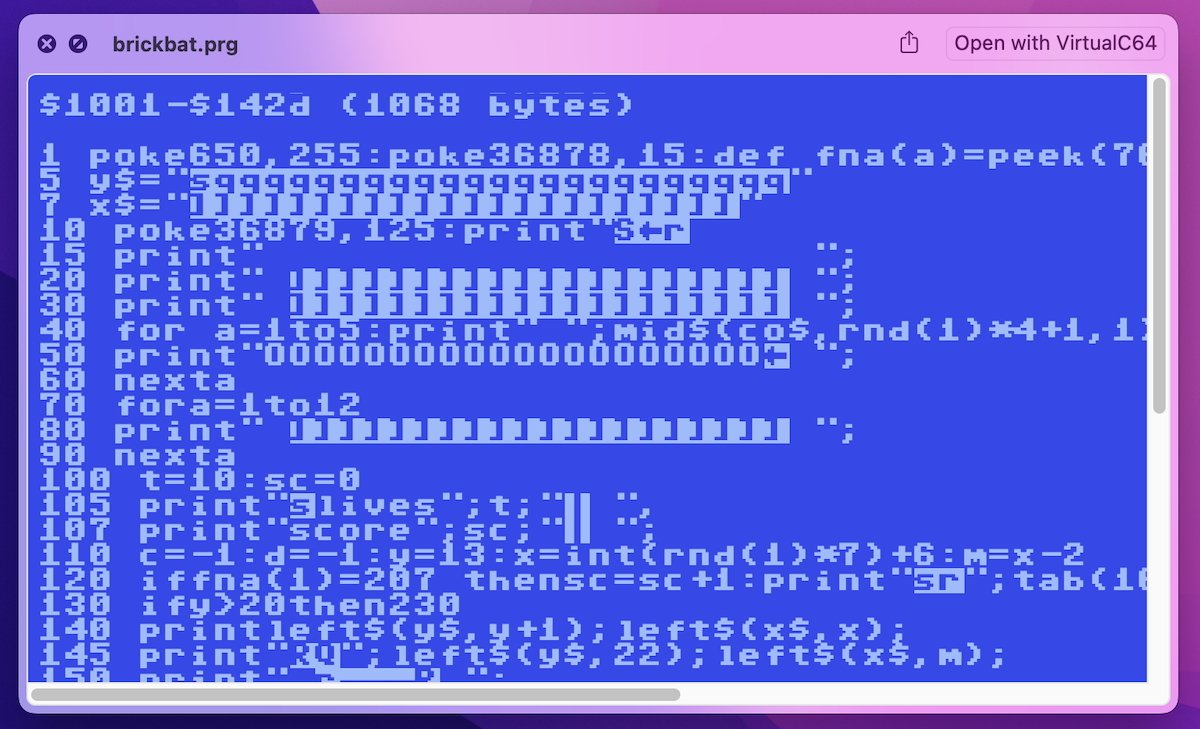
RECOIL is a Quick Look generator which allows you to view vintage computer files and programs from decades ago in the Finder's Quick Look window:
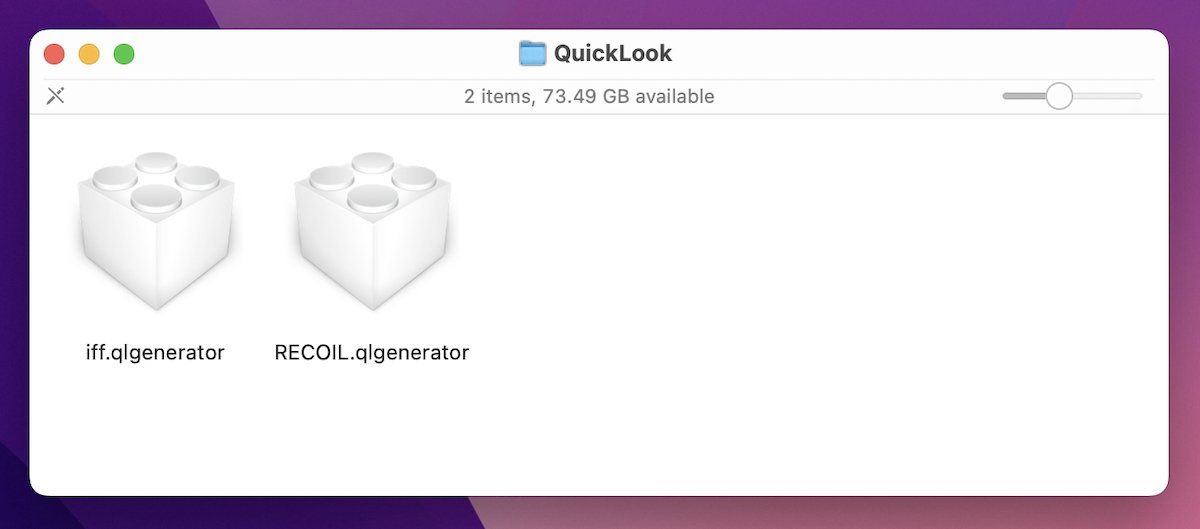
All Quick Look generators must be placed in either /Library/QuickLook, or in ~/Library/QuickLook (in the user's folder). All generators must have a file extension of .qlgenerator and be standard macOS bundles which macOS knows how to read:
In most cases after installing a new Quick Look generator, you'll need to Log Out and log in again in order for it to work.
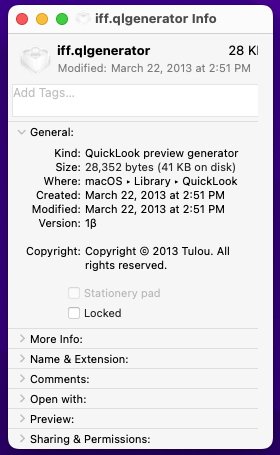
You can get more info about each Quick Look generator plugin by selecting it in the Finder, then pressing Command-I (Get Info) on your keyboard:
Quick Look is easily one of the handiest additions Apple has made to the Finder in recent years - it allows you to quickly peek inside files to see what's in them without having to open an app which takes time.


 Andrew Orr
 Wesley Hilliard
 Amber Neely
 William Gallagher

 Malcolm Owen