How to add and use a second monitor with your Mac
 Malcolm Owen
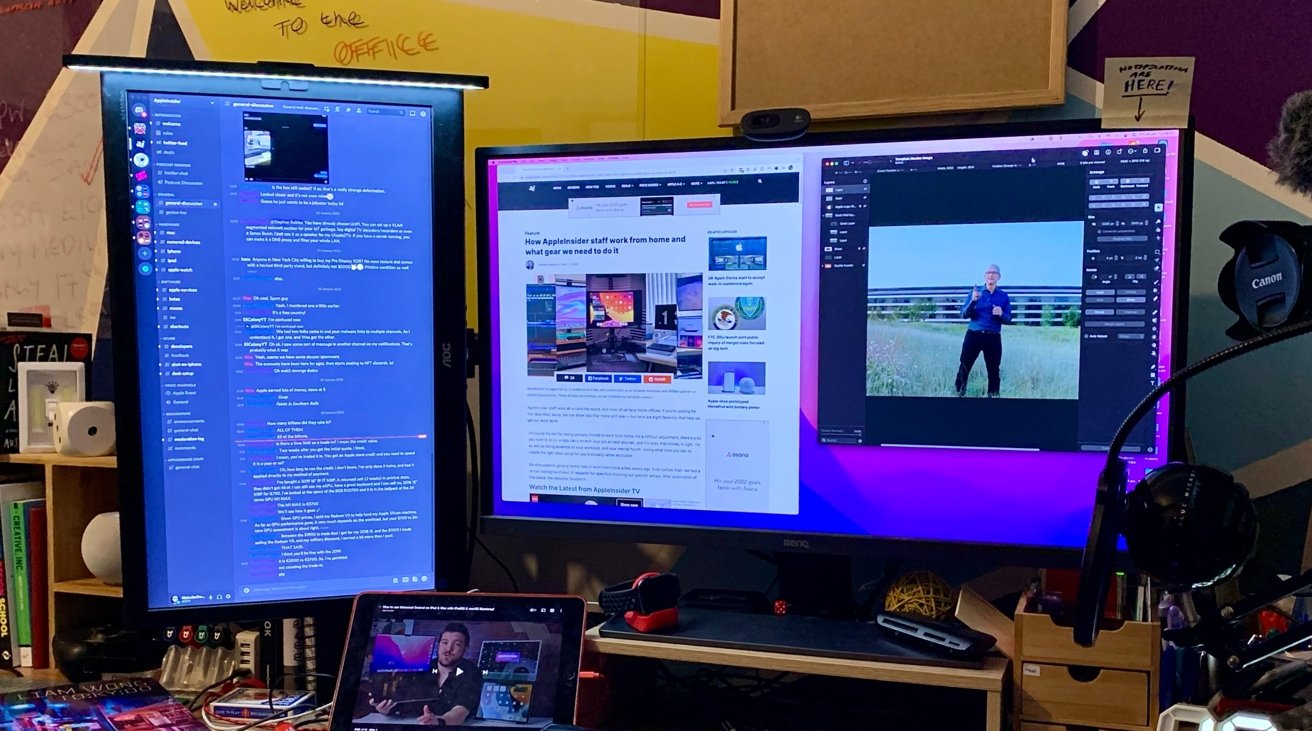
An AppleInsider contributor's dual monitor setup.
If one screen isn't enough to display everything you need at once, consider getting a second. Here's how to manage multiple screens in macOS.
Many people get a lot of work done on a Mac, but they may not necessarily get to see the full picture. With the multitude of apps needed for tasks, there comes a need for more pixels to play with.
However, a large 4K-resolution screen, a 5K Studio Display, or even a 6K Pro Display XDR may not be enough desktop space for your needs. After shuffling apps around the display too many times, it becomes tempting to physically expand your digital workspace onto a second screen.
Why two or more screens?
Aside from simply giving you more pixels to use, using a multi-screen computing setup offers a few more productivity bonuses.
You can more clearly divide your apps between screens. From a productivity perspective, you can put secondary apps on a peripheral screen while keeping a primary display clear for your main tools.
An artist may decide to use a side screen for source images for inspiration while using Photoshop on the main screen, for example. A video editor may dedicate a display to showing footage they are actively editing, such as for color grading.
It could also be as simple as dedicating one screen to handle all social and communications apps so that they're out of the way while focusing. Alternatively, have an app that you're continually monitoring on that side screen, so it's always available without opening it each time.
You also don't have to mount monitors in landscape orientation, leading to other benefits. In the case of the editorial team of AppleInsider, some use a secondary monitor in portrait orientation, so they can more easily read documents without needing to scroll as much.
Depending on your intended tasks, there's almost certainly something beneficial to gain from using two or more screens.
How many screens can your Mac handle?
While you can dream about having many screens on a desk and pretend to be working "the markets" from your desk, or to be able to play and view many YouTube videos at once, not everyone will be able to accomplish that.
It's not just a financial problem or physical practicality in squeezing so many screens onto a desk. It could simply be a limitation of your Mac.

To find out how many displays you can connect to your Mac, check Apple's product listing or the company's support pages for a specification sheet. Depending on the model, you may have an HDMI port available, or you could end up using DisplayPort 1.4 within Thunderbolt 3 to connect the display.
Apple Silicon models with the M1 chip can deal with two displays on the Mac mini, including a 6K display via Thunderbolt and a 4K screen over HDMI. Both the M1 13-inch MacBook Pro and MacBook Air can handle a single 6K external display, alongside the built-in version.
The M1 Pro in the 14-inch MacBook Pro is able to manage two 6K external displays, with the count rising to three for the M1 Max. Lastly, the M1 Ultra in the Mac Studio is able to handle up to four 6K screens over USB-C and one 4K display over HDMI.
Getting set up
The first step is to connect your monitor to your Mac. This is relatively straightforward, as you're just plugging in the display's cable into the relevant port on the Mac.
If there is a difference in ports, such as needing to use HDMI with the display but the connection isn't available on the Mac, you could use adapters. There are many available on the market to change video connections, though other multi-port dongles and docks can offer the same thing along with other ports.
Once physically connected, the Mac should automatically detect the monitor's presence.
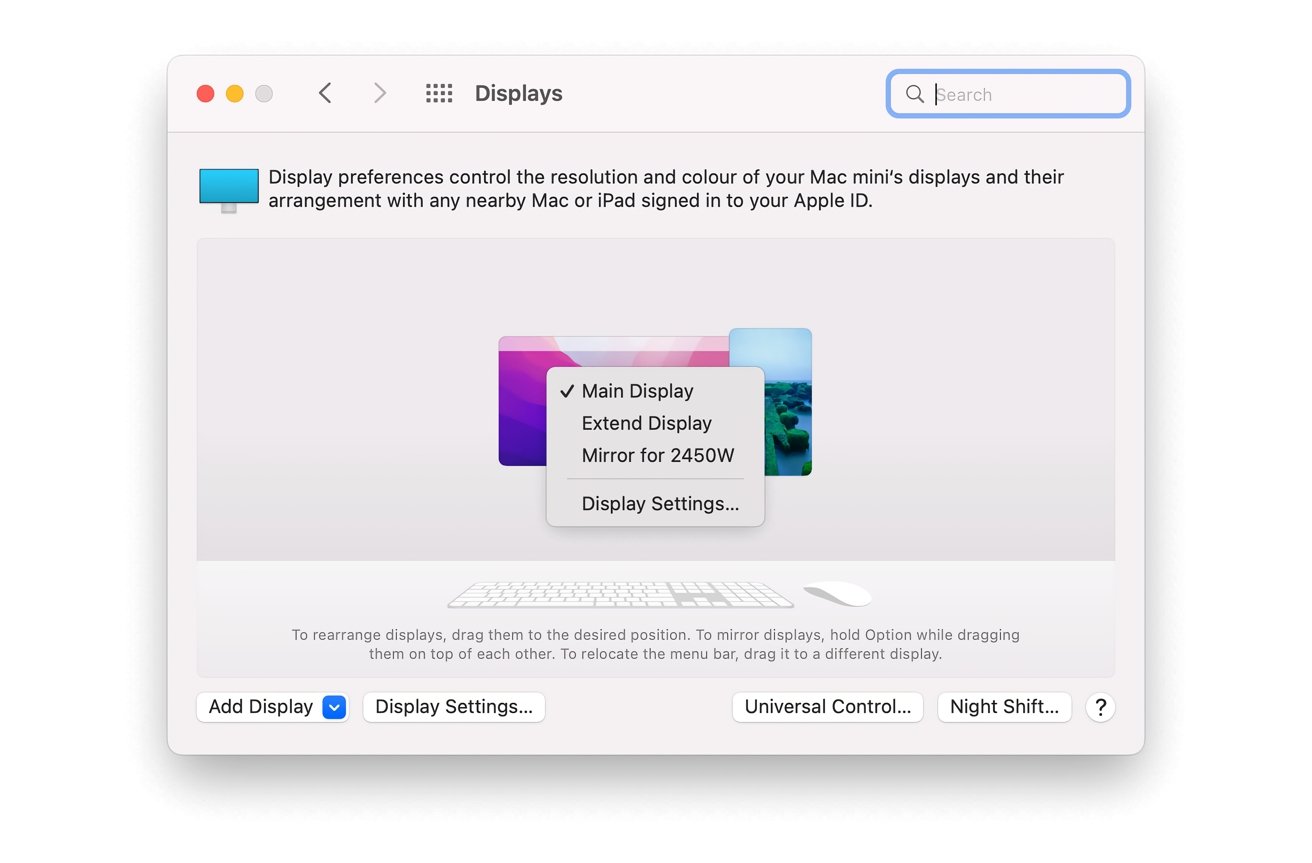
After the hardware is placed and connected, your next step is to configure macOS. This is all done within the same Displays menu, accessible by clicking the Apple icon in the menu followed by System Preferences then Displays.
At this point, macOS should show you all monitors connected to the Mac. If it doesn't, hold down Option to show the Detect Displays button and click it.
Depending on your needs, you may have to inform macOS that you will want to mirror or extend a display.

How to mirror or extend displays in macOS
- Click the Apple icon in the menu then System Preferences, then Displays.
- Click Display Settings.
- Click the name of the display you want to adjust from the left-hand column.
- Click the dropdown for Use as, and select the function you want.
- Extend Display will increase your workspace so that it extends onto the display.
- Selecting Mirror For with the name of the other screen will make macOS show the same image on both displays.
- Alternately, within the Displays window, right-click on a screen you want to change the properties of, then select Extend Display or Mirror For.
When you have multiple displays, macOS will try to keep the original as the main display, referring to the screen that new apps will load on and will generally be the focus of your attention. If you're adding a new larger display to your setup, you may want to change that.
How to set a second display as the main display in macOS
- Click the Apple icon in the menu then System Preferences, then Displays.
- Right-click the display you want as the main one, then select Main Display.
- Alternately, drag the small white bar in the current main display to the one you want as the primary monitor.
- Alternately, click Display Settings, select the monitor, then under Use as, select Main Display.
Fine tuning the setup
The Displays menu provides many options to make your second screen usage more optimal.
First, you can drag the screen positions within the Display window to roughly where they are in real life, so you can more seamlessly move the cursor from one screen to another.
This isn't exact, as macOS knows the resolution but not the physical size of the displays. Per-display scaling may not be spot-on.
Clicking Display Settings will provide you with even more options for managing your new display. If you're adding a 4K or higher screen to the arrangement, you may want to select Scaled under Resolution, then a lower resolution.
Doing this may make the desktop easier to read without straining your eyes.
Another key element here is Rotation, which is used if you have mounted a display in a vertical orientation. Select 90 degrees or 270 degrees for a vertical layout for that particular screen, though there's also the option of using 180 degrees if your monitor is in landscape, but upside down.
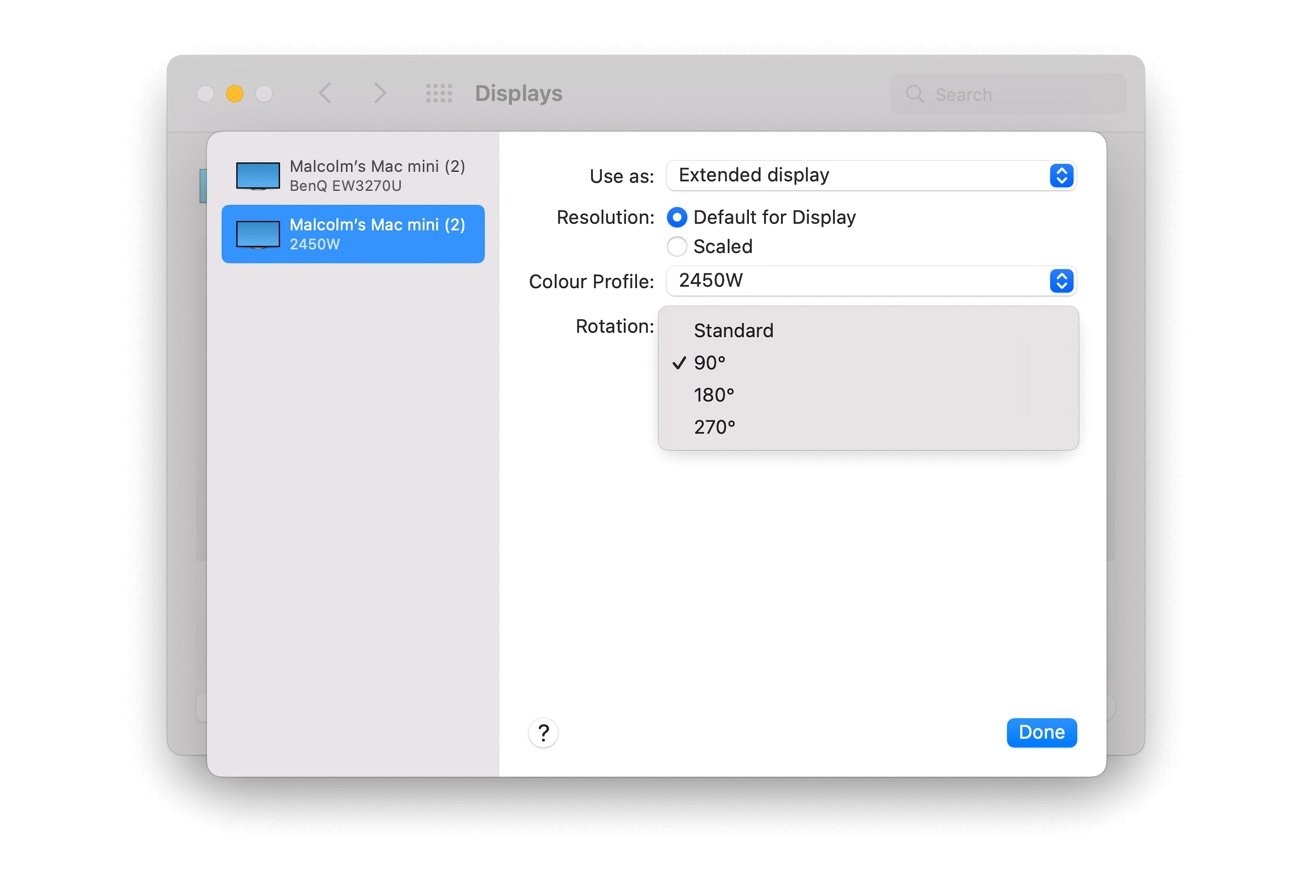
You may also want to adjust the Color Profile, as monitors may appear different to the user when looked at side-by-side, such as one having a warmer color temperature.
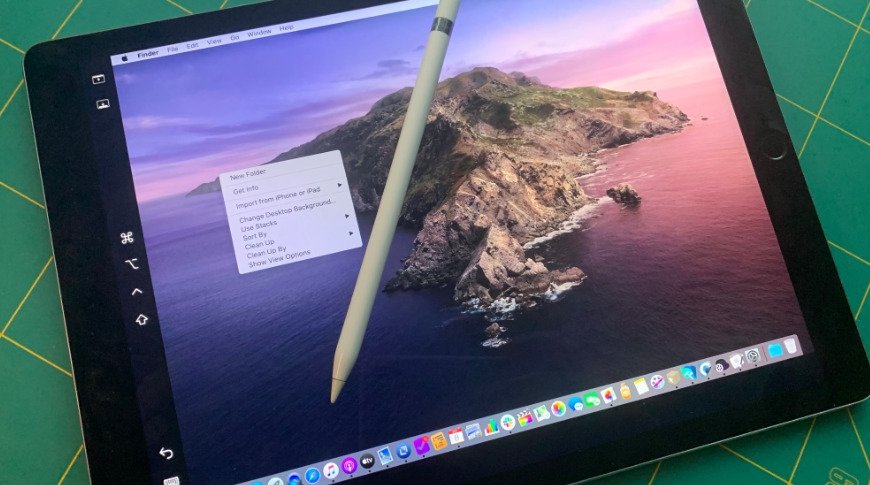
What about Sidecar and Universal Control?
Though you could hook up a second monitor or a spare TV to your Mac, Apple does provide options to extend the digital workspace without needing an extra dedicated screen. Sidecar and Universal Control provide additional options if you have an iPad nearby, but in different ways.
For a start, Sidecar is a mode that turns the iPad into a secondary display, as in an extension of the Mac desktop. It's not strictly just a display, as there's some further interactivity available if you have an Apple Pencil, but you have the same mirroring options and other settings you can control within the Displays window.
Universal Control is a newer feature of macOS and iPadOS, in that it extends your workspace in a different way. Rather than making an iPad work purely as a display, you can control the iPad via your Mac's keyboard, mouse, and trackpad.
This means you can access and manage apps on the iPad from the comfort of your Mac, but without considering it a full part of your typical Mac setup.
If you are a MacBook Pro user who is always on the move or occasionally needs more desktop space, it is worth investigating these two modes. They effectively give you a way to use the iPad as an extra workspace while on the road without needing to bring along a second dedicated monitor.


 Wesley Hilliard
 Amber Neely
 William Gallagher