How to get the most out of extra features in macOS Finder
 Alex Baggott
Time to see what the Finder has to offer...
The Finder is probably the most fundamental app in macOS. Each person has their own way of using the Finder, but what you may not be aware of are the many ways it can help you work faster.
You might be surprised at some of the subtle ways the Finder can help you manage and manipulate files more in-line with your particular style of working. So, let's take a look at some of the lesser-known productivity features it offers.
One window, many views
No setting is so polarizing between Mac users as the default view in Finder. There are four different types: Icons, List, Columns, and Gallery.
The Column view lets you keep track of where you are in the folder structure by opening each in its own column from left to right.
Meanwhile, the Gallery view is useful for folders containing images since it displays a large preview of the file. You can switch between them using the button to the right of the title bar.

Clicking View -> Show View Options will open a new window with extra settings. Here, you can change save the view type for the current folder by checking Always open in icon view at the top, or you can make Finder use the current view for all folders by clicking the Use as Defaults button.
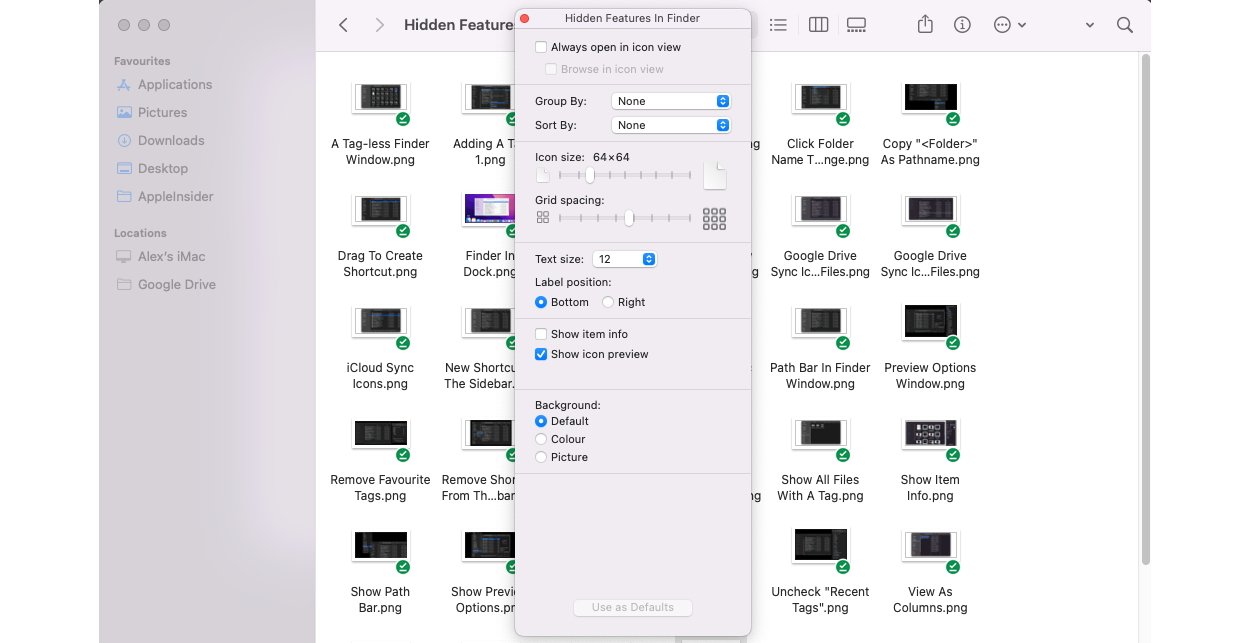
When in Icon view, you have the option of checking Show item info, which can display extra information in blue below the file or folder's name, such as image resolution or the number of items contained in a folder. However, this feature only works in Icon view. You can also adjust icon size and spacing.
Shortcuts to success
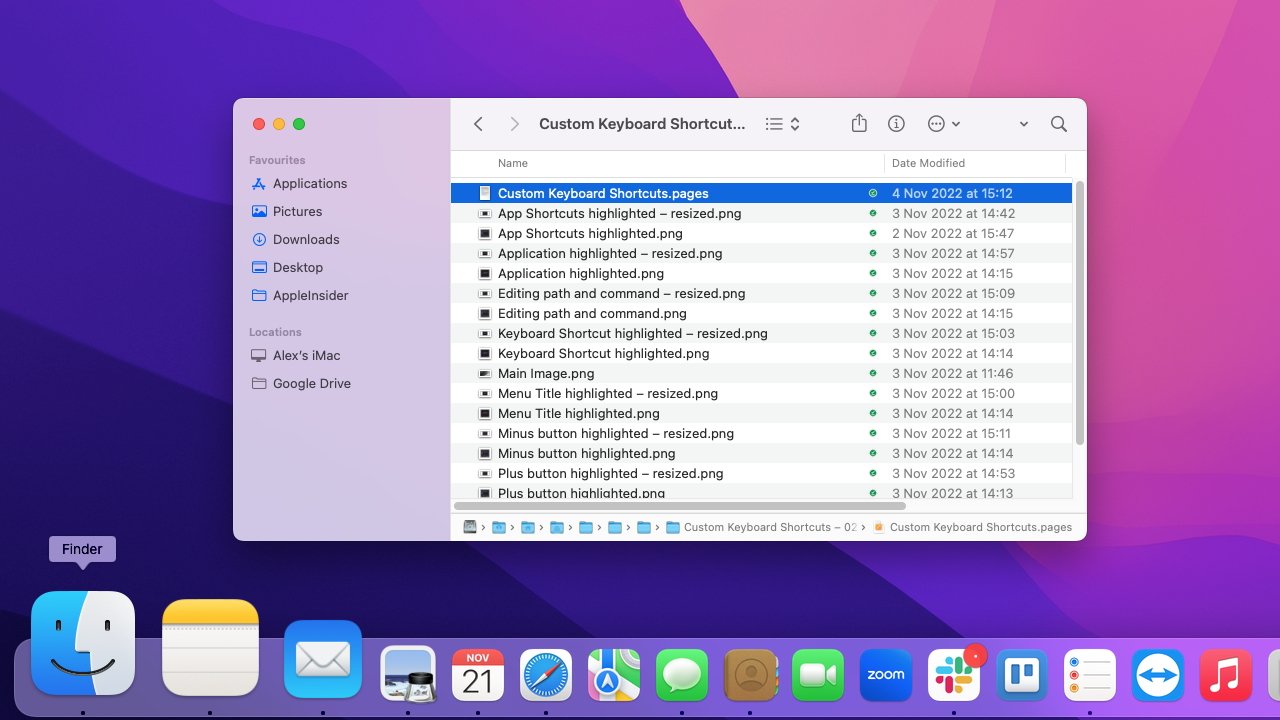
You can create a shortcut to any folder by dragging it to the Favorites section in the Sidebar on the left. You can also rearrange your Favorites by dragging them around.
If you want to remove one, just right-click it and choose Remove from Sidebar.

Pathfinding
To quickly see where your file is stored, select it and hold the Option key to show the folder path to that file at the bottom of the Finder window.
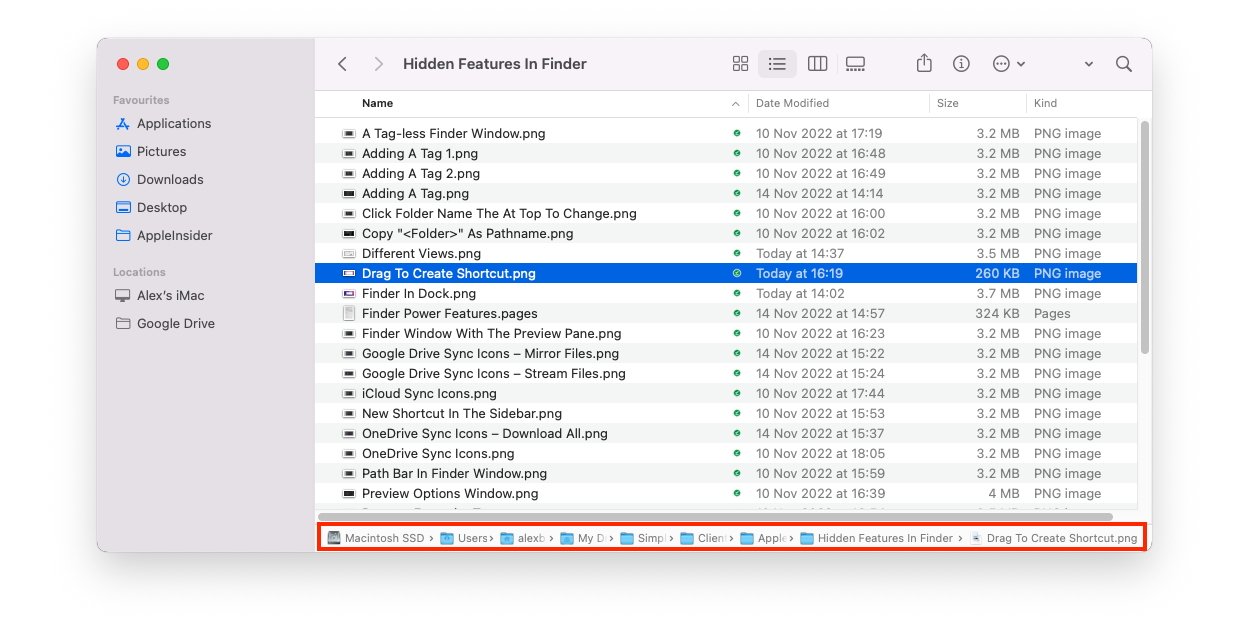
When you let go, the path will disappear. If you want the path to remain permanently, go to the menu bar and click View -> Show Path Bar.
You can also click any folder in the path to go to it, or right-click the folder name in the title bar to change level.

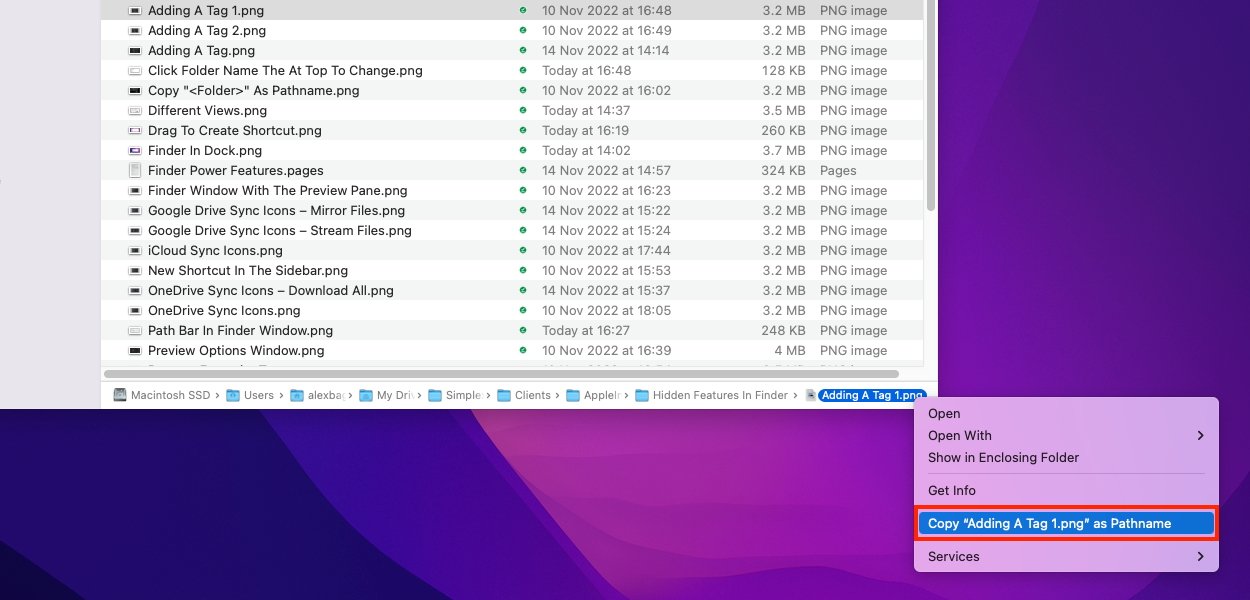
If you need to copy a folder's path, such as for pasting into a Save Dialog window, right-click the file or folder in the path bar, then choose Copy "[Name]" as Pathname.
Don't hide the pane
One major time-saving feature of the Finder is the Preview pane. Here, you can see a small snapshot of the file's contents, plus information such as size, date created, and any tags associated with it.
To show the Preview pane, go to the menu bar and click View -> Show Preview.
You can also customize the information displayed in the Preview pane. Go to View -> Show Preview Options to show the checklist of available data.
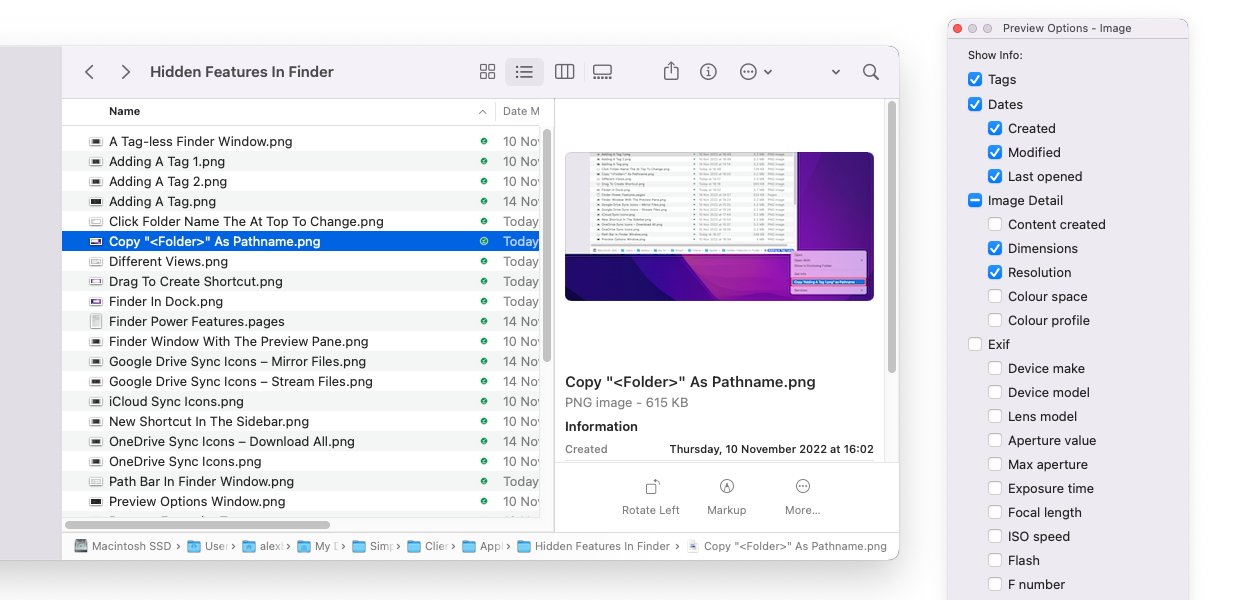
There's a section at the bottom of the Preview pane for Quick Actions, which let you manipulate a file without opening it. For example, when an image file is selected, it will show options for Rotate left and Markup.
The Finder also lets you customize or add your own. Take a look at our main article on Quick Actions to learn more.
Don't cut off the tags. . . or do
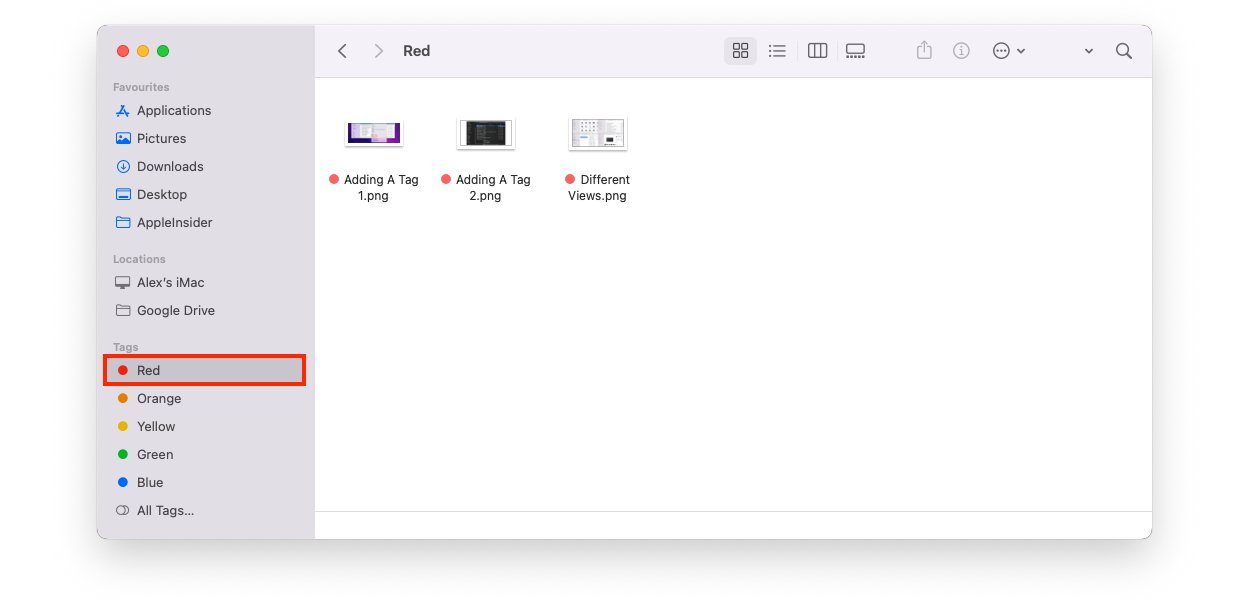
The Sidebar shows a list of tags on the bottom. Tags are a way of categorizing your files and folders without keeping track of their locations.
In List view and Columns view, tags will be shown to the right of the filename. In Icons view, they'll be shown the left of the filename, and in Gallery view, they'll be shown in the pane to the right of the file preview.
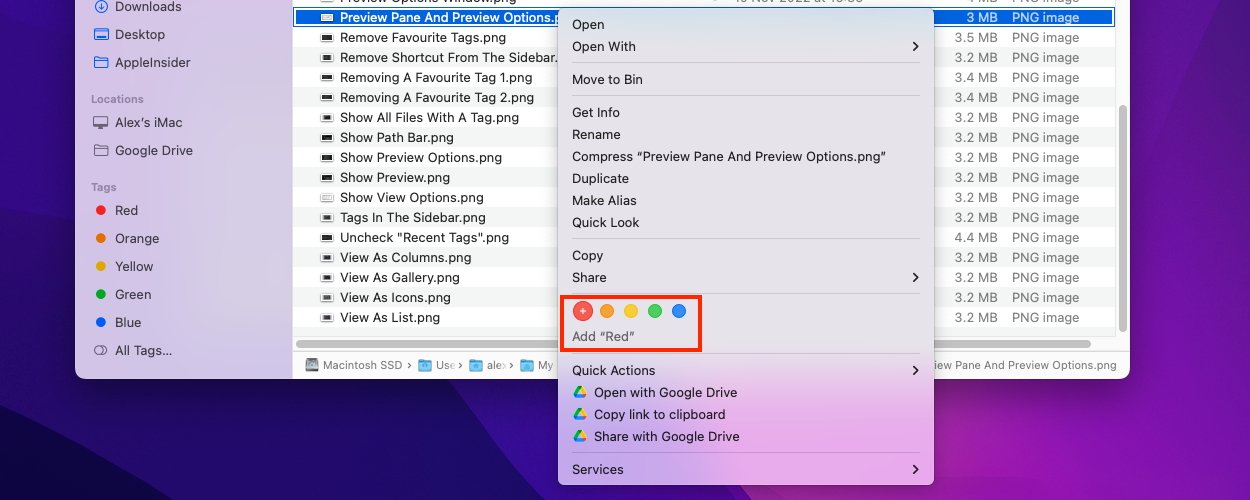
To add a tag, right-click the file in question and then select one or more tags. To remove a tag, simply right-click the file and click the tag again.
You can change the name of a tag by right-clicking it in the Sidebar and choosing Rename "[Name of tag]>". You can click a tag in the Sidebar to show all the files and folders on your Mac that you've given that tag.
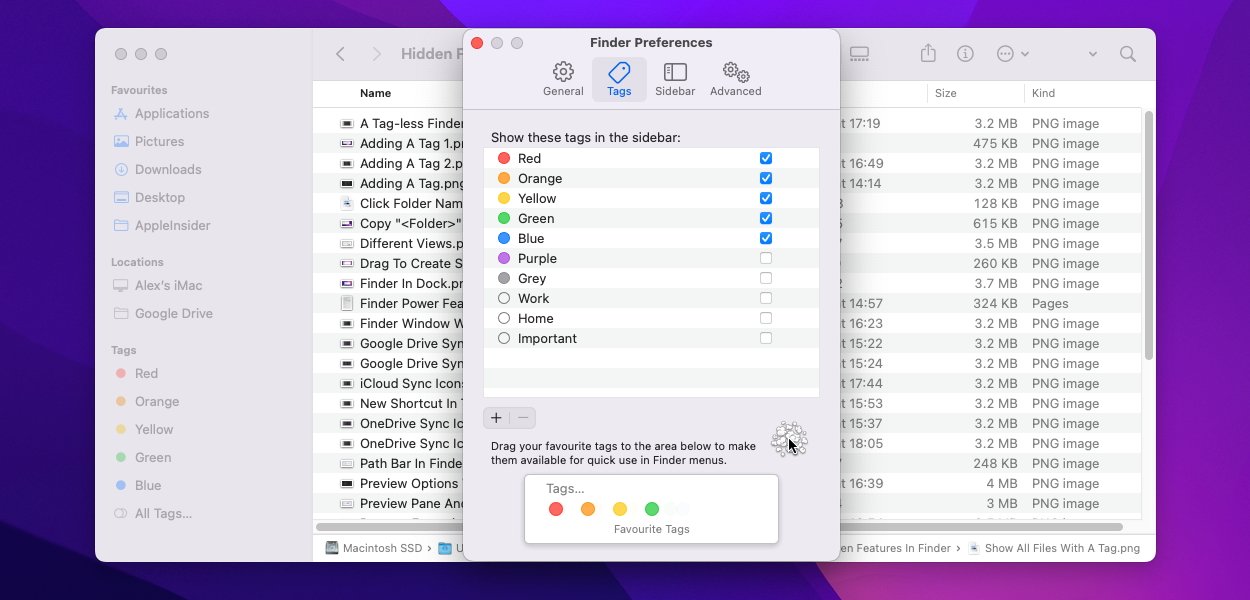
If you want to customize tags - or if tags aren't your thing and you want to hide them entirely - just head to Finder -> Preferences -> the Tags tab. Here, you can check or uncheck which tags are shown in the Sidebar, as well as select favorite tags, i.e., those which show up in the shortcut menu when you right-click a file.
To remove a favorite tag, click and drag it from the Tags... section at the bottom out to some empty space, and you'll be treated to a little puff of smoke animation. To remove tags from the Sidebar entirely, go to the Sidebar tab and uncheck Recent Tags.
The humble Finder app provides many more features than you might appreciate, so why not try out some of these tips? We hope you'll give the Finder another look, and find some extra features you can use to speed up working on your Mac. After all, nobody wants a frustrating workflow.


 Chip Loder
 Wesley Hilliard
 Malcolm Owen

 William Gallagher

 Christine McKee