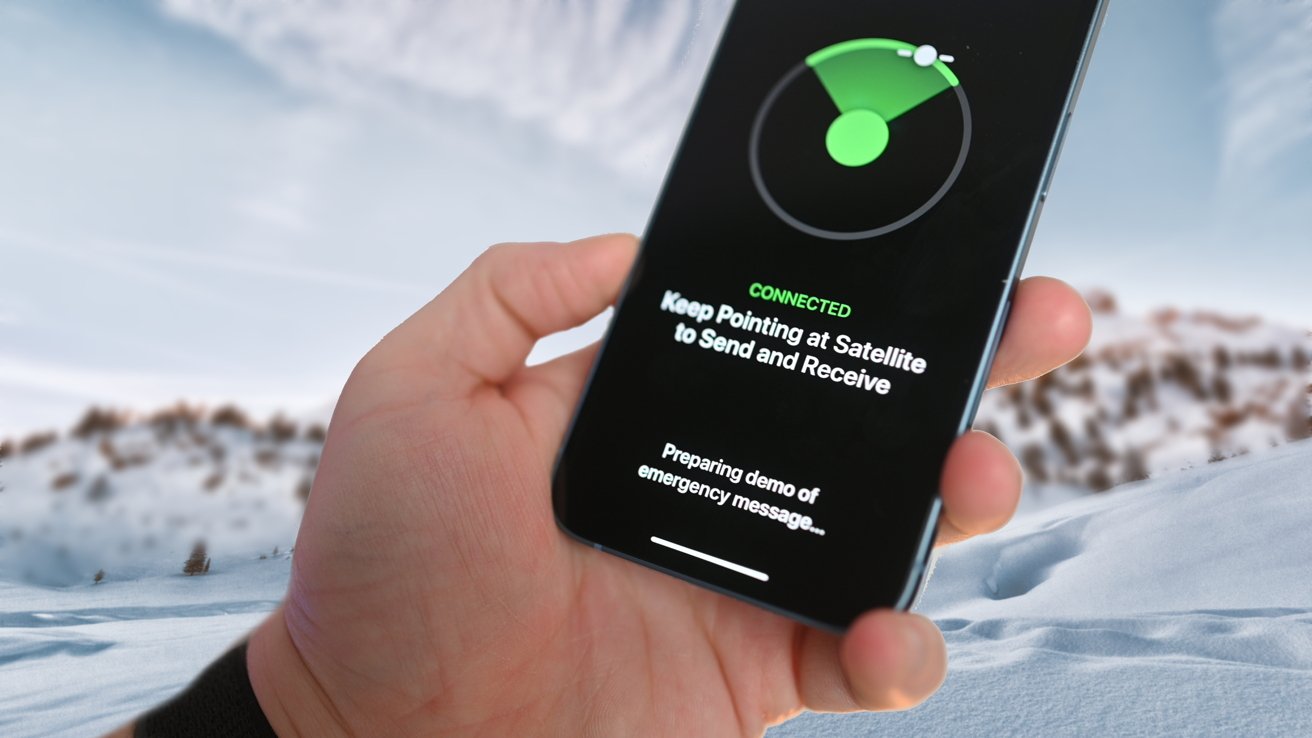
If you're off the grid, can't see wireless, and need help, and have an iPhone 14, you can use Emergency SOS via Satellite. Here's how to use it.

Emergency SOS via Satellite
The iPhone has been a fantastic tool for people in trouble in a variety of ways, including its most basic of allowing users to call 911 for emergency services. However, while the United States has a lot of its land covered by some form of cellular signal, sometimes it's just not available.
A feature launched following the release of the iPhone 14 range, Emergency SOS via Satellite goes one stage further than providing a phone call to a dispatcher. As the name suggests, if you don't have phone signal, your iPhone will establish a connection to a satellite and transmit messages that will get through to emergency services in as data-efficient manner as possible.
This means you won't be able to make a voice call and actually speak to dispatchers directly. Instead, the iPhone will ask a series of questions to classify the kind of emergency, along with other important details that are combined into a compact message, similar to a text.
This information will also include your location and, if you have it already set up, your Medical ID.
You're then guided on how to hold the iPhone to establish a connection with a visible overhead satellite, and for the message to be sent to emergency responders.
The message will be passed directly to some emergency response centers that support the message. For areas where such centers don't support the message directly, the message will instead be routed to an Apple-operated center, before being passed on to the right location.
What do I need to use Emergency SOS via Satellite?
You will need an iPhone 14-generation model for the service to work. Emergency SOS via Satellite won't work for older models of iPhone.
The iPhone also needs to be running iOS 16 that was updated in November to add the functionality.
Naturally, you have to be in an area without any cellular or Wi-Fi coverage, but there are other restrictions. For example, you need to be in the United States, including Puerto Rico and the U.S. Virgin Islands, or Canada.
Apple says the feature will be made available in the UK, France, Germany, and Ireland in December.
The different stages of using Emergency SOS via Satellite.
The iPhone also ideally needs a clear view of the sky in order to have the best chance of seeing satellites. Tree cover could impact the signal and make it take longer to transmit the message.
Apple notes that Emergency SOS via Satellite may not work properly in locations above 62 degrees in latitude, impacting northern regions of Canada and Alaska.
How to use Emergency SOS via Satellite on the iPhone 14
- Attempt to make a 911 call.
- If the call fails, tap Emergency Text via Satellite SOS in the bottom right corner.
- Follow the prompts to Report Emergency. This includes selecting the kind of emergency you're in, and other general details.
- If you wish to notify emergency contacts of the situation, you can tell the iPhone to do so.
- After completing the questionnaire, follow the instructions to point your iPhone into the sky. Arrows will show which direction you should turn or move the iPhone for the best reception with a visible satellite.
Satellite connected
- Once the screen turns green, stop moving the iPhone.
- The message will take between 15 and 30 seconds to transmit under ideal conditions. Foliage, hills, or other visible impediments can cause the message to take a minute or so to pass through.
- If emergency services respond with more questions, enter the required information and send it.
Sending a message
Follow-up messages should be kept short, since it takes so long for each message to be sent and received. Use brief identifying information rather than long or full sentences to cut the transmission time.
Sending locations to contacts
While the key feature involves contacting emergency services, you can also use it for non-emergency situations too. By using the Find My app and the My Location via Satellite feature, you can send where you are to contacts.
This sounds similar to the typical Find My feature for keeping track of contacts, except it's performed via satellite. The location is forwarded to your selected contacts, who will be able to see it in their own Find My app.
Unlike the regular version, My Location via Satellite does limit transmitting where you are to a few times per hour. Therefore, use the feature sparingly.
How to use Find My's My Location via Satellite on the iPhone 14
- Open Find My on the iPhone.
- Select the Me tab.
- Swipe up to access the My Location via Satellite section.
- Select Send My Location.
Anyone you have shared your location with will then be updated with your current location.
