The volume and overall sound settings in macOS are straightforward and easy to use, but some users may want more control over their Mac's audio. AppleInsider reveals a few tips and tricks that give Mac users more ways to improve their audio experience.
Turn off the volume pops
Many Mac users will be familiar with the popping sound that is played each time the volume control keys on the keyboard are pressed. This is supposed to give an indicator of how loud or quiet the system audio will be if kept at the just-selected setting, but not everyone wants to hear it.
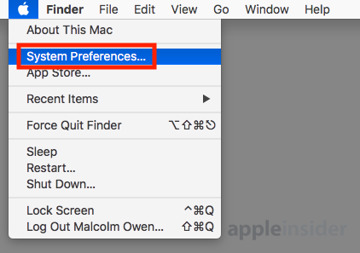
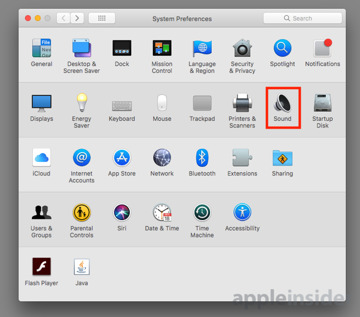
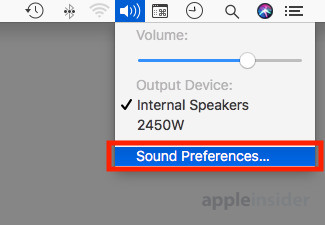
If you want to turn off the pops permanently, this can be done within the macOS settings menus, by selecting the volume control in the menu bar then the Sound Preferences... option. Alternately, select the Apple logo in the menu bar followed by System Preferences, then Sound.
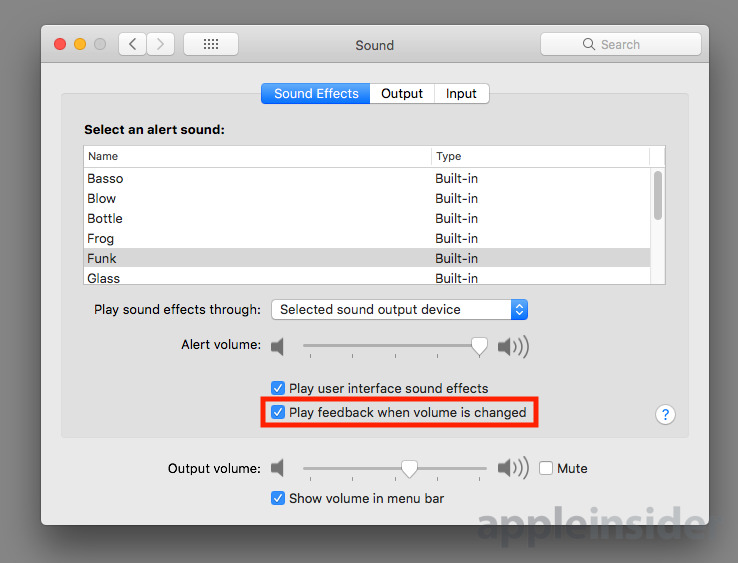
Under the Sound Effects tab, untick the box next to the setting titled Play feedback when volume is changed.
There is also a temporary way to silence the pop sound effect, if it is preferred for the audio confirmation to be kept active. Holding down the Shift key while pressing the volume adjustment keys on the keyboard will mute the popping while pressed, with the sounds returning once the key is released.
Finer volume adjustments
When the sound level needs to be adjusted, the volume keys on the keyboard are probably the most-used way to change it. However, this method limits sound output to only 16 different settings (17 if you include silence), and sometimes you want to get to a volume that's somewhere between the two.
The obvious way to do this is to make adjustments to the volume by using the icon in the menu bar, if enabled in the Sound preferences. If it isn't present in the menu, a quick way for granular volume control is to continue using the keyboard volume control keys, but while also holding down Option-Shift.
Using this key combination makes the volume control keys perform quarter-step adjustments to the volume level, bringing the total count of volume settings to 64, as well as mute. Note that if the volume is set to a quarter-step or half-step, pressing the volume keys without the extra modifier keys will snap the volume to the next available full step.
As a bonus, the same trick can also be used for the brightness controls on the keyboard, with the Option-Shift modifier again cutting down the adjustment into quarter steps.
Audio input selection
If you have the volume icon visible in the menu bar, clicking it may also bring up a selection of audio outputs, if you have multiple sound-producing peripherals and accessories connected to the Mac. While this does allow for users to quickly set a different audio output, such as using a connected monitor's speakers instead of the Mac or MacBook's own, it doesn't do the same for audio inputs.
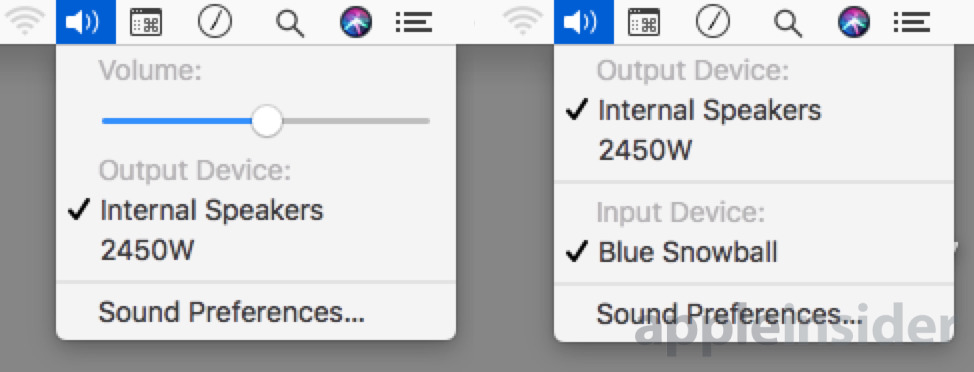
Holding down Option while clicking the volume icon will remove the volume control slider, and shift the audio output selection to the top. Below the outputs, the menu will instead display all of the active audio inputs for the Mac, as well as highlighting the currently enabled input.
Just as for changing the outputs, clicking a different input in this menu will switch over to that specific device.
 Malcolm Owen




-m.jpg)




 Marko Zivkovic
 Wesley Hilliard
 Amber Neely

 William Gallagher

 Christine McKee


-m.jpg)


21 Comments
Pressing Shift will also temporarily enable the sounds pops if they are silenced.
Still wishing I could use iSub with late-2006 iMac. I've mused on retrying it with graphite iMac DV, but I seem to recall OSX breaking functionality, leading to my initial gnashing of teeth. Plus the hard drive is so loud it would overpower most music. (It's always been factory-level loud. A fan isn't the only noise-maker, Apple.)
Here is another handy tip, if you press the option key and hit the sound, keyboard brightness, mission control or screen brightness, etc. on the keyboard, system preferences will automatically open up to the corresponding keypress.