Whether you're working on a personal project, trying to open a document from a coworker, or creating marketing materials for your business, you may find yourself in need of installing a new font on your Mac. How to do so may not be clear, so AppleInsider is here to walk you through the process.
If you're looking for free fonts, we recommend checking out DaFont and 1001 Free Fonts. Find whatever fonts you like and simply click download. Just pay attention to the copyright license above the download button.
If a font says it's "Free for personal use," you can't use it for commercial or business use or you risk getting sued by the copyright owner.
Once you've downloaded all the fonts you want, open the Downloads folder on your Mac, or wherever your browsers default download location is. Your fonts should be in compressed .zip files, just double click on one to uncompress it. Some will just contain a single font file, whereas others will contain a folder with multiple font files, a "read me" and font previews.
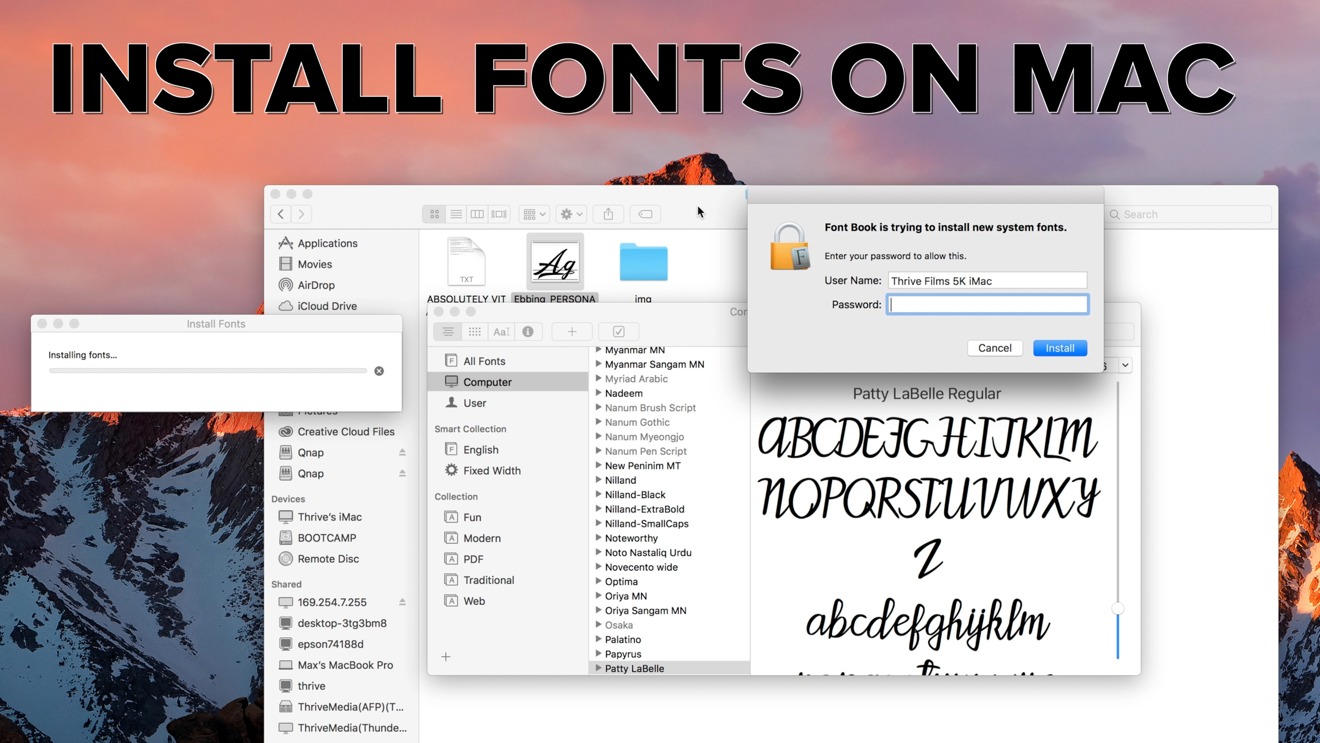
The simplest way to install a font is to open it, and click Install Font. A faster method is to click "Go" in the menu bar, hold the option key, and click Library. Now find and open the Fonts folder. Right click on your Downloads folder in the side bar, and click "open in new window."
Switch your Finder to Action view, which allows you to have access to everything contained in a folder without having to open it. Now simply double click all the zip files to unzip them, and drag all the files that end with .tff or .otf into the Fonts folder. This will instantly install the fonts, but there's just one issue: installing the fonts with these two methods only installs the fonts for the Mac user account you are currently logged into.
There's a couple of ways to install fonts system-wide on your mac. With Finder selected, click "Go" at the top of the page, and click "Go to folder." Type in /Library/Fonts and click Go. This will take you to the systemwide fonts folder instead of the individual user fonts folder. As you can see, it's full of the default fonts that come with your Mac. Perform the same process of dragging and dropping fonts into that folder to install them.
If you prefer to have all your fonts installed systemwide, you can set them to automatically install to the whole computer instead of per each user. Just double click on a font in your Downloads folder, then click Font Book in the menu bar, and click Preferences. Now simply switch the default install location to "Computer" instead of "User." You can also check the box to automatically get rid of duplicate fonts. Now, every time you use Apple's default method of installing fonts, they will install systemwide.
The only downside to this method is that you have to constantly enter your passcode, so using the drag-and-drop makes it easiest. If you've just installed some fonts and you can't seem to find them in the application you're using, just restart it, and they should show up.