A user's music and video collection can be one of the largest consumers of hard drive space on a Mac, and is typically overlooked in favor of other items when it comes time to free up drive space. This guide explains how to shift where iTunes stores all of the content to an external drive.
Users looking for ways to reduce the amount of things they store on their Mac usually steer clear of doing anything to iTunes and their precious music collection. Even at a time when there are many popular streaming services available to use, deleting these files is not viewed as an option, making iTunes itself an obstacle for salvaging a Mac's drive.
Moving iTunes to an external drive is one compromise, one which still keeps the music available, but off the primary storage drive completely. Though daunting to users, possibly due to the sentimentality associated with music collection, moving an iTunes Library is a relatively simple procedure that is also quite safe to perform.
Before the move
Transferring gigabytes of files between drives can take a considerable amount of time, with that length depending on a number of different variables.
First, make sure to select an external drive with a fast transfer speed, typically one that connects over USB 3.0, USB-C, or Thunderbolt. Using an older technology, such as USB 2.0, can severely prolong the amount of time it takes, purely from its slower transfer rates.
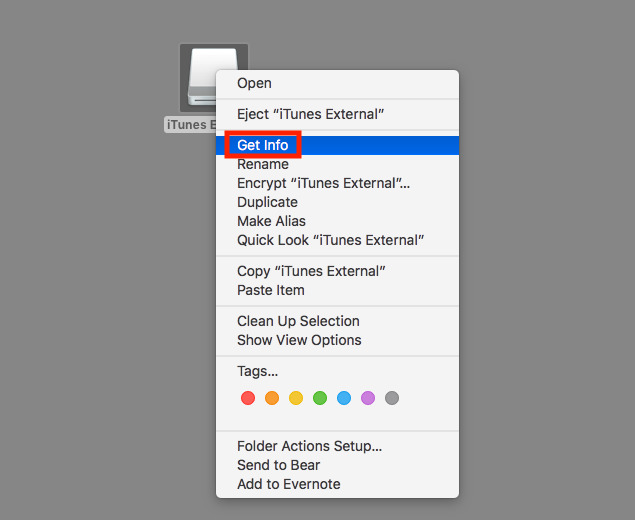
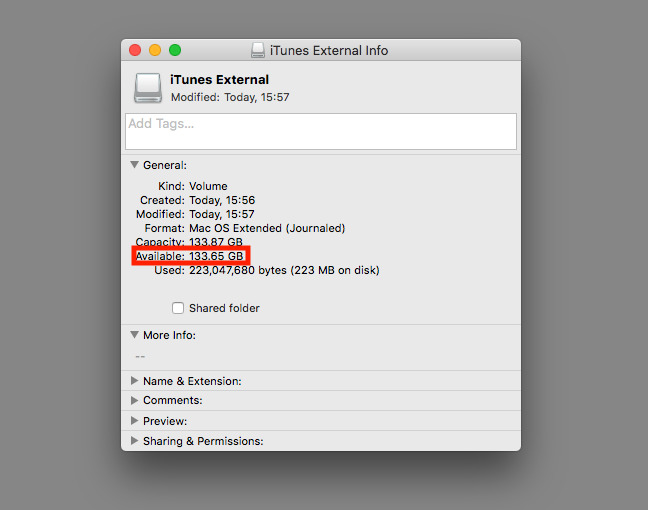
Once you have your selected drive installed, make sure it has enough storage capacity to hold your library, and for future expansion. Right click the desktop icon for the external drive and select Get Info, and make sure the Available listing has enough to cover the library's size.
The size of the iTunes library also dictates the length of the transfer, so it may be worth doing a little pruning beforehand. For example, check your podcasts to see if there are old and listened-to episodes that can be safely deleted.
If you are running iTunes 12.7 or later, there may be an archive of apps that are no longer usable within iTunes, that you may wish to remove. If you do, this AppleInsider guide will tell you how.
While it may be tempting to reuse an external drive already used for Time Machine backups, it is recommended to use a different drive completely. Backups are meant to be separately stored from the data it is duplicating, and keeping some of that data on the same drive as a backup effectively defeats the object of the exercise.
Now would also be a good time to make an up-to-date backup of your Mac before transferring any files.
Moving the library
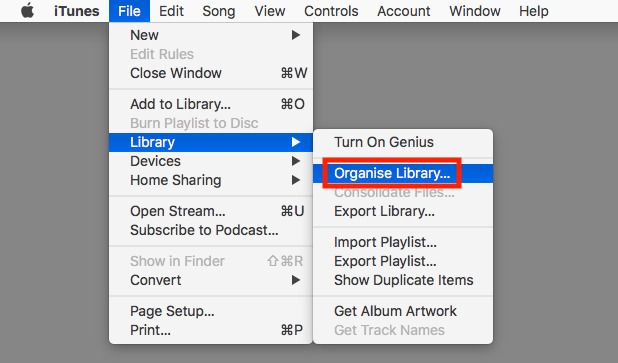
We first need to collect together all of the content iTunes manages into one folder before making the move. Open iTunes, click File in the Menu Bar, then Library, then Organize Library.
Make sure the Consolidate Files checkbox is ticked, then select OK. Wait for iTunes to complete its consolidation before continuing.

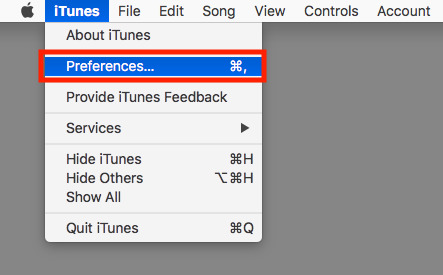
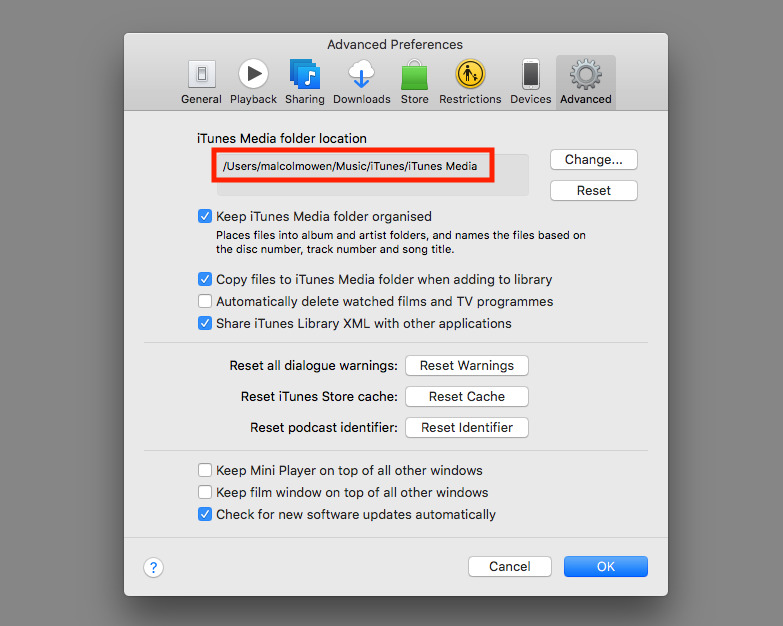
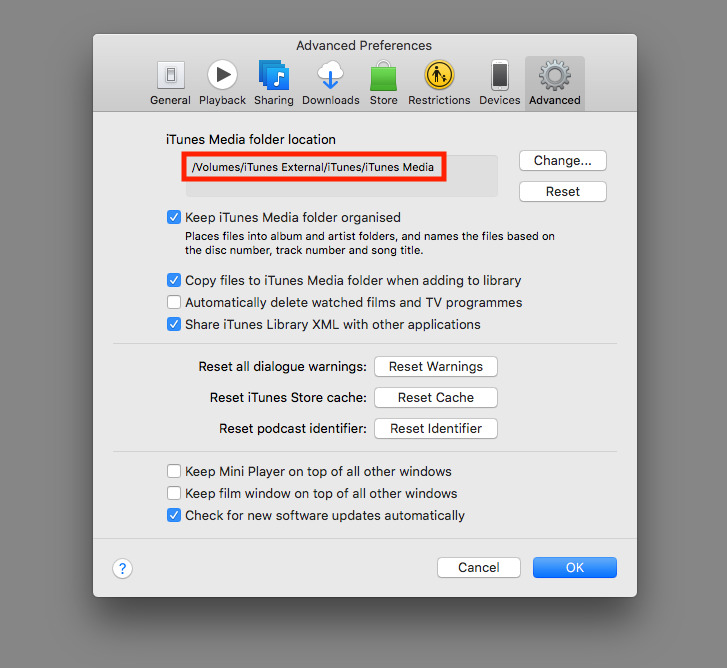
Check the path for the folder within iTunes by going to Preferences within the iTunes Menu bar and selecting Advanced in the new window. The iTunes Media folder location section at the top details where the file collection is located.
Close iTunes, then bring up a Finder window and navigate to the iTunes folder.
If the external drive you wish to move it to is already empty, click and drag the iTunes folder from the Finder window directly onto the icon for the external drive. Alternatively, copy the iTunes folder, navigate to the place in the external drive you want to use to store iTunes in a separate Finder window, then paste.
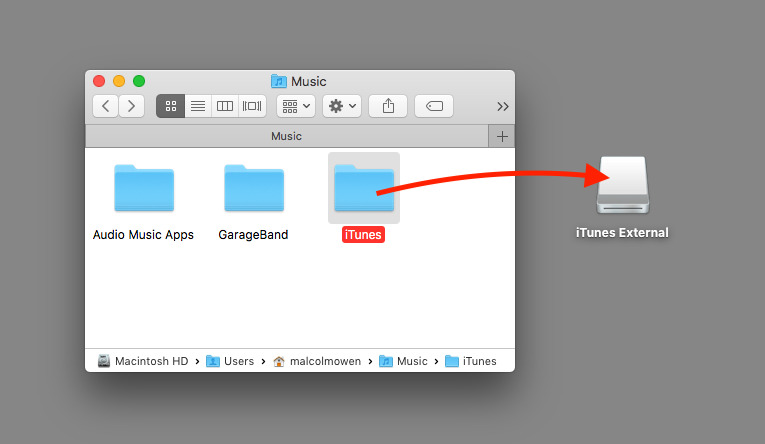
At this point, the iTunes folder will be copied over to the external storage.
Depending on the bandwidth of the connection, the size of the iTunes folder, and if the Mac or the drive are being accessed by other tasks, this could take a long time to complete. For extremely large collections, or if the Mac needs to be used during the day, it is recommended to wait for a period of time when the Mac is left alone, as it can take multiple hours to move to its new home.

Once the transfer has completed, iTunes needs to be told where to find the files.
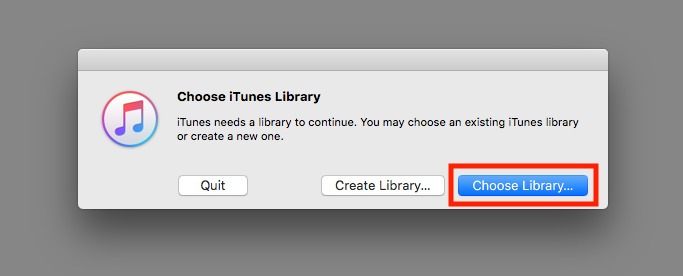
Hold the Option key and open iTunes. This will bring up a Choose iTunes Library window with three options. Select Choose Library on the far right.
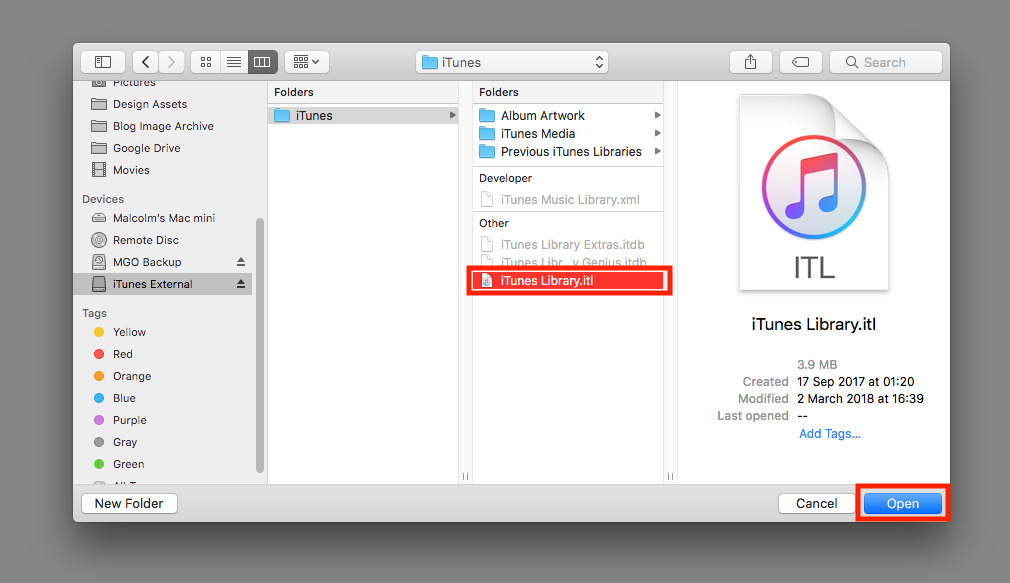
In the next window, navigate to the external drive and enter the iTunes folder. Find and select the iTunes Library file, and click Open.
At this point, iTunes will open up from the new location, and will be accessing files from the external storage instead of the Mac's storage. If you are unsure, you can check the path again by going to Preferences in the iTunes Menu Bar, selecting Advanced, and reading the iTunes Media folder location.
If you wish, you can close iTunes and disconnect the external drive. To reuse that iTunes library, you will need to reconnect the drive to the Mac before opening iTunes again, else it will offer a "Library cannot be found" error.
Saving space
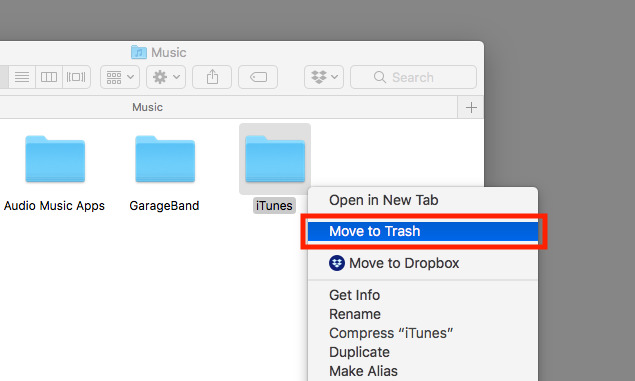
Once the iTunes library is confirmed to be working on the external drive, and possibly backed up too, you now have the option of deleting the initial iTunes library from the Mac to save space. Navigate to the original iTunes folder, and either drag it to the Trash or right-click the folder and select Move to Trash.
To fully reclaim the storage after this, either enter the Trash and select Empty, or right-click the Trash and select Empty Trash. If you have the Trash to automatically delete files after 30 days, doing this will free up the storage occupied by the iTunes folder in the Trash far earlier.