There is no strict Do Not Disturb on HomePod or HomePod mini, and as great as it is, sometimes the Intercom feature makes you wish there were. Here's how to temporarily stop those messages coming through when you don't want them.
The HomePod mini (left) and the HomePod
Intercom is an excellent feature, and if it isn't enough to make you buy a HomePod mini, it's at least great enough that it gives you another reason to justify the purchase. Except when you're on a business Zoom call and your partner's voice announces that they've found your rubber duckie.
The problem is that if a HomePod is set up to play Intercom messages, that's exactly what it's going to do -- and do the moment it receives one.
Compare that to how Intercom works on the iPhone. There you do have the option for Do Not Disturb, but you don't even need it.
By default, an Intercom message appears on an iPhone as a regular notification with a play button. You can choose to listen now or later, it's up to you.
Read More from AppleInsider

It's the same on an iPad, or an iPod touch, and Apple Watch, too. True, if you're wearing AirPods, AirPods Pro, AirPods Max, or certain Powerbeats wireless headphones that are connected to your iPhone, then the audio plays automatically.
However, the worst that can happen then is that Intercom interrupts you just as you've got to a good bit in an audiobook. If you're having a meeting with someone, they won't hear the message, they just at most will see you roll your eyes.
When the Intercom message comes over your HomePod, though, they hear it and there's nothing you can do. Not in that moment.
There are, though, two things you can set up in advance to prevent Intercom interruptions coming at inopportune moments. One is the nuclear option of turning off Intercom on one, some, or all of your HomePods and HomePod minis.
How to permanently turn off Intercom on HomePod and HomePod mini
- Open the Home app on iPhone or iPad
- Tap the Home icon at top left, or the Rooms tab at the bottom
- Choose the room where the HomePod or HomePod mini is
- Press and hold on the icon for the HomePod
- Scroll down past the Currently Playing track, and all your alarms
- Tap the Settings gear icon at the very bottom of the screen
- Scroll down and tap on Intercom
- Tap to select Never under the Receive Notifications When heading
You could permanently switch off Intercom, but you'd be missing out
It's not quick. It's not exactly hard, but it is enough of a chore that you're not going to do it every time you start an important Zoom meeting. And you're surely not going to reverse the steps to bring back Intercom after each of those meetings.
In the absence of a faster permanent route, or a real Do Not Disturb option, though, there is a way to temporarily pause the interruptions. You can set a Shortcut to reduce the volume to zero.
How to fake Do Not Disturb on HomePod or HomePod mini
- Open Shortcuts on iPhone or iPad
- Tap the + sign to create a new Shortcut
- Tap Add Action
- In the search box that appears, type Home
- Choose Control {your home name}
- In the action that appears, tap on Scenes and Accessories
- From the list of scenes and accessories, scroll down to the room your HomePod is in
- Tap on the icon for your HomePod and then tap Next at top left
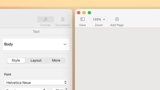
- Under the Media heading, tap on Audio
- Tap Play Audio at the top of the list that appears
- With that ticked, now tap Adjust Volume Only
- Tap Set Custom Volume
- When a slider appears, swipe it all the way to the left and zero volume
- Tap Back
- Tap Done
- Give the Shortcut a name by tapping the ellipses icon at top right
- Tap Done
Alternatively, you can create a Shortcut to turn the volume to zero
True, that's not exactly the speed of light either. And it works out to more than twice the number of steps it took to permanently turn off Intercom.
Do it anyway -- and then do it again anyway. The second time you do it, the second time you set up a Shortcut this way, change the last steps so that you change the volume from zero to something audible.
Now you've got a Shortcut that effectively turns off Intercom interruptions, and you've got another that turns them back on again.
When you've schlepped through making these two Shortcuts, you will never again have to think about it. And you will be able to think about many different ways to run those Shortcuts.
How to use your new HomePod Do Not Disturb Shortcuts
Now that you've made them, you can always go back into the Shortcuts app and tap on their button. Turn on this faux Do Not Disturb just before you place a Zoom call, then tap the other Shortcut to turn it off afterwards.
Only, now you've gone to this trouble, there are so many other ways to leverage your effort. With iOS 14, you could set your iPhone up so that tapping twice on the back turns runs the first Shortcut. And tapping three times runs the second.
If you're working your Zoom meetings on your iOS device, you could even set it up so that the first Shortcut runs automatically when you open Zoom. And the second Shortcut runs the moment you close the Zoom app.
Then just as with any Shortcut, you can ask Siri to run the Shortcuts for you. Or you can have them automatically run at certain times of day.
Why it's a fake Do Not Disturb
Doing this means you can choose to not be interrupted by your kids messing around with Intercom during your promotion interview. But unlike Apple's real Do Not Disturb, if your kids call you over Intercom a second time, they still don't get through.
There's no filter on this Shortcut, no way to have it allow certain messages through. Plus the HomePod will not save the Intercom messages for when you can listen later.
If you have your iPhone or iPad set to receive Intercom, then that's not so much of an issue. The real Do Not Disturb on iOS will prevent the notification popping up, but it will still be there for you when you're able to look.
Whereas as far as the HomePod is concerned, it has played the message when it arrived and that's that.
But until Apple offers a genuine Do Not Disturb on HomePod and HomePod mini, this temporary Shortcut solution will help. It means you can use the superb Intercom feature, you don't have to lose the entire feature just because you can't risk inopportune interruptions.
Keep up with AppleInsider by downloading the AppleInsider app for iOS, and follow us on YouTube, Twitter @appleinsider and Facebook for live, late-breaking coverage. You can also check out our official Instagram account for exclusive photos.