The Creality Ender-3 Max Neo is a great starter 3D printer for those who want to produce much bigger plastic creations than you'd normally get on an entry-level printer.
After quite a few years and from highly technically-minded origins, 3D printing has become much more mainstream. Sure, it's not quite widespread enough for everyone to have their own miniature Star Trek replicator in their home, but it's certainly more popular.
At least popular enough for there to be hundreds of different 3D printers available to buy. At the value end of the market, at least, it is populated by 3D printers with the same appearance, vaguely similar core specifications, and general pricing.
We have already looked at Creality's Ender 3 V2 Neo 3D printer, and while it is a perfectly good 3D printer for those starting the hobby, it's not necessarily the best choice for your needs.
If you have plans for bigger prints, you have two options. Either you create a model in parts assembled after the fact, or you get a bigger printer.
The Creality Ender-3 Max Neo is for those who want to take this second path.
Ender-3 Max Neo 3D Printer - Important specs
- Printer Type: Fused deposition modeling (filament printer)
- Printer dimensions: 516mm by 582mm by 590mm (20.3 by 22.9 by 23.2 inches)
- Build Volume: 300mm by 300mm by 320mm (11.81 by 11.81 by 12.59 inches)
- Build plate surface: Carborundum Glass
- Heat bed max temperature: 100C
- Number of nozzles: 1
- Printing precision: 0.1mm
- Layer height: 0.05mm to 0.35mm
- Nozzle max temperature: 260C
- Extruder type: Full-metal Bowden extruder
- Rated power: 350W
Ender-3 Max Neo 3D Printer - Initial setup
Compared to a normal printer, a 3D printer can seem quite intimidating to set up. Your standard inkjet or laser printer only needs you to unpack it, insert the ink cartridge or toner, add in the paper, connect it to your Mac in some way, and then you're off to the races.
An FDM 3D printer, on the other hand, has completely different workings to your standard printer. There are many more visual moving parts, melted plastic, and many more elements that have to work correctly.
After opening up the large box, you're greeted with an unexpectedly straightforward assembly process for the Ender-3 Max Neo. For a start, it's in three main sections: the gantry that holds the extruder, the base with the main electronics and the build plate, and a control panel.
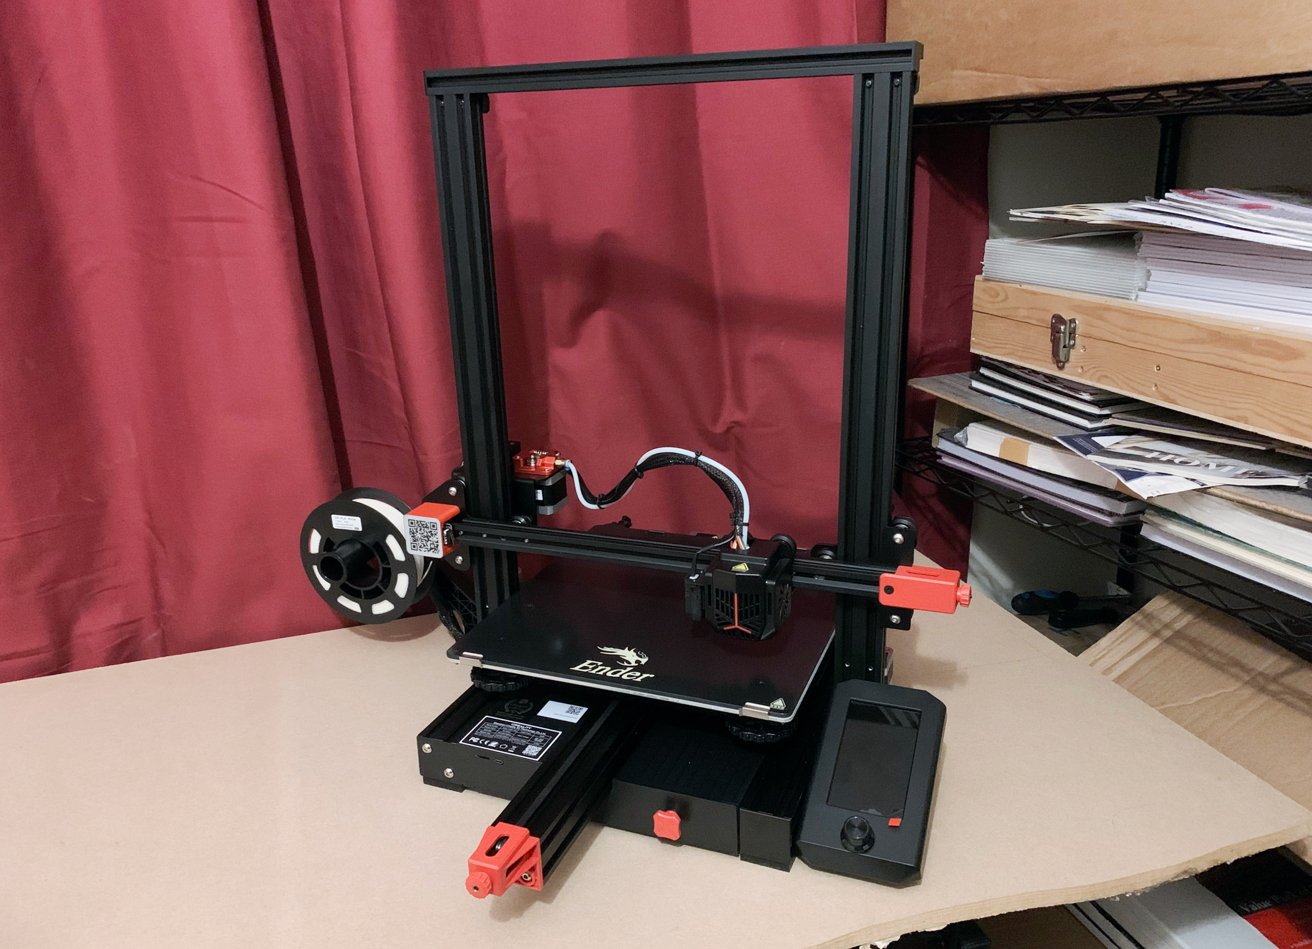
Creality uses the same design in the Ender 3 Max Neo as in the V2 Neo, only in a much bigger form.
It is more involving than a typical printer setup process but far from what it could be. You only need to install a small number of screws to attach the gantry to the base, connect the control panel, plug in some cables, and make sure there's nothing tangled or that will interfere with the printing process.
After that, you've got a plastic holder to attach to the side of the printer, where the spool of filament resides. Then you have to feed the filament through the filament-detecting sensor and a thin tube to the extruder itself.
This includes passing the filament through the full-metal Bowden extruder, which is more durable than Creality's previously used. This consists of a mechanism to continually push the filament through to the extruder head, which it does with a fair amount of force.
Indeed, this is much more to consider than the usual printer, but it's far less work than most will think there is to get started.
Ender-3 Max Neo 3D Printer - Bigger is better
The primary and noticeable difference between the Ender-3 Max Neo and other models, like the Ender-3 V2 Neo, is its size. As the name suggests, this printer can create much larger prints than some other entry-level printers.
For example, its stablemate Ender-3 V2 Neo has a build volume measuring 220mm by 220mm and 250mm in height (8.66 inches by 8.66 inches and 9.84 inches tall). The Ender-3 Max Neo instead works at a maximum scale of 300mm by 300mm and 320mm in height (11.81 inches by 11.81 inches by 12.5 inches).
A 36% increase in length and width, and 28% more height, in simple terms, means you'll be able to print out larger stuff.
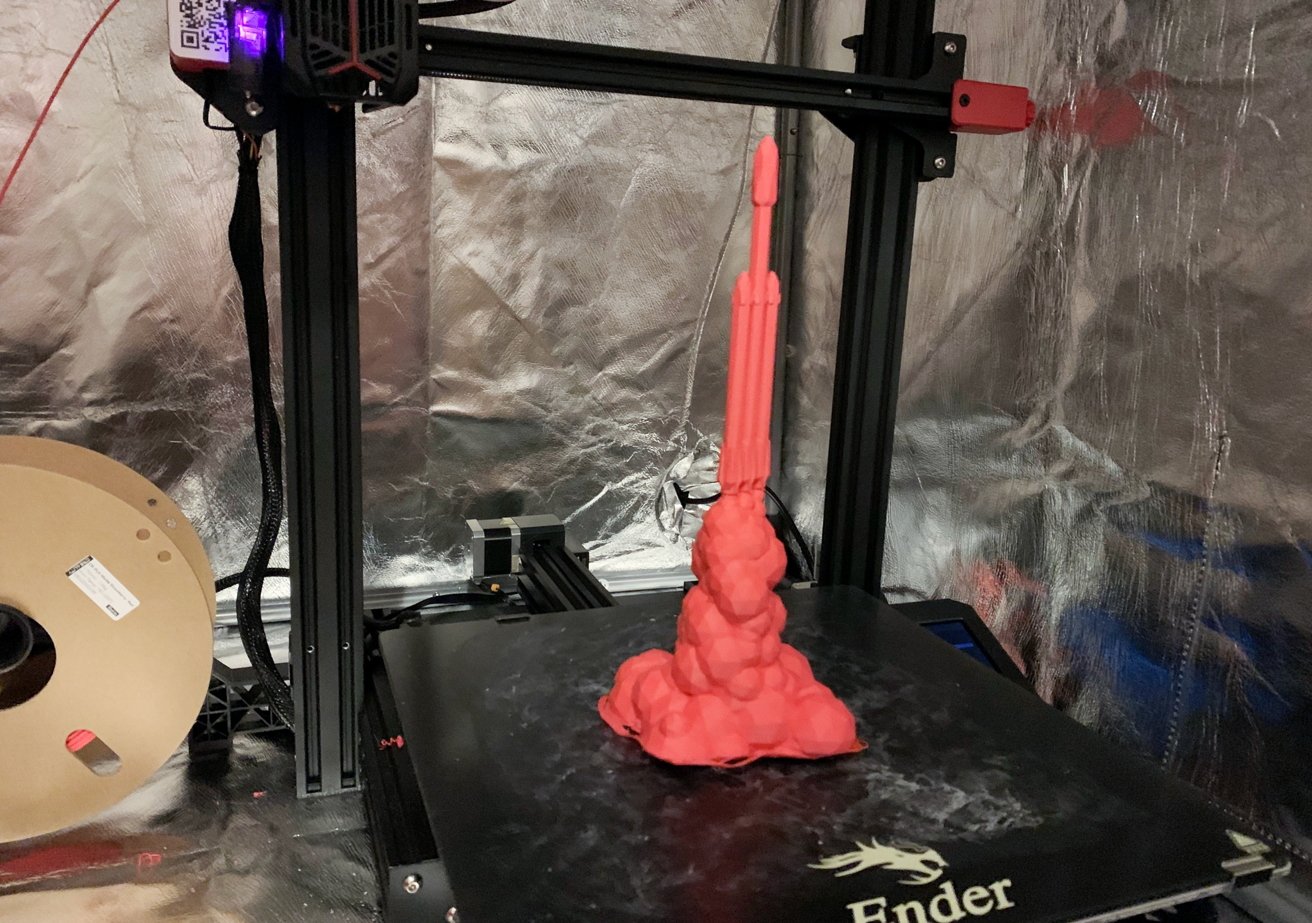
The added height allows you to build much taller prints than usual
It could be argued that you could print a large object in smaller sections on a more normal-sized 3D printer and then assemble them afterward. That's true, but the larger physical capacity means there's more chance of printing out that larger object in one go.
This could save you from having to deal with seams if you're gluing smaller sections together.
Ender-3 Max Neo 3D Printer - Design
The printer's design is simple but also made to be straightforward and robust. Once assembled, the entire unit feels quite solid and not wobbly in the slightest.
The gantry, which raises and lowers the extruder, is very stable and benefits from dual Z-axes, namely synchronized motorized screws on each side for raising and lowering the extruder arm. These screws keep the extruder nice and level, and steady throughout a print.
How the printer works is that the extruder moves left and right on its own horizontal arm between the two vertical sections of the gantry. The arm is raised and lowered by the gantry while the build plate moves back and forth.
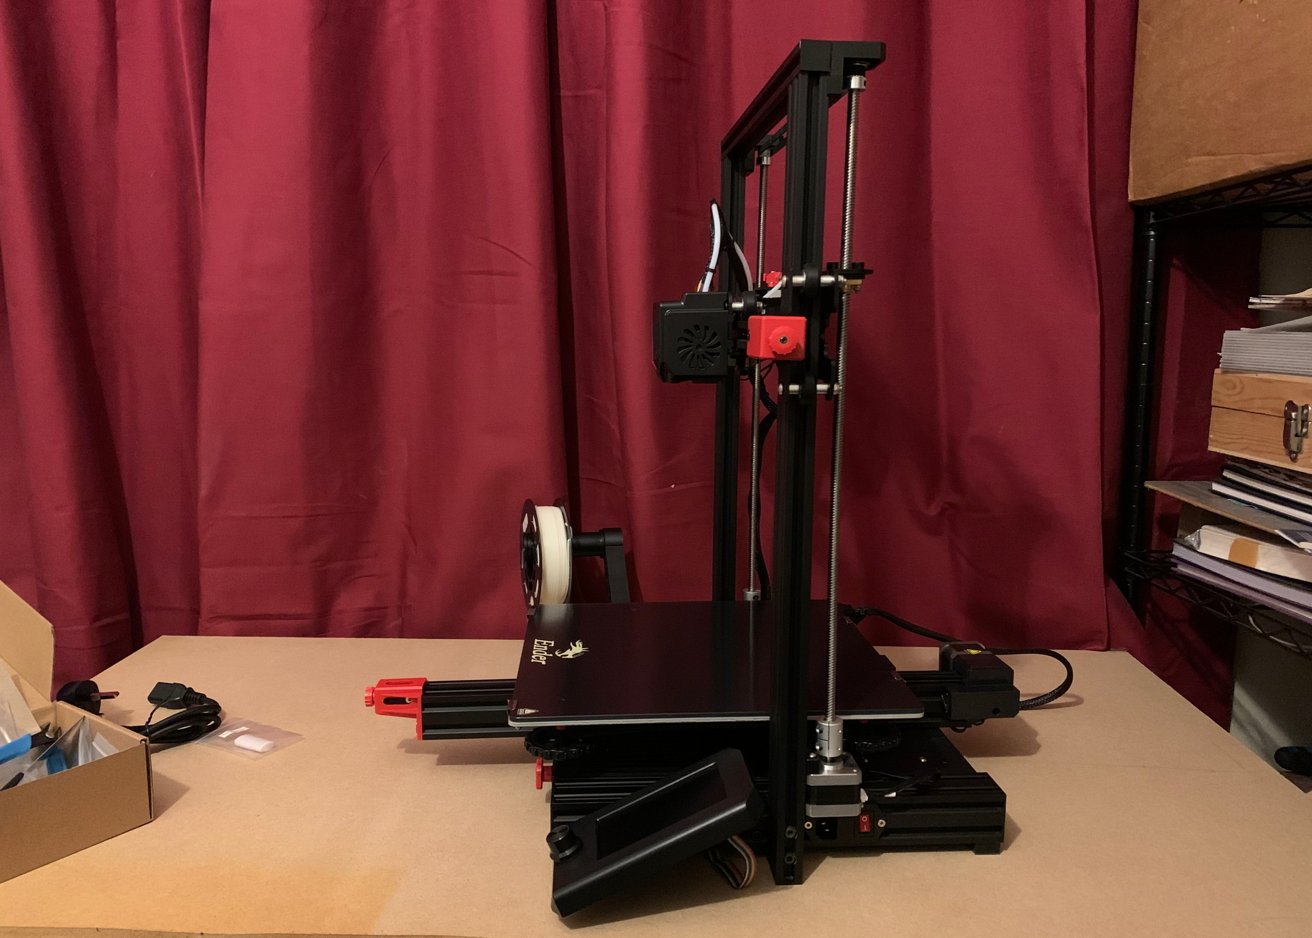
It may have the word 'Max' in the name, but it's not a giant printer...
With the extruder and build plate movements, the extruder can first pump out melted filament onto the build plate. Then, once the layer has finished, the gantry's screws raise the extruder by a small amount, and the process goes again, using the first printed layer as a base for a new layer.
While the V2 Neo we reviewed used a removable magnetic bed that can be bent, the Max Neo used a glass plate instead. While not bendable, it can still be removed by unfastening a pair of clips, making cleaning easier.
You'll find a collection of knobs underneath the build plate for leveling it. Under that, included in the main base section, there's a drawer intended for all the bits and pieces you may accumulate over your printing career.
Ender-3 Max Neo 3D Printer - Interfaces and preparation
As with most other 3D printers, getting ready to print is a bit of a chore the first time you do it, but it is a necessary part of the process.
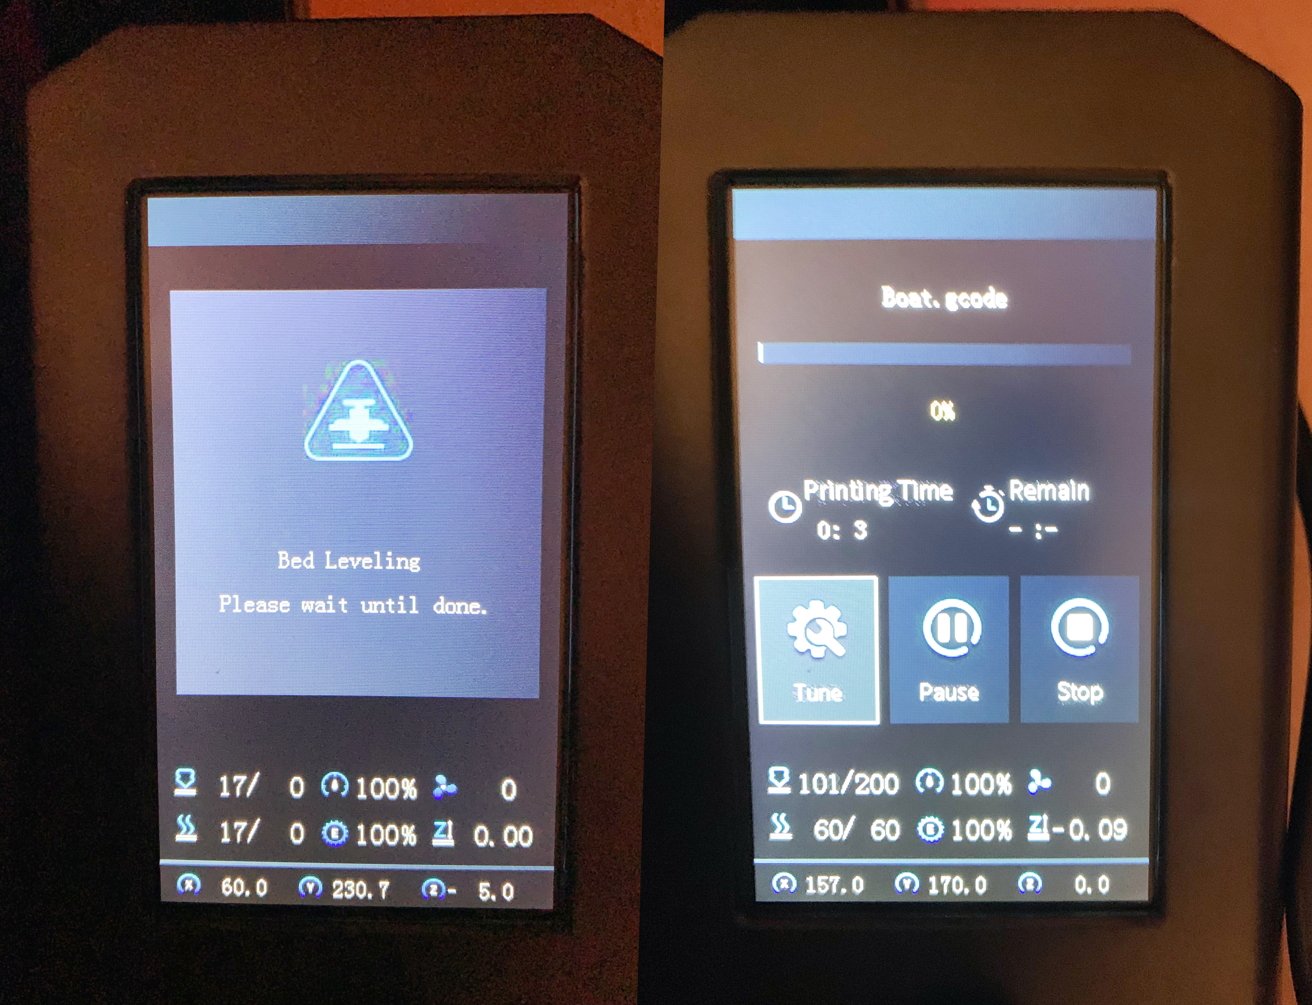
This includes the dreaded leveling of the build platform, which requires you to slide a piece of paper between the extruder head and the platform in all four corners, adjusting using the below-platform knobs a few times until it is as close as you'll get it.
There's also an automated leveling function, which uses a sensor next to the extruder to map out variances in a grid, which it then takes into account for the print itself. Ideally, this should work on its own, but doing it manually gets you most of the way there.
The main interface itself consists of the side control box, which is managed by a single clickable knob. Rotating takes you through the various menus, on the 4.3-inch display, with clicking selecting items or backing you out of menu options.
In a perfect world, this would be a touchscreen, but since it could feasibly be used in a dusty workshop by someone wearing gloves, the knob will do just fine.
The control box doesn't have a touchscreen, but it does have a nice dial interface.
This controller handles all the main elements, including setting the exact positioning of the extruder, offsets, temperatures for the extruder and build platform, build speeds, and other adjustable factors. It's also used to select the print from the microSD card plugged into the front and to start and stop the prints if necessary.
The 3D models, either acquired from sources like Thingiverse or made in tools like Blender, are all prepared via a slicing tool. Of course, you could use Creality's own if you wish, but others, such as Ultimaker Cura, also work just fine.
The sliced print files are then put onto the microSD card, either via Creality's supplied USB adapter or your own alternative, with the card then plugged into the printer itself at the front.
Once the card is in, you can select the print using the control box and set it all going. After reaching temperature, the printer will start depositing hot filament onto the build platform, creating the piece layer by layer.
Though not immediately, you will see a timer appear on the control box's display, showing an estimate of how much longer you have to wait for the print to finish.
Depending on the size of the print itself, as well as how you set the fill and other settings, a print can take a few hours or enough to stretch into a second day. With the extra size of the platform itself and the height of the printer, super-sized prints will easily fall into the latter category.
Ender-3 Max Neo 3D Printer - Printing and Maintenance
While half of the battle is getting to a point where you can print, the other half deals with the print afterward and keeping the printer in top condition, ready for the next.
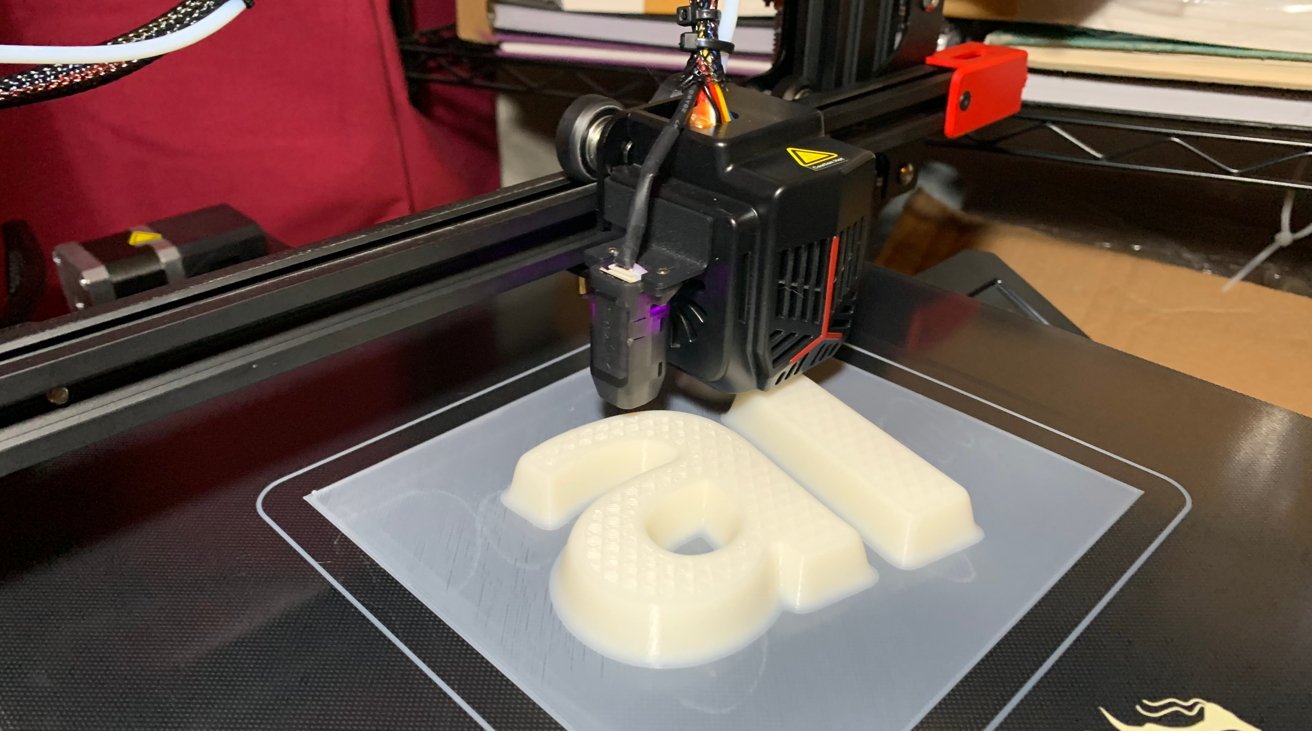
After printing finishes, the model takes a little easing to get it away from the textured glass base using the supplied scraper, but sometimes just a light pressure will do.

Printing 3DBenchie onto the textured glass build platform. Note the sensor used for the auto-level feature.
You'll almost certainly have to clean the glass base each time you print due to some PLA residue, but that can be easily handled with some IPA and a microfiber cloth. Just two clips at the front allow you to pull out the glass sheet itself, making cleaning much easier to handle.
As for the filament, the metal mechanism that forces the material forward is also used to release it, in case you want to change colors, for example. A press forward of a tab removes the tension applied to the filament, allowing you to pull it from the feeding sheathe.
Much like in our Ender-3 V2 Neo review, there is a learning curve when it comes to fine-tuning the printer, determining temperatures for specific filaments, and so on. Unfortunately, there's little that can be done about these steps, and users should be doing this prep work when they change printers or filaments anyway.
As for what comes out of the printer, we did encounter some stringing at times, but that is largely a preparation issue and not down to the printer itself.
Since the printer is so simple in its design, at least relative to others, many bits can be tightened or tidied up on the machine using simple tools or the tools supplied by Creality. If you're adventurous, you could print and add your accessories, with the different arms and frame elements quite capable of accepting whatever attachments you come up with.
Ender-3 Max Neo 3D Printer - Enclosures
While not part of the initial package, Creality did send an enclosure to assist with the review. In addition, concerns over print issues caused by the printer's location near a window and a cold house due to an energy crisis in the middle of winter led to one being provided as part of the test.
A $109.99 to $129.99 accessory, the 3D Printer Multifunction Enclosure consists of a cuboid box that has a footprint of up to 27 inches by 29 inches and up to 35 inches in height, depending on the selected size.

Enclosures are entirely optional but could be handy depending on your environment.
This box consists of a black fabric outside and a thermal insulation layer that is silver in color on the inside, held up by a very sturdy metal frame. A hole on the side allows for power cables to go in and out of the box when it is closed up, and a side pocket is available for holding tools.
At the front and top is a zip-sealed flap, complete with a window, which gives you access to the printer itself.
The enclosure aims to protect the printer and the print from the "elements" of your workspace, including water and dust. Its material also helps keep the air temperature immediately around the printer toasty, so the filament and the printer itself are not affected by any coldness in the air.
The enclosure also slightly dampens the sound of the cooling fan on the 3D printer, which is a small bonus.
While you may not necessarily require an enclosure for your workspace, acquiring one could be a good idea if it will help with the actual printing process. You could get away with a giant cardboard box in a pinch, but a made-for-purpose enclosure is a better idea if you can afford it.
Ender-3 Max Neo 3D Printer - A bigger printer for grand designs
As far as budget 3D printers go, Creality's Ender-3 V2 Neo is a good choice for many users getting started in the hobby. As it shares most of the same features and functionality, the Ender-3 Max Neo can certainly be considered in the same category.
It's reasonably easy to use and understand, quick to get going, and with flexibility in both catering to those who just want to print stuff and those who want to delve deeper.
Where the Ender-3 Max Neo is a great choice when you have to consider making much bigger prints. With its much larger build platform and height, you can certainly make some hefty prints if you put your mind to it.
If price is a factor, the Max Neo will always lose out to the V2 Neo, simply because the V2 Neo costs $299 and the Max Neo is $369. If size is also a concern, then the smaller space the V2 Neo takes up will also make it a more attractive proposition.
But, if you're willing to spend the extra $70 and are willing to make space for it, the Ender-3 Max Neo is certainly a good buy. You may not need to print something that big anytime soon, but it's nice to know you have the capability to do so if needed.
Ender-3 Max Neo 3D Printer - Pros
- Simple assembly
- Easy to navigate controls
- Good value on price
- Solid full-metal Bowden extruder
Ender-3 Max Neo 3D Printer - Cons
- Fiddly initial levelling
- 3D printing still has a steep learning curve
Rating: 4 out of 5
Where to buy the Ender-3 Max Neo 3D Printer
Get the Ender-3 Max Neo 3D Printer from the Creality store for $369. A 3D printer enclosure can also be found on the Creality website for $87.99, a $22 discount.