A vintage Apple 30-inch Cinema Display can be used as your second or main display on your modern Mac. Here's how to hook it up.
When Apple added USB-C and Thunderbolt ports to modern Macs, it also added DisplayPort connectivity over the same ports. This means you can add a second display to your Mac using these ports, instead of relying on display-only connections like HDMI.
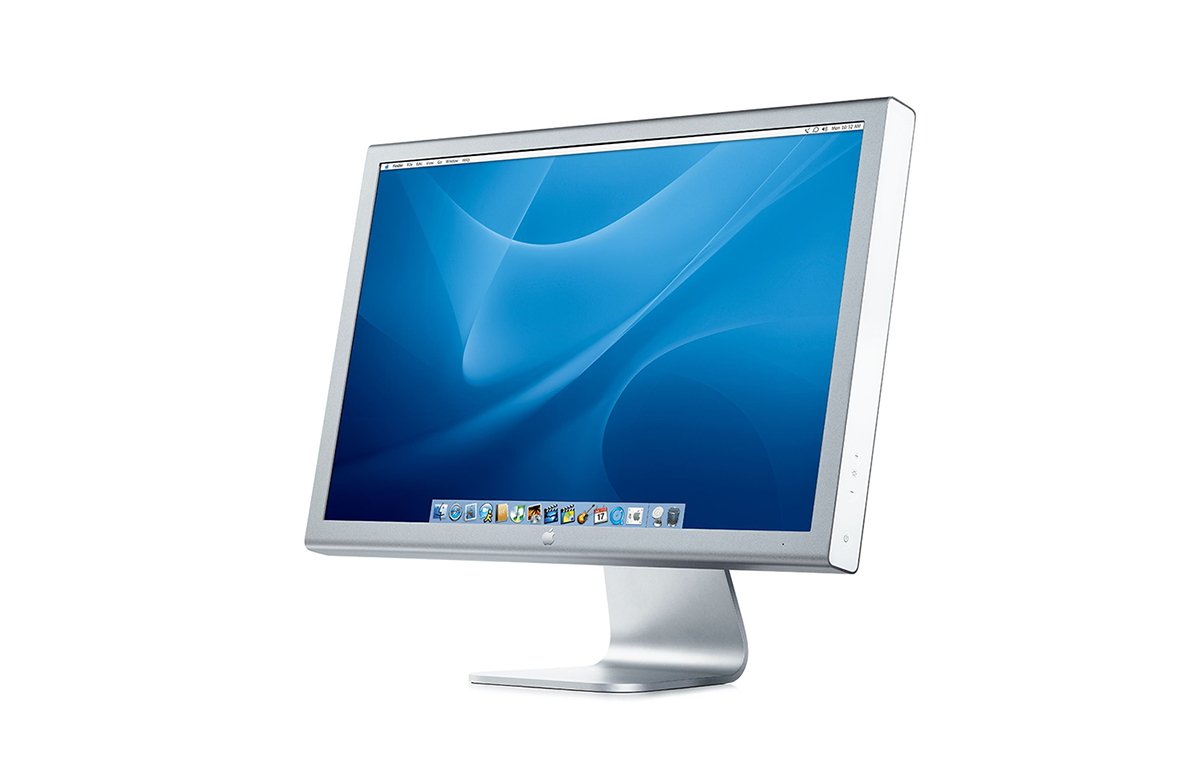
From 2004 to 2010, Apple sold the 30-inch Apple Cinema Display, and many of these displays are still around and working. Although lower in resolution by today's standards, they can still make great second or primary displays for your modern Mac.
These displays had a proprietary Apple dual-link DVI connector which requires a separate adaptor box. This adapter box has a DVI port and a USB port for power and control.
You'll need both the Apple adapter box and a third-party dual-link DVI to DisplayPort adapter to connect these displays to your Mac via the Thunderbolt port.

Apple's Dual-Link DVI connector adapter.
The dual-link DVI connection essentially breaks the image on the display into upper and lower halves and merges them into one image, before sending the image to the display. Hence, single-link DVI adapters won't work with the 30-inch display.
Connecting Apple's 30-inch Cinema Display to your modern Mac
To connect an Apple 30-inch Cinema Display to your modern Mac, first plug its included power brick into an AC outlet. You then connect the display's cable to the Apple DVI dual-link converter box, and plug that box's USB cable into a USB port on your Mac.
The same USB cable coming from the display also has a mini DisplayPort connector, which is small and square with a tapered end. Plug this cable into a third-party mini DisplayPort to Thunderbolt adapter.
This allows the original Apple mini DisplayPort cable to connect to the modern USB-C-style Thunderbolt port on your Mac which also carries the DisplayPort signals.
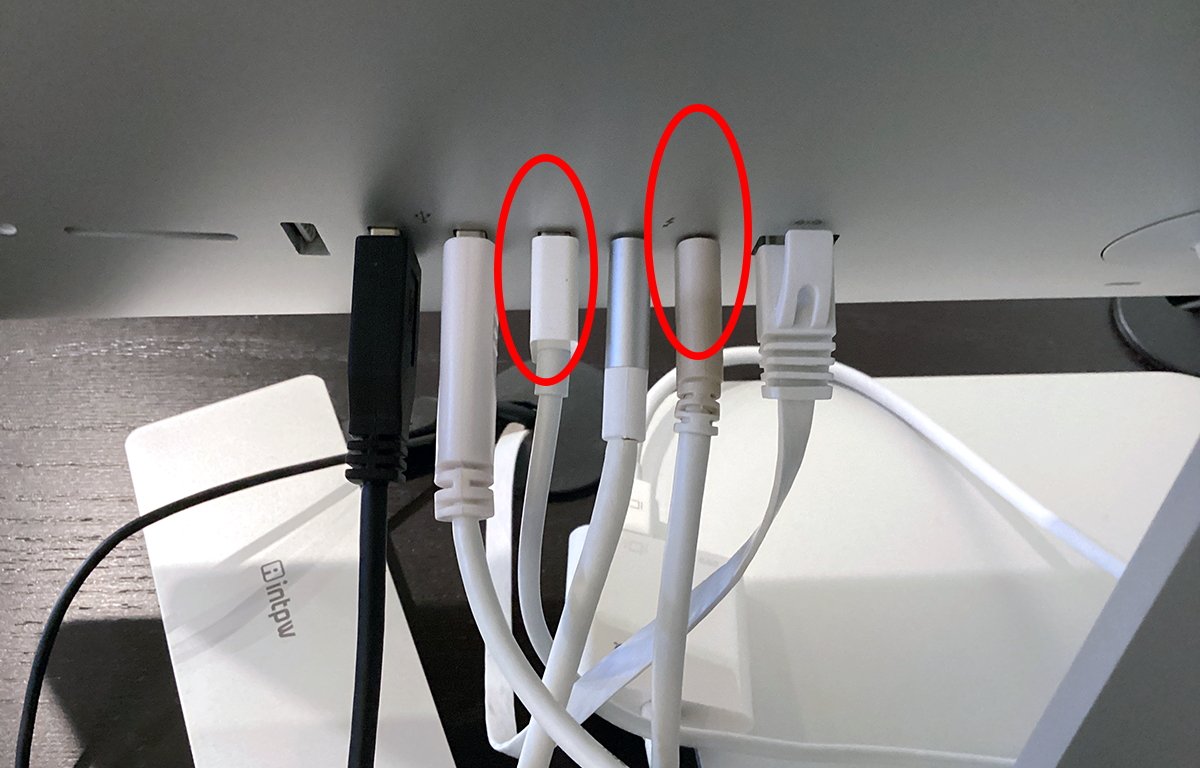
Display USB connector, left and DisplayPort over Thunderbolt, right.
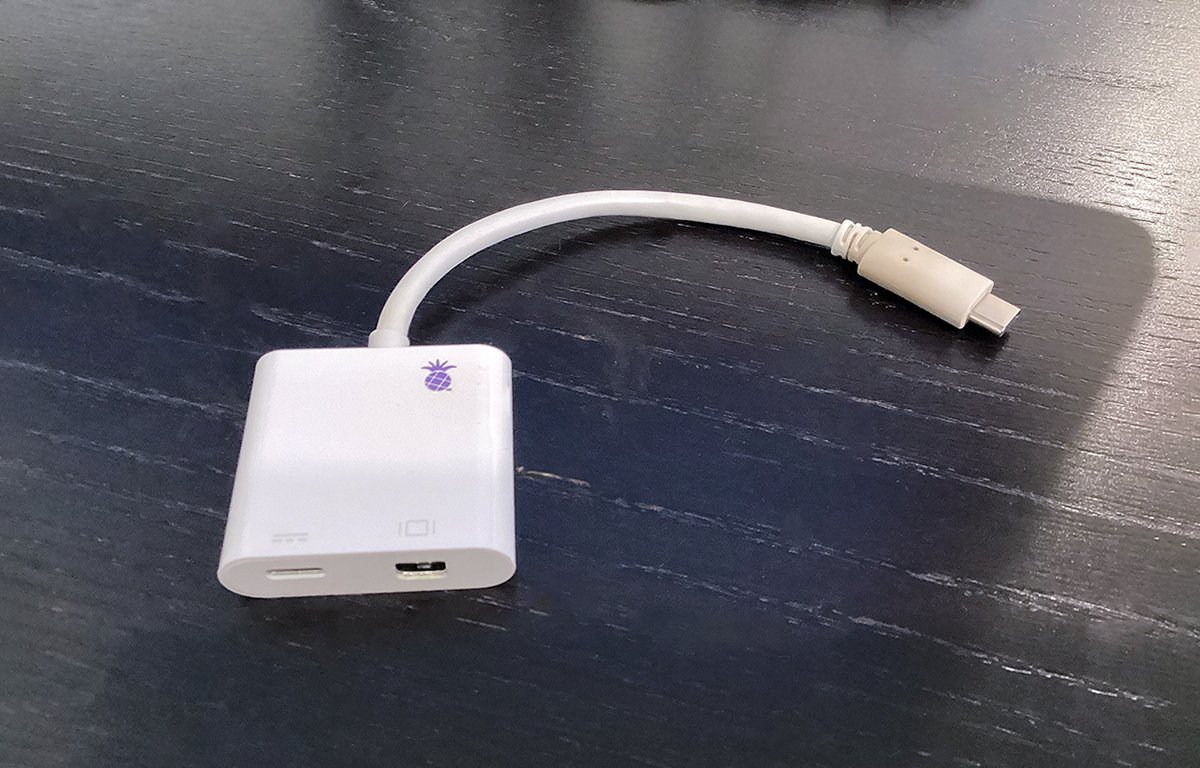
Most third-party DisplayPort adapters have a pass-through Thunderbolt port, so you can connect your other Thunderbolt or DisplayPort peripherals without losing access to the port on your Mac you just plugged the adapter into. We used the Display JellyFish by Paheven ($25), but there are several others available on Amazon, and other vendors online.
Do make sure the adapter can support dual-link before purchasing.
 .
.
Paheven Display Jellyfish Mini DisplayPort to Thunderbolt adapter.
Once you're all connected up, you can turn on the display by pressing the round touch-sensitive power button on the right side.
System settings
Next, open System Settings on your Mac and click Displays on the left. Click the Arrange button and move the displays by dragging them so they're in the locations next to each other that you've physically set them up on your desk.
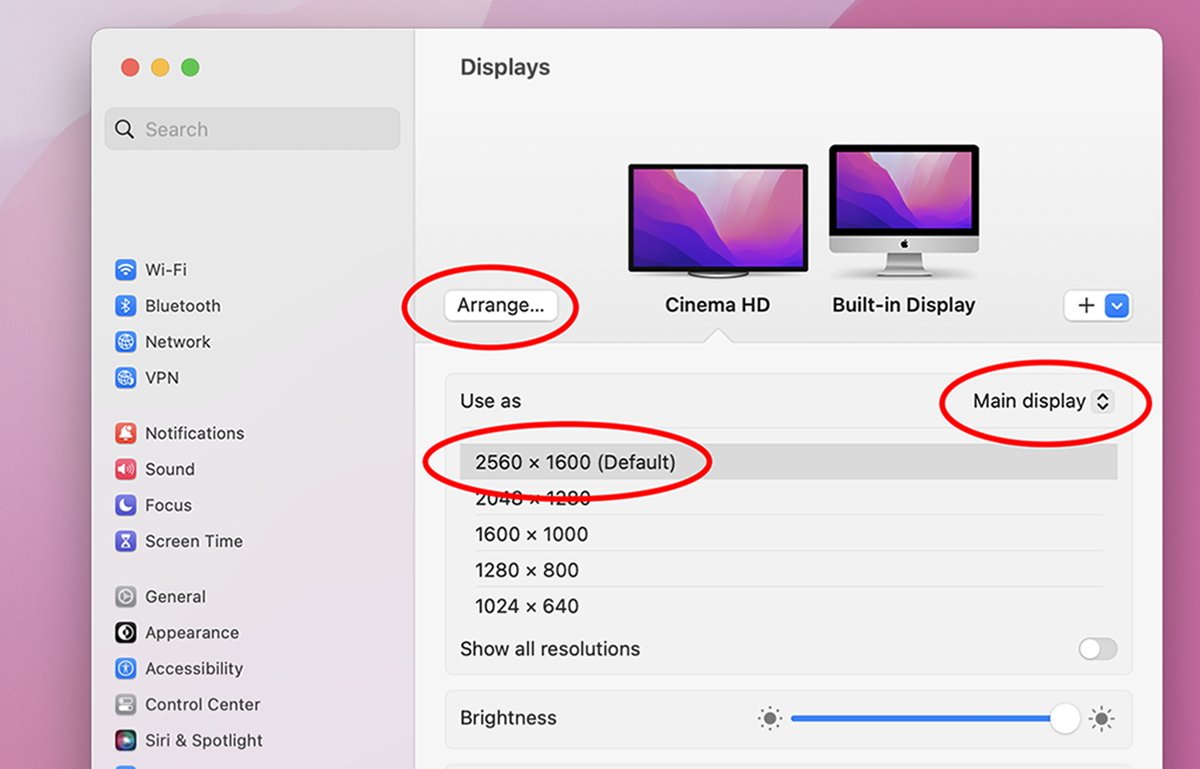
Click the Use as popup menu to set whether you want to use the 30-inch display as your main display, or secondary display. If it's set as the Main display, the menubar will be moved to it.
Finally, select a resolution under the Use as popup. 2560 X 1600 is the maximum resolution the 30-inch display can handle.
You can also adjust the brightness using the Brightness slider, or by pressing the brightness buttons on your Apple keyboard, or on the right side of the display. The display also has a touch-sensitive on/off button on the right side.
While not razor-sharp, the big advantage of using the 30-inch display is the vast screen real-estate. You can open browser or text editor windows and view huge amounts of information at once.
Here's an example of a Firefox window with several dozen tabs open at once next to a 21.5-inch iMac displaying the Firefox bookmarks window:
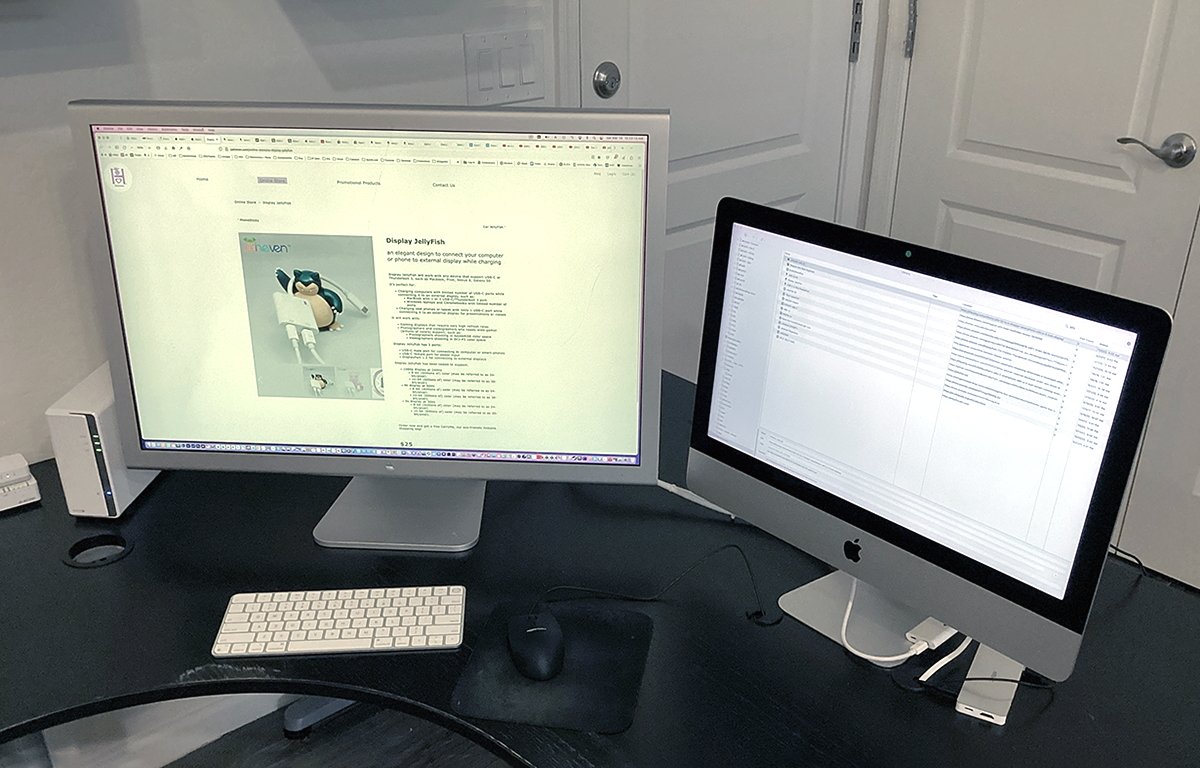
You can also view more Finder and application windows at once by arranging them neatly on the display.
These displays do tend to get quite warm because they have an all-aluminum outer case. Since they are now close to two decades old, you may want to get a small USB fan and point it at the rear of the display to keep it cool.
There are two USB 2 and two FireWire ports on the back of the display, so you may want to use one of them to power that fan instead of adding another power cable to the mix.