Using off-the-shelf electronic components, a Raspberry Pi, and a 3D printer, it's possible to build your own working miniature classic Mac. Here's how.
There is a lot of overlap between the maker community and retro computing. So, one of the most popular maker tasks is to make working miniature replicas of classic computers.
Several makers have made tiny working classic Mac replicas based on old Classic Mac OS ROM files, a Raspberry Pi Zero computer, and a 3D printed case. The number of parts needed to build such a machine is surprisingly small, although as of late, it can cost a bit more than expected due to component supply chain issues.
Also be aware Apple still holds copyrights to all classic Mac ROMs and ROM files, so in order to legally make a mini classic Mac, you must also own one of the original Macs for the ROM file you will be using. You also cannot sell any working mini replica Macs you create which contain a copyrighted Apple ROM file or other Apple software.
3D printed Mac parts list
To make a 3D-printed mini classic Mac you will need:
- A 3D Printer
- A 3D model file of the case for the classic Mac you wish to create
- A Raspberry Pi Zero or Zero W computer
- A small TFT display panel to use as the computer's display
- A Raspberry Pi GPIO header cable to connect the Pi to the TFT display
- Pi Zero DC power supply - usually 5V or 3.3V
- A double-row 40-pin Pi header to connect the GPIO cable to
- 3 M3 X 12mm screws
- 3 M3 Hex nuts
- A 16GB microSD card
- 3rd party emulator software which runs on a Pi and is capable of running the classic Mac OS
- A Micro USB hub
- A USB keyboard and mouse
- Mini HDMI to Standard HDMI Connector for optional external display
There is even an inexpensive 3D model file of the Mac's forerunner - the MacintoshXL/Lisa. The Lisa was named after Steve Jobs' first child, Lisa Brennan Jobs.
There are several excellent online tutorials for making your own 3D printed classic mini Mac, including at Intructables, the Macintosh Librarian, and by cgenco at Thingaverse.
If you don't have a 3D printer, you can have the 3D parts printed for a fee at Shapeways.
You don't need 3D software to make a mini classic Mac unless you want to open and edit the 3D file. There are a number of free options for doing so including OpenSCAD, Autodesk Fusion 360, Blender, and FreeCAD.
Most of these classic Mac mini projects are based on 1980's model Macs such as the Mac Plus, SE, SE/30, Classic, or Classic II. There was also a Color Classic model, although its case was a bit more irregular.
If you plan the location of your Raspberry Pi computer inside your 3D printed Mac case carefully, and are willing to cut a custom USB port hole, it's also possible to plug in an external 3.5" USB floppy drive to read vintage Mac floppy disks, although you may need special software to do so.
To get native classic Mac OS sound, you will need to plug a USB hub with a Micro USB connector into the Pi's USB port, then plug a USB speaker into the hub. Typical Micro USB hubs cost around $6-$12 and usually have 3-4 USB ports.
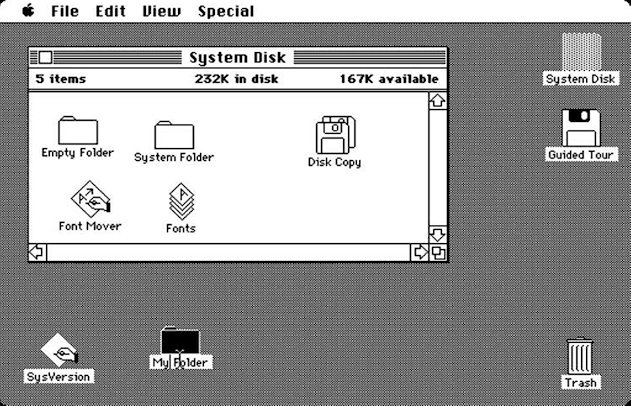
The original Mac OS was a lot like macOS today, except smaller, simpler, and black and white only:
The first step in your 3D printed Mac journey is to find a 3D model of the Mac case you want to use. There are a variety of free and paid 3D models online at Thingaverse, cgtrader.com, Etsy, and others. Macintosh Librarian also has a page on Thingaverse which has case files for SketchUp.
Once you have the 3 case part files, you'll need to print each part on your 3D printer using its software, or one of the 3rd party apps mentioned above. Since the parts are small they print fairly quickly. You may need to make slight adjustments to the case parts with a hobby knife or Dremel tool to get everything just right. Some of the case models are designed to snap together, some will require some form of adhesive to seal the case.
You will need to either solder the 40-pin header to the Raspberry Pi, or in some cases you can order a Pi Zero which has the pins presoldered. Or you can use a "hammer header" available from AdaFruit and other maker sites which allows the header to be attached using only friction.
Before you install the Pi computer into the case, prepare a microSD card on your Mac or PC containing the Raspberry Pi OS, a compatible emulator, and the ROM file for your Mac's model. We won't go into the details of how to do so here, but there are plenty of tutorials online.
In short, you have to tell the Pi to load and execute the emulator, which then loads the Mac ROM image on boot so that it runs the classic Mac OS. cgenco's page also has links to modified versions of mini vMac which allows it to run on most ARM-based systems. See "Step 16: Addendum: Launch on Startup" in cgenco's tutorial.
Depending on which display you are using, you may also need to install custom drivers for Pi OS from the display manufacturer.
Or you can just boot to Pi OS, then using the mouse find the emulator and double-click it on the Pi OS desktop. A variety of compatible emulators abound, including mini vMac, which has a Linux build (Raspberry Pi OS is based on Linux). There's also a build of mini vMac which runs on modern Macs.
Once the Mac OS boots, it effectively takes control of the I/O hardware such as keyboard, mouse, and other system hardware. You now have a working classic Mac and can run any software a real classic Mac would run.
One optional mod is to install a "Faux Disk" — a working SD card reader in the front of the case where the original Mac's floppy drive slot was. 3D part files for the supports are available and secure a SD card reader board to the inside front of the case. The card reader connects to the Pi's small ribbon cable connector via an additional flat ribbon cable (see Step 4 in cgenco's page).
Once your microSD card is ready, insert it into the Pi's card slot.
Next, using the mount points inside the case, install both the Raspberry Pi, and the TFT display in the back and front of the case, respectively. On some case models, you may need to secure the parts with small screws, others are designed to allow the parts to snap in place.
Most case designs have at least 1 extra external port for a USB connection. If not, you will need to cut one yourself using a cutting tool.
Connect the internal display to the Pi using the GPIO ribbon cable. This cable allows the Pi to communicate with the display.
Finally, close the case - either snapping or gluing the halves together, depending on which case design you printed.
Connect the Pi's external power or a powered USB cable (usually 5V, sometimes 3.3V), the Micro USB hub, mouse, and keyboard, and power on. Once your Pi is booted, you may have to edit a config file to have it open an emulator app on boot - or you will need to manually open the emulator.
You may want to write down the IP address of your Pi if it is connected to a network, and enable remote SSH access so you can log into and configure it from a Mac or PC - which are beyond the scope of this article. SSH access is off by default in Pi OS, but is enabled through a setting in the OS's system preferences.
A Few Final Notes
Obviously using the Pi Zero W is better than the original Pi Zero since the Pi Zero W has WiFi built in.
There are additional 3D case files which produce slightly larger cases — allowing you to use a Pi 3, 3B+, or 4 - but which also require a larger display. There is one for the Pi 4B here.
Apart from making classic 3D-printed mini Macs, there are several people in the community who review, refurbish, and repair original working classic Macs. Check out YouTuber Marques Brownlee's review of the very first compact Mac - the Macintosh 128K.
There are even new working printed replacement circuit boards for the original Macs - such as the SE Reloaded from Kai Robinson sold through MacEffects ($49).
For something really cool, check out James Friend's online Mac Plus emulator, PCE.js running System 7.
Assembling your own classic mini Mac does require some maker skills such as 3D printing, soldering, and crafting. But it's enjoyable and interesting enough that most Mac enthusiasts should be able to assemble their own without too much effort.