Apple's new iPhone 6 and iPhone 6 Plus are making their way into consumers' hands today, and one of the first tasks for iPhone owners will be moving their content to their new device. AppleInsider walks you through the process of backing up and restoring data using iCloud and iTunes.
Backing Up
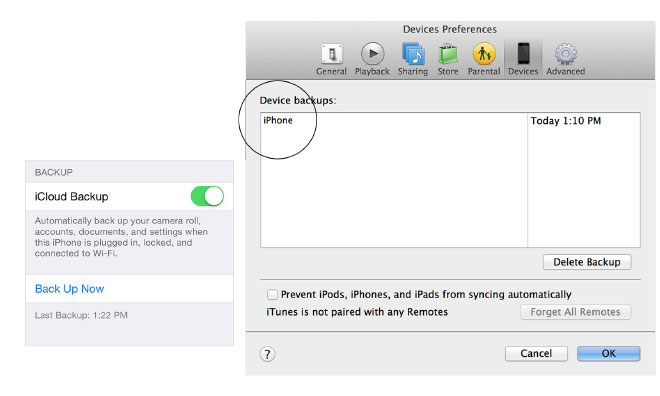
Nothing can kill the joy of a new iPhone faster than realizing your contacts, photos, or Angry Birds saves have disappeared into the ether because you forgot to take a backup of your old one. Most iPhone owners have likely enabled automatic backups via iCloud; If you aren't sure, you can check the status by navigating to Settings → iCloud → Storage & Backup.
If iCloud Backup is already enabled, look just below at the "Last Backup" timestamp. Since iPhones will only perform automatic backups when locked, plugged in, and connected to Wi-Fi, the latest backup could be as much as two weeks old, and you'll want to run a new one before proceeding by tapping "Back Up Now."
Last week, Apple launched new, cheaper iCloud storage plans, so if your iPhone is too large to back up to a free 5-gigabyte account, you can add more space to ensure you won't lose any of your precious data.
Alternatively, users weary of uploading their data to the cloud can back up to their computer using iTunes. Connect your iPhone to your computer with the Lightning cable, then open iTunes — you can either sync the device, or open File → Devices → Back up to bring up the backup menu. To start a backup, right-click your iPhone and select Backup Now.
Restoration
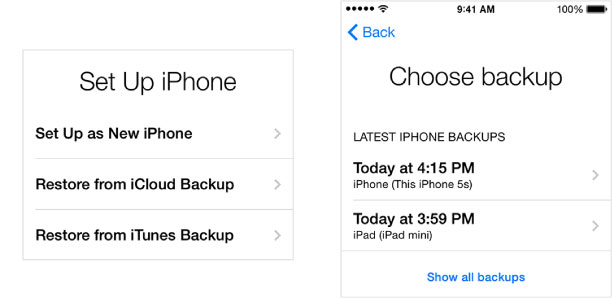
Restoring from iCloud is straightforward. During setup — Â after signing in to iCloud — Â iOS will ask if you want to restore your device from a backup, or set it up as a new iPhone. Choosing 'restore from backup' will show you a list of your latest backups, and allow you to choose which one you want to restore.
Doing it this way will allow you to set up your iPhone without ever connecting it to a computer. Depending on the size of your backup, it could take a significant amount of time to download, so make sure you begin your restore when you can plug your phone in to an external power source.
Restoring from an iTunes backup is equally easy: make sure you've updated iTunes to the latest version, then connect your iPhone to your computer with the included Lightning cable. Choose File → Devices → Restore from Back up, and follow the on-screen prompts to choose your backup and begin the restore process.
Gotchas
Anything that's synchronized from your computer — Â things like music, movies, and photos from iPhoto — isn't included in your backups, so you'll need to resynchronize your handset after the restore is complete.
You can get around this for music by subscribing to iTunes Match, Apple's cloud-based music locker. The services costs $24.99 per year, and will let you download any song that's in your local music library from the iTunes Store — Â songs that aren't sold in iTunes will be uploaded and made available as well.