How to protect your Apple ID, iCloud, iMessage and more by enabling two-step verification
 Stephen Robles
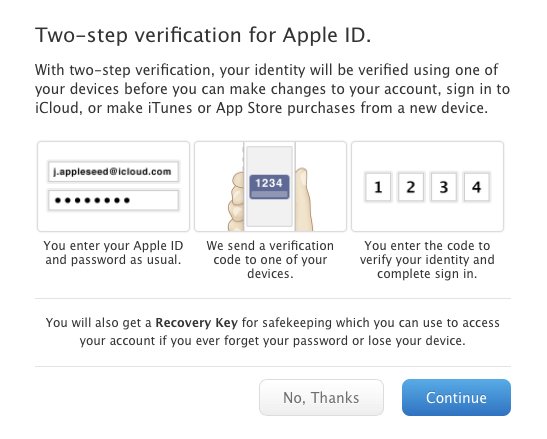
Two-step verification adds an additional layer of protection to your Apple ID login by requiring users to enter their password plus a second, temporary number sent to a trusted device.
Apple has recently expanded which services are protected by its two-step verification service, which now includes your iCloud account, iTunes Store purchases, FaceTime and iMessage.
Should you have two Apple IDs, such as one for iTunes Store purchases and another for iCloud, you'll need to enable two-step verification on both accounts separately. In order to begin the process, your Apple ID password must also meet the requirements of eight characters with at least one number and one capital letter.
If you change your Apple ID password to meet these requirements, there will be a short waiting period to begin the process of enabling two-step verification.
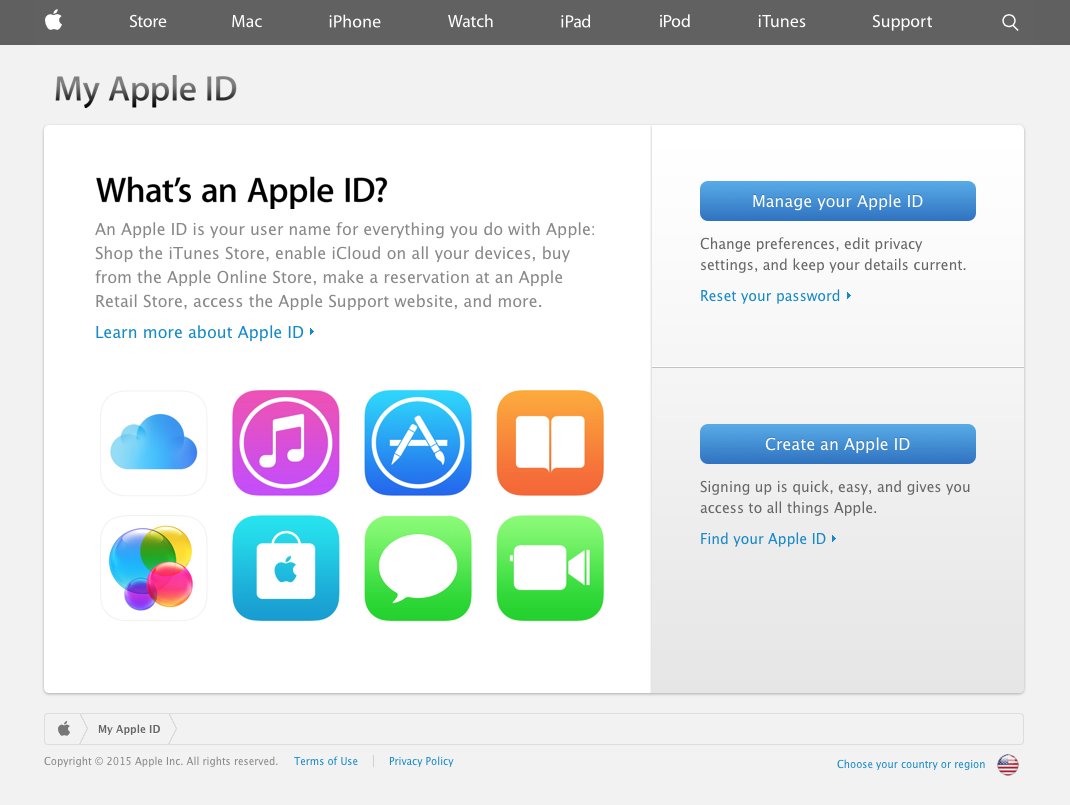
To get started, visit the website: appleid.apple.com and Sign In.
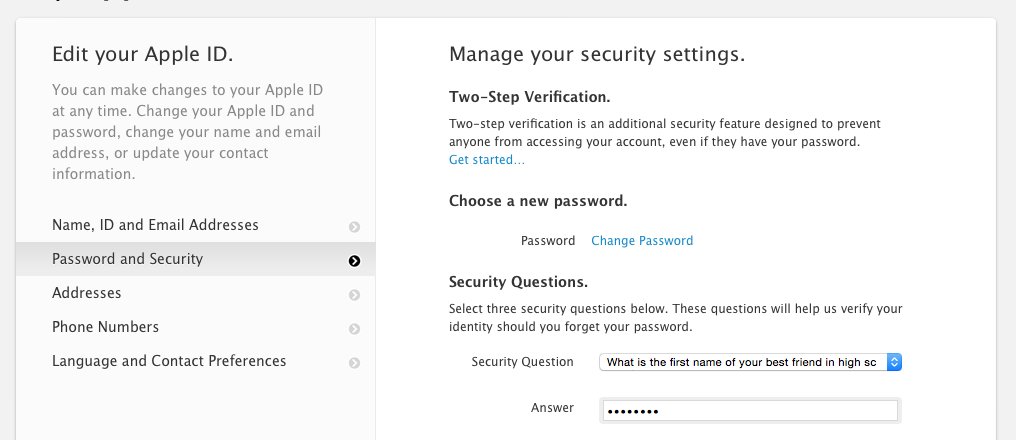
On the next screen, select Password and Security in the left sidebar.

Before proceeding you'll need to answer two of your security questions. Click Continue once you've answered.

On the next screen you'll see options to change your password and security questions. To enable, click the Get Started link in the Two-step verification section.
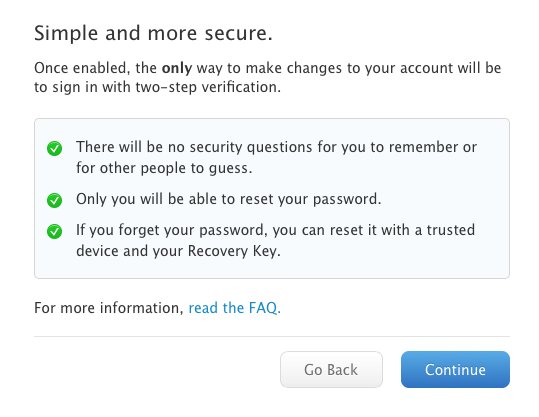
Next you will see a brief description of the sign-in process once two-step verification is enabled. Click Continue to proceed.
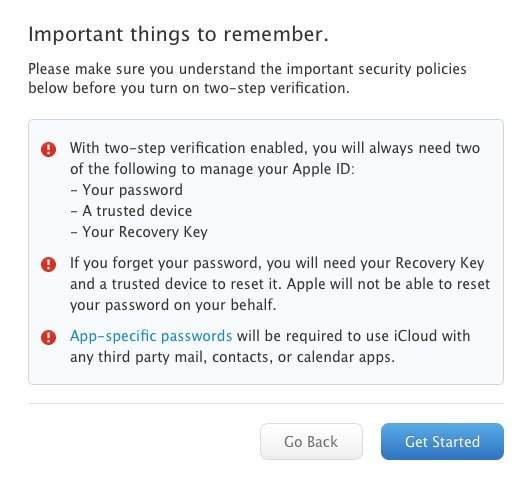
A further description of the benefits will appear on the next screen. As we'll describe later, it's very important to save your Recovery Key in a safe place. Physically writing it down on paper and placing it in a safe is advisable. Click Continue.
Next will be a list of warnings and cautionary instructions. If by chance you lose all trusted devices and your Recovery Key, Apple will not be able to help you regain access to the account. App-specific passwords will also be required for third-party apps using iCloud such as Fantastical on OS X and other mail, contacts or calendar apps. Click Continue.
Step one to enabling two-step verification will be selecting your trusted devices that will receive the automatic, temporary codes when you login with your Apple ID. If no devices are displayed here, you must enter a valid phone number that can receive SMS text messages.
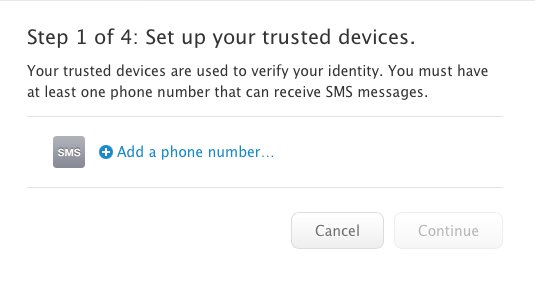
Click Add a phone number..., enter the phone number you would like to use and click Continue. Apple will send that phone number a four digit Verification Code via text message. Once received, enter the code into the new window and click Verify.

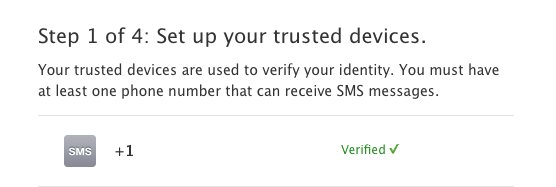
Once your number is successfully verified, you'll see a green Verified note and check mark next to that number. Click Continue.
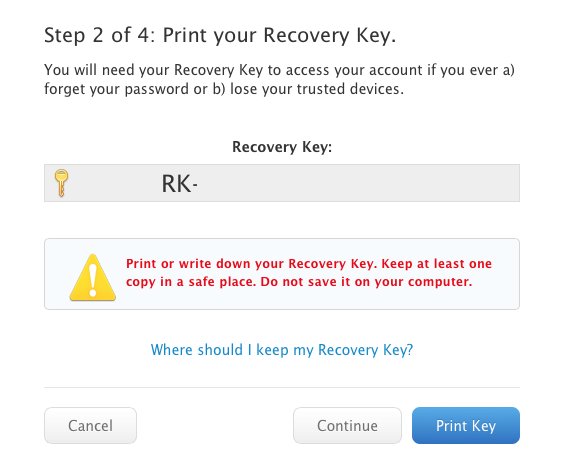
Step 2 will give you the important Recovery Key. Physically print this key or write it down and store it in a safe place. Users may add this information to 1Password or other app, but we still advise keeping a physical record. Click Continue.
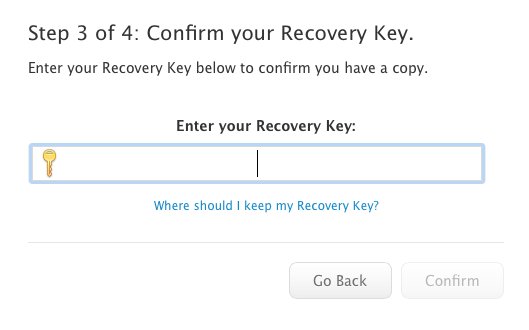
You will then be required to enter your Recovery Key to ensure you have copied it correctly. A green check mark will appear if it is correct. Click Confirm to proceed.
Final instructions and warnings will be displayed on the last page. Check the box I understand the conditions above. and finally, click Enable Two-Step Verification.

The Password and Security section will now display that "Two-step verification is enabled." From now on, any time you attempt to login with your Apple ID a four digit code will be sent to your trusted device for verification.

Any third party apps that were previously logged in with iCloud may now require an app-specific password that can be generated at appleid.apple.com.


 William Gallagher
 Chip Loder
 Andrew Orr
 Marko Zivkovic
 David Schloss

 Malcolm Owen