It was probably prudent to make a backup of all of your iPhone's data before the shift to APFS with iOS 10.3 was applied, but fortunately it all went okay — but what if it hadn't? In celebration of Backup Day, AppleInsider shows you how to back up your iPhone or iPad.
Apple's APFS sounds great for the future, but any time the file structure of a device is modified on-the-fly by an update, there's always the potential for things to go horribly wrong — and iOS 10.3 did exactly that as it updated your device. We all took a chance on Apple's say-so, but there were no guarantees of success, really.
At AppleInsider, we make sure that we have a backup before we plow into an update or beta install — and you should too.
Back up to iCloud
Assuming you've got space, an iCloud backup is probably the most convenient.
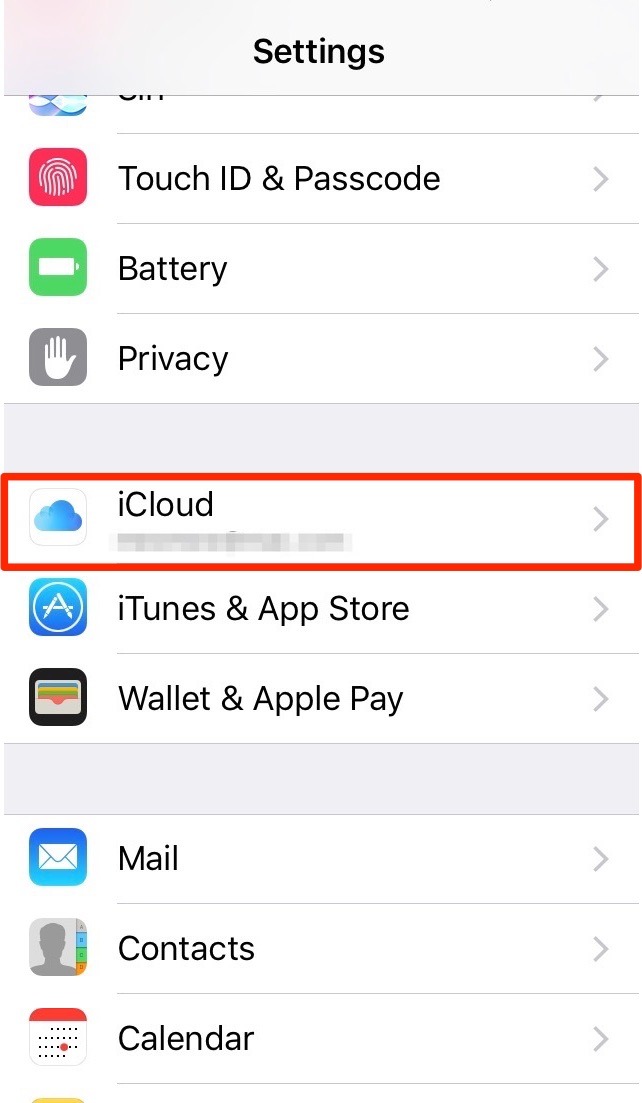
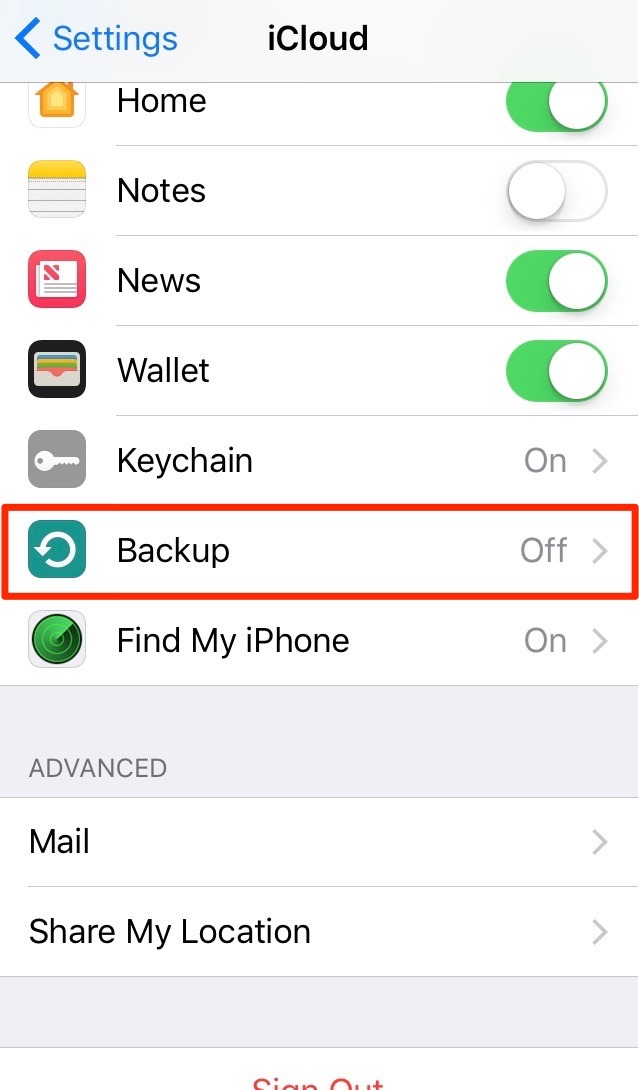
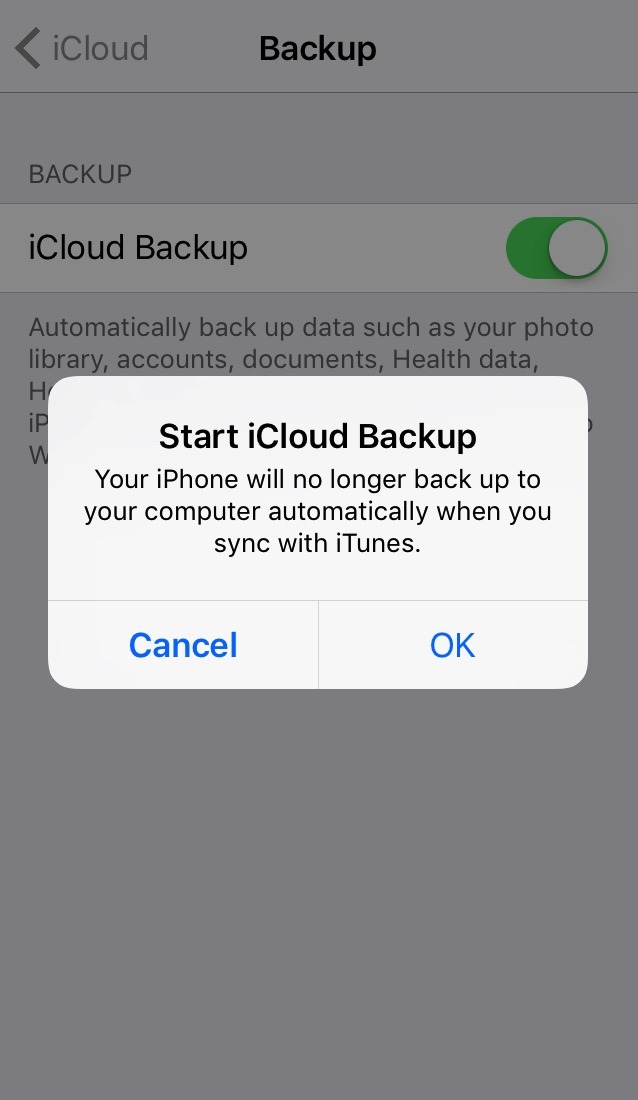
First. ensure that you're connected to wi-fi. Then, tap Settings, and tap iCloud. Scroll down nearly all the way, and tap Backup.
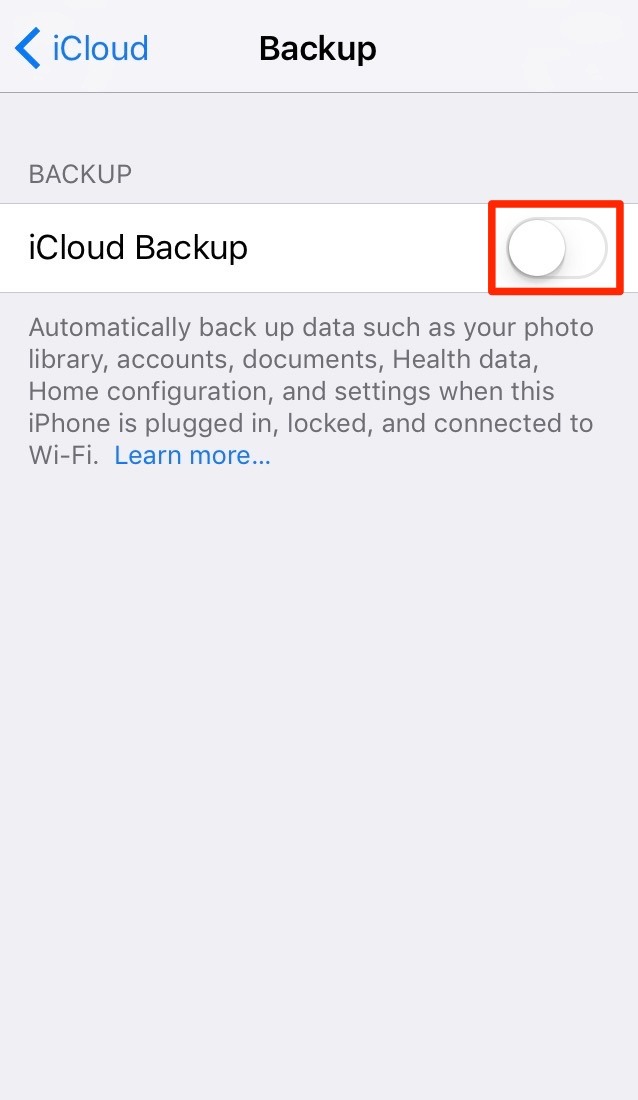
Enable the iCloud Backup by tapping on the toggle. The iPhone will pop up a warning saying that it won't automatically back up when connected to iTunes. Click OK and then click Back Up Now. Otherwise, your phone will back up to iCloud when connected to wi-fi and your phone is locked and not in use.

Given that only 5GB of iCloud storage is given to users free, if you choose to go this route, you probably want to spend a bit per month to grow this storage space.
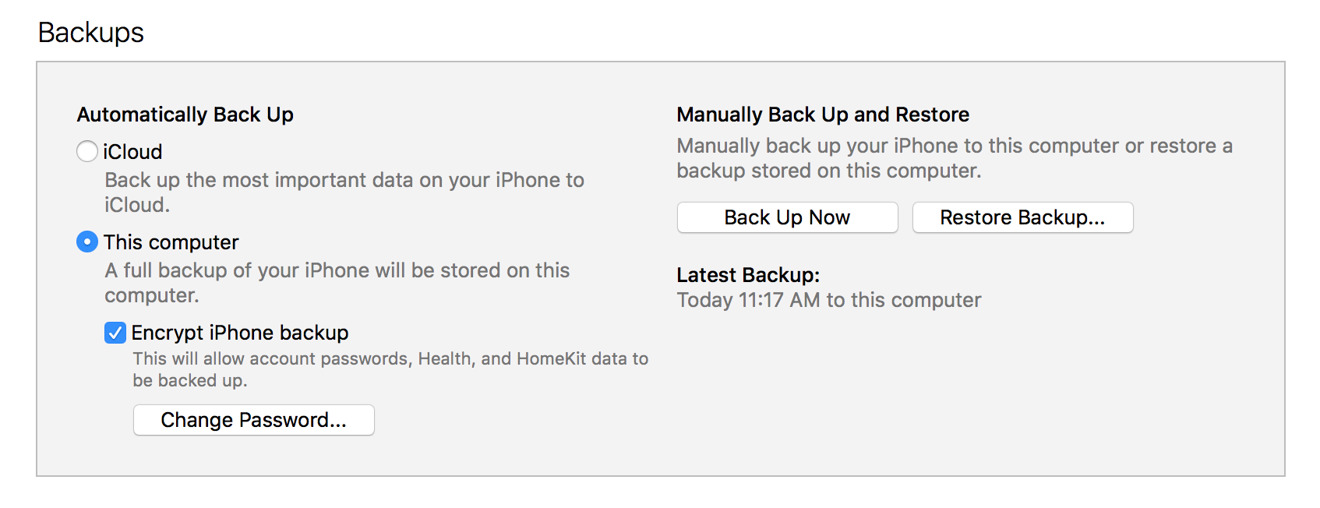
Back up to iTunes
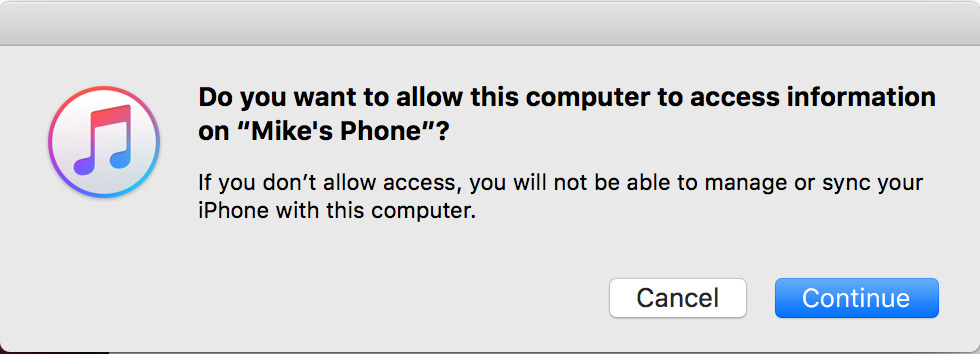
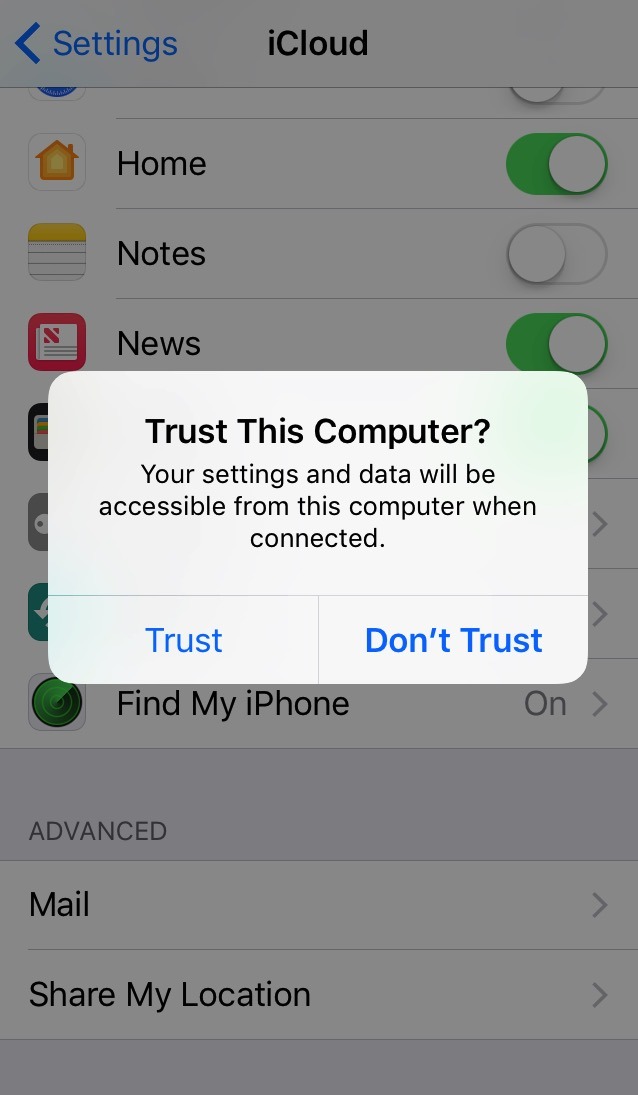
Open up iTunes in macOS or Windows, and connect your iPhone to the computer. If you have set up two-factor authentication, a message will pop up asking you for a device passcode, to Trust This Computer, or both. Do so, or you won't be able to back up. Click on the little iPhone icon, just to the right of the media type selector.

Odds are good, that your phone will start backing up now, if you haven't enabled iCloud backups. Another possibility is that you're not doing an encrypted backup — and you really should.
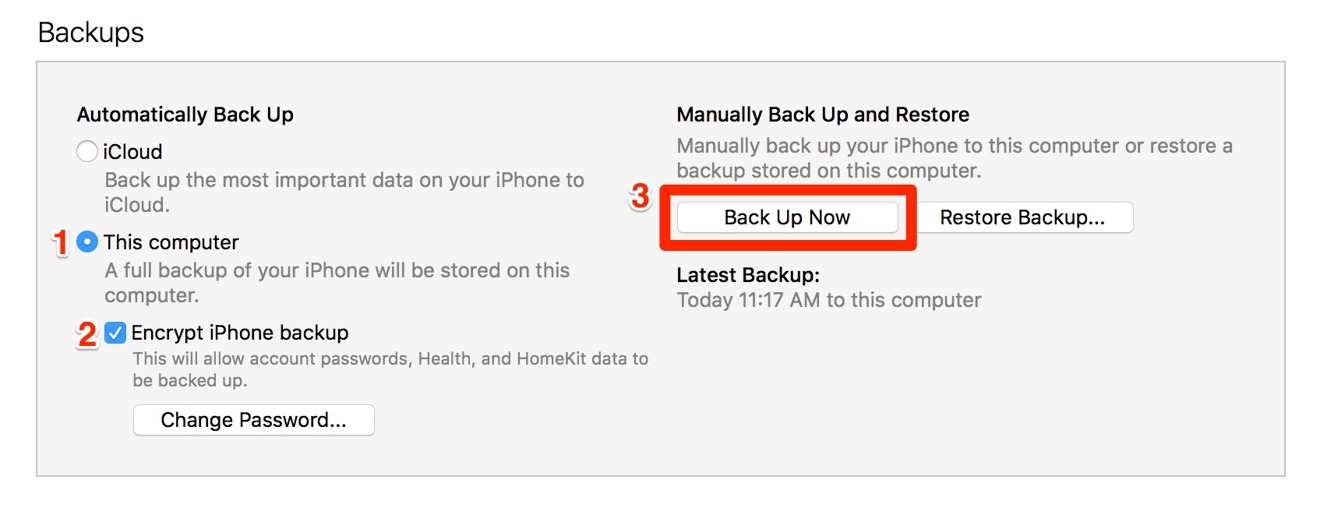
Make sure This computer and Encrypt iPhone backup are both selected — this will ensure that health data and passwords transfer with the backup. Click the Back Up Now button to start the process.
Our backup took about four minutes from an about half-full 64GB iPhone SE.
The backup is done — now what?
The backup will be automatically stored by the computer. They are all backed up by Time Machine, and all the other solutions we recently examined when you back up your host computer.
If the worst happens with a device, the most likely corrective step will be to erase the device, and restore from a backup — and now you have one to restore from!