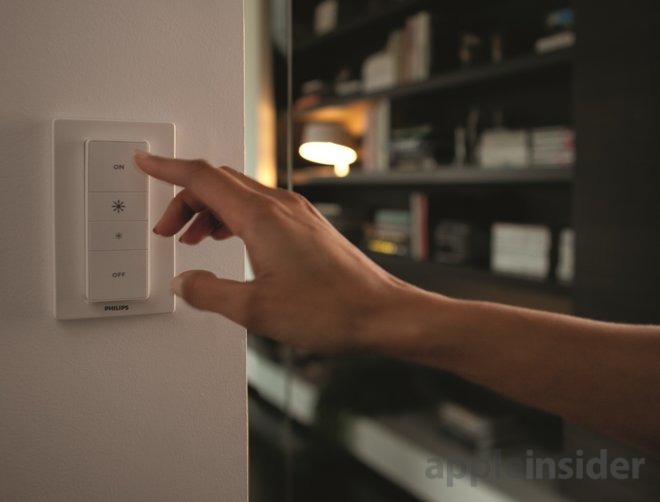
A recent firmware update for the Philips Hue lighting lineup has given HomeKit compatibility to the company's affordable dimmer switches. That means you can now customize the switches to your liking, making them control a multitude of HomeKit accessories beyond Hue bulbs. AppleInsider shows you how to do it.
While Philips Hue bulbs have long been compatible with HomeKit with a bridge, the official Philips Hue Dimmer Switch, which launched in 2015, was not HomeKit compatible prior to a recent update.
Previously, the switches could be configured via the Hue app to turn specific Hue bulbs on or off. Beyond that, the switches were not recognized by HomeKit, and could not be viewed or customized through the iOS Home app.
But the firmware update allows the switches to now be reprogrammed as the user sees fit, allowing any of the four face buttons to control any compatible HomeKit accessory, or groupings of accessories.
Priced at just $24.99 on Amazon, the update makes the Philips Hue Smart Dimmer Switch one of the most affordable HomeKit switches available — provided you already own a Hue hub.
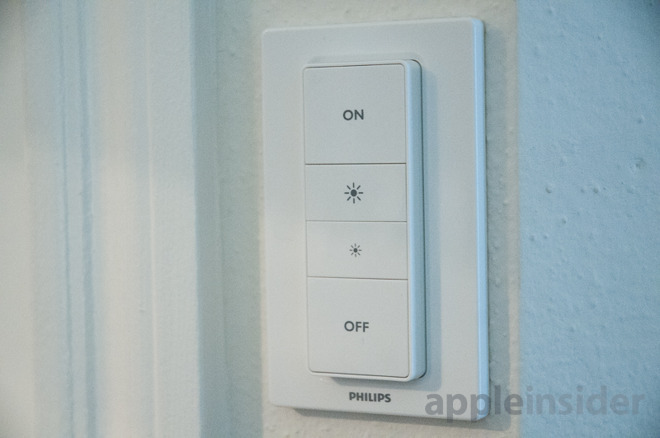
And because the switch actually pops out of its wall plate for completely wireless use, it's also a portable remote control, allowing users to bring the switch to their bedside at night or to put on the coffee table while watching TV.
Disable Hue app controls for best results
Somewhat paradoxically, to get the most out of the Philips dimmer switch, you'll need to disable controls through the official Philips Hue app. This is because the controls will overlap in both the Hue and Home apps if you leave both enabled.
For example, if you reconfigure the dimmer buttons to control an accessory like a ceiling fan, connected Hue bulbs will still get brighter or dimmer as you press the buttons, in addition to turning the fan on and off.
Before you get started, make sure your Hue hub and accessories are running the latest firmware. You can open the Hue app, choose Settings, then scroll down to Software update to check for the latest update.
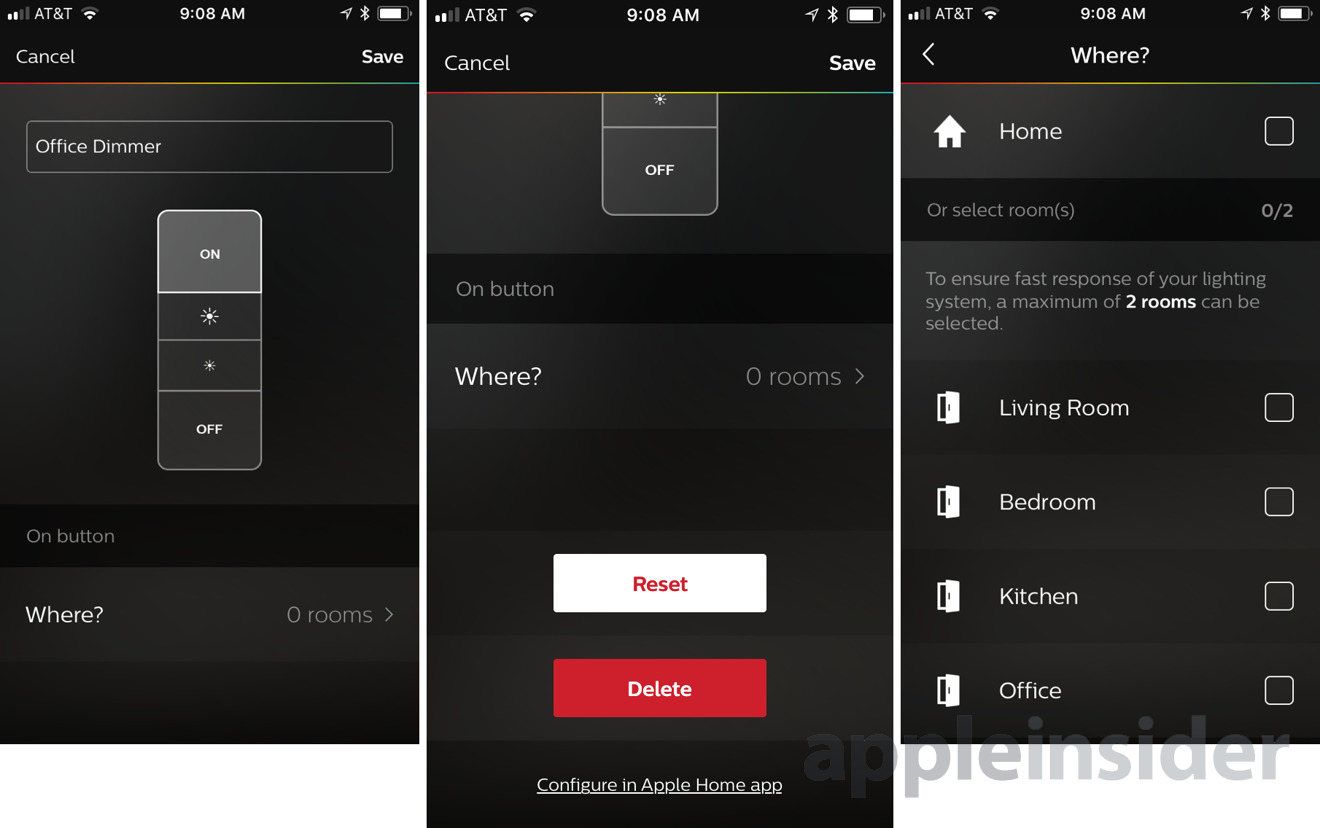
Next, to disconnect dimmer controls from the Hue app, go back to the Settings tab, but this time select Accessory Setup. Here, you will see any official dimmer switches you have connected to your bulbs.
Tap on the dimmer you want to customize, and you'll see which bulbs it controls. Tap the Where? menu and deselect any rooms or bulbs currently connected. This will leave controls to the Apple Home app.
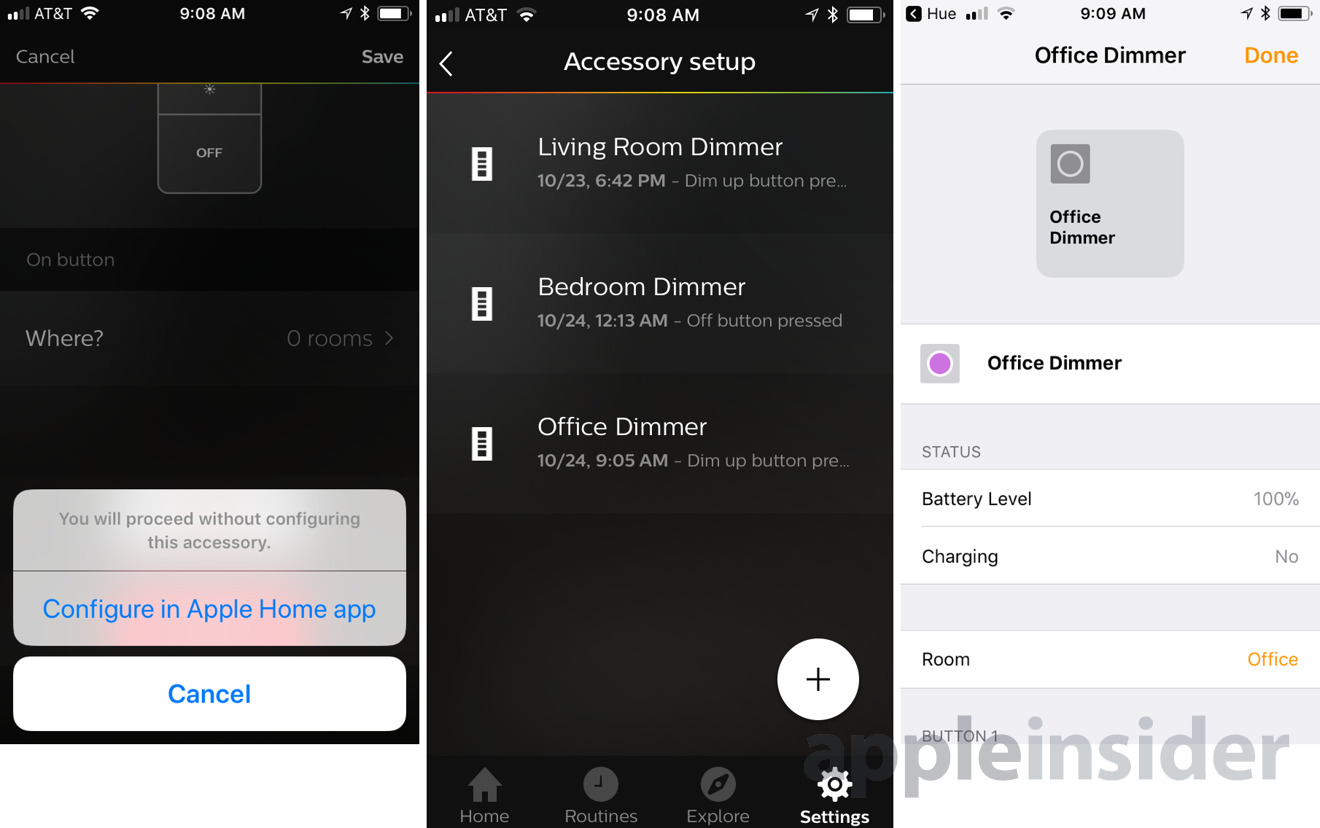
Conveniently, the Hue app now includes a quick link to configure your specific switch in the Apple Home app. Simply go back to the controls overview for your switch (which should now show "0 rooms" and have no controls in the Hue app), and scroll down to a small Configure in Apple Home app link at the bottom. From there, you'll authorize configuring in the Home app, and then you'll be presented with an App Store link for the app (assuming you already have it installed, just tap "Open").
Configuring in Apple's Home app
You can open Apple's Home app on your own or be whisked away to it through the Hue app. If you launch the app separately, you'll need to find your dimmer in your list of accessories and either long press or 3D Touch on the switch to bring up an overlay with the Details button at the bottom. Tap that.
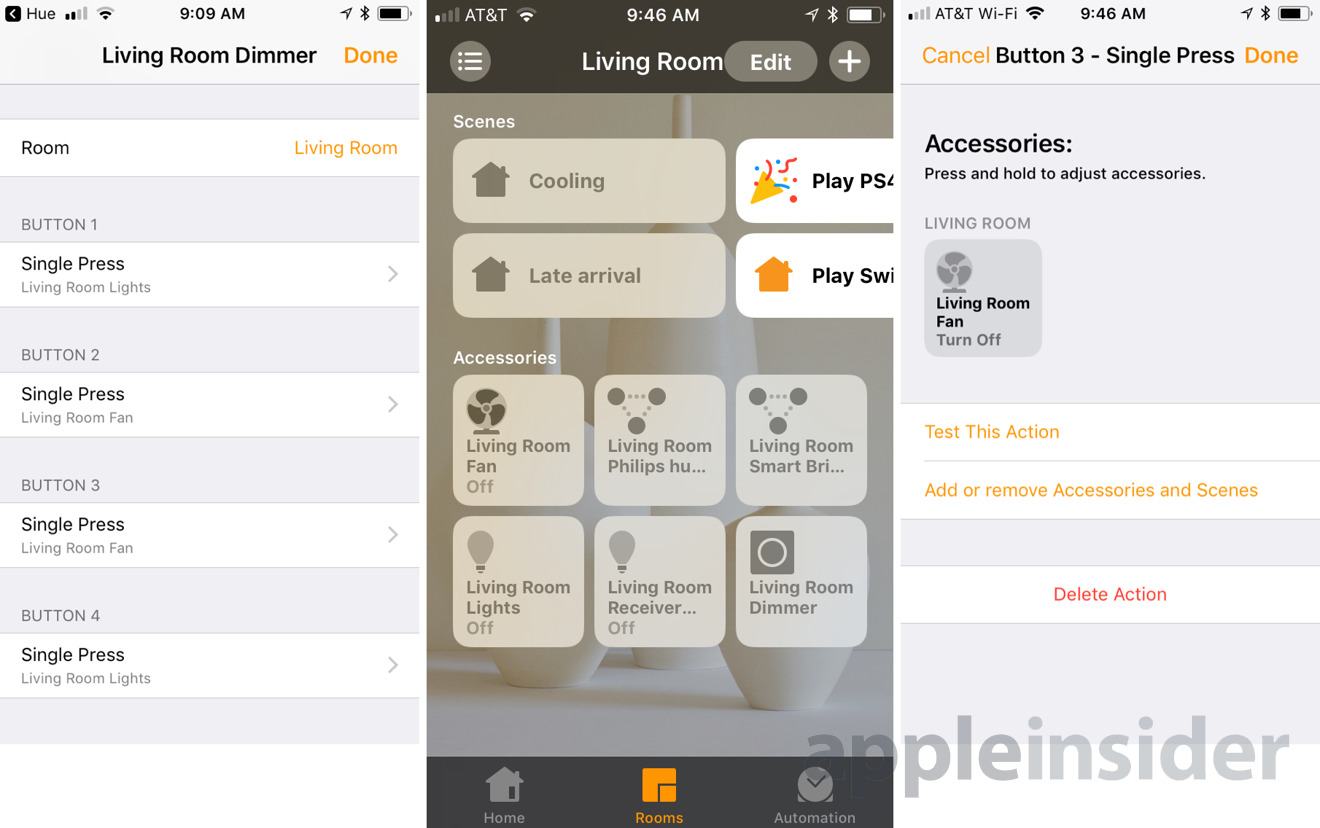
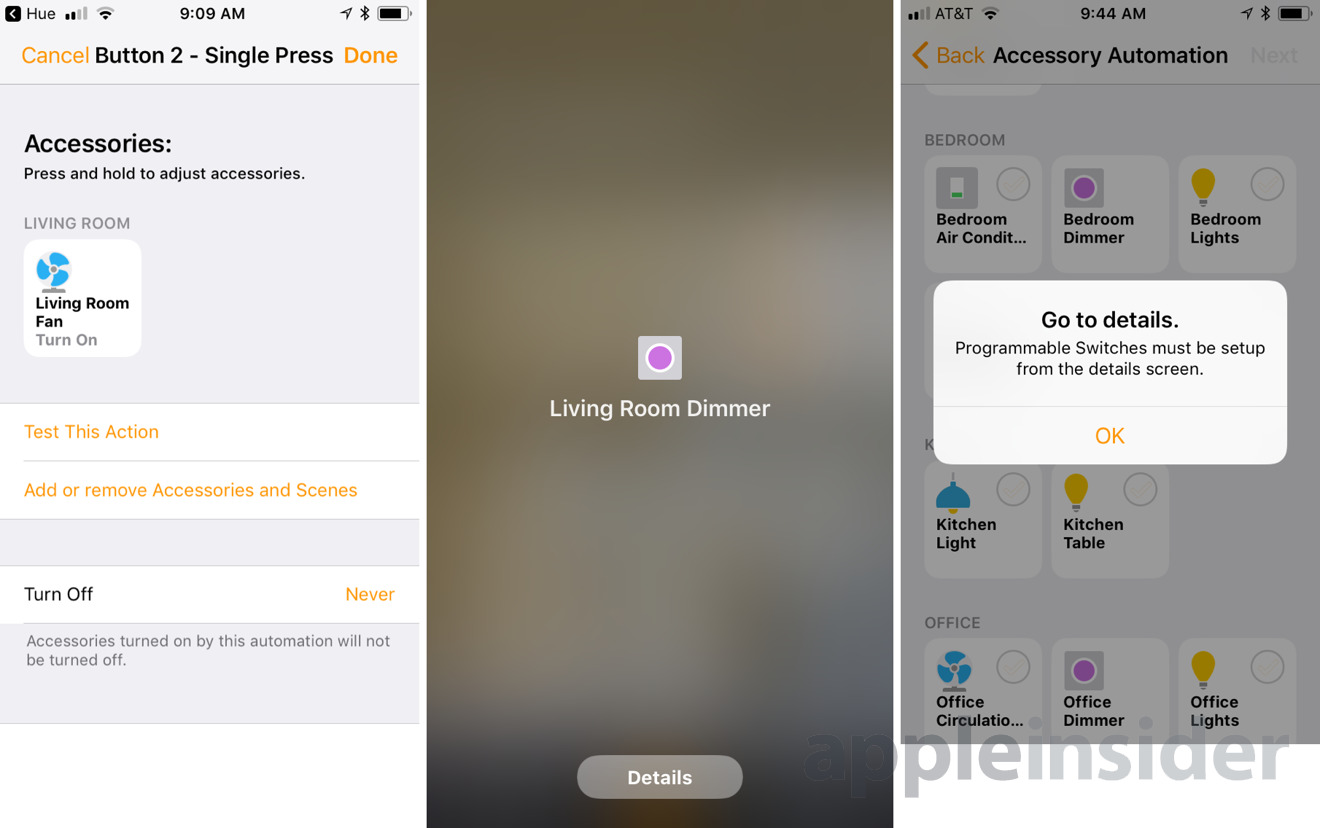
Once you have the configurable controls open, scroll down to see a list of all four buttons on the front face of the dimmer. Here, you can configure them as you see fit.
Simply tap on the button you want to configure, then choose Add or remove Accessories and Scenes. This will present you with all of the scenes and accessories in your HomeKit configuration, and you can mix and match them as you see fit.
For example, in my configuration, I have a HomeKit-connected Lutron wall switch that turns a (dumb) ceiling fan on and off. But the physical switch for the fan is in a rather inconvenient place, while my Philips Hue dimmer is mounted in a more accessible location.
I don't use the dimmer controls on my bulbs very often, so I instead replaced the dimmer buttons on the Philips switch to turn my ceiling fan on and off. The top "brighter" button (button 2) turns the fan on, while the lower "dimmer" button (button 3) powers it off.
The remaining "On" and "Off" buttons (buttons 1 and 4) on the Philips switch continue to control the lights in my living room. But now they are configured to do so through the Apple Home app instead of the Hue app.
Go wild (with some caveats)
The aforementioned setup is admittedly rather simple — the magic of HomeKit is that you can get nearly as complicated and specific as you see fit.
For example, because it is now connected to the larger HomeKit ecosystem, a single button push can now control non-Hue lights in tandem with Hue lights.
Or, if you want, anything other than lights. Perhaps you want to use the brightness controls to adjust the temperature settings up and down on your air conditioner, or maybe to adjust your HomeKit window shades while also changing the lights.
Consider a single button press that triggers a custom bedtime scene — dimming the lights, raising the window shades, lowering the air conditioner's temperature, and powering a smart switch that controls a white noise maker.
Unfortunately, the update does not make the switches compatible with the more complex automation controls in the Apple Home app. If you try to set up an automation using a Philips Hue Dimmer Switch as a trigger, you're told to configure the switch through the details screen.
This is different from Lutron in-wall switches, which can be configured to trigger automations within HomeKit. But those Lutron switches and dimmers are also pricier than the Philips product.
Regardless, with smart home accessories, it's good to have options. The HomeKit update to Philips Hue Dimmer Switches expands the lineup in a meaningful way, giving users more ways to control and customize their connected home.