
If you want to play games on a Mac that has lower specifications than ideally needed to play properly, it is possible to take advantage of the hardware of a more powerful Mac or PC elsewhere on the home network to have a more enjoyable gaming experience. AppleInsider explains how to set up Steam's In-Home Streaming function to remotely play your game collection.
As newer games are released, the specifications needed to play them smoothly continue to rise, and can end up being unplayable on some desktops. In the event that there happens to be a second computer that's more powerful and more suitable for gaming, the obvious answer is to use that one, but there are situations where it is unfeasible.
For example, the more powerful computer could be in a completely different place in the house to where you would prefer to play the game. Maybe there's a Mac mini connected to a large living room TV that isn't great at displaying games, but a Mac Pro in the home office which can easily do the job, but you don't want to move.
Valve Software's answer to this is built into the app for the Steam online game marketplace: Steam In-Home Streaming.
Using two computers over the same network, the powerful host computer can play the game and send a video stream to a client desktop, which displays the image. Inputs taken from peripherals, like keyboards and game controllers, are fed back from the client computer to the host, which then performs the commands in-game.
The feature also offers the benefit of not having to install the game on the client desktop at all, only the host, minimizing the amount of storage used up by game files. It also expands the Mac's game collection, as the stream works across Windows and Mac desktops, meaning Windows games are playable on a Mac in this way.
Requirements
Two computers are needed for In-Home Streaming: the host and the client. Originally the host was limited to Windows PCs, but it has since been updated to work with Mac desktops, and Linux.
In terms of hardware, Valve recommends a minimum of a quad-core processor for the host. Client desktops can be lower-powered but must be capable of H.264 decoding, preferably using hardware acceleration.
For Mac specifically, the host needs to run OS X 10.8 at a bare minimum.
Both systems need to be on the same network for In-Home Streaming to function. It is recommended to use a wired network due to the high amount of bandwidth required, but there are also claims it will work on wireless N and AC networks and some powerline networking equipment.
As it is a feature of Steam, the software itself has to be installed on both the host and client, which can be downloaded from the store's website. It is also expected that the user has an account set up with Steam, has games they want to play on the account, and has already installed them on the host.
Setting up on Mac
Launch Steam on both the client and the host systems, and log in to the same account on each desktop. For Mac users, the Steam client can be accessed within the Applications folder in the Finder.
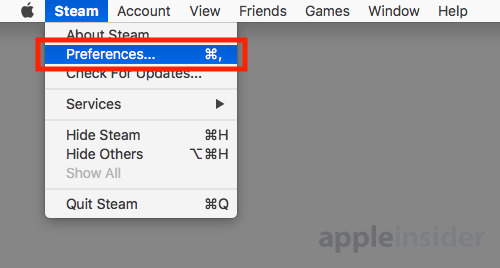
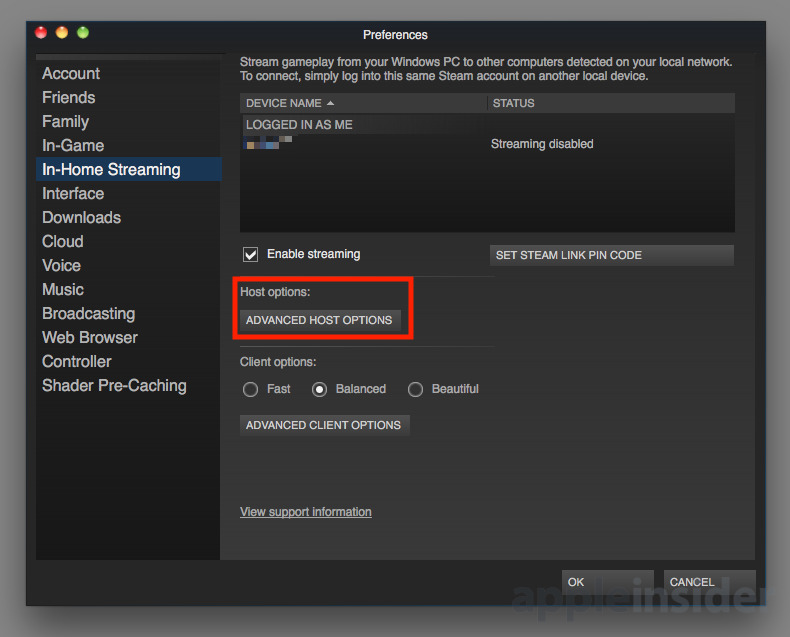
On both computers, select Steam in the Menu then Preferences. In the Preferences Window, select In-Home Streaming in the left-hand column, then click the tickbox next to Enable streaming if one is not present.

This window will show other Mac and PC desktops on the network that are logged into the same account, as well as whether they are enabled for In-Home Streaming or not.
Host Mac Settings
To fine tune the host's settings, click the Advanced Host Options button midway down the window.
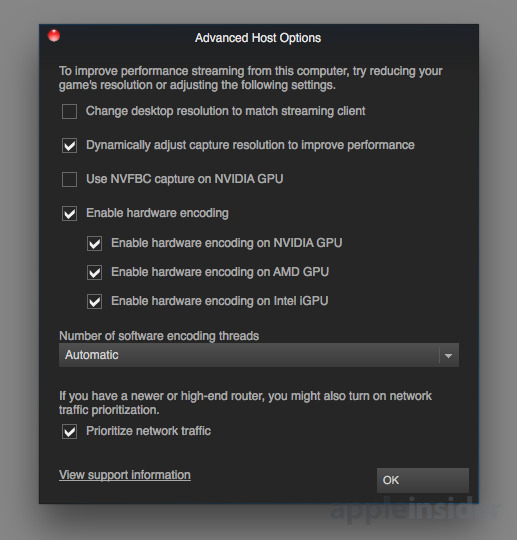
This new window will offer up a number of ways to change how the stream is generated on the host desktop, with the default options usually fine for most users. If you are familiar with the specifications of the client Mac, you could select or disable the hardware-encoding and capture options to suit your hardware, but it isn't essential.
The top option, "Change desktop resolution to match streaming client," will aim to match the resolution of the client system for a better experience, but this could potentially cause performance issues if the host is not capable of rendering the game at that level. Keeping this switched off will instead send the same resolution as the game is already set to run at on the host.
The "Dynamically adjust capture resolution to improve performance" setting is self explanatory, and is generally a good idea to keep enabled. The stream will try to reduce in resolution if issues occur, like network lag, instead of stopping completely or stuttering at a higher resolution.
If software encoding is employed but it is choking the gameplay, you can limit the number of threads used in the Number of software encoding threads dropdown box instead of allowing Steam to automatically manage it for you.
Lastly, it is highly advised to enable "Prioritize network traffic," as for newer routers with network traffic prioritization features, this will limit the impact of other network users on the stream's connection.
Close this window by clicking OK.
Client Mac Settings
The main Preferences window includes three basic options for how users want the stream to appear from the host on the client. Balanced is the default, while Fast will prioritize speed rather than picture quality when decoding the stream, and Beautiful opts for higher quality images but potentially lower frame rates.
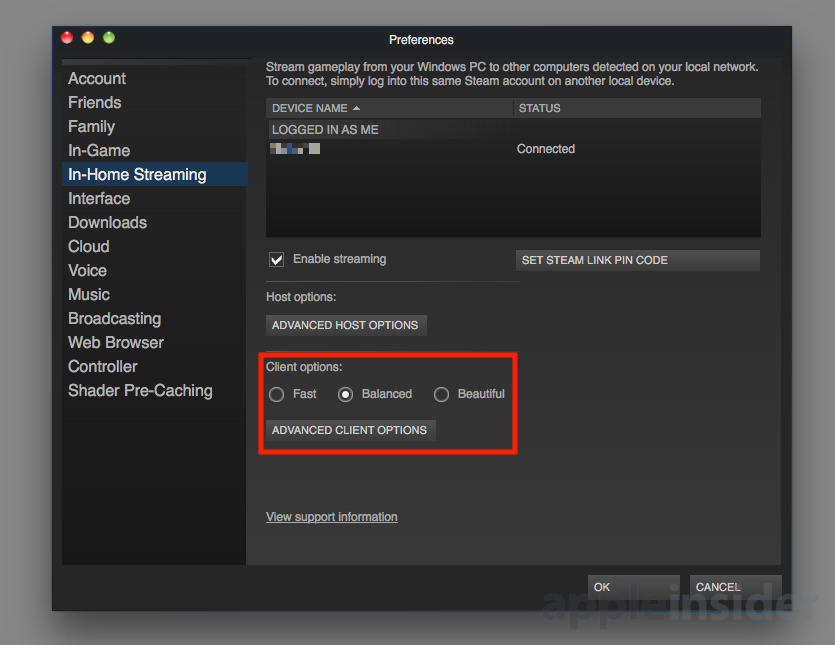
More settings are available by clicking Advanced Client Options.
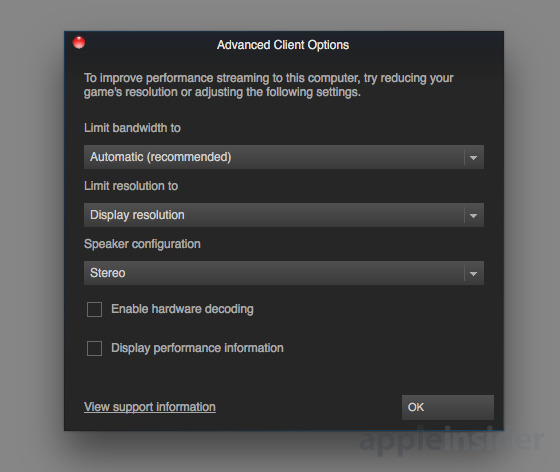
In cases where the network is being used for other tasks or bandwidth needs to be preserved for various reasons, the Limit bandwidth dropdown box can restrict the stream's bandwidth usage. Generally, the more bandwidth is used, the better the stream will appear on the client.
The "Limit Resolution" dropdown gives the client the ability to limit the stream's resolution, which can reduce the overall bandwidth used or sacrifice the resolution in favor of higher frame rates. The stream can go as low as 480p, with the upper limit being the display resolution of the client system.
There is support for multiple speaker configurations in the menu, allowing clients to request stereo, quadrophonic, and 5.1 surround sound from the host, if available from the game and usable on the client. It is usually advised to stick to Stereo to preserve bandwidth usage for the visual element of the stream.
A tickbox is also available to enable hardware decoding on the client, if it has supporting hardware. If it does not, this is instead performed in software, and may be more taxing to the client Mac overall.
Lastly, the "Display performance information" tickbox will show data relating to the stream on the client's screen, making it useful for diagnosing a poor quality video feed from the host.
Click OK to close the window.
Starting the stream
Ensure Steam is running on both the client and the host desktops.
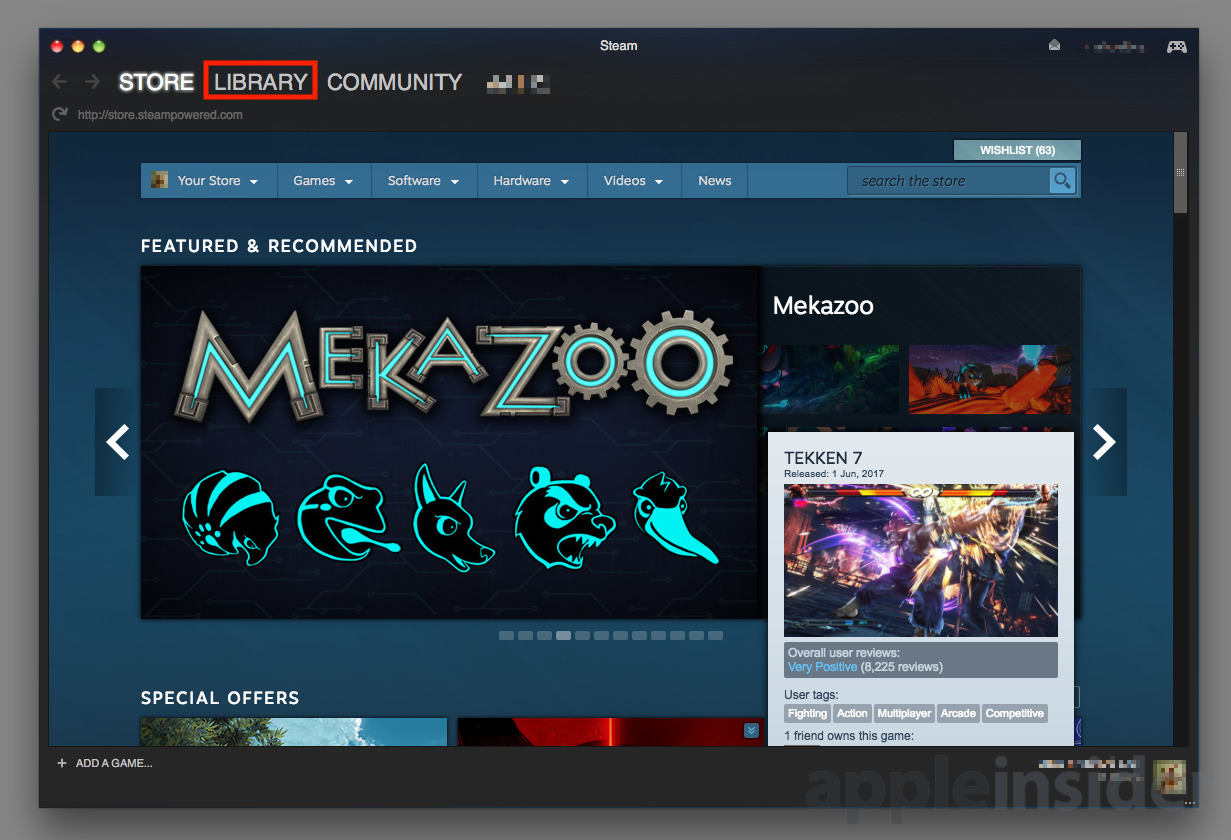
On the client, select Library in the main Steam window, and select the game you wish to play from the left-hand column. Available to play games will be brighter on this menu, regardless of whether it is installed locally or streamable.
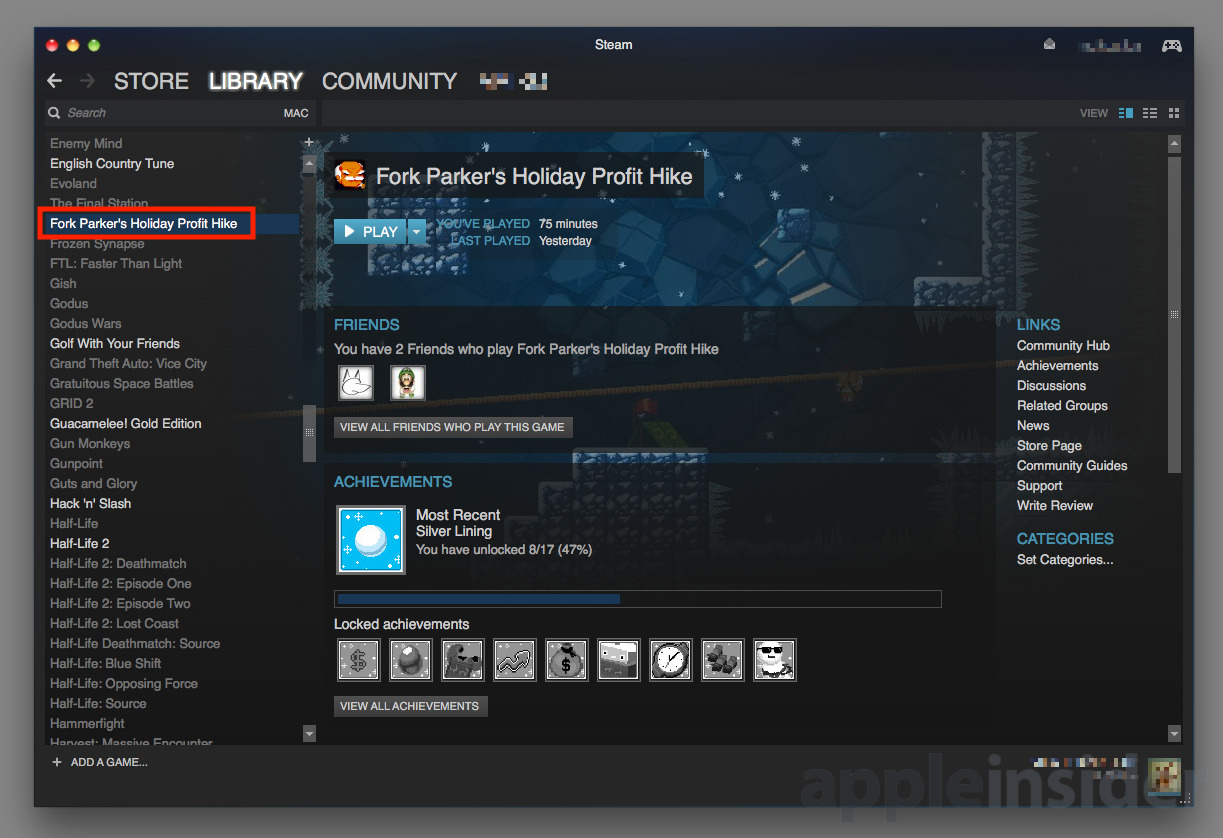
In the selected game's screen, click the arrow next to Play to bring up a dropdown box, and select the host system from the list. Click the now-renamed Stream button to launch the game.


On the first occasion the Host will be used, the client will show a notification that actions need to be carried out on the Host. This refers to drivers that need to be installed by Steam in order to stream.
On the Host, click Install on the Gamepad Driver Update window, and pass through the installation process for Steam Input. Typically this requires clicking Continue, Install, entering your macOS account's password, authorizing it in the Security & Privacy settings menu following the "Allow" notification, Ok on the notification, then Close once the installation completes.


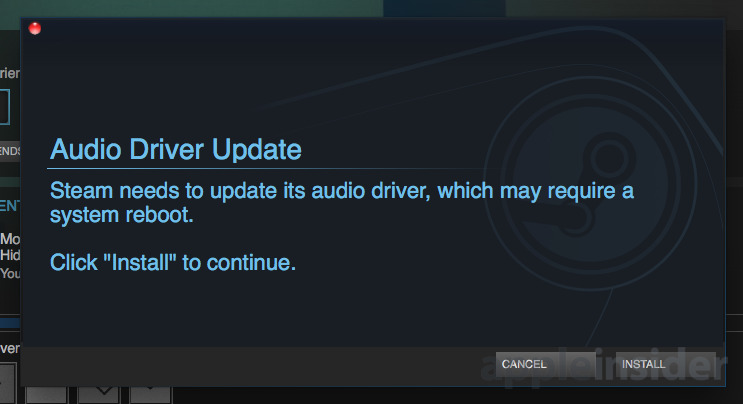
Attempt to run the game stream again on the client. A second host actions notice will be displayed, this time for audio drivers.
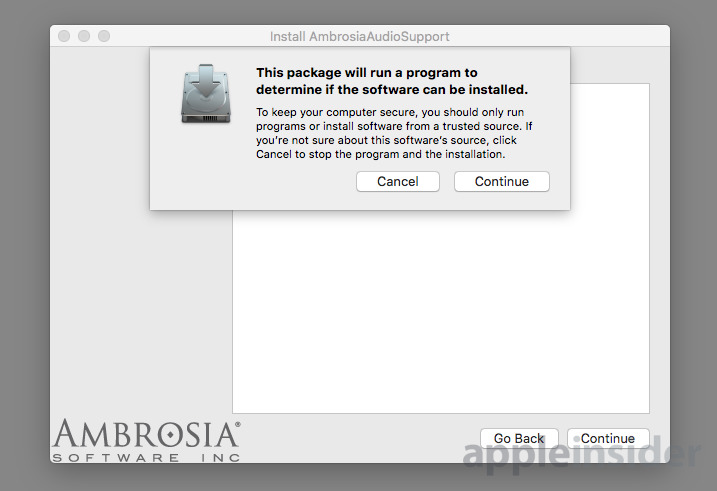
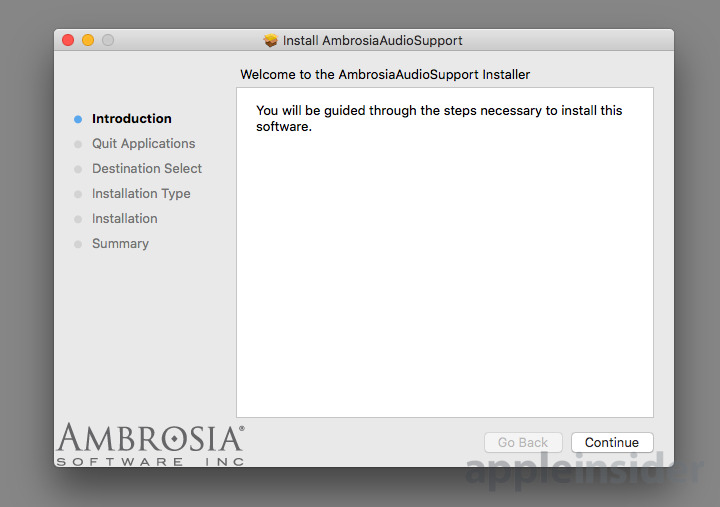
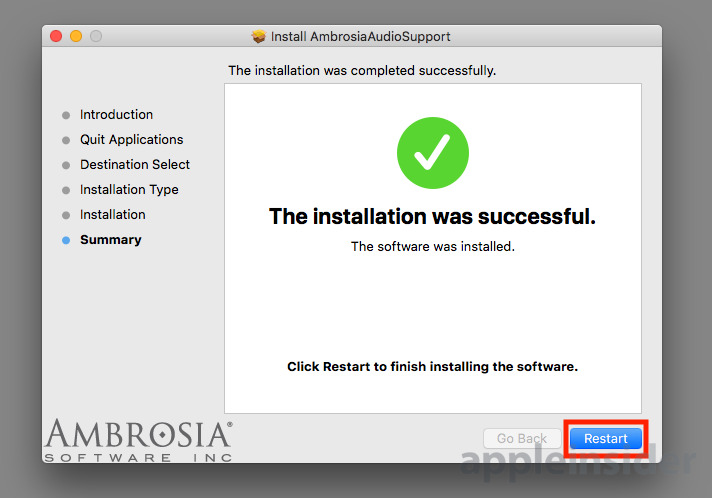
On the Host, click Install on the Audio Driver Update window, and go through its installation process. This time the path for the default installation of Ambrosia AudioSupport will be Continue on the package installation determination notice, Continue on the welcome screen, Install, enter the Mac account's password, Continue Installation at the restart notice, and authorizing the Security and Privacy settings to allow it to continue.
At the successful installation screen, click Restart to reboot the Mac.
Once it has booted and been logged in, load Steam again on the Host, and reattempt to load the stream from the client. On this third attempt, the host should start up the game and commence the stream, which will then be displayed and playable on the client, if everything is installed correctly.
Note that this process is shorter for future play sessions, as the drivers only need to be installed once.
A Word on Windows
As games can be streamed from a Windows host to a Mac client and vice versa, it is worth covering how to perform this in Windows. Handily, the basic instructions are the same for both platforms.
Once installed on Windows, launch Steam, click the Steam menu item in the top-left corner, then Settings. In the new window, select In-Home Streaming in the left-hand column, then follow the rest of the Mac guide above.
The main difference is in the driver installation for the host, as while the initial notice window will be the same for both GamePad and Audio drivers, the process of installing the drivers themselves will differ. Unless there is something specific to the host's particular Windows installation that needs attention, the default options will work fine.
Starting the game stream using Windows as a client is identical to Mac, once signed into Steam.