Photographers will be familiar with the editing tools offered by Photos in macOS, but sometimes the available selection just isn't enough. AppleInsider shows how to add more options to the editing roster, by taking advantage of extensions offered by other image editing applications.
Photos is an extremely handy application that has built-in tools to alter an image, allowing users to improve upon the original. The Auto Enhance tool, as well as the finer controls for individual changes like white balance and level alterations, are likely to be more than enough to make most images stored in the user's Photo Library look good.
The app does have its limits, which may force some users to export the photograph into their image editing tool of choice to make the level of changes they want. Sometimes a third-party app may be able to perform some of the editing functions Photos offers, but better or in a way the user prefers.
In many cases, it is possible to access some of the tools included in these image editing suites without having to leave Photos at all, via the use of extensions.
Editing with Extensions
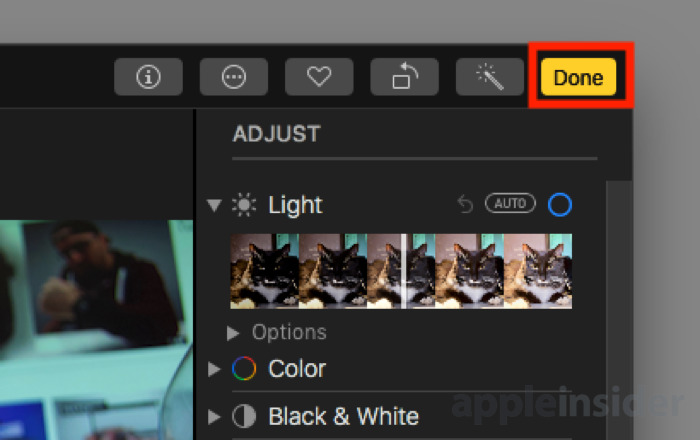
Open the Photos app, either via the Applications Folder or from the Dock. Once open, select the image you want to make changes to, and click Edit in the top-right corner of the window.

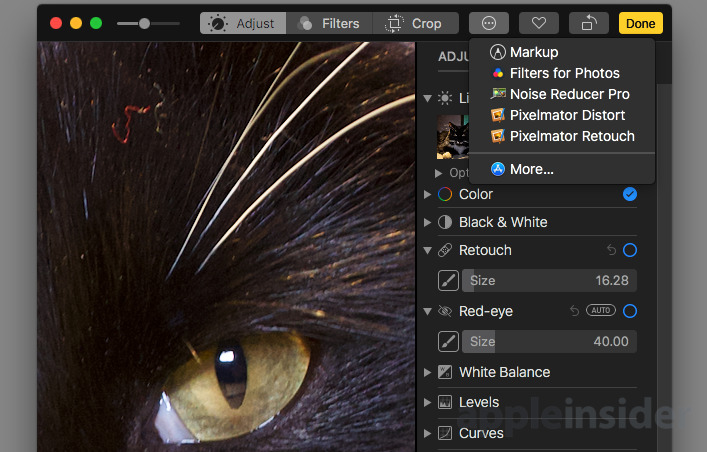
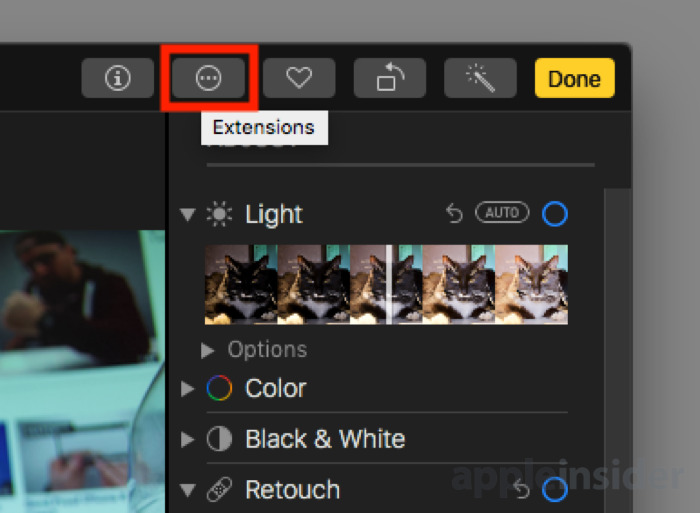
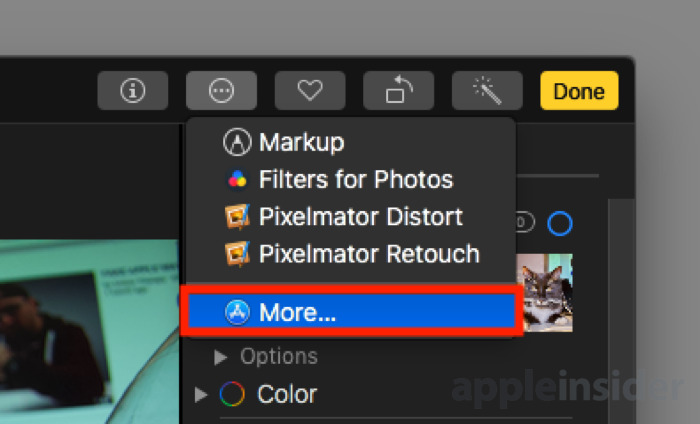
In the editing screen, click the Extensions icon at the top, which looks like a circle with three dots in the middle. This will bring up a list of available extensions from other apps that you can use to alter the image. Click an extension to use it.
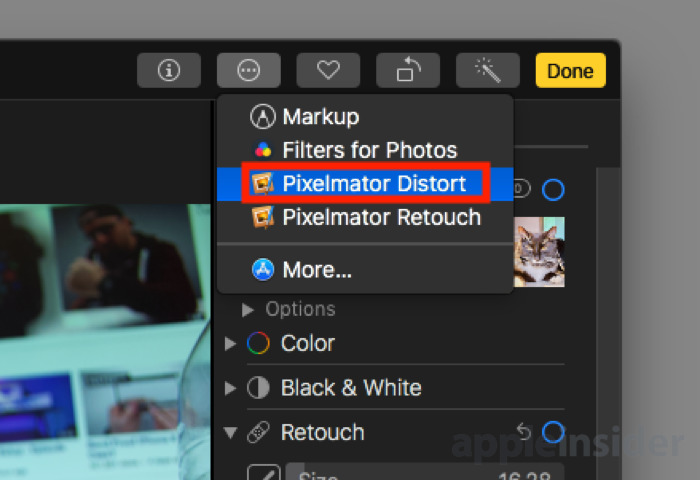
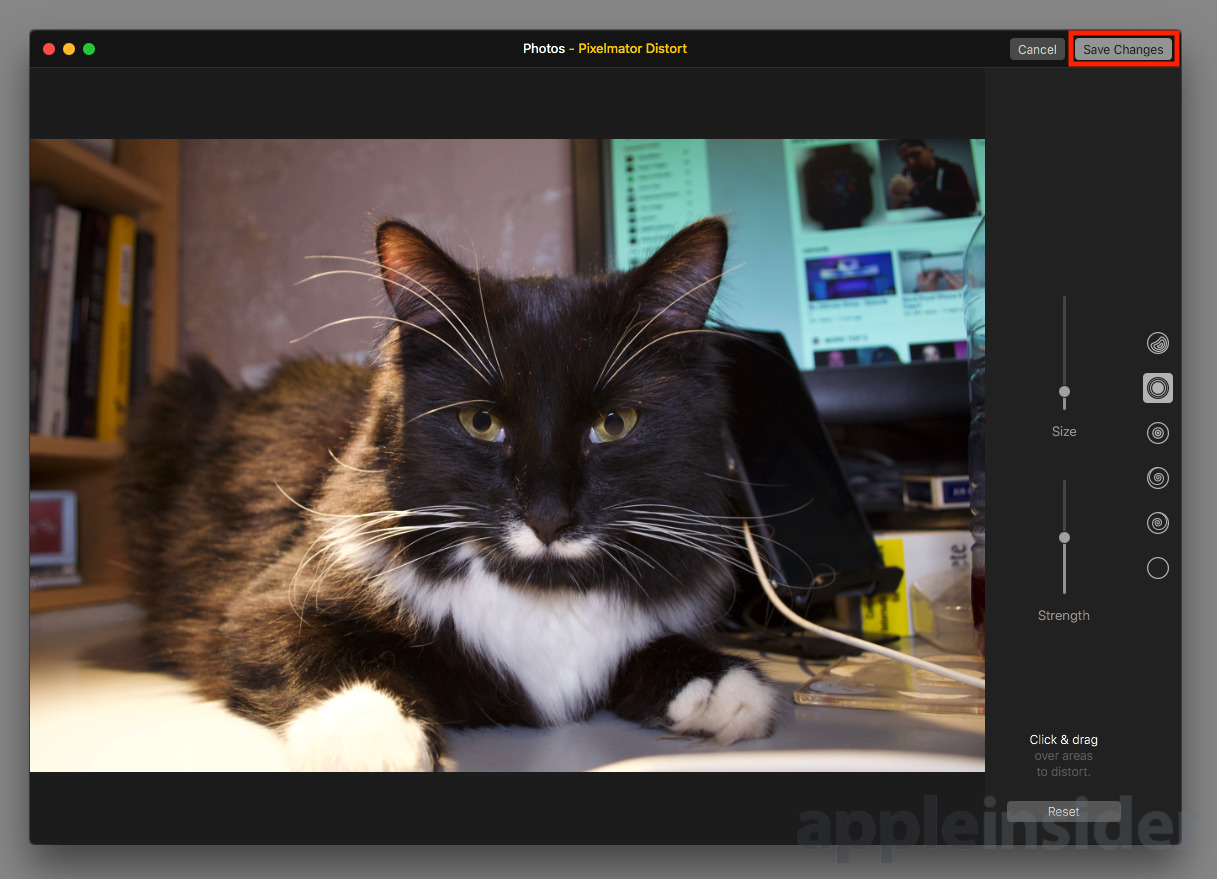
Depending on the selected option, the interface will change to provide more editing tools specific to that extension. This will vary between extensions, so some experimentation from the user is required at this point.
Once the edit has been made, click Save Changes in the corner to apply the effect to the image, and to return to the main Edit view.
At this point you can make edits with another extension or Photos' own tools. Once finished, click Done in the top right corner of the window to complete the editing process.
Acquiring Extensions
At a minimum, the Extensions selection will include Markup, but if there aren't any other options, it's time to install some new apps.
Click the More... option in Extensions to load up the Mac App Store, which will bring up a list of imaging apps that have extensions supported by Photos.
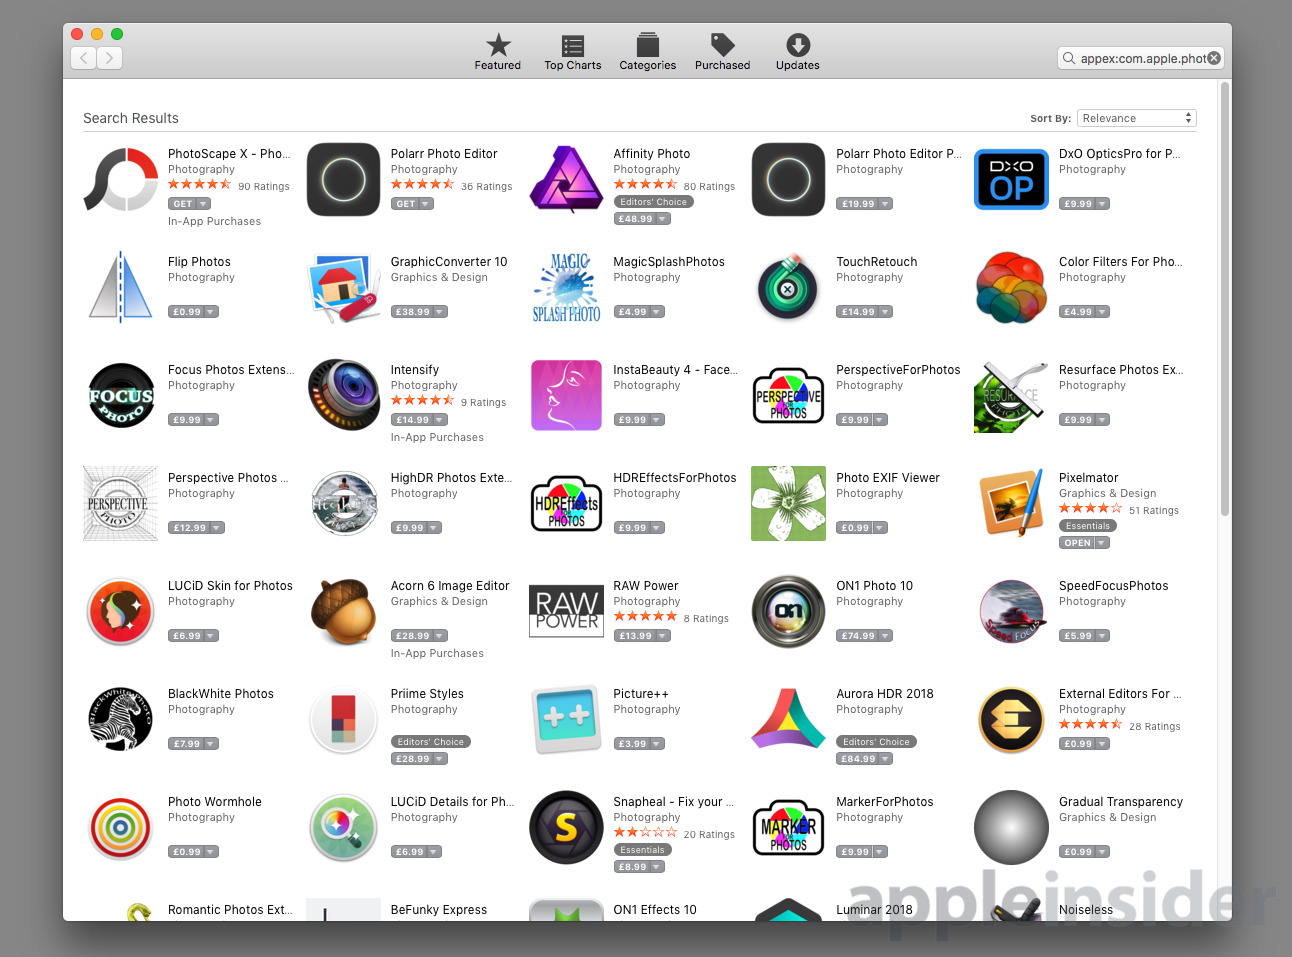
Install the app you want to use by clicking the Get button next to the icon, then Install App. If the word Get is replaced by a price, you will have to pay for the app before installation.
In most cases, the new app should automatically appear on the Extensions list. If not, you may need to separately enable extensions from the app before they become available in Photos.
Editing in apps, saving to Photos
If the extensions still do not give enough options, there's always opening the image in a separate editing tool. While you can export the image, edit, then reimport it to Photos, there's an easier way.
Right-click the image and select Edit With, then the app you want to use from the submenu. The photo will then open in the selected application.
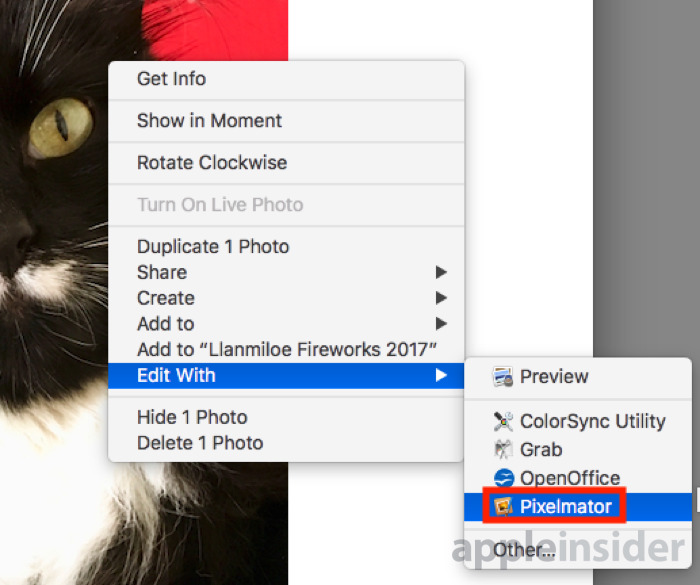
Once changes have been made, save the file in the editing app as normal. The result will be automatically saved back in Photos.