The end the AirPort product line could cause some issues in the future, when users want to back up their Mac's data using Time Machine but find their Apple network appliance has died completely, with no immediate replacement available. Here's how to set Time Machine to use a NAS or another Mac's storage elsewhere on a home network.
Apple announced on Thursday that it would be officially discontinuing the AirPort product line, effectively ending not only the router but also the hard drive-equipped Time Capsule, which allowed for Time Machine backups to be made over a local network. This effectively made it very easy for Mac owners to set up a backup process, without needing to connect an external drive to their devices, a highly useful feature for the portable MacBook line.
While Apple has advised existing stock will still be sold in stores and online until existing supplies are exhausted, it is unknown when Apple will run out of its remaining hardware. At some point, users will have to consider alternative ways to have Time Capsule-like cross-network backups, but without the original hardware.
Some network attached storage (NAS) devices do offer some Time Machine compatibility, but not all provide this functionality. There's also the potential of setting up a dedicated Mac as a home storage appliance, though while there is always the opportunity of setting up a home server, just using one for Time Machine storage doesn't require too much effort to set up.
The Terminal Method
If you own a NAS that doesn't seem to have full Time Machine support, it is possible to use these network drives with Time Machine, but with a little extra work. Time Machine defaults to using locally-connected external drives and the aforementioned discontinued hardware, and sometimes just doesn't bother offering other locations up for use, even though they may well be perfectly usable.
Warning: the following instruction is not officially supported by Apple. The decision to do this is up to the user, but it is advised to make any back-up preparations before continuing.
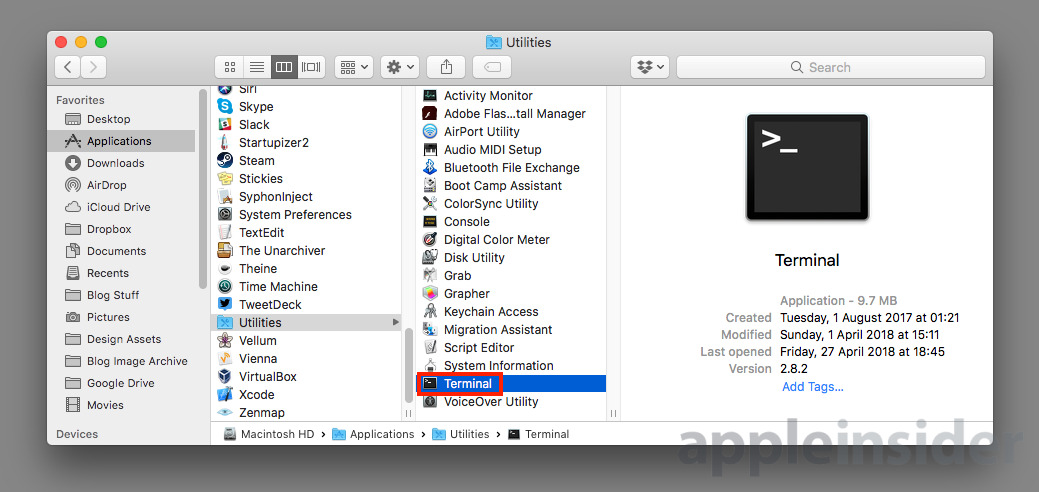
To nudge Time Machine to use unsupported volumes, open a Terminal window. You can do this by accessing the Applications folder, scrolling to Utilities, then Terminal.
Enter the following command into Terminal:
defaults write com.apple.systempreferences TMShowUnsupportedNetworkVolumes 1
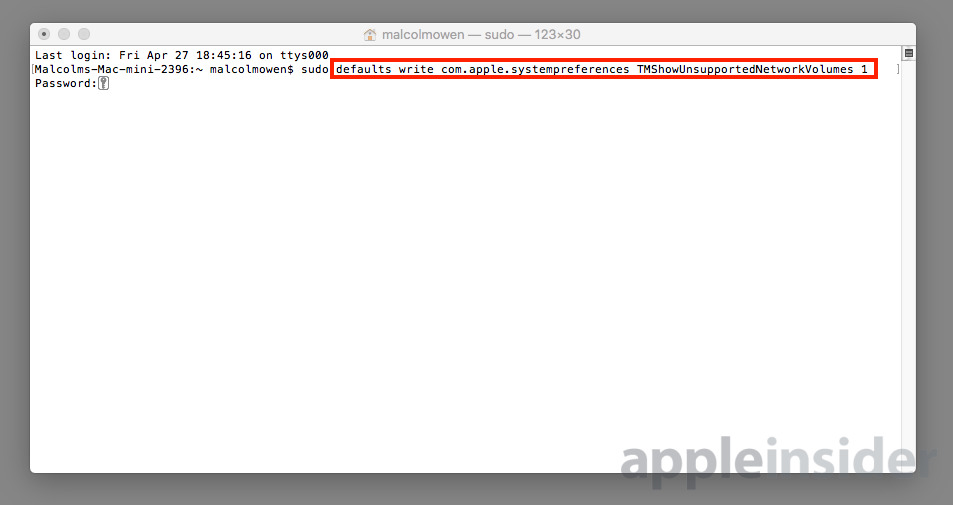
If this command doesn't work immediately, you can also try again by typing sudo before the command. This will usually result in having to authenticate by typing the account password into Terminal.
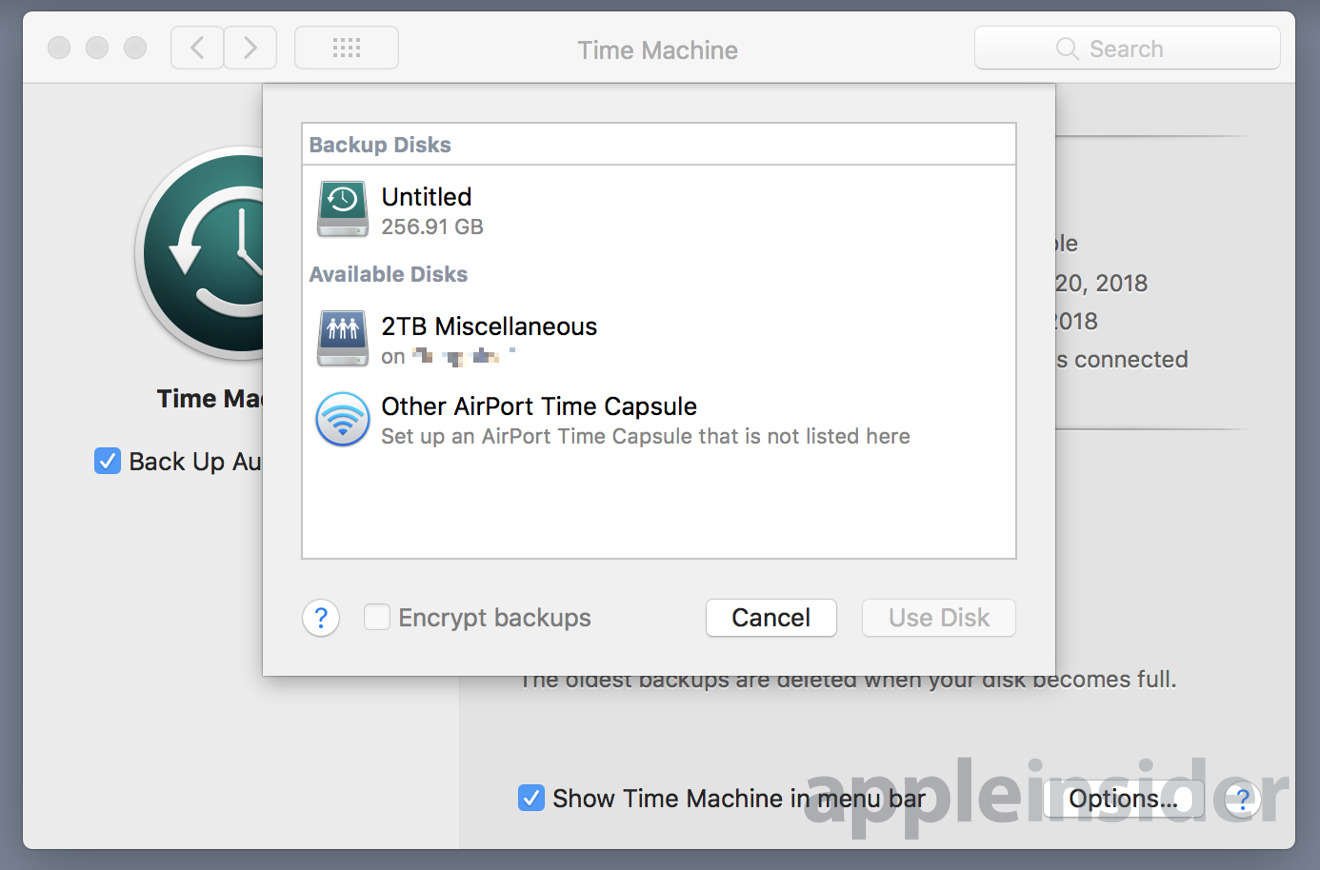
Once entered, check Time Machine, and it should show extra network drives on the list.
To disable this, enter the same command into Terminal but change the 1 to a 0.
Using Another Mac
If you have a Mac going spare with a considerable-enough hard drive, you can create a shared Time Machine backup folder on it for any machine to use, without relying on a terminal command to see it.
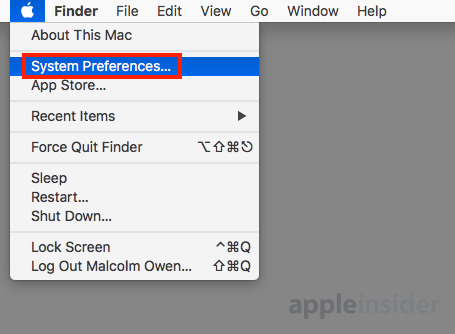
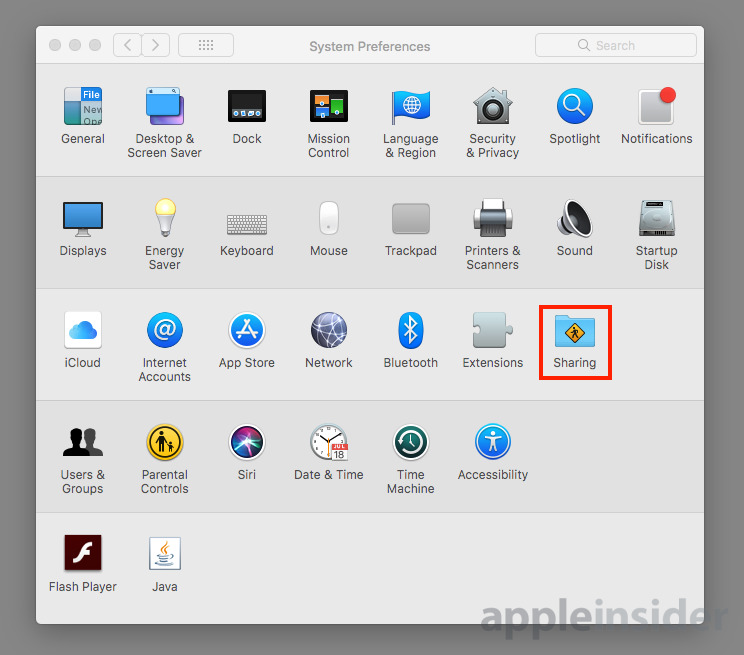
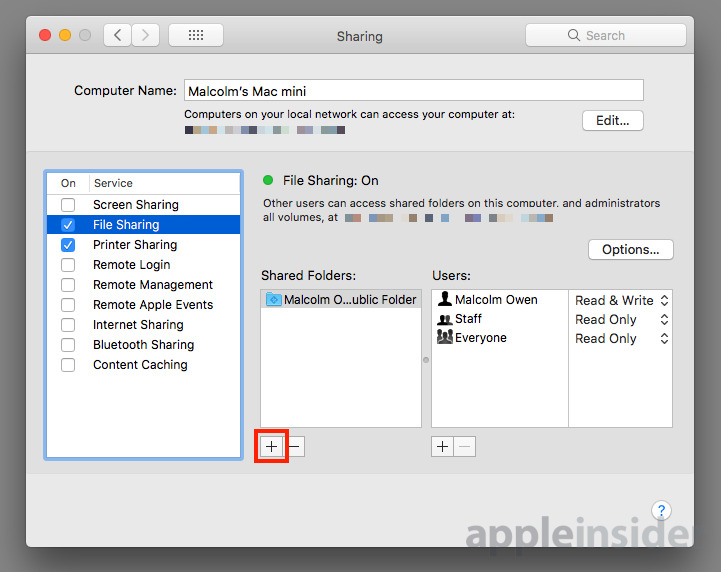
Click the Apple icon in the Menu Bar then System Preferences, then Sharing.
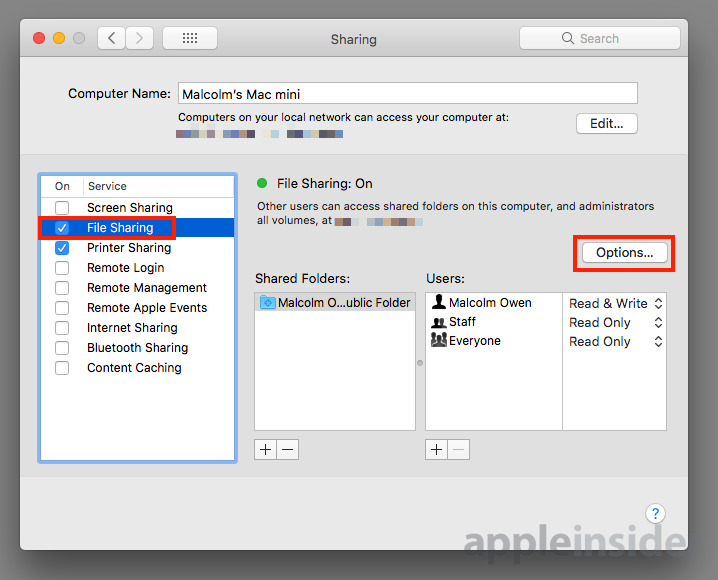
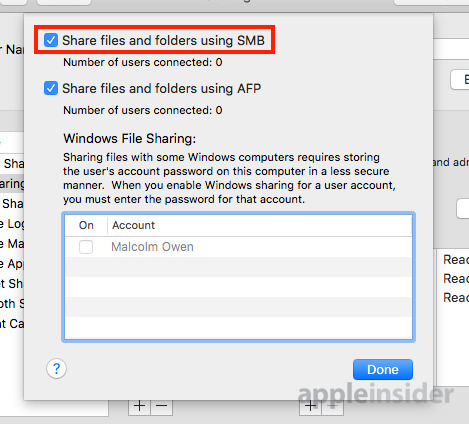
Tick the File Sharing checkbox, click Options, then make sure Share files and folders using SMB is enabled before exiting that panel.
Under the Shared Folders list, click the plus button. Select the folder you want to allow other Mac systems to access over the network, and click Add.

Right-click the newly-added folder and select Advanced Options. In this new window, make sure SMB is selected in the Share Over menu and tick Share as a Time Machine backup destination.

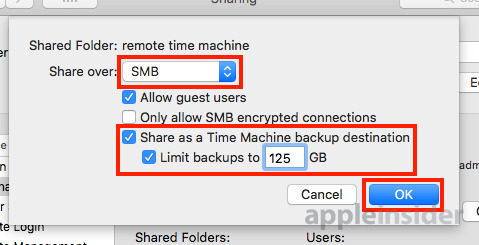
At this point, you can also set a limit for how much of the Mac's storage can be set aside for remote Time Machine backups. Once completed, click OK.
Further Notes
The instructions above do not explain how to set this up with a Windows-based machine, and your NAS may not work with it either. We'll be covering how to force that incompatible NAS or idle PC to do your bidding in regards to Time Machine in a future tip.
Also remember that, far from just using another Mac as Time Machine storage, it is worth exploring the possibility of using the spare machine as a macOS home server. It can do quite a bit more than holding files, and may be worth looking into, depending on your level of experience and computing requirements.