The iPhone XR starts arriving on Friday. Before your shiny new device arrives, take a minute to do these eight simple steps to ensure that you're getting the most out of your investment, and have a smooth migration from your old device.
Editor's note: we first ran this video when the iPhone XS hit customers' hands. The advice still applies, and works great if you're getting a new iPhone XR
1 - Backup your old iPhone the correct way
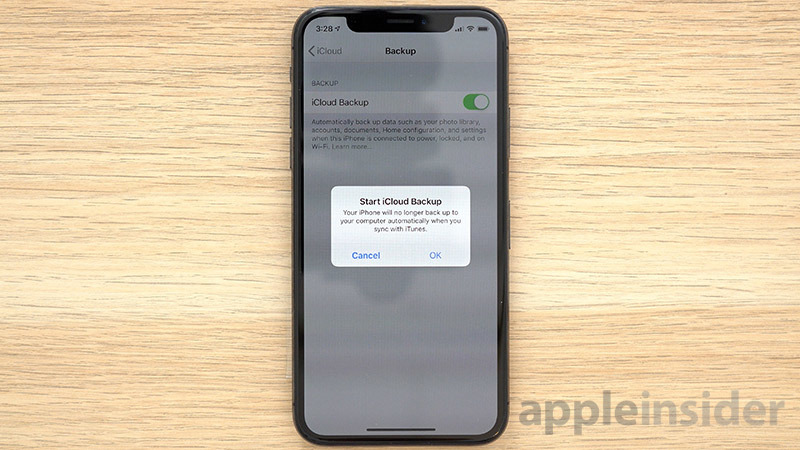
The first step is very important. If you're upgrading from an old iPhone, you need to make sure that its data gets backed up the correct way before attempting to transfer it over to a new device.
The easiest way to conduct a backup is through iCloud. Navigate to Settings > Apple ID > iCloud and make sure everything you want backed up is toggled to the "on" position. Scroll down to iCloud Backup and tap Back Up Now.
If you need more space and haven't purchased an iCloud storage plan, now is the time to do so. Tap back to get into iCloud settings, scroll to the top and tap Manage Storage. From here, you can update your storage plan to a higher tier.
You can opt to restore your new iPhone from the saved iCloud backup during the setup process.
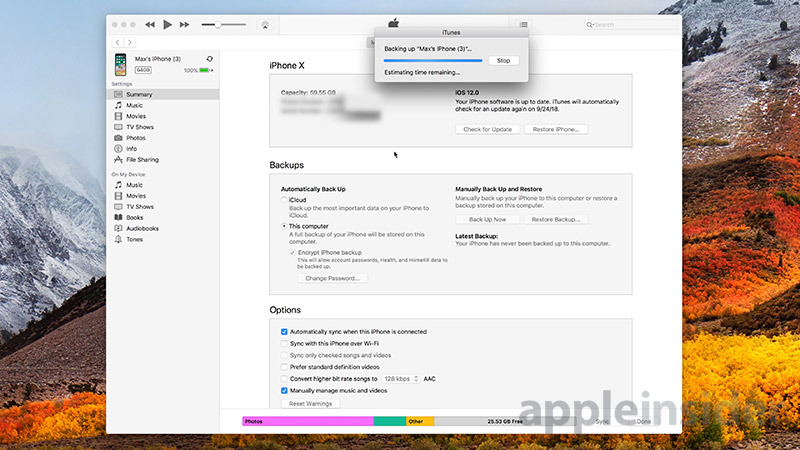
The next best option is iTunes, which you can download for free on Mac or PC.
Connect your iPhone to your computer and when prompted enter the displayed passcode on your iPhone to authorize the connection. Click on the iPhone icon under the music controls and select This computer in the Backups section. Make sure to check the box that says Encrypt iPhone backup and enter a password. The phone should start backing up automatically, but if it doesn't, simply click Back Up Now.
If you don't encrypt your backup, your app passwords won't be saved, meaning you'll have to log into apps like FaceBook and Instagram all over again.
When you get your iPhone XR, simply choose the option to restore from a backup, and connect it to the same computer.
2 - Learn new gestures
If you're coming from an iPhone X, or have seen Apple's barrage of promotional videos for last year's flagship, you probably already know a lot of the basic gestures used to control the iPhone XR. If not, here's a short list of the most important commands:
- Navigate to home screen — swipe up on home bar
- Notification Center — swipe down from top of screen
- Control Center — swipe down from top right of screen
- Siri Search — swipe down from center of screen
- Switch between apps — swipe left or right on home bar
- App Switcher — swipe up from home bar and hold or perform a swooping motion towards the right edge of the screen
- Reachability — swipe down from just above the home bar.
- Siri — press and hold the side button
- Accessibility — triple tap the side button
- Screenshot — press volume up and side buttons simultaneously
- Power off and SOS — press and hold volume down and side buttons simultaneously
3 - Enable High Efficiency Formats
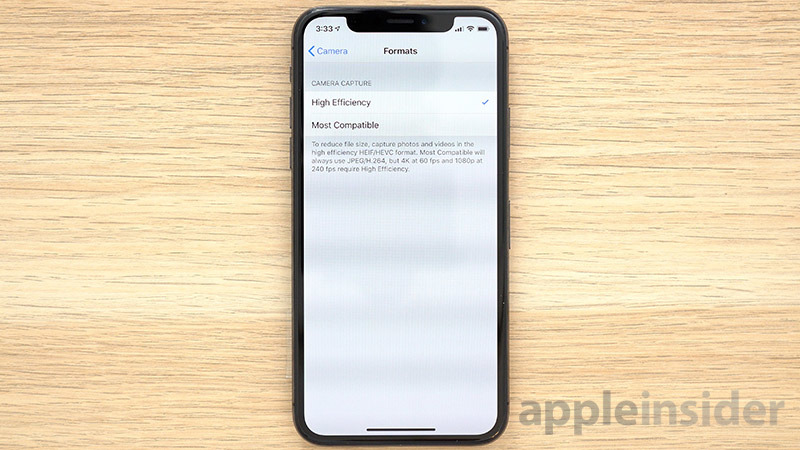
Take advantage of Apple's excellent image compression software by enabling High Efficiency formats for your iPhone's camera. When enabled, photos and video use about half as much storage as they normally would while maintaining high image quality.
Navigate to Settings > Camera > Formats and select High Efficiency. This is a must for anyone who takes a lot of photos or video.
4 - Set up Face ID and Safari Autofill
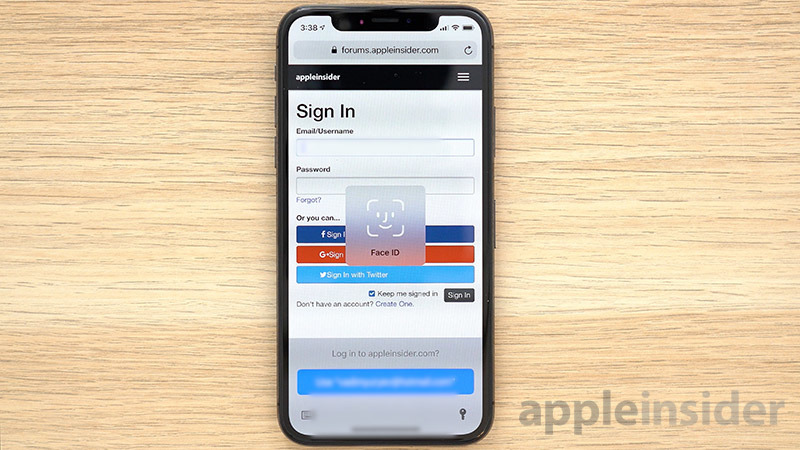
Head into Settings > Face ID & Passcode >Set Up Face ID, move iPhone in front of your face and tap Get Started. Looking directly at the device, position your face in the frame and rotate your head in a circle. Onscreen graphics provide confirmation that Face ID was accurately logged at all angles.
Next, select the phone features you would like Face ID to protect. Typically, we make sure each one is on, including Password Autofill.
Below app and system access choices is an option to set up an alternate appearance. This feature is designed to add flexibility to the facial recognition system — saving a profile while wearing prescription glasses, for example — but you can actually use it to set up Face ID for another person, allowing two people to have access to the same phone.
Users can elect to turn off attention awareness, which makes sure you're looking at the screen before unlocking, by switching off Require Attention for Face ID. Turning the feature off will speed up Face ID authentication at the cost of added security.
To set up Safari Autofill, go back to iCloud settings and make sure iCloud Keychain is on. Navigate to Settings > Passwords & Accounts and ensure AutoFill Passwords is enabled. Finally, head to Safari settings and tap on AutoFill. There, you can select your info, and enable contact info AutoFill. You can also enter your credit cards so they'll be available for payment pages.
Now when you surf the web and log into any account, you'll be asked to save your password to Keychain. Tap yes and your info will be saved into keychain.
In iOS 12, users can also integrate from their favorite third-party password manager, like 1Password or Dashlane.
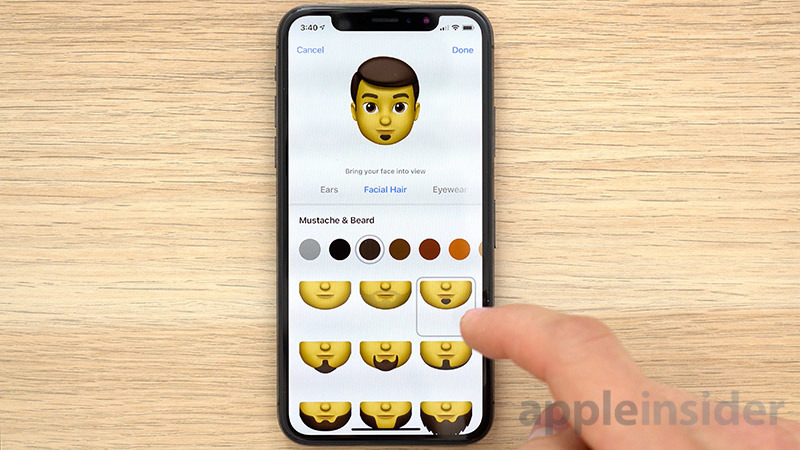
5 - Create your own Memoji
To take full advantage of Apple's new messaging features, you might want to create your own personal Memoji. Head into Messages, tap on a message, and tap the Animoji icon in the app bar. Swipe left to start creating your new Memoji.
An interesting change in iOS 12 is that Animoji now detects your tongue.
With the Animoji display open in Messages, tap on your Memoji to send a sticker or start a video clip that will be inserted in line with the text thread.
6 - Customize display settings
Navigate to Settings > Display & Brightness to customize how your phone's display reacts in different situations. Disable Raise to Wake if you don't want the display to automatically turn on when you pick up your iPhone.
You can set the auto-lock timer to something a bit longer than the default 30 seconds, and schedule and customize Night Shift so your iPhone won't keep you awake at night. You can also disable True Tone, which makes the screen look paper-white in any lighting condition.
Auto Brightness can be enabled or disabled in Settings > General > Accessibility > Display Accommodations.
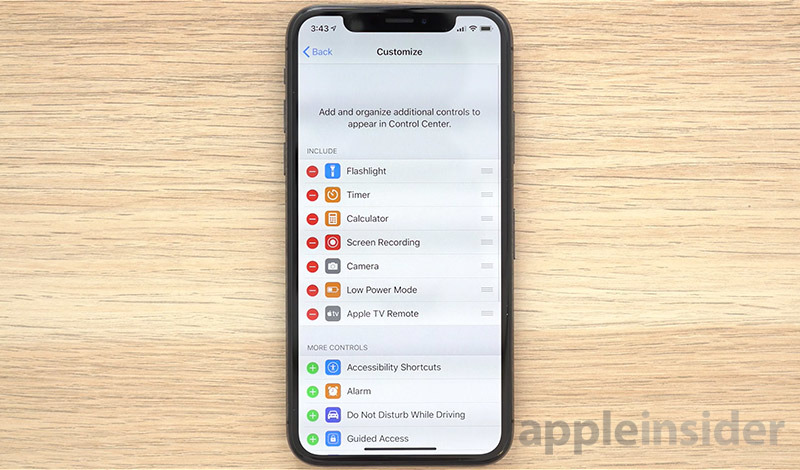
7 - Customize Control Center
When you first get your new iPhone, Control Center will likely look pretty bland. Head to Settings > Control Center and tap on Customize Controls. Here, you can easily add and remove controls for Apple TV Remote, Notes, Screen Recording and more.
Add features by tapping the green "+" icons to add them, remove them by tapping the red "-" icon and rearrange them by holding and dragging the handlebar icons.
In Control Center, users can conduct force-touch gestures on each control to get additional options.
8 - Protect your iPhone XR
Last but not least, consider buying AppleCare+, or at least make sure you buy a good screen protector and case.
There's a number of changes to AppleCare+ this year, and you have up to 60 days after your purchase to decide whether you want Apple's warranty protection.
You can find the best — and cheapest — case and screen protector options on Amazon. If you're looking for the best case out there, we would recommend one of Apple's first-party accessories.
 Vadim Yuryev



-m.jpg)




 Wesley Hilliard
 Malcolm Owen
 Amber Neely
 Christine McKee
 Andrew Orr

 Mike Wuerthele and Malcolm Owen




11 Comments
Am I overthinking this?
I'm thinking of starting all afresh, getting the Max/AW (cellular) with a new email address/AppleID/PW, new phone number, no third-party apps, no Google, Amazon, Facebook, MS.
Thoughts?
Best.
Very helpful video looking forward to the one on the Apple Watch.
I've created my own Memoji on my X. I wonder if it will get backed up and restored onto my Xs Max when I get it.