Safari Notifications can be great, but a flood of them can hide what you really want to see. Here's how to get them under control, and specify which notifications will be displayed to you in macOS.
There's no end-all, be-all set of steps for enabling or disabling notifications — the process is highly dependent on your personal preferences. Instead, it mostly boils down to learning what each option does. This guide is designed to show you the plethora of options you have to manage notifications in macOS Catalina.
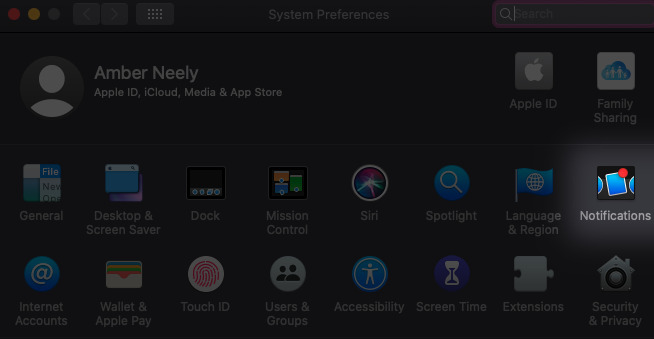
The location of Notifications within System Preferences
Where to find the Notifications settings in macOS Catalina
- Click the Apple menu in the top left corner of your screen
- Click System Preferences
- Click Notifications
Once in Notifications, you'll be able to customize your notifications to your heart's content. Here's a list of the options you'll run into, as well as what each option does.
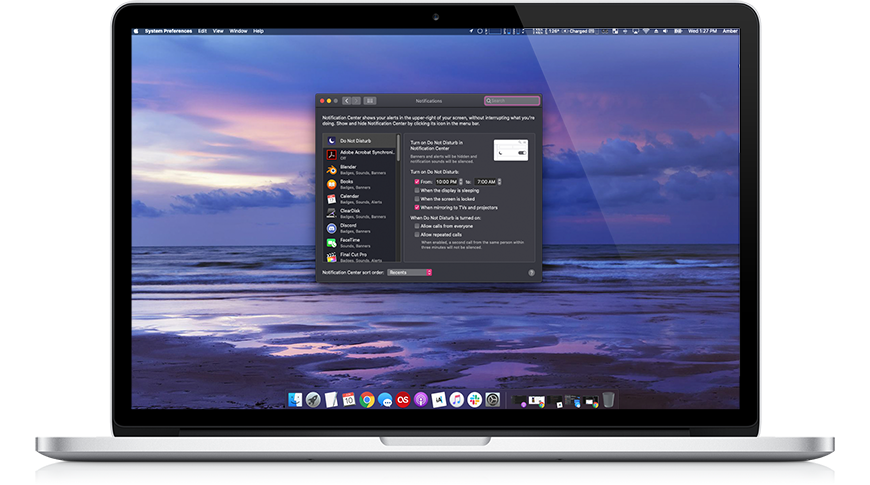
Do Not Disturb
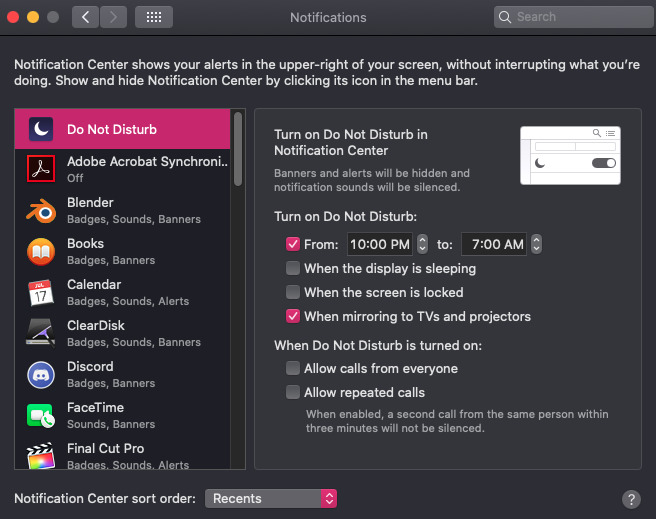
If you've got an iPhone, you're probably already familiar with Do Not Disturb (DND) mode. When your Mac is in DND, all notifications are stopped and held for later review. You can set up specific times and scenarios for your Mac to hide notifications such as 10:00 pm until 7:00 am, when your display is sleeping, or when you're projecting your screen.
You can also allow specific notifications — such as call notifications — to "break through" Do Not Disturb, enabling you to receive them when other notifications are hidden.
Toggling Notifications on and off
Toggling this switch turns notifications on or off for the macOS app Messages
Below "Do Not Disturb", you'll find a list of all the applications on your Mac that have the ability to push notifications to you. Here, you'll be able to set what permissions these apps have when it comes to sending notifications.
Toggling "Allow Notifications from..." for a specific app allows you to toggle any alerts on and off easily.
App alert style
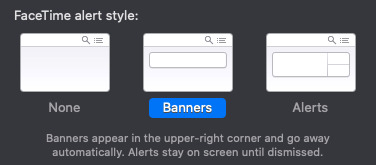
You can further customize the type of alert you get, too. Every app can have one of three types of alert styles.
- None: Notifications don't appear on-screen at all
- Banners: Notifications appear in the top right corner of the screen and disappear after a few seconds
- Alerts: Notifications appear in the top right corner stay on the screen until you dismiss them
Customizing Notification preferences in macOS
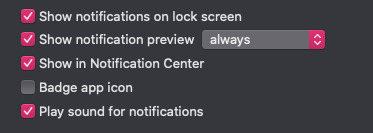
There are an additional set of notification preferences for each individual app. Toggling these on and off allows you to further customize the way notifications can interact with your Mac.
- Show notifications on lock screen: Whenever you wake your Mac from sleep, you'll see missed notifications in the log-in screen.
- Show notification preview: You can toggle when you would like to see a preview of a notification. If you choose "when unlocked," you'll only see a preview when logged into your account. Selecting "always" will show previews on the log-in screen as well.
- Show in Notification Center: This allows you to see an app's recent notifications in your Notification Center.
- Badge app icon: When this box is checked, it allows a small red dot — or "badge" — to be applied to an app in your dock. For some apps, such as mail or messages, the badge may also display a number, alerting you to the number of notifications that specific app has pushed.
- Play sound for notifications: You can control what apps make noises by toggling this option on or off.
- Notification Center sort order: Here you can control the sort-order for notifications in Notification Center.
- Recent: Notifications are sorted by time.
- Recents by app: Notifications are grouped by app, with each notification listed by time.
- Manually by app: Notifications are grouped by app and sorted based on the order they're listed in Notifications preferences. You can reorder apps in the list by dragging them up or down.