Once you know how it's meant to work, it's very easy to have your HomeKit security cameras recognize you and your family. It can just be a little frustrating when you first try to use it.
This is how it should go. Get a security camera that supports HomeKit and HomeKit Secure Video, plug it in, give it permission to access your photos, and you're done.
From that point, whenever someone walks into view of the camera, HomeKit should be able to recognize them as friend, family or stranger. Really, it just recognizes people you've got in your Photos app and can point out people you haven't.
The idea is very impressive, and the system genuinely is easy — except it's confusing. It's confusing because of what Apple chooses to explain, and when.
All of the issues come during the part of the process when you link your Photos app, and then later when you want to see that it's working.
How to set up face recognition in HomeKit cameras on macOS Big Sur
- Make sure you're using a HomeKit-enabled camera
- Check your macOS is up to date
- Connect the camera
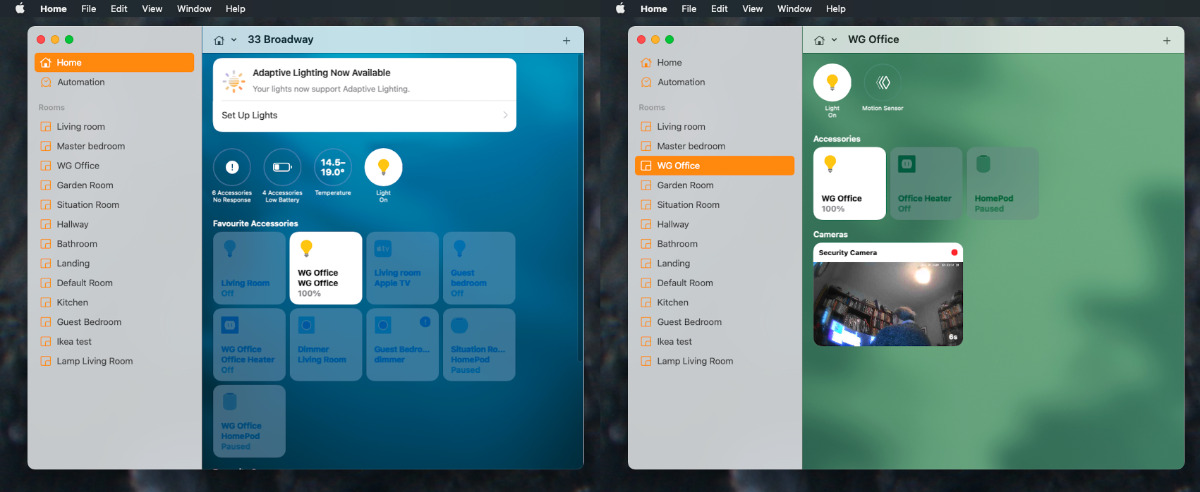
- Launch the Home app
- Click on the listed room where you've said the camera is
- Click once on the camera's thumbnail image
- Hover the mouse over the image and click on the Settings gear icon
- Scroll down to Face Recognition
- Toggle Face Recognition on
- Under the Libraries, click on your Photos library
- Choose whether you want recognition available to you, anyone in home, or no one
- Ignore the Add Names in Photos section for now
- Click the back arrow at top left
- Again, click the back arrow at top left
- Click the close X button at top right
- Close the camera view by hovering your mouse over the image and clicking the X at top left
Where it goes wrong
If you're lucky, and especially if you only have one Apple ID, then it won't go wrong at all. You've done all the steps and it's going to work.
However, when you go into the Libraries section and click on your Photos library, there can be a snag. You can be told that iCloud Photos is not enabled.
It probably isn't, but you can still end up in a circle going to Settings and turning on Photos, going back to Home, and round again. The issue is initially that you're signed in with a different Apple ID on this Mac than your Home app is set up for.
Open the Home app, select the room your camera is in, then click on the camera's thumbnail image
After you've corrected that and signed in to the same ID on your Mac, it still seems to take a time for the Home app to recognize a library. Or at least to recognize its contents.
Once it does, once the Home app is successfully looking at your Photos app, however, then you get the confusion of Apple's wording. It says, "Add Names in Photos" and so you expect to add names in Photos.
If you never have, then this is true. You have to go to the Photos app, and set up some names.
How to set up names in Photos in macOS Big Sur
- Open Photos, click on People in the sidebar
- Yet again, it may take a time for people's faces to appear, but when they do, hover your mouse over one
- Click on the Name button that appears
- Start entering their name and, if they're in your contacts, click to complete it
- Photos will display a number of other faces from images, click to confirm which are this same person
- Click Done
When you've entered their name, and repeated the process with however many people you like, you're done. Except when you've come to this from the Home app, you are left wondering what you do next.
There's nothing telling you what to do, but the answer is that you go back to the Home app. Go to that and it will be showing you the dialog headed Allow Photo Library Access.
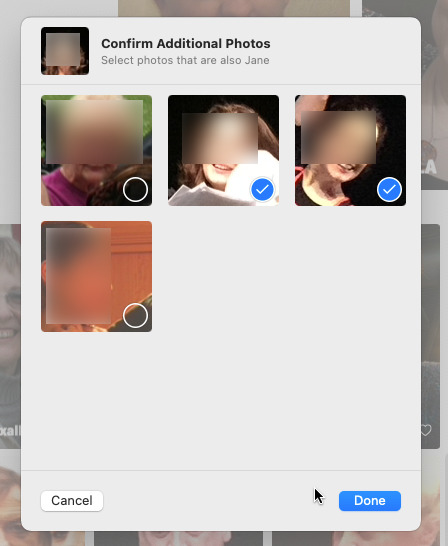
Once you've named someone in Photos, it will ask you to confirm by showing you other faces it believes are the same
Click on the back arrow at top left, then click on it again in the screen that appears. Now click on the X close box at top right and you're back in the main Home app.
There is nothing else to do. While it might be good if the Home app's security camera thumbnail showed you the names of people who come into view, it doesn't.
Instead you need to first leave your security camera running. Then, later on, come back to check it through the Home app.
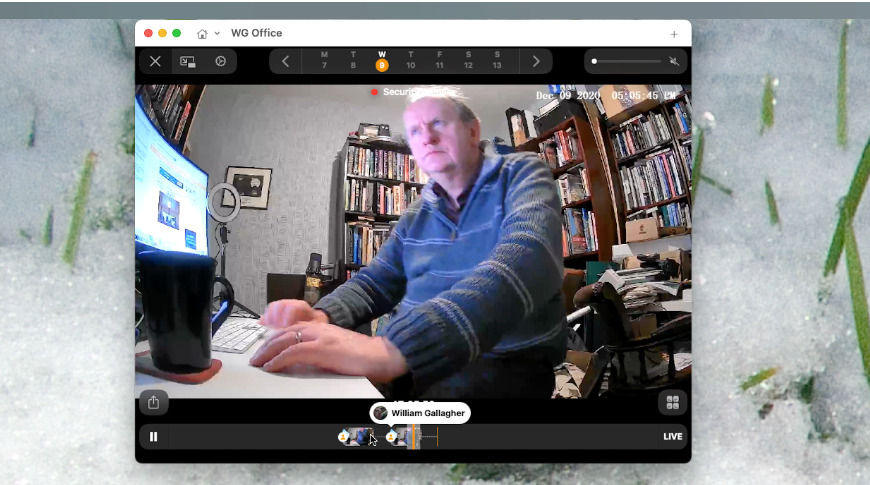
Where you can see recognized people's names
- Launch the Home app
- Click on the listed room where you've said the camera is
- Click once on the camera's thumbnail image
- Hover your mouse over the bottom of the full image when it appears
- One or more video clips will be shown; click on one
- If the video shows a person, and that person is recognized, their name will be shown
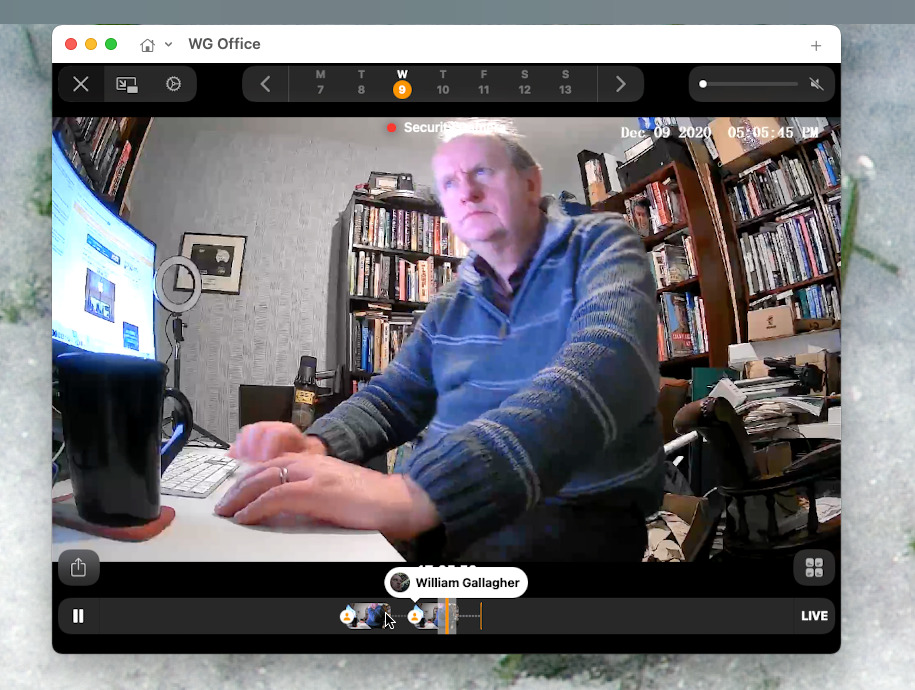
Hover over the security camera footage and then select from the recording clips that appear at the bottom
Alternatively, you can skip the videos and just go straight to a list of who has been spotted by the camera.
How to see who's been spotted by the camera
- Launch the Home app
- Click on the listed room where you've said the camera is
- Click once on the camera's thumbnail image
- Click on the Settings icon that appears at top left
- Scroll down to Face Recognition
- In that section, scroll down to the bottom of the page
- Everyone seen by the camera recently will be shown in a list
That list includes a small icon of their face, as recorded by the camera. If the person is known, their name will be next to the icon.
When it's a known person, you can click on their name to get options. You'll see a slightly larger image of them, plus a toggle to hide notifications. So if this person is always there, you can stop Home app constantly telling you they are.

As well as watching recordings, you can see a list of who the camera has and has not recognized recently
If they are not recognised, then instead of their name, it will say Add Name. You'll never guess what this does — except it seems to go against the instruction that you have to add names in Photos.
Nonetheless, when you click on Add Name, you again see a slightly larger image, and you get the option to add their name. There's again the ability to turn off or on notifications, but there's also a Remove Face setting.
You use that if this is someone who's clearly never going to come back. So if you're having work done on your house, you might first tell the camera to stop alerting you that a particular plumber is there. Then later when that work is done, you could tell it to remove his or her face from the list.
One thing to note. If you have this camera set up in an office and your Mac's monitor is in its field of view, it will record faces that are on the screen.
They could be recorded at a really peculiar angle, but all your Zoom contacts could end up in this list. You have to remove them one by one, though, which can be extremely tedious.
Security and convenience
No question, having a HomeKit camera is handy, and it is also helping your security. Then using a HomeKit camera is very simple.
Setting up a HomeKit camera is pretty straightforward, too. It just falls down a little with this potential business over different Apple IDs — and this definite confusion over Apple's wording.
Keep up with AppleInsider by downloading the AppleInsider app for iOS, and follow us on YouTube, Twitter @appleinsider and Facebook for live, late-breaking coverage. You can also check out our official Instagram account for exclusive photos.