You only get the option to use Facebook Protect if the company believes your account needs extra security, but when you're offered it, you have limited time to turn it on. Here's what you have to do.
Facebook has been expanding its Facebook Protect security system, which was originally launched in 2018 and designed to help political candidates. Now Facebook is also extending the feature to users it believes have greater than average reach on social media.
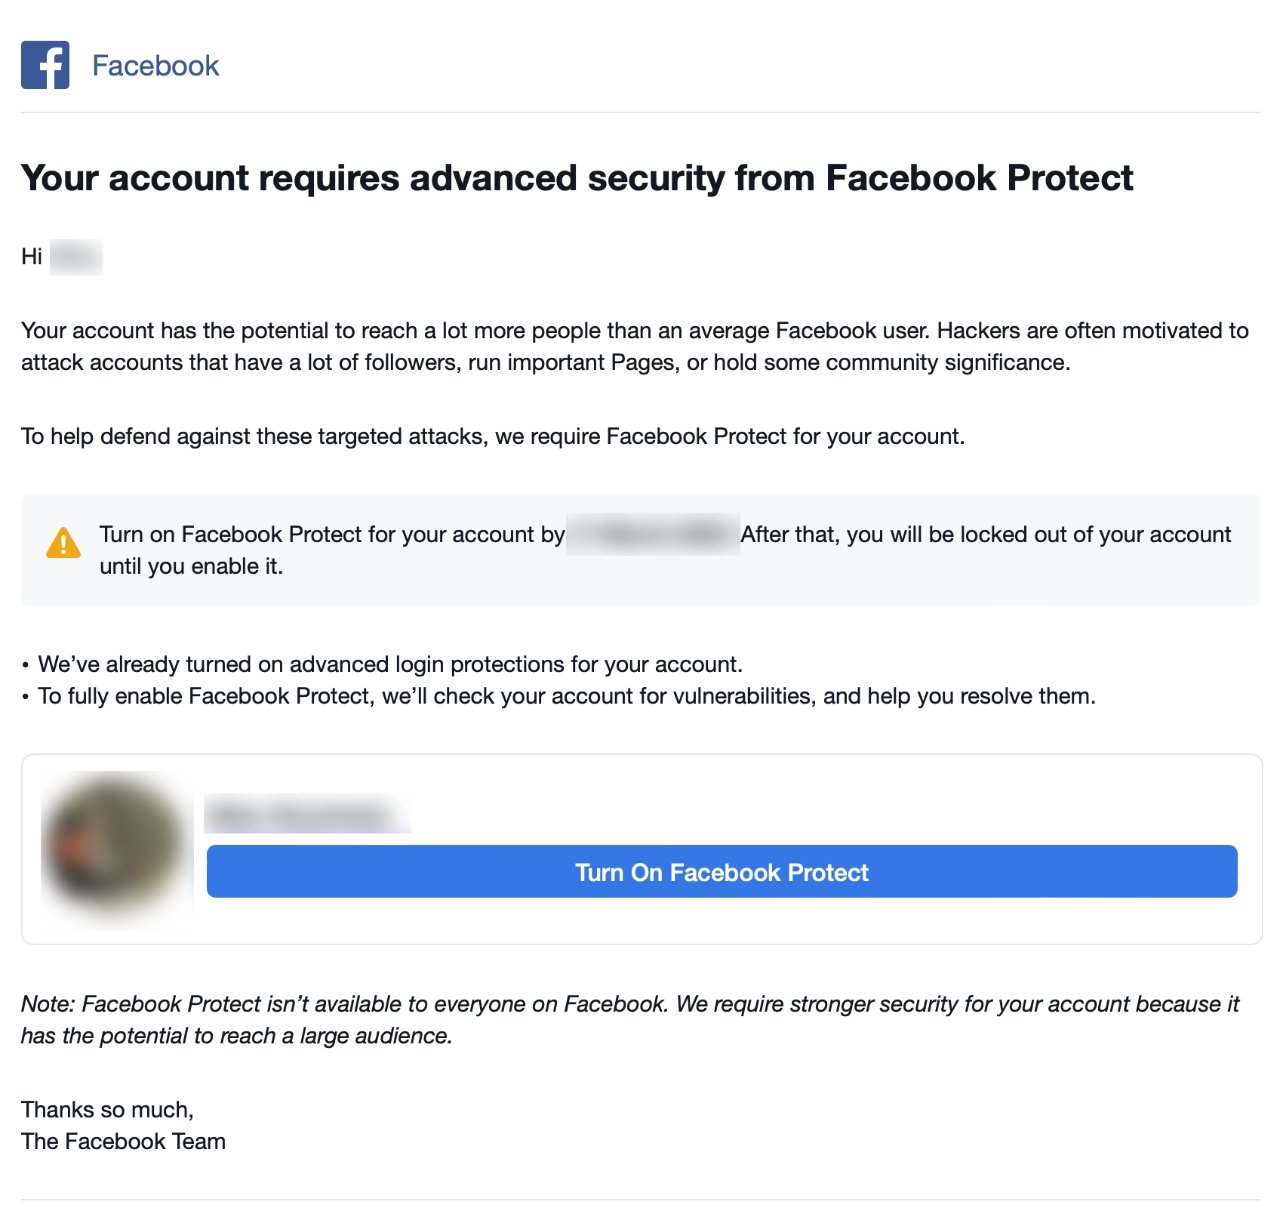
The email feels sketchy. But, we've confirmed with Facebook that they are sending it out to some users.
"Your account has the potential to reach a lot more people than an average Facebook user," says Facebook in the email it sends about the service. "Hackers are often motivated to attack accounts that have a lot of followers, run important Pages, or hold some community significance."
"To help defend against these targeted attacks, we require Facebook Protect for your account," it continues.
The email you receive will also include a cut-off date, after which you will not be able to access your Facebook account unless you have completed Facebook Protect's requirements. The date obviously depends on when you receive the email, but ones sent to AppleInsider have given limits of around eight days.
Facebook's email includes a large, unmissable button for turning on Facebook Protect. However, you don't have to risk clicking on a link in an email that we've already seen has been duplicated by miscreants. You can turn on the feature directly through Facebook itself.
How to turn on Facebook Protect on Mac
- Log in to Facebook
- Click the drop drown arrow at far top right
- Choose Settings & Privacy
- Then choose Settings
- Click on Security and login
- Look for the Facebook Protect heading
- Click on Get Started
- Follow the prompts to complete setting it up
How to turn on Facebook Protect on iOS
- Log in to Facebook
- Tap the Menu icon at bottom right
- Choose Settings & Privacy
- Then choose Settings
- Tap on Password and Security
- Look for the Facebook Protect heading
- Tap on Get Started
- Follow the prompts to complete setting it up
When you don't see an option for FaceBook Protect
Facebook Protect is only enabled for users who the company determines need the extra security. However, at the heart of the service is two-factor authentication, and any Facebook user can turn that on.
To do so, go through the steps above until you get to either Security and login on the Mac, or Password and Security on iOS.
You can set up two-factor authentication from there.
 William Gallagher



 Thomas Sibilly
 Wesley Hilliard
 Marko Zivkovic

 Malcolm Owen

 Amber Neely