Games on the Sony PlayStation and Nintendo 64 can be played on an Apple Silicon Mac with a little bit of work. Here's how to emulate the classic consoles on a Mac or MacBook.
The transition from the fourth to the fifth generation of video game consoles was a unique time in gaming history. It heralded the movement from 2D to 3D games during the mid-1990s.
This involved pioneering work in bringing real-time 3D graphics to life, as well as the disruption of major players in the industry.
It also adds a whole new dimension (literally) to emulating games. Polygon transformation, projection, lighting and shading, texture mapping, anti-aliasing, depth and occlusion, animation, and camera positioning must all be handled accurately by emulators.
Some of these aspects can even be manipulated to produce better visuals.
Incidentally, it's easy for modern Macs to perform the graphical computations made on the hardware of fifth-gen consoles. But, it's more taxing for them to emulate the console performing those same calculations.
When we add multiple graphical enhancements on top of this, you'll see how emulating these games can rapidly make your Mac's hardware struggle.
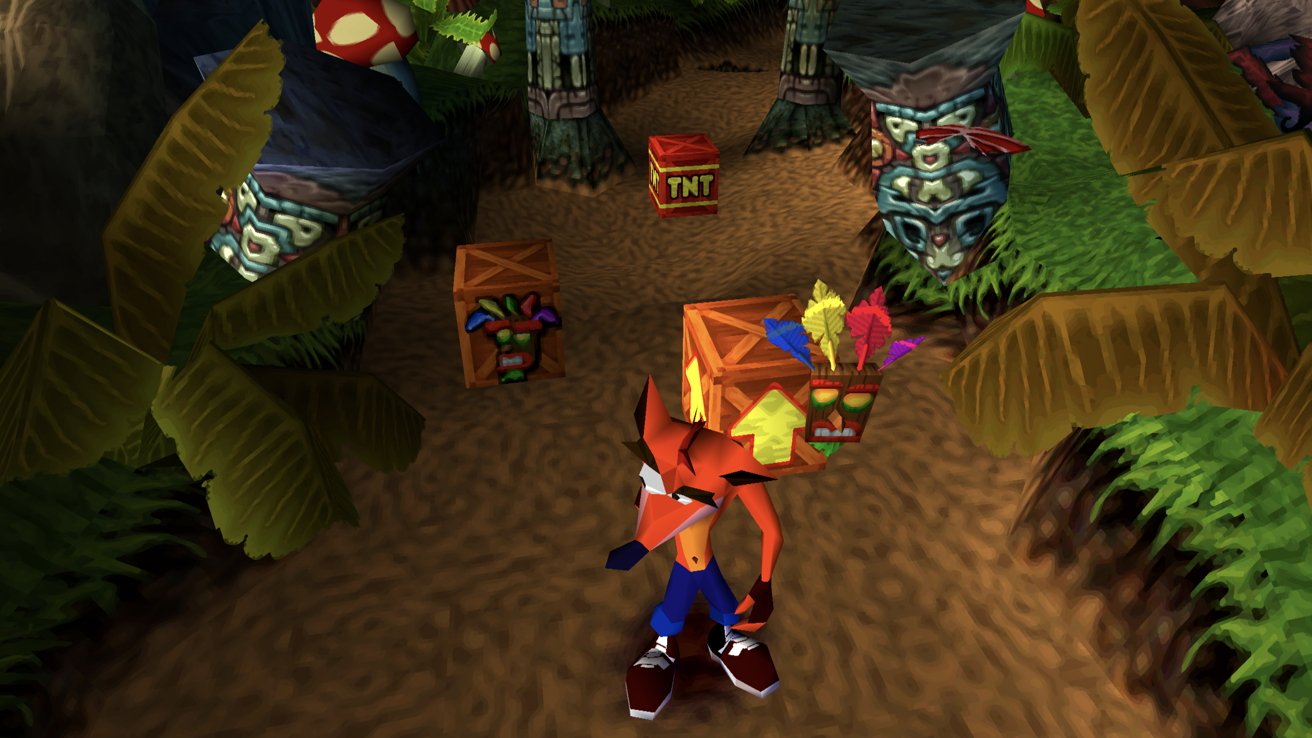
Although the N. Sane Trilogy is excellent, sometimes it's nice to revisit the pixel-precise jumps of the original Crash Bandicoot game engine.
Unlike the fourth generation systems in our previous guide, the setup for emulating fifth generation consoles on Mac depends on the particular console.
Also, due to the higher complexity, not every available approach works well. So, the following guide makes recommendations based on the results of our testing and experimentation.
Important: The legalities of emulation
Before you start, you should ensure that you understand the legality of emulating games. It is usually legal to emulate a console as long as you own the original hardware, so make sure that you do.
You should also own a legitimate copy of the original game, since downloading or distributing a game without owning it is illegal. However, the legality of using digital copies of physical games depends on copyright laws in your jurisdiction, and can vary significantly between regions.
Please check all of this out before proceeding.
The need for BIOS files
In the world of emulation, optical disc systems such as the PlayStation or Sega Saturn need BIOS files to run. Cartridge-based systems like the N64 do not.
BIOS (Basic Input/Output System) files contain the firmware necessary for the console to interface with the game's hardware. Essentially, the BIOS acts as an intermediary, handling system startup routines and ensuring proper communication between the game and the emulated hardware.
On the original consoles, the BIOS initializes the hardware, including the optical drive, to make sure that it reads the game disc correctly. It also manages core system functions such as memory card access, audio, and video settings.
This provides a standardized environment in which games run.
Additionally, BIOS files perform security checks to authenticate the game disc, verifying that it's a legitimate copy. This step is crucial for consoles designed to prevent piracy.
Many optical disc consoles implement region locking through their BIOS. This restricted games to specific geographic regions, such as Europe or the US.
In contrast, cartridge-based systems like the Nintendo 64 do not require BIOS files for emulation. This is because cartridges are self-contained, meaning the hardware initialization and system functions are directly managed by the cartridge itself.
Games on cartridge-based systems access the console's hardware directly, bypassing the need for an intermediary firmware layer.
For emulators, this distinction means they require the original BIOS file to accurately replicate the startup routines and system functions of consoles that used them. Without the BIOS, these emulators cannot perform essential tasks, leading to compatibility issues or failure to boot games.
The BIOS region must match the region of the game ROM. For example, an SCPH-3000 BIOS (a model of Japanese PS1) can only run PS1 games that were released in Japan.
You must also make sure that you only use BIOS files from the hardware that you own. For example, if you own PAL PS1 from the UK, it's illegal to download and use the BIOS of an NTSC PS1 from the US.
How to extract your PlayStation (PS1/PSX) BIOS
This process dumps the BIOS from your PS1 and converts it for use in an emulator.
This guide uses a piece of software called MemcardRex which is currently only available for Windows. Therefore, you'll either need access to a PC to run it, or you'll need to use CrossOver or a virtual machine.
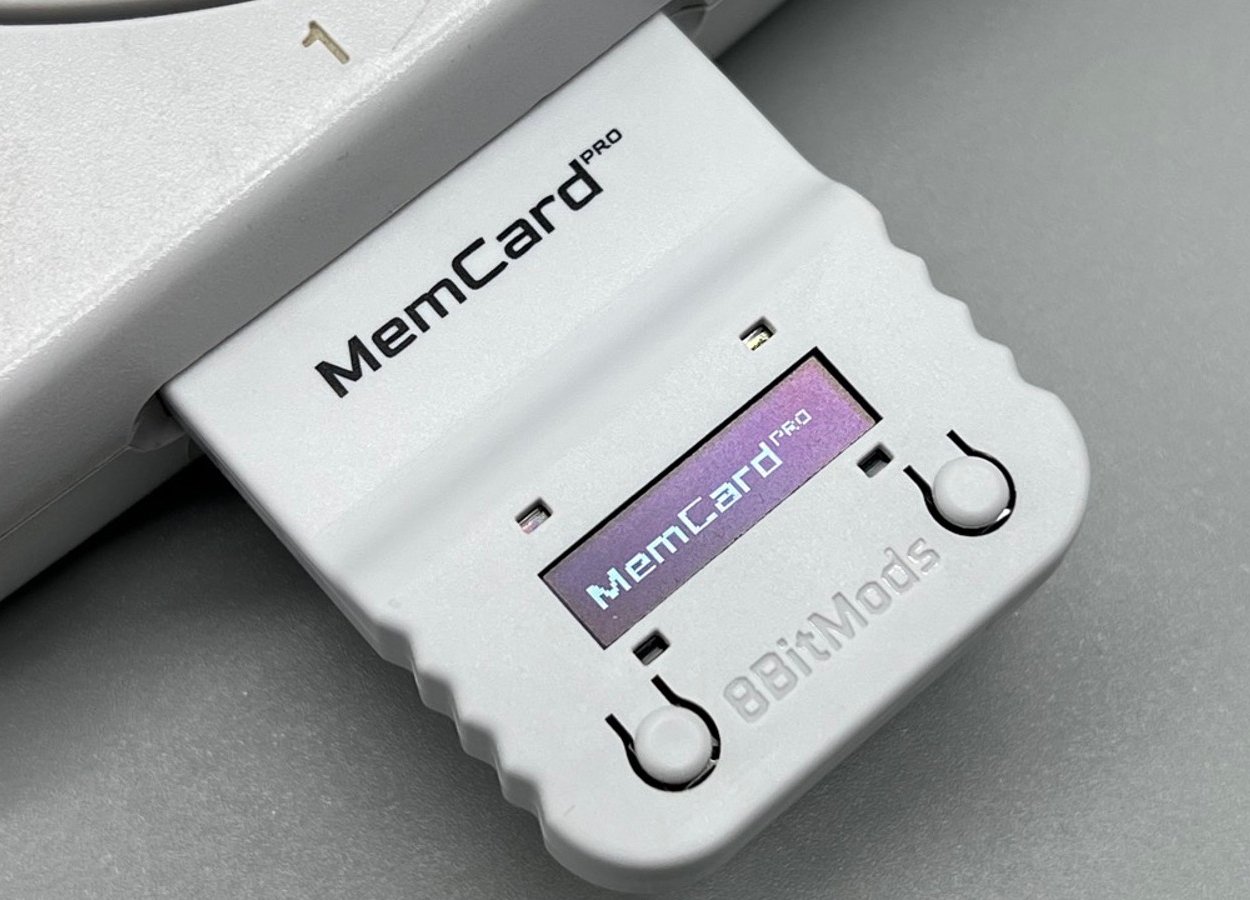
The MemCard PRO is a handy device which not only gives you a PS1 memory card with enormous capacity, but also makes transferring them to your Mac easy. Credit: 8BitMods
How to extract the PlayStation BIOS with BIOS Dumper
- Start by downloading the BIOS Dumper program designed to run on the PlayStation. Extract the downloaded file to reveal several folders, and locate the folder containing the bin and cue files.
- Burn BIOS Dumper to a CD. You can use a program like Imgburn to burn the cue file to a blank CDR. Rewritable CD-RW discs cannot be read by the PS1.
Select the lowest write speed for the best chance of success. - Prepare an empty PS1 memory card. We recommend that you use something like the MemCard PRO from 8BitMods as a memory card, as this will make transferring the BIOS file to a PC/Mac easier. It works by creating an interface between a microSD card and the memory card port.
- Boot the PS1 with the burned CD. Insert the burned BIOS dumper CD into your PlayStation and boot the console. You will be presented with a screen prompting you to dump the BIOS.
- Dump the BIOS to the memory card. Follow the on-screen instructions to dump each part of the BIOS onto the memory card. This process may take some time, so be patient.
- Transfer the BIOS files to a Mac/PC. Use your MemCard PRO, or a USB adapter like a DexDrive with a regular memory card, to transfer the BIOS files to your computer.
- Download and install MemCardRex, which is a tool for managing PlayStation memory cards. Be aware that this application will only run on Windows.
- Convert BIOS Files. Use MemCardRex to import and save each one of the dumped BIOS files sequentially, naming them "part1.mcr," "part2.mcr," etc.
- Run BIOSmerge. Return to BIOS Dumper, and place all five parts of your BIOS into the BIOSmerge Windows' folder. Run BIOSmerge.exe in that directory to combine them into a single binary file, which it will call "SCPHXXXX.bin."
- Rename BIOS File. You'll need to rename your BIOS file according to the model of your PlayStation. You can find the model number on the bottom of the console. For example, if your PS1 is an SCPH-7503, you'll need to name the BIOS file "SCPH7503.bin."
How to set up DuckStation for the PS1
The surefire way to emulate fifth-gen game consoles on Apple Silicon Macs is to use OpenEmu, as it's worked with every game we've tested. However, it only emulates games in their original state, i.e., without enhancement or much customization.
Although there's been some resurgent interest and nostalgia in the aesthetics of PS1 games, there are some issues. Face it, a 320x240 resolution and wobbly PS1 textures can be hard on the eyes, especially when viewed on a Retina Display.
If you want to play these games with the best graphics possible, or with extra options for your controller, then you can try DuckStation.
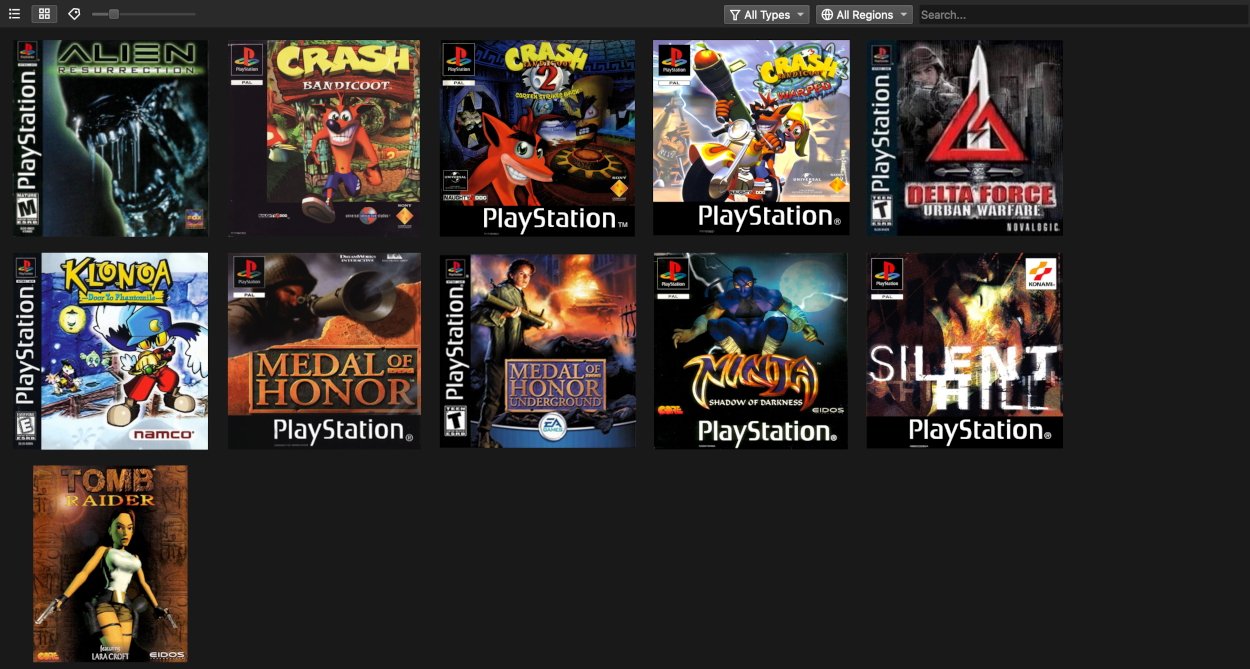
An example of the DuckStation library screen with some games.
Warning: We don't currently recommend using RetroArch for emulating the PS1 because the cores which are presently available can produce unreliable performance.
How to set up DuckStation on your Mac
- Download DuckStation from the DuckStation GitHub page and install it into your Applications folder.
- Open the DuckStation app from your Applications folder. On the first launch, confirm any prompts to allow the app to run by clicking "Open."
- Copy your BIOS file(s) into ~/Library/Application Support/DuckStation/bios. If the bios folder does not exist, create it.
- In DuckStation, go to Settings -> BIOS Settings. Ensure the BIOS directory is set to ~/Library/Application Support/DuckStation/bios.
- Place your PS1 game files (e.g., .bin, .cue, .iso, .pbp) in a convenient directory on your Mac.
- In DuckStation, go to Settings -> Add Game Directory Select the directory where your game files are located. DuckStation will scan and add them to your library.
- If you're using a controller, rather than the keyboard (and you should be), ensure that your controller is connected to your Mac (see here for instructions). A PlayStation controller should be ideally used for playing PS1 games, but you can also use others.
- Go to Settings -> Controllers.
- Select your controller from the left-hand list and check that the buttons are mapped according to your preference.
- Double-click the game you want to play from the DuckStation library, and the game will load.
How to extract ROMs from PS1 discs
Since PS1 games are CDs, they can be extracted easily using an external optical disc drive.
How to extract ROMs from PS1 discs
- Connect your external disc drive. Plug your external disc drive into your Mac via USB and insert your PS1 game disc into the drive.
- Identify your external drive. Open Terminal on your Mac. You can find it in the Applications > Utilities folder. In Terminal, type diskutil list' to list all connected disk drives. The external disc drive will have a name of the form `/dev/
`. - Create the disc image (ISO). Use the following command to create an ISO image of your PS1 game disc, replacing `[disk#]` with the correct identifier for your drive, and [game name] with the name of the particular game: sudo dd if=/dev/
of=~/Desktop/ .iso bs=2048'
`if` stands for input file (your disc drive).
`of` stands for the output file (where you want to save the ISO).
`bs` is the block size, which should be set to 2048 for CDs. - Verify the ISO File. Open DuckStation, go to System Start File and select your ISO file to check that the game loads correctly.
- (Optional) Compress the ISO. If you want to save space, you can compress the ISO to a .PBP file format using tools like PSX2PSP, which may require running under a Windows environment through Crossover or a virtual machine.
This process will take some time. Once it's complete, you'll find the ISO file on your desktop.
PS1 controller improvements
The PlayStation was first released on December 3rd, 1994, in Japan. However, the first official PlayStation control pad to feature analog sticks (leaving aside the arcade-styled Analog Joystick') was the Dual Analog Controller,' released on April 25th, 1997.
This was even before the enduring design of the DualShock, which added vibration motors, and arrived later that year on November 20th.
The intervening years of the PS1 saw games which didn't typically support analog sticks for controlling characters, such as the first Tomb Raider. You had to use the D-pad, which isn't great for 3D movement (although arguably the game's tank' controls fit this interface nicely).
Thankfully, emulators like DuckStation allow analog stick movements to be mapped onto D-pad inputs, adding this functionality into the older games.
How to set up controllers in DuckStation
- In DuckStation, click Settings -> Controllers.
- Ensure your controller is connected to your Mac, then select it from the left-hand list.
- Find the D-pad section in the list of mappings.
- Click on the mapping for Up under the D-pad section. When prompted, press the up direction on your left analog stick.
- Repeat this with the corresponding stick direction for Right, Down, and Left.
- Close the Controller Settings window and start a game to ensure the left analog stick now controls the D-pad actions. (You'll still have to contend with the tank controls though.)
PS1 graphical enhancements
Due to all of the extra factors involved in rendering 3D graphics over 2D ones, there's more room for enhancing them in emulation. The graphical options within the DuckStation emulator can make PS1 games look quite impressive (at least compared with their native renditions).

Harry Mason in Silent Hill, natively rendered (left) vs. enhanced (right).
Here's a list of the settings we've found to produce the best balance between graphics, loading times, and game compatibility, on an M2 Mac. However, you might need to experiment with these, depending on your Mac's hardware and the particular game.
Any settings which were disabled or left as default have been omitted.
Console Settings
CPU Emulation
- Execution Mode: Recompiler (Fastest). Uses a dynamic recompiler for CPU emulation, providing the best performance by translating game code on the fly.
CD-ROM Emulation
- Async Readahead: Disabled (Synchronous). Controls the reading method from the emulated CD-ROM.
- Read Speedup: None (Double Speed). Adjusts the read speed of the CD-ROM. Double speed is the default for most accurate emulation.
- Seek Speedup: None (Normal Speed). Adjusts the seek speed of the CD-ROM. Normal speed is standard for accurate emulation.
- Preload Image to RAM: Enabled. Loads the entire CD image into RAM, reducing loading times and improving performance. However, this is at the expense of an initially longer load when the ROM is started.
- Ignore Drive Subcode: Enabled. Ignores subcode data on the CD, which can improve performance but might affect some games.
Emulation Settings
- Emulation Speed: 100% [60 FPS (NTSC) / 50 FPS (PAL)]. Sets the emulation speed to match the original console's frame rate for NTSC and PAL regions.
Latency Control
- Vertical Sync (VSync): Enabled. Synchronizes the frame rate with the monitor's refresh rate to prevent screen tearing.
Graphics Settings
Rendering
- Renderer: Vulkan. Selects the Vulkan graphics API for rendering, providing better performance and compatibility on modern systems.
- Internal Resolution: 6x Native (for 1440p). Upscales the internal resolution of the game to 6 times the original, improving visual quality.
- Texture Filtering: JINC2 (Slow). Applies JINC2 filtering to textures for better quality at the cost of performance.
- Aspect Ratio: Auto (Game Native). Automatically sets the aspect ratio to match the original game's resolution.
- Deinterlacing: Adaptive (FastMAD). Uses an adaptive deinterlacing method to improve video output for interlaced games.
- Crop: All Borders: Crops all borders from the video output, useful for removing black bars.
- Scaling: Bilinear (Smooth). Applies bilinear scaling for a smoother image.
- True Color Rendering: Enabled. Ensures that the game is rendered with true colors, improving visual fidelity.
- PGXP Geometry Correction: Enabled. Corrects geometry inaccuracies using PGXP, enhancing visual accuracy.
- Disable Interlacing: Enabled. Can improve visual quality for some games.
- FMV Chroma Smoothing: Enabled. Smooths the chroma (color) in full-motion videos, improving visual quality.
Advanced
- Line Detection: Triangles (Aggressive). Attempts to detect one pixel high/wide lines that rely on non-upscaled rasterization behavior, filling in gaps introduced by upscaling.
- True color debanding: Enabled. Applies modern dithering techniques to further smooth out gradients when true color is enabled. This debanding is performed during rendering (as opposed to a post-processing step), which allows it to be fast while preserving detail. Debanding increases the file size of screenshots due to the subtle dithering pattern present in screenshots.
PGXP
- Geometry Tolerance: 15.00px. Adjusts the tolerance for geometry corrections using PGXP.
- Depth Clear Threshold: 300.00. Sets the threshold for clearing depth buffers, impacting visual accuracy.
- Perspective Correct Textures: Enabled. Corrects textures to maintain perspective accuracy.
- Culling Correction: Enabled. Adjusts culling to fix visual issues where parts of models may be incorrectly hidden.
- Vertex Cache: Enabled. Caches vertices to improve performance.
While DuckStation is generally reliable, you may need to change settings for particular games to get them to work. You can right click a particular game and choose Properties to apply per-game settings.
Here are all of the games we tested and found to work reliably with our settings:
- Alien Resurrection
- Crash Bandicoot
- Crash Bandicoot 2: Cortex Strikes Back
- Crash Bandicoot: Warped
- Delta Force: Urban Warfare
- Klonoa: Door to Phantomile
- Medal of Honor
- Medal of Honor: Underground
- Ninja: Shadow of Darkness
- Silent Hill
- Tomb Raider 1
Texture filtering
Upscaling the resolution of the game makes a huge improvement to the appearance of the game. Another emulation technique that can substantially improve graphics quality is texture filtering.
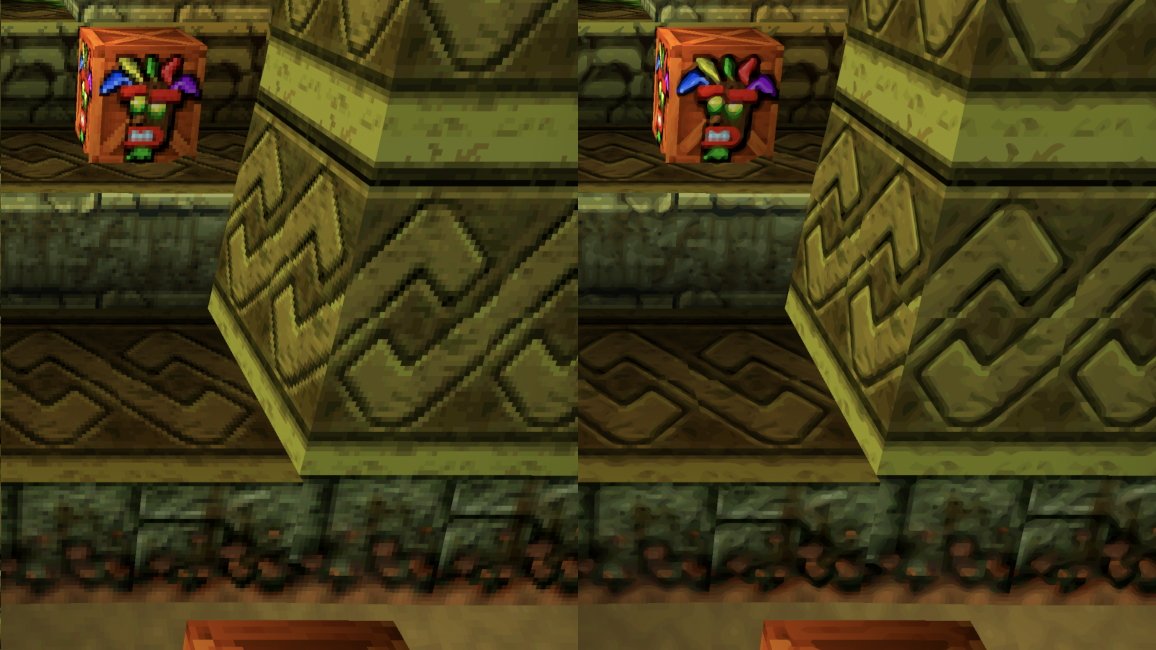
Texture filtering: nearest neighbour (left) vs. xBR (right).
This is used to enhance the visual quality of textures (the images or "skins" applied to 3D models), which is especially appealing when running these games at higher resolutions.
Essentially, texture filtering employs an algorithm to minimize the pixelation often seen in older games. The more advanced the algorithm, the more computational power is needed.
Texture filtering works by blending the colors of pixels at the edges of textures. When a texture is magnified or viewed at a steep angle, the emulator uses algorithms to smooth the transitions between pixels.
Here are some of the most common algorithms:
- Nearest Neighbour: This simply maps each pixel of the original texture to the nearest corresponding pixel in the scaled output, resulting in a blocky appearance.
- Bilinear Filtering: This method averages the colors of the four nearest pixels to the point being rendered, creating a smoother transition and reducing the blocky appearance.
- Trilinear Filtering: This technique builds on bilinear filtering by also considering the distance between texture levels (mipmaps), further improving smoothness when textures are viewed at varying distances.
- JINC2: Provides higher quality smoothing by using a more complex algorithm, resulting in superior texture clarity and reduced artifacts, but at the cost of more computation. Instead of considering just a few nearby pixels (as in bilinear filtering), it considers a larger area of the texture around each pixel that needs to be rendered.
JINC2 calculates a set of weights based on the Jinc function, then uses these weights to compute an average which blends the colors. This is particularly effective at handling edges and fine details. - xBR (Scale by Rules): This uses pattern recognition to understand the shapes and lines within the texture, and can produce even higher quality results. It matches pixel patterns against predefined rules to decide how to scale different parts of the image.
Once edges and patterns are identified, it interpolates new pixels in a way that smooths out edges and transitions. This process involves calculating the color values of new pixels based on the surrounding original pixels, maintaining the integrity of the original texture while scaling up.
PGXP (Precision Geometry Transform Pipeline)
One of the reasons that PS1 graphics wobbled was that it used affine texture mapping. In contrast, other consoles, such as the Nintendo 64, used perspective-correct texture mapping, so didn't suffer from this problem.
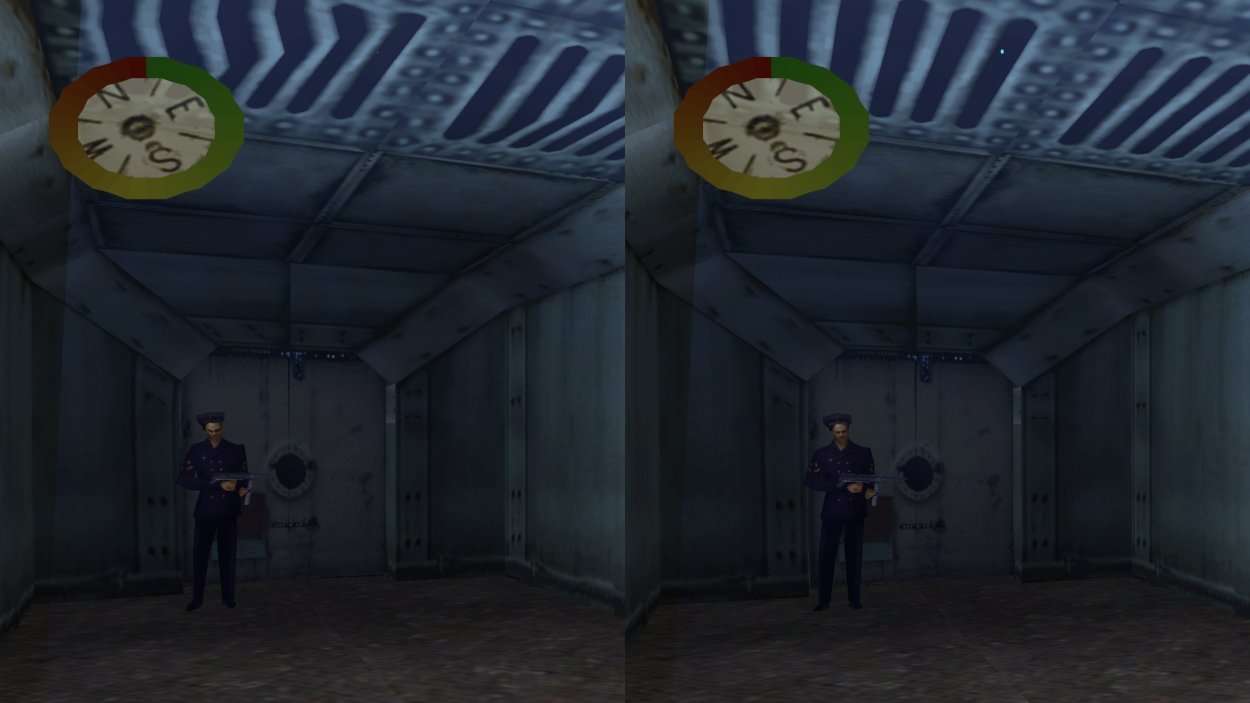
Non-PGXP texture mapping vs. PGXP (right) in Medal of Honor. Note the warped grids on the ceiling in the non-corrected image on the left.
When mapping textures onto polygons, the affine technique does not account for the perspective, leading to texture distortion when viewed at oblique angles or over large surfaces. This phenomenon is often referred to as texture "warping" or "swimming."
PGXP recalculates the texture coordinates for each vertex, taking into account their actual depth relative to the camera. This ensures that textures are mapped accurately onto 3D surfaces.
This maintains their intended appearance even when viewed from different angles and distances, and substantially improves the visual stability of emulated PS1 games.
How to set up OpenEmu
If you find that DuckStation simply refuses to run a game, however much you experiment with settings, the surefire way is to use OpenEmu.
- Visit the official OpenEmu website here and click on the Download Now button to get the latest version of OpenEmu for macOS.
- Once the download is complete, open the downloaded .zip file and drag the OpenEmu app into your Applications folder.
- Open the OpenEmu app from your Applications folder. You might be prompted to allow the app to run by clicking Open and confirming any security warnings.
- In the menu bar, click on OpenEmu -> Preferences, go to the System Files tab, and click on the Open button next to the PlayStation entry to open the BIOS folder.
- Drag and drop your PS1 BIOS files into the PlayStation BIOS folder that you opened in the previous step.
- Drag and drop the PS1 game files into the main OpenEmu window, or click on the + button and select Add to Library to browse for your game files.
- In the main OpenEmu window, navigate to the PlayStation library by clicking on the PlayStation icon in the console sidebar. Select the game you want to play from your library and double-click the game's icon to start playing.
- In the menu bar, click on OpenEmu -> Settings, go to the Controls tab, and configure your keyboard or game controller mappings according to your preference.
- You can now enjoy playing your favorite PS1 games in OpenEmu.
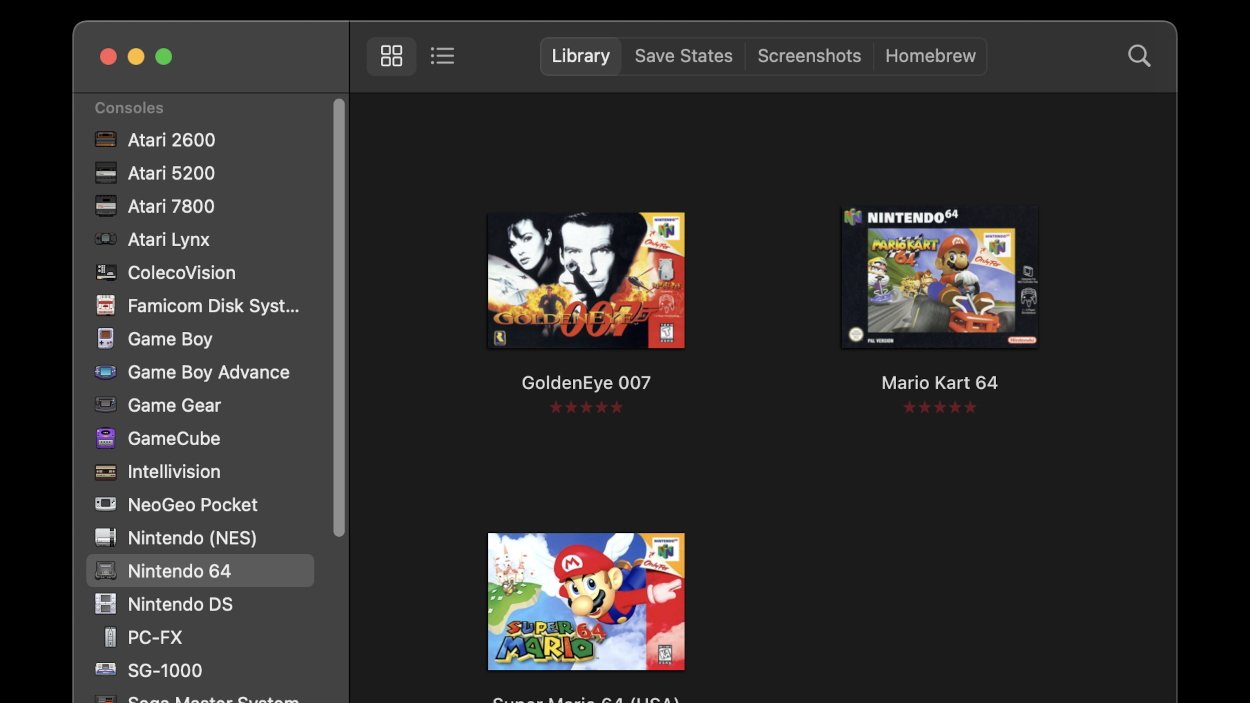
The OpenEMU library screen with some N64 games.
Aside from a game not working in DuckStation, there is another reason to use OpenEmu: if you prefer an experience closer to the native hardware. Just run games at their native resolution and apply a shader that mimics the visuals of an old CRT TV.
To apply a CRT shader preset:
- In the menu bar of OpenEmu, go to OpenEmu -> Settings
- In the Gameplay tab, open the Shader: dropdown.
- Select a CRT shader, such as 'CRT Royale Kurozumi.'
You can read more about shaders in our fourth gen guide.
How to extract ROMS from Nintendo 64 (N64) cartridges
You'll need two pieces of hardware to extract the ROM from an N64 cartridge: the Retrode 2' and its N64 Plugin' adapter. These will allow you to connect the cartridge to your Mac.
How to extract the N64 ROM using Retrode 2
- Insert the N64 Plugin into the cartridge slot of the Retrode 2, then plug the Retrode 2 into your Mac.
- Place your N64 game cartridge into the N64 Plugin. Make sure the cartridge is clean and properly inserted to avoid read errors.
- Open Finder on your Mac and navigate to the Retrode 2 device. The N64 game should appear as a mounted drive, displaying the game files.
- Copy the ROM file from the mounted drive to your computer. This process involves dragging and dropping the game file from the Retrode 2 directory to your desired location on your computer.
- Use OpenEmu to open the ROM file and check that it works.
How to set up RetroArch for the N64
Although OpenEmu can run N64 games in their native state, RetroArch gives you more enhancement options. As with the PS1, if a game won't work using the RetroArch core, despite altering the settings, you'll need to resort to OpenEmu.
See here for how to install RetroArch.
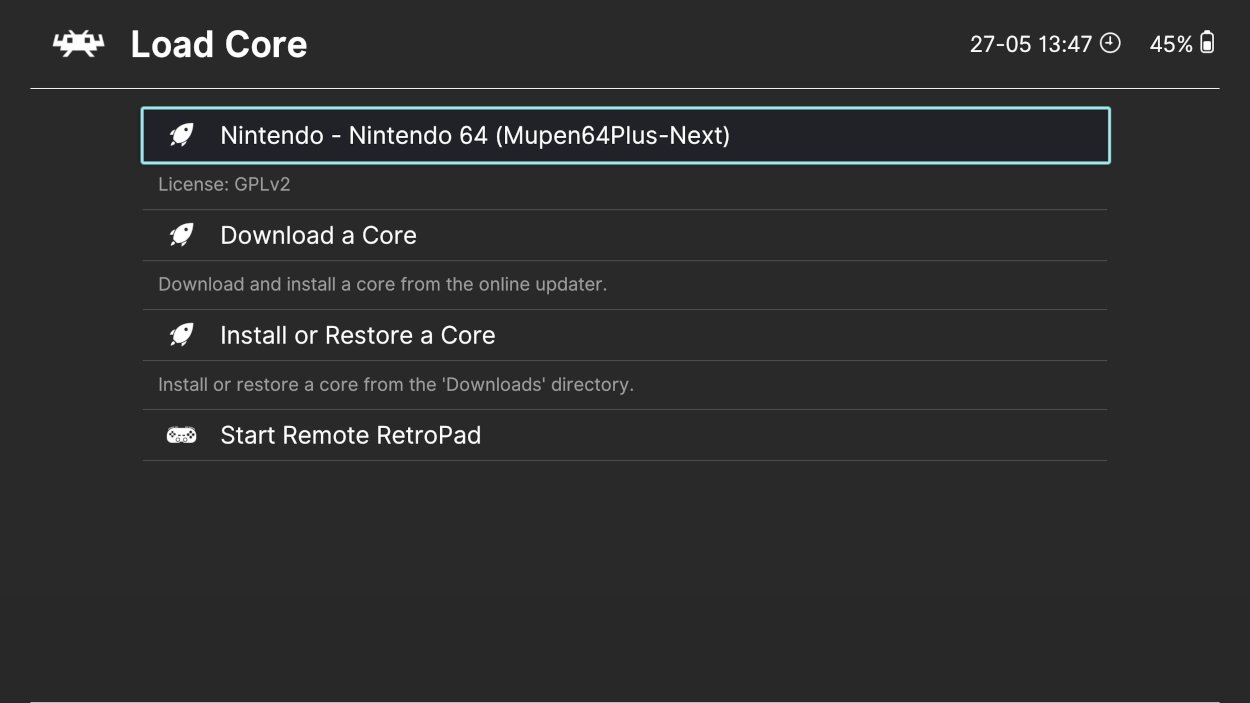
Loading the Mupen64Plus-Next core in RetroArch.
- In RetroArch, navigate to Main Menu -> Online Updater -> Core Downloader. Scroll through the list and find Nintendo - Nintendo 64 (Mupen64Plus-Next). Click on it to download and install the core.
- After the download is complete, go back to Main Menu -> Load Core. You should see Nintendo - Nintendo 64 (Mupen64Plus-Next) listed among the available cores. Select it to load it.
- In RetroArch, go to Main Menu -> Load Content. Navigate to the directory where your Nintendo 64 game files are located, select a game file, and RetroArch will automatically detect and use the Mupen64Plus-Next core to run the game.
- In the menu bar, go to Settings -> Input -> Port 1 Controls to configure your keyboard or game controller mappings according to your preference.
- With the core installed and your games added, you can now enjoy playing Nintendo 64 games on your Mac.
Annoyingly, RetroArch has a bug in that it'll crash if you try to run an N64 ROM after having closed one. You will need to quit and re-open RetroArch each time you change or restart a game.
N64 graphical enhancements
The Mupen64Plus-Next core can modify the Nintendo 64's graphics using RDP plugins. RDP stands for "Reality Display Processor," the component of the N64's Reality Co-Processor (RCP) which handles pixel rasterization and the Z-buffer.

Native resolution Super Mario 64 (left) vs. 4x resolution (right).
In this case, a "plugin" is a module that emulates the RDP component. It translates the N64's graphical instructions into something that can be processed and rendered by modern computer hardware.
This means it can also enhance the output.
How to increase a game's resolution in RetroArch
- Start RetroArch and load the Mupen64Plus-Next core.
- Press fn + F1 to open the menu. Go to Core Options -> RDP Plugin and change it from GLideN64 to ParaLLEI-RDP.
- Also under Core Options, change RSP Plugin from HLE to ParaLLEI.
- To increase the resolution, go to ParaLLEI-RDP -> Upscaling factor (restart).
- To avoid frame skipping (stuttering) during gameplay, the upscaling factor to choose depends on how powerful your Mac is, as well as how demanding the particular game is. Unless you're running the most powerful M chip, it's usually best to avoid 8x and stick to 4x or 2x.
N64 controller options
Although the N64's control pad has a rather unique design, its buttons can still be mapped quite comfortably onto a modern controller. Unlike the original PS1 controller, it came with an analog stick from the outset, so at least its games were designed to use this.
How to remap controls in RetroArch
- Press fn + F1 during gameplay to open the Quick Menu, then go to Controls.
- To configure the inputs for player 1, go to Port 1 Controls.
- In the list of controller buttons, select each one to change the N64 control pad input to which it maps.
- Repeat steps 2 and 3 for any other players, selecting Port 2 Controls, etc.
As with improvements in 3D graphics over time, there have also been innovations in control schemes since the conception of the N64 controller. For instance, you may be accustomed to such newfangled concepts as dual analog stick operation in first-person shooters. Luxury.

Dual stick controls makes returning to GoldenEye a much easier experience for most of us.
In some games, it's possible to arrive at a modern control scheme, through a combination of changing the game's options and remapping inputs from the controller.
For example, here's how to set up dual-stick controls in GoldenEye 007:
- Load the game within RetroArch.
- Press Start' to enter the game's pause menu.
- Choose the 1.2 Solitaire control scheme.
- Open the RetroArch quick menu by pressing fn + F1 during gameplay and then go to Controls.
- Scroll down and swap the C Buttons and Control Stick inputs, so that the left analog stick is mapped to the C buttons, and the right analog stick is mapped to the control stick:
Left Analog Y-: C Buttons Y-
Left Analog Y+: C Buttons Y+
Left Analog X-: C Buttons X-
Left Analog X+: C Buttons X+
Right Analog Y-: Control Stick Y-
Right Analog Y+: Control Stick Y+
Right Analog X-: Control Stick X-
Right Analog X+: Control Stick X+ - Optionally, scroll down to find the buttons for L2 and R2, then swap their inputs. This will make L2 toggle the crosshair for aiming, and R2 the fire button:
L2: C-button mode R2: Z-trigger - Ensure your settings persist specifically for GoldenEye 007 by going to Controls -> Manage Remap Files -> Save Game Remap File.
- Return to the game and test your new dual analog stick controls.
(Optional) Create an app for each game
While all of the emulators described in this article will organize your game library for you, it's also nice to simply click an app and load a particular game.
This part of our 4th gen article will show you how to create a custom app, as well as how to create a pleasing icon for it. However, you'll need slightly different commands to launch games with DuckStation and OpenEmu.
For DuckStation, it's: /path/to/DuckStation.app/Contents/MacOS/DuckStation /path/to/ROM
For OpenEmu, it's: /path/to/OpenEmu.app/Contents/MacOS/OpenEmu /path/to/ROM
Emulator evolution
It's worth noting that emulation on Apple Silicon Macs is still relatively young, and improvements are continually made which make both the software and the games work better. Keep your emulator software updated and periodically retry games to see how well they work and what features are available.
Setting up and tweaking emulators requires some work. Once this is done, however, not only will your old console games remain preserved and playable on your Mac forever, but they'll look much better and shinier than they ever did.