 Charles Martin
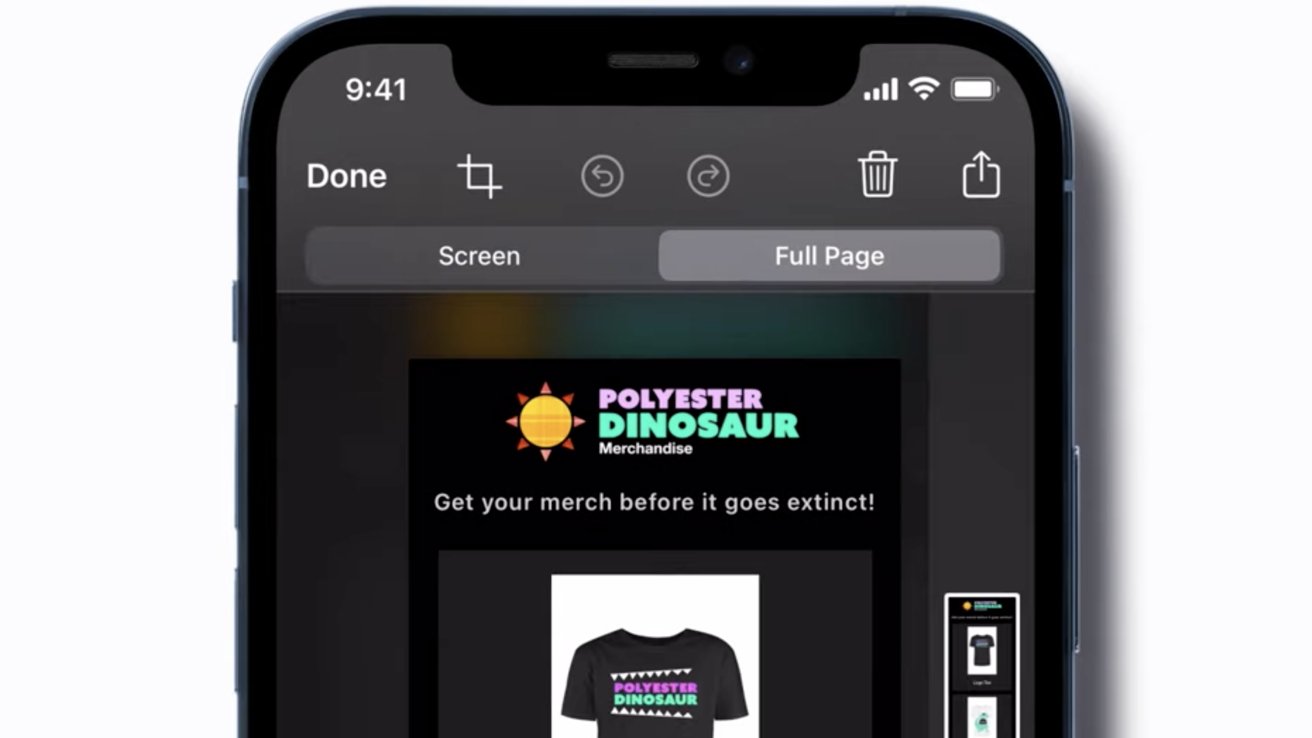
It's surprisingly simple to capture a long web page in a single screenshot on your iPhone or iPad, and edit it to hold just the information you want.
When you create a screenshot on your iPhone — or iPad, for that matter — the image that is created initially appears to be just the portion of the web page that appears on your screen — a literal "screen" image. However, website articles and home pages tend to be much "longer," running off-screen until you scroll down.
In fact, though, your "screenshot" taken on an iPhone also captures the entire page of the website, no matter how long it is. You have to then say that you want the full screen image, but when you do, you can also easily edit the screenshot after it is taken to trim it to any section you really want.
Taking a full-page screenshot on iPhone
To take a screenshot using your iPhone, press the upper volume button and the power button briefly at the same time. The screen will "flash" to indicate you were successful, and a small thumbnail of the visible screen content will appear in the lower-left corner, and move offscreen after a few seconds if you don't tap on it — or if you flick it away to the left.
If you instead tap on the thumbnail, it will expand into edit mode, starting at the top of the captured page. You'll see a few standard editing tools above the image, and two choices just below the tools: "screen" and "full page."
If your intent was just to capture something on the visible screen area when you took the picture, you can tap on the "crop" tool to trim off anything you don't want, tap the "done" button, and choose where to save it. You can save it to the Photos app, the Files app, or create a Quick Note with the image in it.
You also get the option to "copy and delete," meaning to save the screenshot image to the clipboard but delete the actual screenshot, or delete the screenshot outright. The options for the "full page" image are slightly different: you can save to photos, save as a PDF to files, or copy-and-delete and just delete.
If you wanted to capture the whole page, though, just tap on the "full page" option, and you'll see a long, skinny, and very small thumbnail of the entire image to the right, while your screenshot remains on the left. Likewise, these tools are all available if you're working on your iPad.
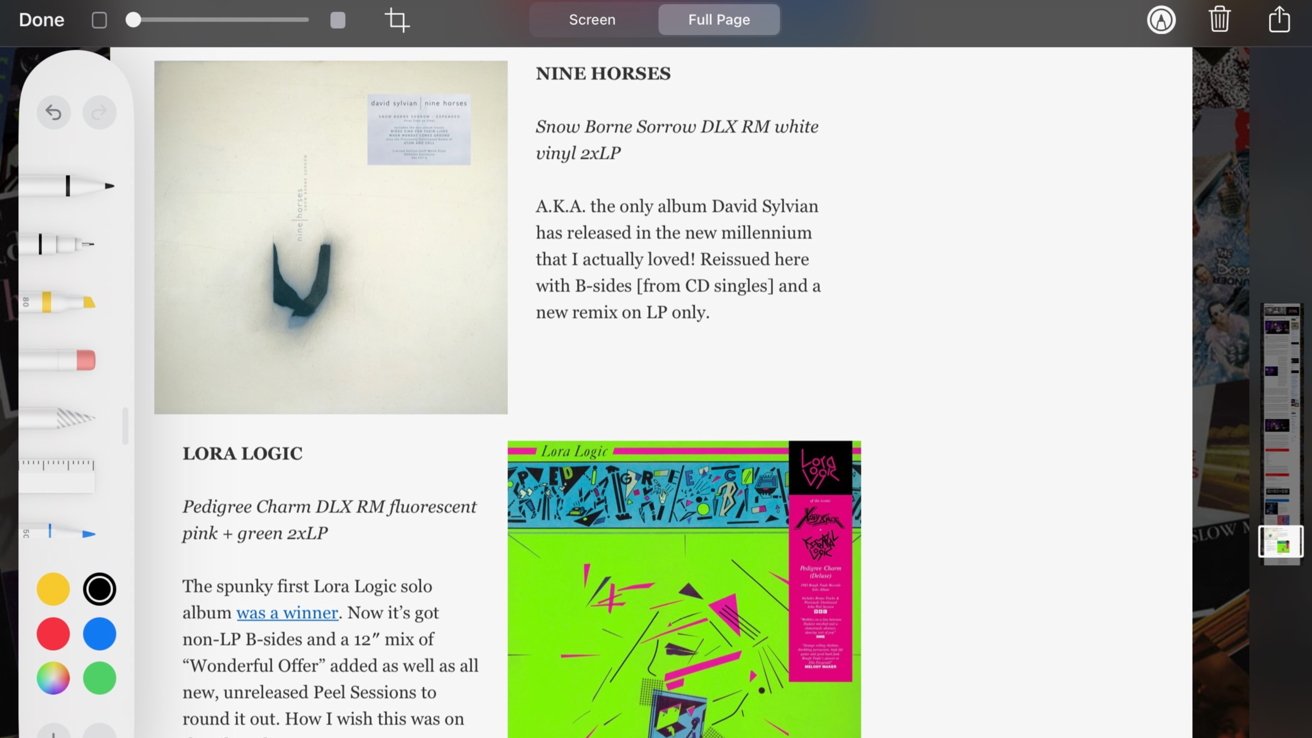 Editing a captured full-page screenshot on an iPad
Editing your full-page screenshot
You can scroll down through the screenshot by moving the highlighted area of the thumbnail to get an idea of what, if anything, you'll want to trim. The tools at the top of the screen will let you undo or re-do your editing actions, trash the image, or send it somewhere.
When you want to save the full-page screenshot, just tap the "Done" button on the left side of the toolbar. You'll get the option to save it to Photos or save a PDF version to the Files app, where you'll be asked where in your iCloud files you want to keep it.
As with the "screenshot" option, you can use the "send" icon to email, message, AirDrop, and send to your full page screenshot to specific people, your preferred social media sites, or add to the Notes. By default, screenshots and full-page screenshots are saved as .png (portable network graphics) files, which is a lossless raster RGB format.
As with a lot of Apple features and apps, there are obscured but advanced features you can take advantage of behind the "simple" operations that most users find is all they need. For those occasions when you want to go beyond the basics, the tools to create something more impressive are there — they just take a little more effort to find and utilize.


-m.jpg)


 Chip Loder
 Marko Zivkovic
 Malcolm Owen

 William Gallagher
 Christine McKee
 Andrew O'Hara
 Andrew Orr


-m.jpg)


15 Comments
For those like myself who cannot press both buttons simultaneously, there's there ever-useful double-tap-in-back accessibility feature.
Ironically this doesn’t work on the AppleInsider app. It does work in Safari though.