 David Schloss
Most video creators are familiar with the dreaded "Media Offline" warning and the panic it triggers. For users of DaVinci Resolve, the fix usually takes just a few clicks, but sometimes relinking clips seems impossible, and a project appears to be gone forever.
It's not uncommon for a complex project to end up with offline clips during editing. A video editing program doesn't touch the original footage during editing. Programs like Resolve use a file to track changes instead of modifying the original clip, and that file can lose track of where original media lives.
Media Offline simply indicates that the editing program has lost the path to an original file. This is often caused by moving or renaming clips in the Finder, but sometimes, media can go offline for no apparent reason.
The larger problem occurs when it's not possible to relink to the original clip, and that's when "conforming" media in Resolve becomes necessary.
How to fix corrupted DaVinci Resolve Projects — The traditional fix
Typically fixing offline media begins with right-clicking on a clip to bring up the contextual menu and selecting Find In Media Pool.
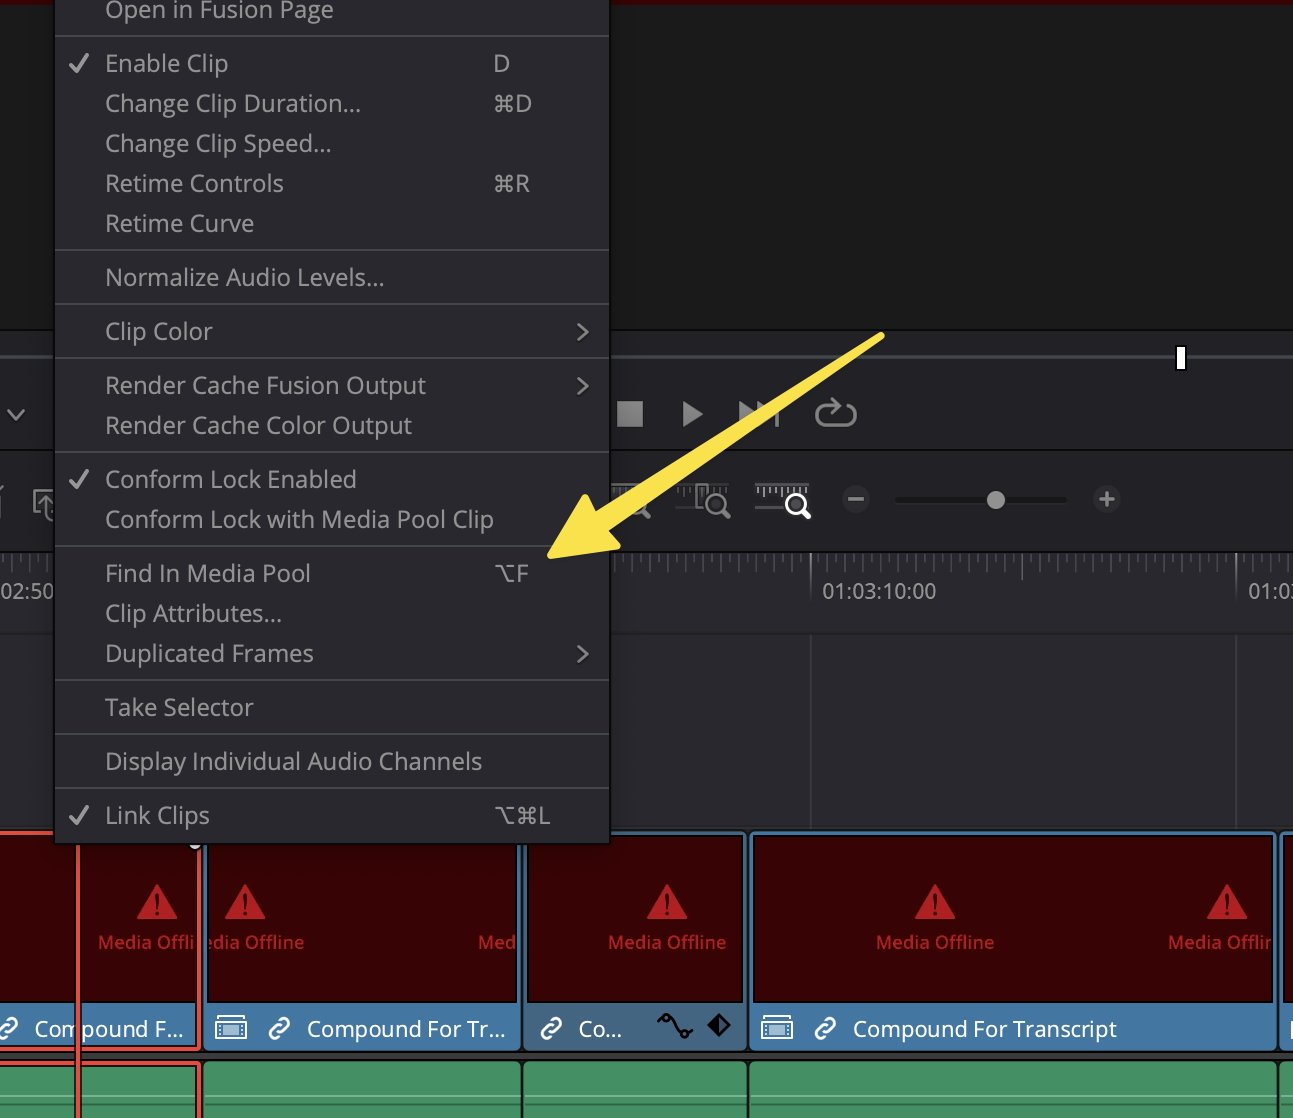 How to fix corrupted DaVinci Resolve Projects — Find In Media Pool is the traditional way to fix offline media
Once the clip is located, right-click on the footage, and from the contextual menu, select Relink Selected Clips. A standard Open dialog box lets you point the original clip on a drive and reconnect the footage.
Sometimes, relinking doesn't work; in that case, Replace Selected Clip will serve the same function. As long as you select the same clip original clip, the media will become available again, and the media offline warning will go away.
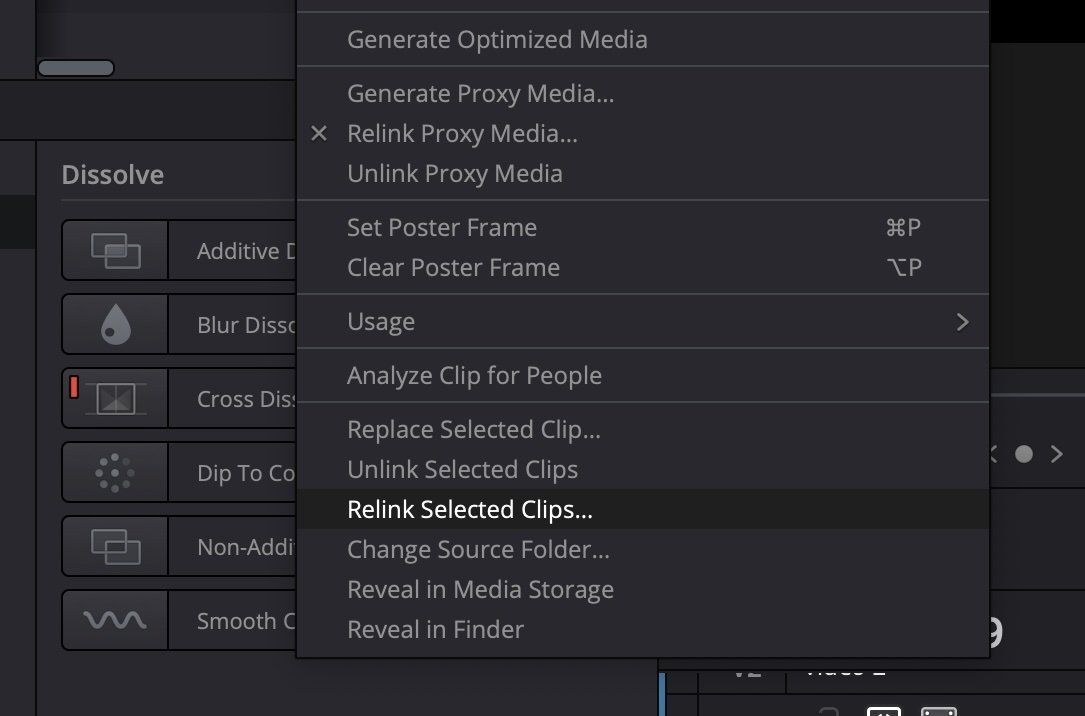 How to fix corrupted DaVinci Resolve Projects — Relink Selected Clips typically works perfectly, but not in this case.
The bigger problem is that sometimes selecting Find In Media Pool fails to select an original clip, even though that clip is in the media pool. Selecting Find In Media Pool doesn't have any effect and nothing happens at all.
If the problem is with a single clip, re-importing and re-editing that one clip is the simplest solution. In a timeline where all of the media is shown as offline, redoing all of the work is usually unfeasible, and this is when a backup can fix the issue.
DaVinci Resolve has a backup feature that will save at user-selected increments, which is found under the DaVinci Resolve menu, then Preferences. Click on the User tab and then Project Save and Load. Set a time and location for incremental backups.
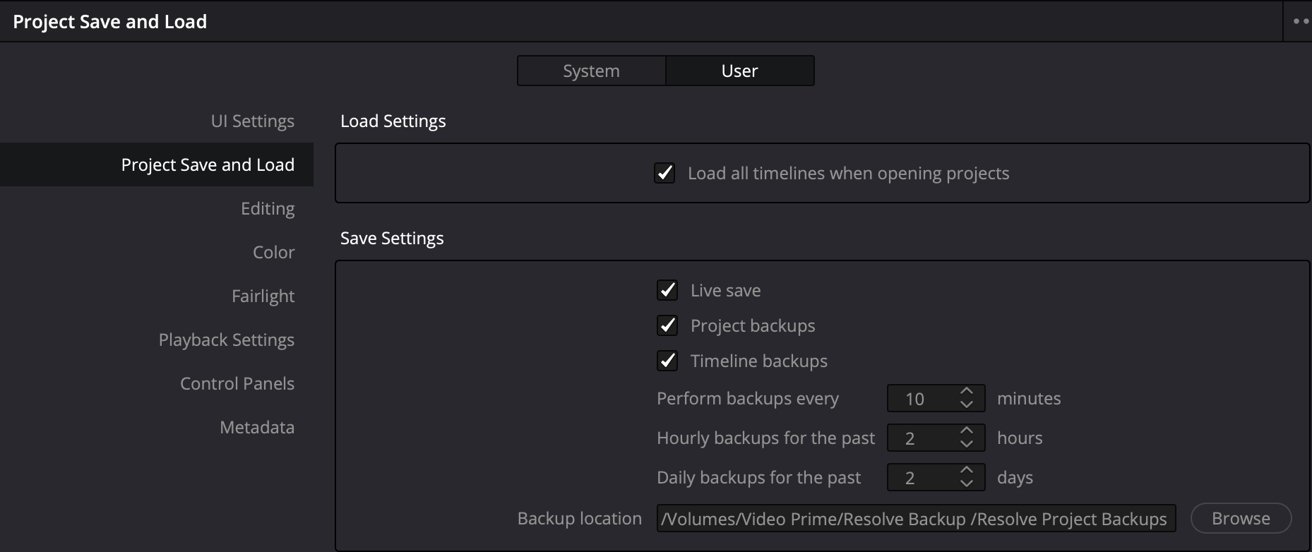 Setting a backup location and frequency is a crucial first step when working in Resolve.
Sometimes, even with backups, it's impossible to fix this problem if the offline error was caused by clips being moved or renamed or if there's some issue with the drive storing the original media.
To compound the problem, backups are disabled for editors using the Blackmagic Cloud workflow tool.
Conforming your media
The solution to this problem is the "Conform Lock To Media Pool" tool found under the Clips menu.
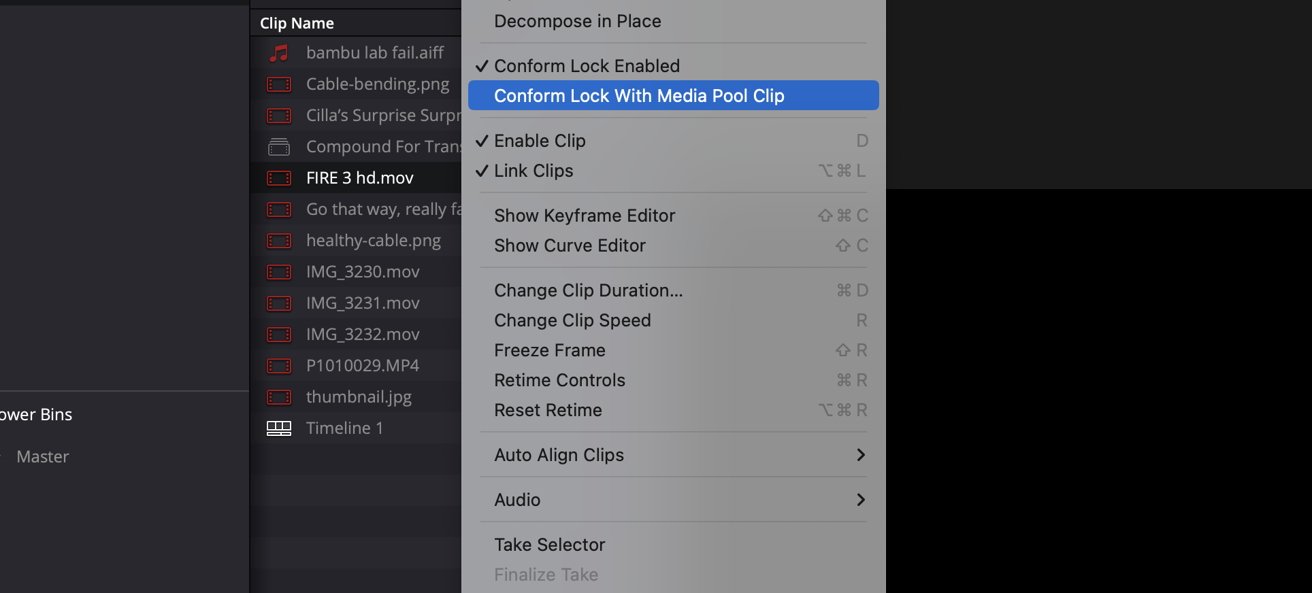 Conform Lock allows you to link any clip back to the original source material
Start by clicking on the correct, original clip in the media bin, and then head to the timeline and right-click on a clip that's offline. Head to the Clips menu and select Conform Lock To Media Pool.
Since the clip with missing footage and the original clip have the same timecode, using the conform tool has the same effect as relinking or replacing. The media should become available online again, and the media offline warning should disappear.
Problems conforming
There are some caveats in this process. Conforming only works one clip at a time so it's necessary to conform to each one individually.
Many projects are comprised of hundreds of clips from one original piece of footage so it's necessary to select every clip one at a time, select Conform Lock With Media Pool Clip, move to the next clip, and repeat.
One trick to simplify the process is to head to the Keyboard Customization setting under the Davinci Resolve menu and assign a simple keyboard shortcut for Conform Lock To Media Pool.
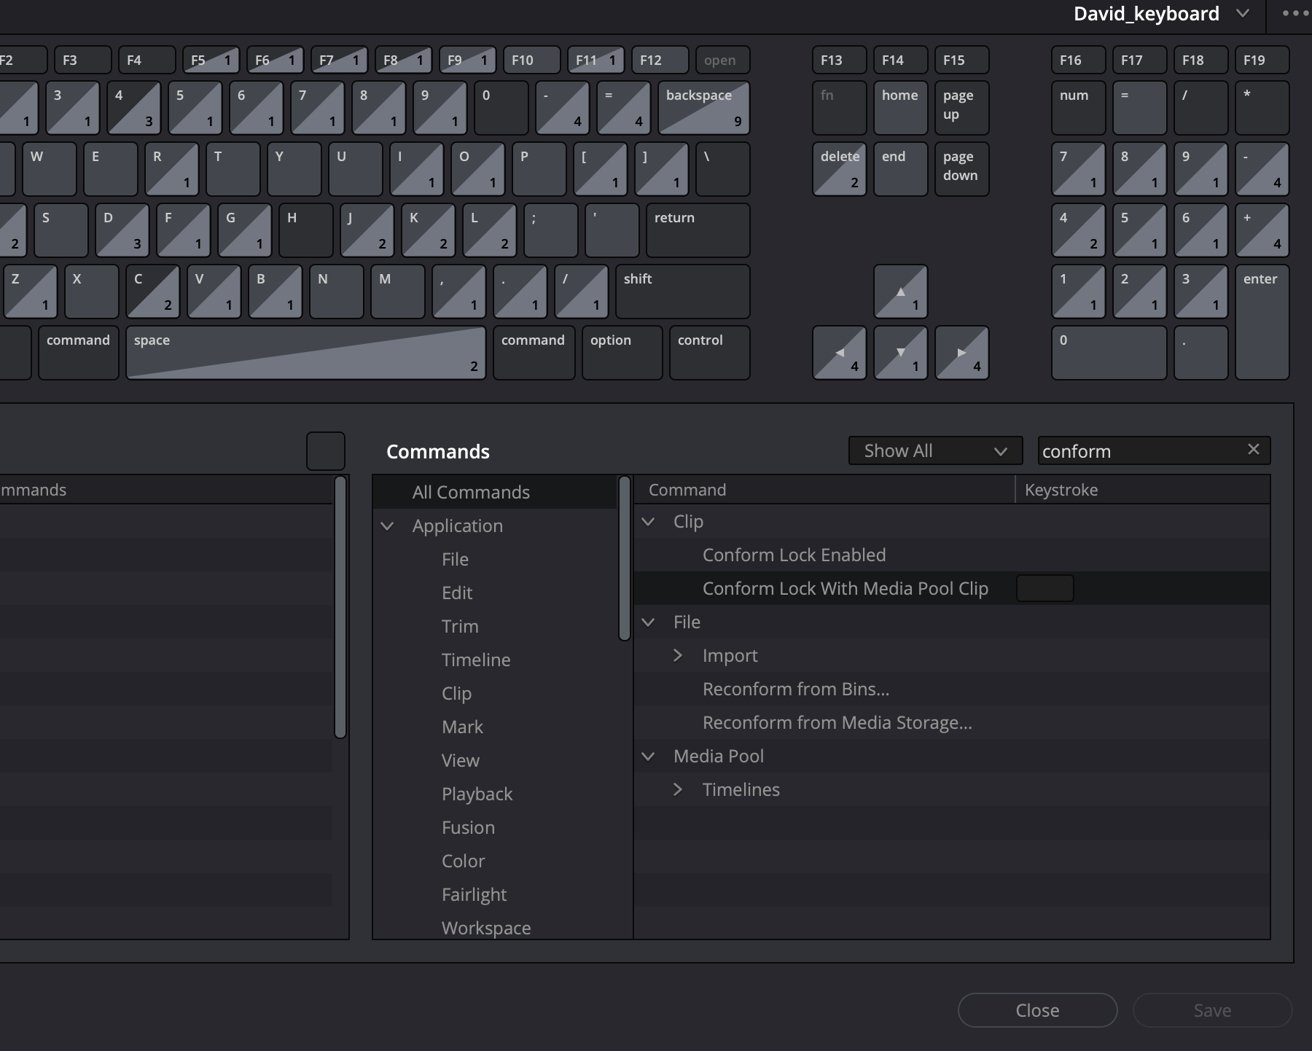 Keyboard shortcuts in Resolve are a great way to speed up tasks
It's common for adjustments like zooming and cropping, color correction, or audio adjustments to disappear when conforming media, so it might be necessary to re-adjust clips. If all of the original footage had the same color adjustment copying and pasting adjustments can come to the rescue.
Perform all the missing adjustments on the first clip and select Copy from the Edit menu (or press Command-C) and then select all of the remaining clips and select Paste Attributes... from that menu. Select all the attributes you'd like to apply to the clips, hit enter, and everything will update.
Backup plan
A good backup plan is the first line of defense against many data corruption issues, so it's good practice to ensure that a program's backup features are working properly.
The Mac has backup built in thanks to Time Machine, and setting that up also helps recover from data loss.
Our guide to using Time Machine for backups is a good place to start to prevent data loss.


 Chip Loder
 Marko Zivkovic
 Malcolm Owen

 William Gallagher
 Christine McKee
 Andrew O'Hara
 Andrew Orr


-m.jpg)

1 Comment
Same thing happens in Premiere CC.