Apple's macOS Ventura's Dictation feature is a little bit different that it was when it originally debuted. Here's how to turn it on, and how to get started with what it can do.
Dictation allows you to dictate text in any text field that you can type in. This feature is handy if you want to draft a quick email, but it has many other uses — the sky's the limit. But, you have to turn it on first.
How to enable Dictation on macOS Ventura
- On your Mac, click the Apple Menu
- Click System Settings
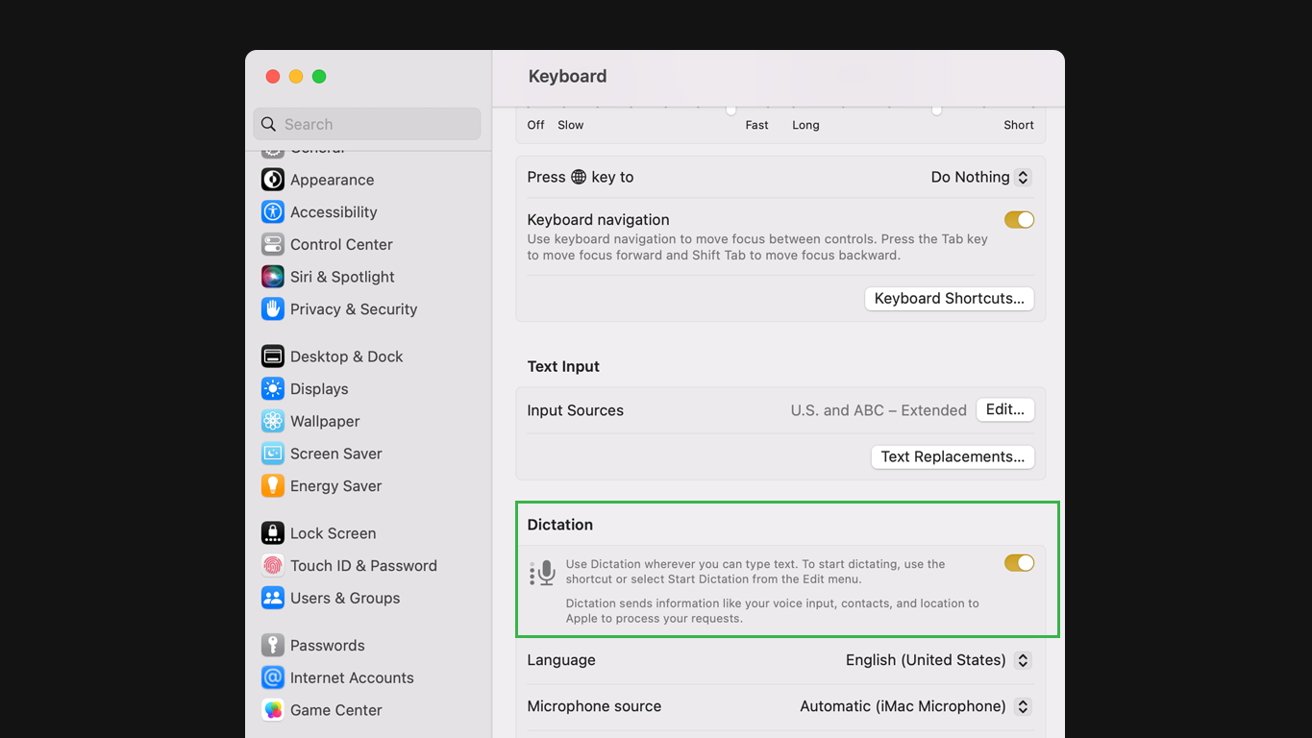
- In the window that appears, scroll down and click Keyboard
- Toggle on Dictation
Once dictation is enabled, you can use it wherever you'd type. Naturally, email and word processing software are the logical uses, but you can use dictation for forum posts, internet searches, and more.
How to begin dictating in macOS Ventura
- In an app on your Mac, click where you would like to insert your text
- Turn on dictation by either pressing the dictation button on your keyboard or clicking Start Dictation under the Edit menu
- When the microphone appears on screen, dictate your text in a clear voice
- When finished, tap the return key
You can dictate for any desired amount of time, but the feature does turn off after it detects no speech for 30 seconds.
Dictation automatically inserts punctuation, such as commas, periods, and question marks as you dictate. To insert other punctuation marks, you can simply say the name of the punctuation mark you wish to use.
Saying "new line" will move the text down one line, while saying "new paragraph" will move it down two lines.
Dictation is not designed to be a full accessibility feature. To control your Mac and apps with your voice, you'll need to head to Accessibility and enable Voice Control — which we will be covering soon.