Inside macOS Mojave: How to use Apple's new Screenshots feature
 William Gallagher
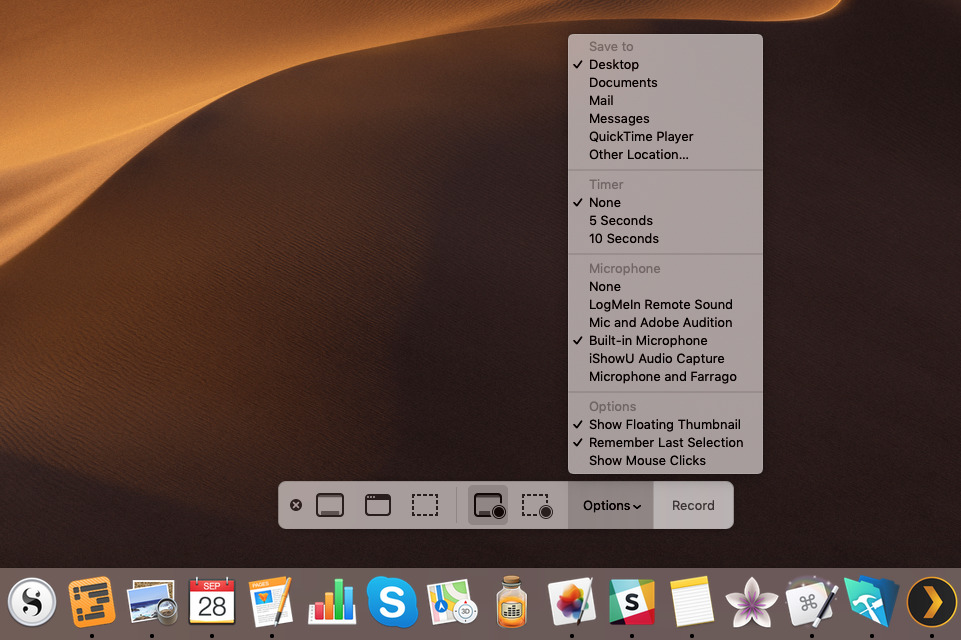
It seemed like just a slightly better way to grab an image of your Mac screen but Apple's new Screenshots feature is far more powerful than that. AppleInsider digs into the details.
There is one feature in macOS Mojave which you can't find through a menu, you have to know the keyboard shortcut. If you're a long-time Mac user, though, you're well on your way to using this new Screenshot feature because it's an evolution of what we've had before.
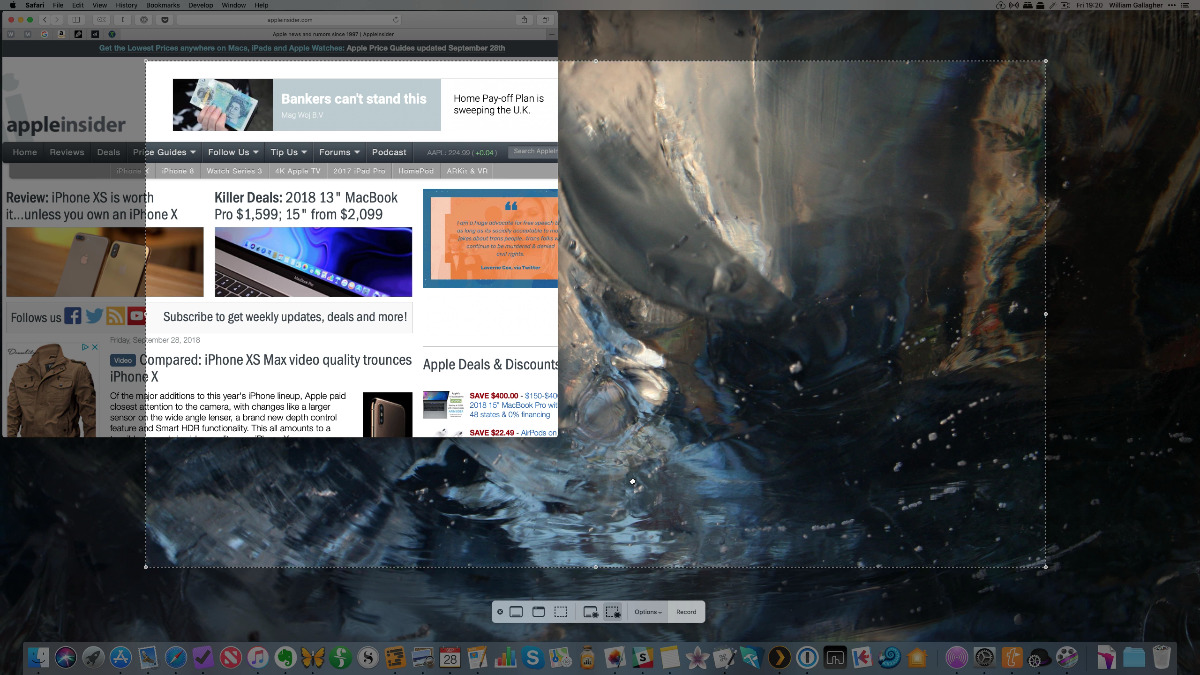
Where you can press Command-Shift-3 to take a full-screen shot or Command-Shift-4 to take a portion of the screen, now you can do Command-Shift-5. This doesn't take an image quite the way the other two do: it first presents you with small strip of tools for taking images.

It's all very neatly done but behind the neatness hides a plethora of options and they're not all obvious.
The control strip
The strip appears toward the bottom middle of your screen. Apart from a small cancel X to the left, the strip is divided into either three or usually four sections.
The first section has three icons to do with taking a still image of your Mac's screen. From left to right they are buttons for taking a shot of your entire display, just one selected window on it, or some other portion you decide.
Choose the middle one for taking a selected window and the strip shrinks from four to three sections. The fourth is labelled Capture and it's one way you can tell your Mac you're ready to take the shot.
As it happens, though, if you click on any of the first three buttons and then click again away from the control strip, it takes the shot immediately anyway. That's an option when you're taking a shot of the whole or a portion of the screen, it's the sole way to take the shot of a window.
Very, very nicely, that one where it takes an image of a particular window on your display does so whether you can actually see all of the window or not. So long as there is a portion visible, clicking in there will take a shot of the whole window as if nothing were in front of it.
That also happens if you take the slightly longer route. Rather than click once on the button and then click away from the strip, you can select the button you want and now choose from other controls too.
Options and preferences
If you've selected one of the three still image buttons, then the section toward the right of the strip marked Options contains display preferences, a timer and also a destination.
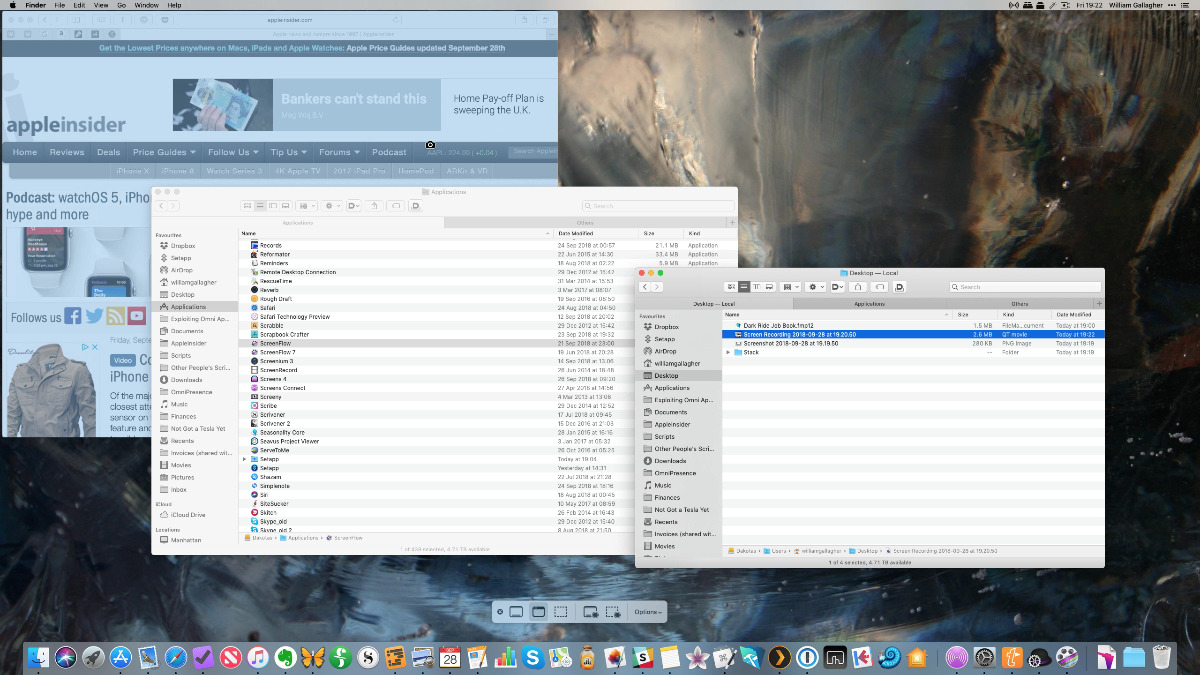
Previously whatever way you took a screenshot on your Mac, the image file was saved to the desktop. That's the default here too but you can instead choose to skip saving it and send the image to someone over email or Messages. You can elect to have Preview open the image directly or you can have it save to anywhere on your Mac.
The timer section is an excellent touch. If you ever have to show someone which menu option to choose in Excel then this is how you do it: you set the timer for 5 or 10 seconds and then click through to the menu you want to show. Time it right and you're in position when the timer goes off and the shot is taken.
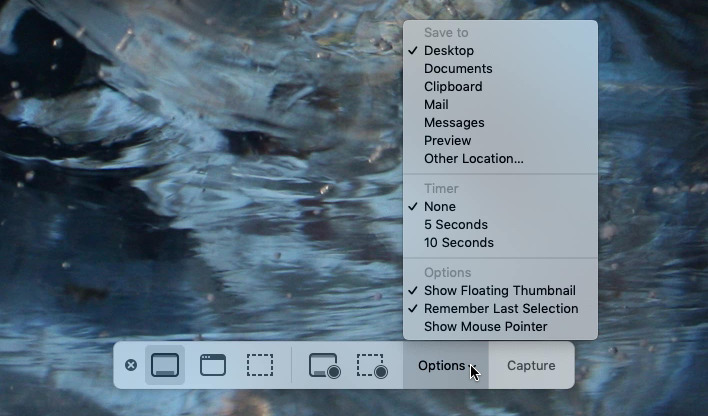
One of the remaining choices in this Options section is to have your mouse pointer be shown. Typically it isn't, the pointer is invisible so that it doesn't spoil the shot but when you want someone to be really clear which menu option or which tick box you're telling them about, this can help.
There are then also options for Show Floating Thumbnail and Remember Last Selection, both of which are on by default.
You'll recognise the floating thumbnail: this is iOS 12's screenshot feature brought to the Mac. Unless you switch this off, as soon as you've taken any shot, it appears for a few seconds as a small window at bottom right of your display. You can click on that to edit it or just ignore it, knowing that the image will be saved for you.
Remember Last Selection is also a smart touch. If you drag the cursor across the screen to take a shot of a specific part of it, Mojave's Screenshot feature remembers where you did it. That means next time it will default to doing the same thing.
And that means you can end up with a series of shots that are all exactly the same size and composition. It saves you editing time in Photoshop or Pixelmator Pro later.
Video
The next section along from the three buttons for taking still images is concerned with video. Here you only get two buttons: one for recording the whole screen and one for just a particular portion of it that you then define.
Once you click on either of these video buttons, the Capture button at the end of the strip changes to Record. More significantly, the Options section changes.
You get all the same timer controls, options for where to save the file and whether to have a floating thumbnail afterwards. However, you also get a new section about audio. Every possible sound input connected to your Mac is displayed here and you can choose any — or none.
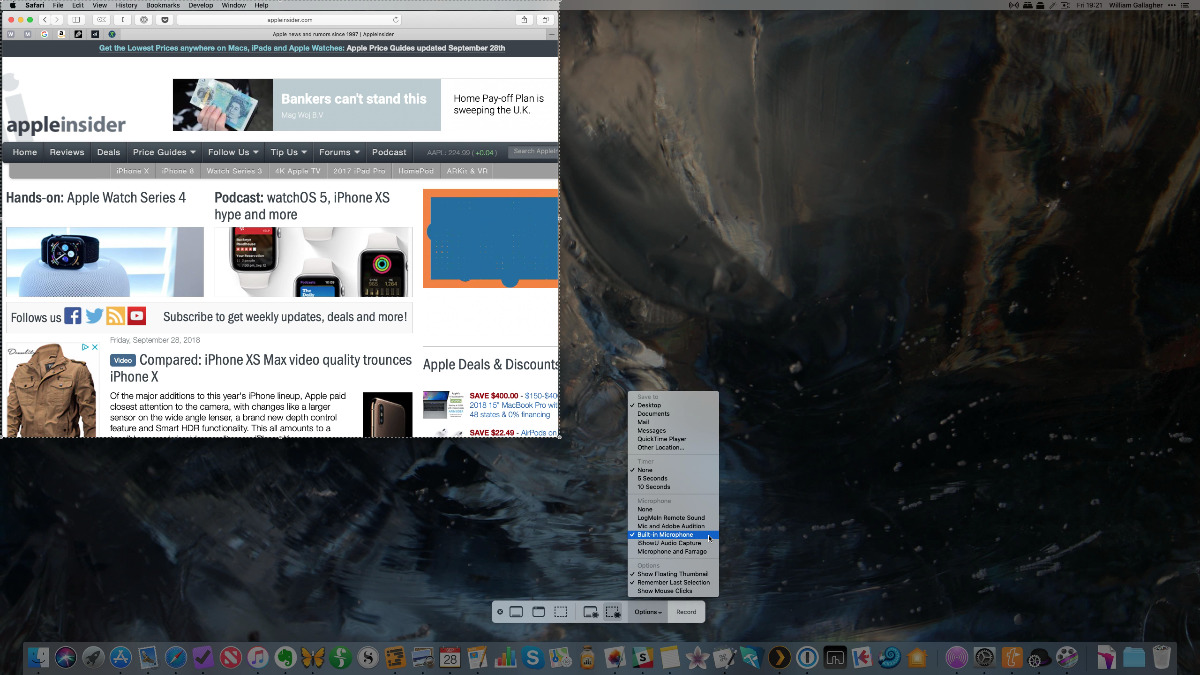
If you want to record yourself talking through how you apply grading to a movie in Final Cut Pro, this is how you do it.
You don't have the same freedom to set controls and then click away from the strip to start recording as you can with the still image screenshots. With video, you have to make your choice and then click on the Record button.
Once you do that, it obviously starts recording but the very first time you do it, you get a notification of how to stop it, too.

One tip we'd give you is to wait a moment before you start either speaking or doing anything on your Mac. It depends on your hardware but it can take a couple of seconds before Screenshots is capturing the video.
You can check that it got the start of what you were trying to do by clicking on the Floating Thumbnail that appears after you stop recording. Click on that and it springs up into a larger window that includes a scrub bar for moving back and forth through it.
In a similar way to the old QuickTime Player, which still exists in macOS Mojave, you can also do some light editing on the video. You can trim the start or end of it to get it to be featuring only what you want.
It's very nice, but...
If you'd like to mess with your own head, use this feature to make a video of your screen — and then while that's recording, use the same thing to take a screen shot.
Mojave's new Screenshot feature is just remarkably powerful and feature-packed. It will stop some people needing to buy apps like Screenflow, but then it will also show some other people why you'd want that other software.
If there are any alternatives to Apple's own tools for taking actual screen shots, then we neither know nor care. What we do know and care about enormously is that there have long been tools for taking videos or screencasts of your Mac.
They do still offer more. Screenflow, for instance, has the ability to easily zoom in or out of a video. So say you want to show someone a tiny icon in the middle of a Mac app's window: Screenflow lets you zoom in and highlight it.
Really apps like Screenflow have moved on to become fuller-featured video editing tools.
If you just need to grab a single shot or show someone a simple video, though, macOS Mojave is now your best option.
Keep up with AppleInsider by downloading the AppleInsider app for iOS, and follow us on YouTube, Twitter @appleinsider and Facebook for live, late-breaking coverage. You can also check out our official Instagram account for exclusive photos.


 Mike Wuerthele
 Malcolm Owen
 Chip Loder


 Christine McKee
 Michael Stroup
 William Gallagher and Mike Wuerthele