AirDrop is one of the quickest and easiest ways to transfer files between macOS and iOS devices, but performing a small change in macOS can make it even simpler to start using straight away. AppleInsider shows how to add this handy file-sharing tool to your Mac's dock, ready to initiate transfers at a moment's notice.
Most people who needed to share files from an iPhone or iPad to a Mac or vice versa will have heard of AirDrop, Apple's application for sending files to nearby devices. So long as both devices have Bluetooth and Wi-Fi turned on, are in range, and don't have any settings enabled to block transfers, it can be used to share photographs, videos, documents, and other files with minimal interaction.
While it is available to access in the Finder in macOS, as well as through the keyboard shortcut Command-Shift-R from the desktop, asking Siri, and Spotlight queries, it is oddly not immediately able to be added to the Dock.
The AirDrop application is well-hidden, though not kept in the usual Applications folder. It is possible to find it, but it's not a straightforward process.
Finding AirDrop, Method 1
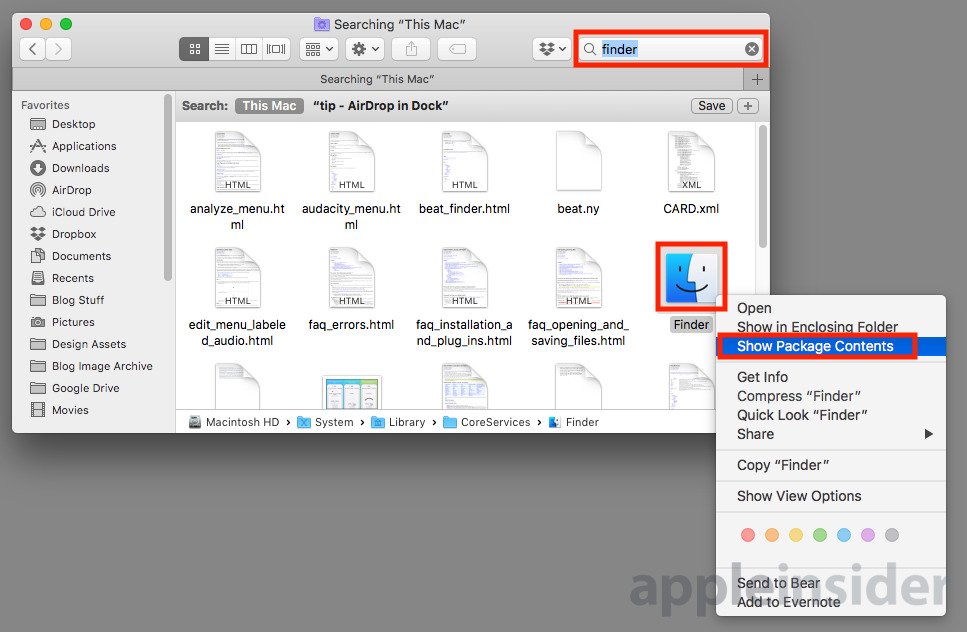
Open Finder, select the Search bar, type in "Finder," and hit return to search. Make sure to select "This Mac" in the search area option near the top.
Right-click the Finder icon and select Show Package Contents.
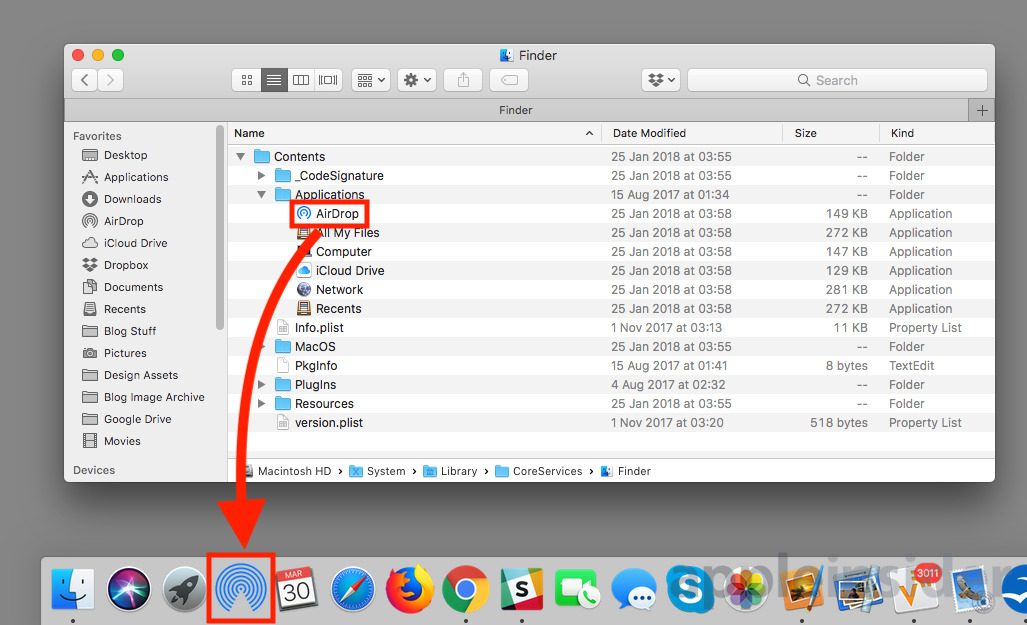
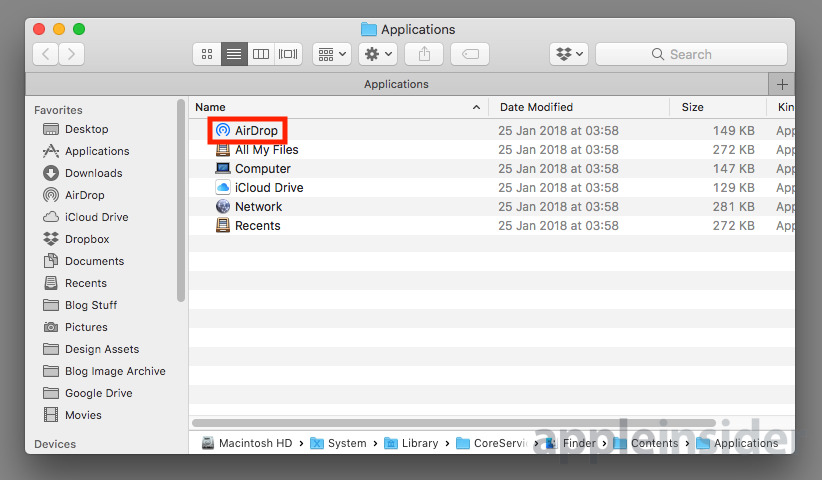
The files and folders that make up Finder become visible. Navigate through Contents and Applications to see AirDrop alongside some other apps. Lastly, drag AirDrop down to the Dock.
Finding AirDrop, Method 2
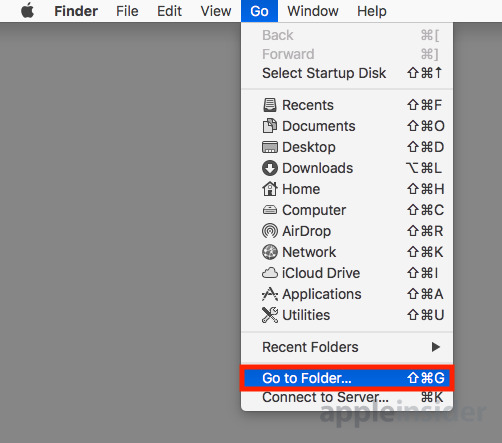
From the desktop, select Go in the menu followed by Go to Folder.
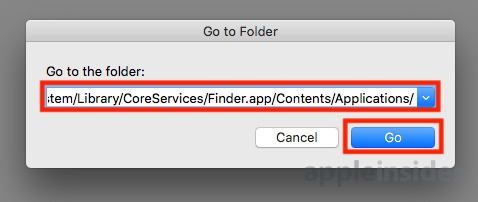
In the search box that comes up, enter "/System/Library/CoreServices/Finder.app/Contents/Applications/" and click Go.
This will bring up a Finder window showing the same directory containing AirDrop as in Method 1. Again, drag AirDrop down to the Dock.
Further Notes
Adding Finder to the Dock does make it slightly quicker to access the function if you wish to send files, but not by much. Clicking it brings up the usual Finder window for AirDrop, which effectively saves only one click by not needing to open Finder first.
As a byproduct, using this method also provides a way to add iCloud Drive to the Dock. Follow the instructions as above, but instead of dragging AirDrop, drag iCloud Drive to the Dock instead.
The same can be performed for other items in the folder, with each opening a Finder window displaying different items. Network brings up visible devices on the network, Computer shows your Mac's drives, and Recents and All My Files simply brings up lists of files.
 Malcolm Owen



-m.jpg)





 William Gallagher
 Christine McKee

 Mike Wuerthele
 Andrew Orr
 Andrew O'Hara


-m.jpg)


12 Comments
There's a 3rd method:
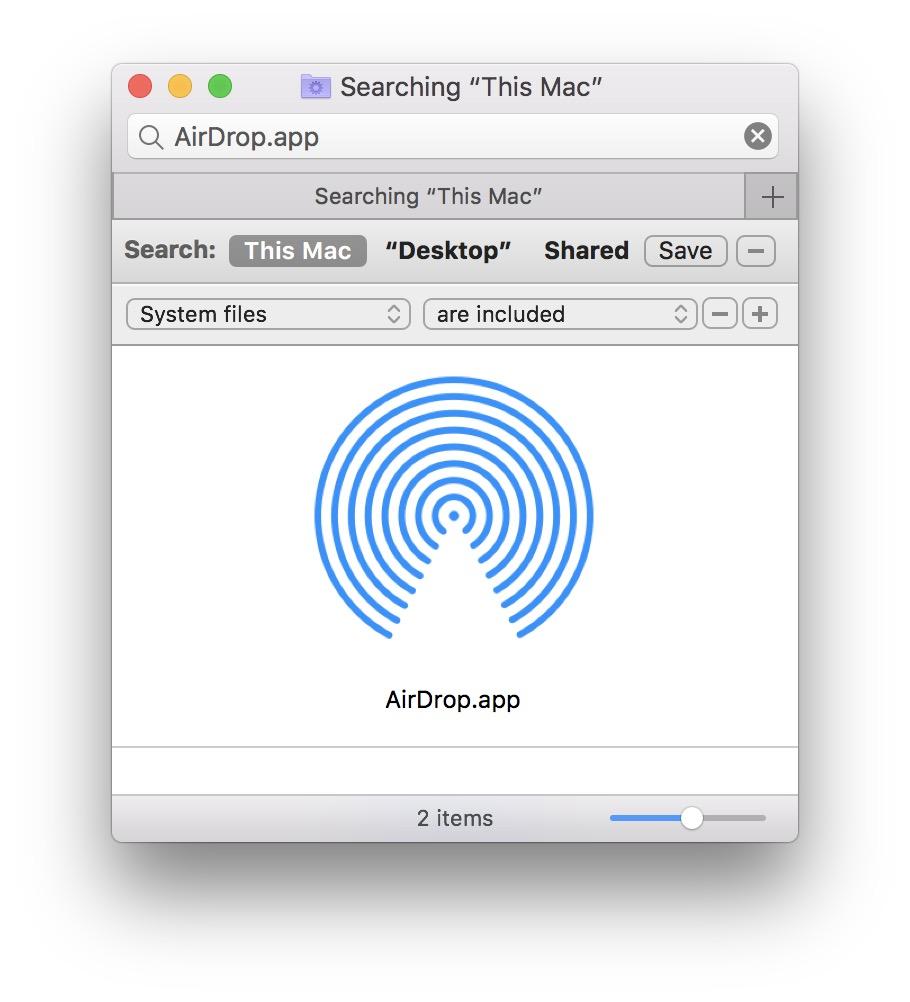
In Finder do a search for AirDrop.app. The search will yield nothing. Click the '+' sign and then Other… and then add System Files to your search parameter and select Are Included.
I think it's good to have this checked so it's always a quick option when searching for items so you only ever have to go through that process once to find anything on your Mac quickly.
I think there might be an age issue for some macs.
Useful tip AI, thanks. Just wish you could make it more reliable! I usually default to iMessaging things as Airdrop's success rate (even between iOS devices) only seems to be about 50%
This seems like a whole lot of work compared to simply opening a finder window. The real problem is the continued unreliability of AirDrop. It’s a lot better than it used to be, but I still have issues with it on a very regular basis. The ease of use makes it worth trying, but every time I use it I find myself subconsciously thinking about what I’ll do when it doesn’t work.