Before you even bother with Apple's powerful Automator and AppleScript tools, your Mac is capable of saving you time and speeding up your work every day.
You're too busy to look into automating your Mac — and already we've used the word 'automating'. When you get into this subject, that's the word you enjoy looking out for. When you're not, though, it sounds like programming and you might be fine with that but you just do not have the time.
Automation saves you time. It does more, it removes or at least eases those repetitive chores you have to do, and it also makes certain you can never make a mistake in those chores. However, the overriding absolute benefit is that automation saves you lots and lots of time.
It does mean spending a little of it now but everything is about saving you much, much more time later. Set up your Mac so that when you start something, it can finish the job for you.
You're on a Mac
The Mac is built for this automation. Not only are there third-party tools for the Mac that cannot be found for Windows, but Apple packs a lot of features into macOS already.
We'll cover the tools you can buy to amplify what we've done here some other time, but for now, we're just going to use what comes with your Mac. We're not even going to touch the free Automator and AppleScript yet. We're just looking at the Mac tools that you're already using, yet which can be automated further.
Spotlight
Spotlight does not get enough respect. You already know that it's a way to search your Mac for your files and you've soon found that you can start web searches in it too.
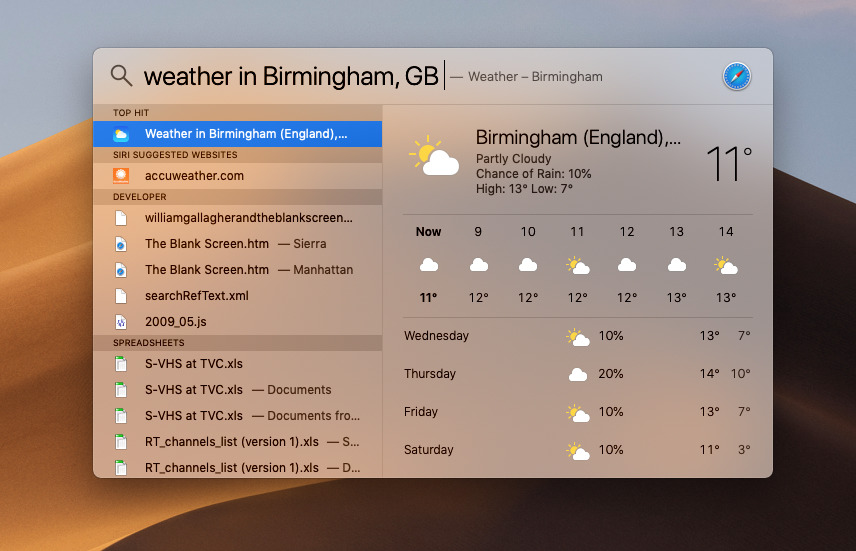
However, you can end some web searches there as well: rather than finding a website that you then go to read, Spotlight can just tell you the answer. Press Command-Space to bring up Spotlight and type the word "Weather".
Now, officially this should get you the local weather report wherever you are and it should be shown to you in Spotlight's window. If you happen to be a forecast nut and have previously installed many apps with 'weather' in the name or you've written a lot of documents about precipitation, Spotlight may instead show you all of those first.
If so, just type a little more. Type "Weather in New York", for instance, and then you'll get the report.
That saves you looking up some information but Safari can also calculate information for you. Press Command-Space and type "99+101" and Spotlight will append "= 200". Now press Command-C, click away to go back to whatever you're working on, and then press Command-V.
Your Mac will paste that "200" result into your current document.
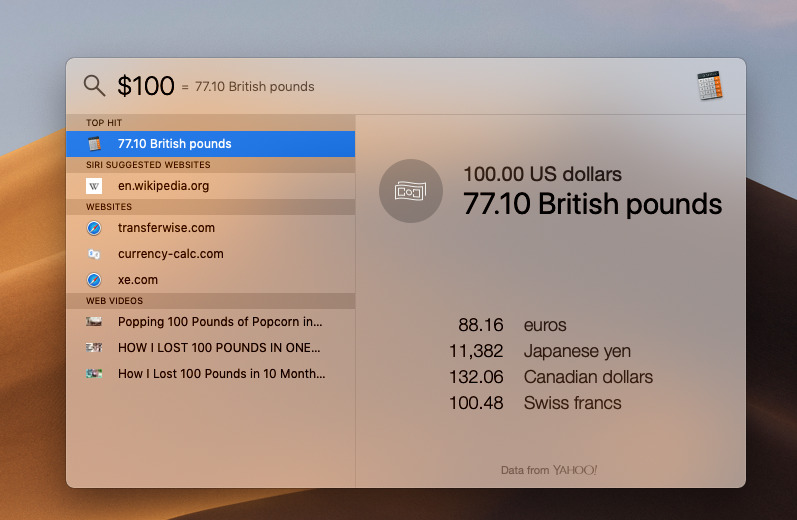
Similarly, you can ask for scores of a football team or you can type something in a foreign currency and Spotlight will append what that is today in US dollars. And again you, can copy and paste that result.
These are all really small things but they just saved you going onto the web to find them. And that means they also saved you getting distracted.
The apps you use every day
You're probably not very good at switching your Mac off at night but one reason you don't is because it then takes an age to re-open all of the apps you need. Tell your Mac to open them instead.
Go to System Preferences and choose Users & Groups. Click on your name in the top left column and then on Login Items. You'll need to now click on the lock icon at bottom left and enter your password to prove it's you. There is an oddity here in that you have a lock icon to click but if you don't, you can still go through adding login items. They don't always appear in the list until you later click on that icon to unlock but it's inconsistent.
Everyone's list of login items will be different. Ours is replete with automation tools that we've added. However, you can add absolutely any application to this list. Click the plus sign at the bottom of the list and you'll navigate through to your Applications folder. Click on any you want, hit Add and you're done.
From now on, every time you start up your Mac, that application will open up automatically. There is no limit to how many apps you add like this, but trust us: keep it to a few. That's because if you ever have problems with your Mac and you have to keep restarting, this time-saver becomes extraordinarily irritating as you have to watch all these apps starting up over and over again.
Although you don't actually have to watch them at all. Look at the list again and you can see a tick box under the heading Hide. If you click that, then the app will automatically open but you won't see it on your screen.
So it's there, it's ready, it's just not in your way.
While you're in System Preferences
Click that lock icon to stop anyone else leaning over and adding apps to your login items. Then go back to the main System Preferences screen and click on Keyboard.
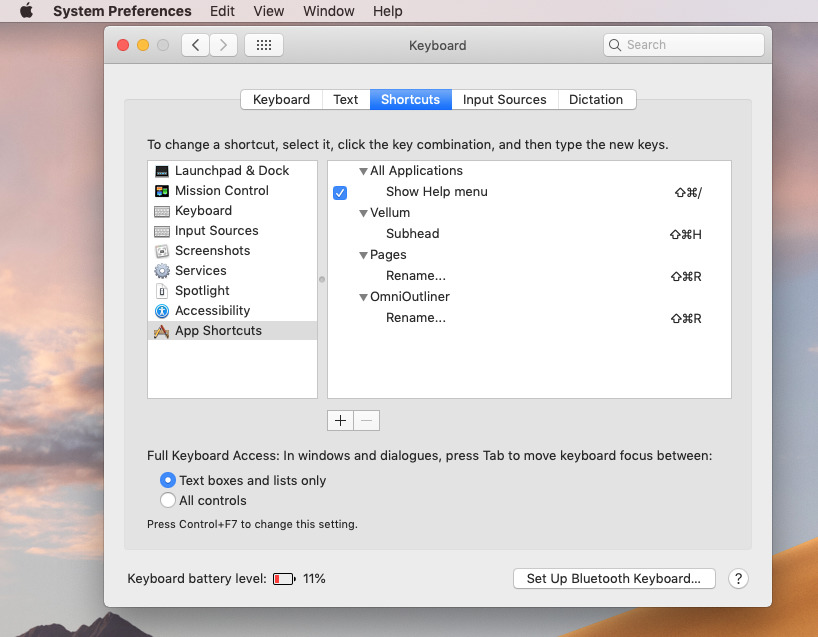
In the screen that appears, click on Shortcuts. There's a list of options on the left: choose the bottom one, App Shortcuts.
This is where you can add a keyboard shortcut to any app you use — or to all of them. In this example we keep finding we need to rename documents in Pixelmator Pro. So rather than going to the File menu and choosing Rename before we can type the new name, we want to just press a key.
Click on the plus sign and a list of all your applications appears. Right at the top is the option to create a shortcut for every app. Depending on the shortcut you're trying to make, it won't actually work in every app, though.
Something like our one for renaming a document is likely to work in everything. However, you can't change a text style in both Word and Photoshop, you can't change from RGB to CMYK in Excel.
Instead of choosing All Applications, take the time to pick out just one.
When you do, macOS shows you a pop-up dialog asking for what you want the app to do and then what keyboard shortcut you want to use.
That first part is both exact and limited. You must type in precisely the name of the app's menu item that you want. It's the end item, the menu entry that you end up clicking: so in our case it's Rename and not File, File. Also note the ellipses on Rename — if the menu item has ellipses, you must type those three dots here.
The limitation is more of an issue. You can do this to make a keyboard shortcut that saves you schlepping through menus to any command you want — but it can only do menu commands.
In Pixelmator Pro, for instance, we are forever switching between seeing the size of an image in pixels or in percent and we can't make a keyboard shortcut for that because it's a drop down option, not a menu command.
Or rather, we can't do it without third-party automation apps which we'll cover another time.
There is a minor limitation on the second part of this dialog pop-up, the place where you enter a keyboard shortcut. When your cursor is in that box, any key you type will be set as the shortcut. So if you change your mind about all of this and decide to just quit System Preferences, you've now made macOS treat Command-Q as meaning Rename.
Speaking of keyboard shortcuts
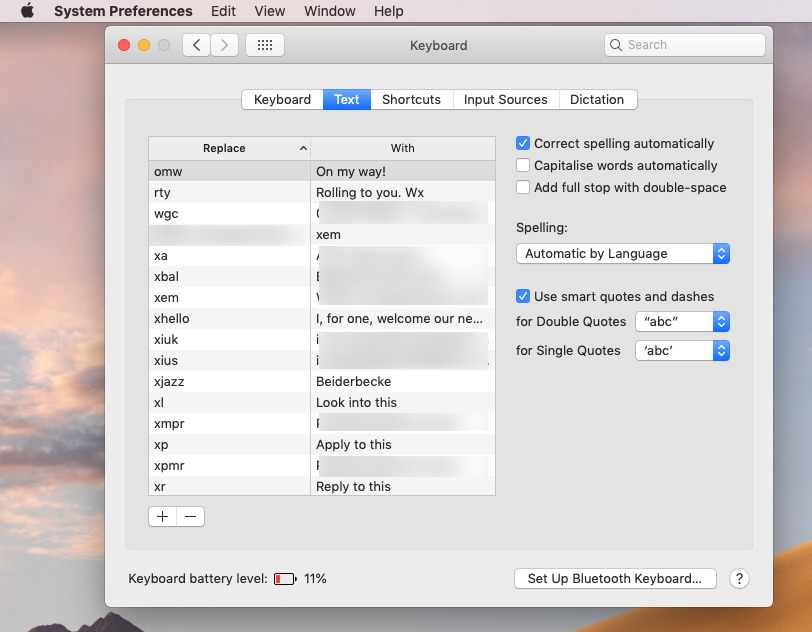
While you're in the Keyboard part of System Preferences, click on Text. This will show you a list headed Replace and With.
If this is the first time you've been into this section, you'll find a very short list that's probably headed with 'omw' in the Replace section and 'On my way!' in the With one.
Since the day you got your Mac, typing the letters o, m and w together in any application on it has automatically changed those to the phrase "On my way!" or at least offered to do so. Now you know why, if you've ever made a typo writing the word 'homework', you've ended up with "hOn my way!ork".
This is text expansion and there are third-party tools to do more with it but right there on your Mac is a basic system. Every text expansion system, every tool, all work the same way: you say what letters you type and what you want those replaced by.
It works like autocorrection but instead if replacing mistyped words with what macOS thinks you meant, it replaces trigger letters with words or sentences you've predetermined.
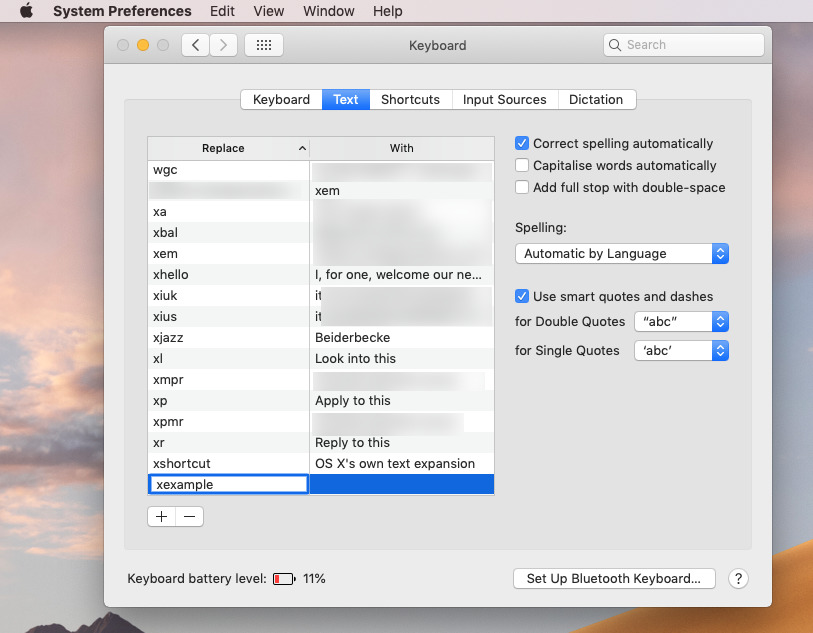
We have used it for words or names that we consistently have trouble spelling such as Beiderbecke. We more often use it for things we just either forget or get weary of how many times we have to type it out, such as our email address or phone number.
To add something to this list, click the plus sign and type in what trigger letters you want to use and then what you want them replaced with. Avoid the "hOn my way!ork" problem: begin your series of letters with something unusual like an x. To enter our email address, for instance, we've set our Macs to write out the whole thing whenever we type the letters x, e, and m. That's x to avoid ever doing this in the middle of a real word and 'em' for email.
You may have to change these over time: we used to have a phrase that would be written out whenever typed 'xr'. That became a problem when Apple released the iPhone XR.
Also, recently we were in a passport office filling out a form by hand and in the box where they want you to write your email address, we handwrote 'xem'.
Folders and files
More than you type your email address and more than you open apps, you spend time finding and opening documents. Depending on your work, you could have dozens of documents that are made in different applications and apply to completely different elements of your job. The one thing they have in common is that you probably go back to them over and over for at least a few days.
Make one folder that just shows you every document you've worked on in the last couple of days. Go to the Finder, choose the File menu and New Smart Folder.
You get what looks like an empty folder but with a search bar in it. To the far right of that bar, there's a Save button and a plus sign. Click the plus.
Now you get a search option which begins with Name matches and ends with a blank space for you to type in.
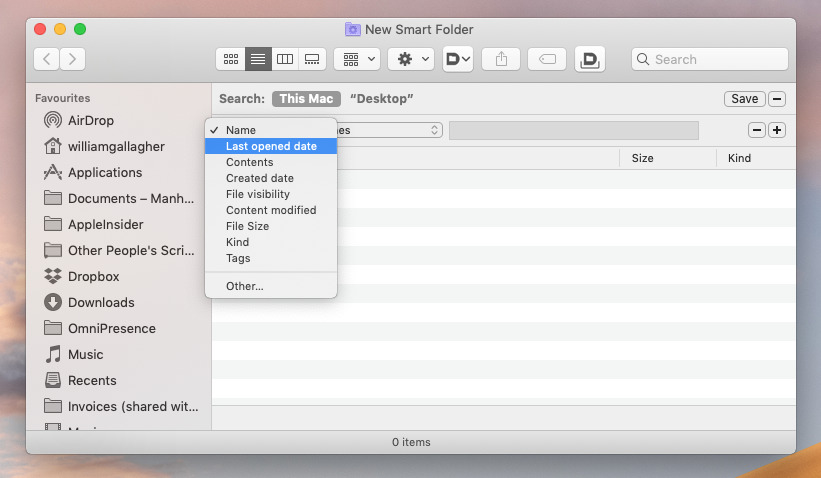
Name and matches are both dropdown menus. Click on Name and from the list that appears choose Last opened date.
As soon as you do that, matches is replaced by a series of dropdown and spaces to type. You're creating an instruction for your Mac which is saying that you want to find any document that was opened within the last few days. Type a 2 into the days box and macOS will start searching.
Every document you've worked on since yesterday will now appear to be in this folder and you can open any of them. Before you do that, click the Save button at the top right, next to the plus sign. You can choose to save it in the default location macOS offers or you can place it anywhere else you want such as your desktop.
As soon as you've saved it, you also get an entry for it in every Finder window. It appears under the list of your favorite folders on the left hand side of each Finder window.
To use it, just click. To change it to, say, the last 7 days, right click on it in the Finder window and choose Show Search Criteria.
Now you have one single folder to go to that appears to have all of the documents and files you're currently working on. Notice that we do say it appears to have them. While this looks like a folder, it isn't: it's a search result. Your documents are exactly where you left them.
However, that's even better because it means you can open a document from this smart folder and make changes. When you then press Save, you're still saving the latest version of the document to wherever you originally put it.
Quick Actions
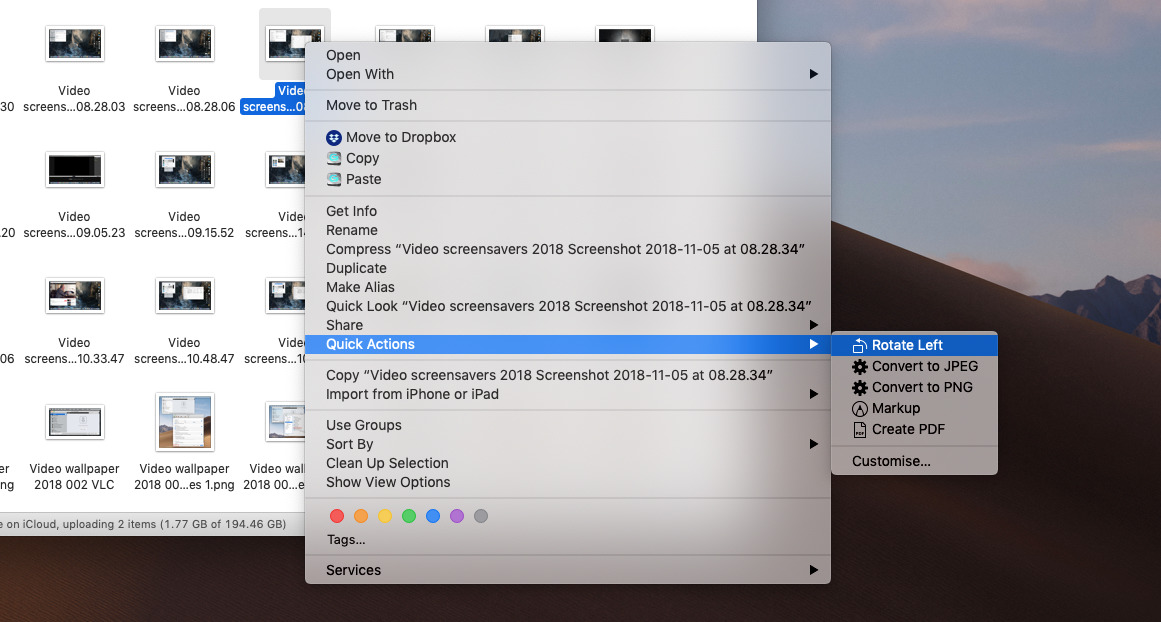
New to macOS Mojave is the ability to do more directly in the Finder with Quick Actions. You now have the ability to click on an image and rotate it, for instance. No opening that picture into Preview or Affinity Photo, you just tell the Finder that you want it rotated.
Mojave comes with a few Quick Actions but you can add your own. Apple makes this particularly easy but it is still heading into Automator and possibly AppleScript territory.
These are two powerful automation tools that Apple has provided for years. AppleScript is harder to learn but the most powerful; Automator is limited but easier to get into. If you've used Siri Shortcuts on iOS, you'll recognise Automator.
It's just that even without going into Automator and AppleScript yet, you've already got enough automation tools to speed up your work and remove some of the tedious searching and saving you currently have to do.
Keep up with AppleInsider by downloading the AppleInsider app for iOS, and follow us on YouTube, Twitter @appleinsider and Facebook for live, late-breaking coverage. You can also check out our official Instagram account for exclusive photos.
 William Gallagher








-m.jpg)




 Wesley Hilliard
 Oliver Haslam
 Marko Zivkovic
 Amber Neely
 Sponsored Content
 Christine McKee

 William Gallagher and Mike Wuerthele





10 Comments
THANK YOU THANK YOU
1) Currency Convertor without having to goto Calculator
2) Keyboard Shortcuts (which was the best!)
Automatic replacement can be a problem. Years ago, I set two keyboard shortcuts in iOS: typing "tea" in any context changed to "TEA!" and likewise "science" became "SCIENCE!". It was a cool joke at the time, but these days I find myself writing both those words in contexts where my enthusiasm might not be appreciated. And now they crop up when typing them on my Mac.
Yes, I know I can delete them, but I always forget until the problem comes up, and then I'm in the middle of something so I don't do it then, either.
Maybe I should just embrace my love of both TEA! and SCIENCE! and stop caring. It's easier than changing my OS settings.
As far as I can tell, there's almost no limit to how long the thing you're making a keyboard shortcut for can be. I have one that's an entire form letter that's triggered by "xform." After it has spit out the full letter, I can go back and make a small change if I wish, but I still saved myself writing an entire four-paragraph letter.
Excellent article!
You should also do a follow-up for Automater.