One of the perks of Apple's native Mail app in iOS 12 is the ability to create a "VIP" mailbox, gathering messages from your most important contacts as a way of cutting through the noise.
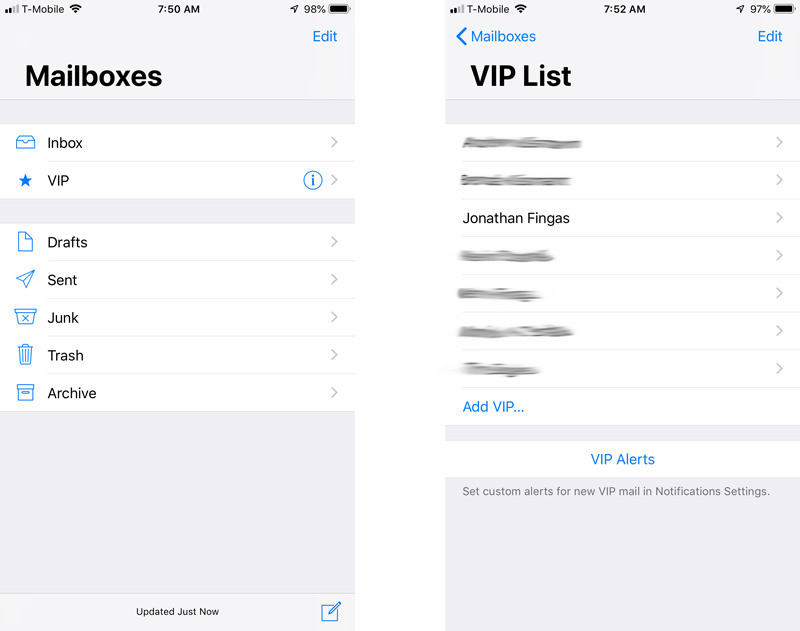
To get started, launch the app, and navigate to the main Mailboxes menu. You may need to tap "Mailboxes" in the upper-left part of the screen if you're sitting in the Inbox view.
You'll now see a "VIP" section available. Tap on it, and you should see an "Add VIP" option. A note for later: once you've added VIPs, you'll want to tap on the "i" (info) button here to see your VIP List and make changes.
Either way, selecting Add VIP will bring up your contacts, from which you can tap on an entry to add a person. If a contact is grayed out, that means that they don't have an email address Mail can use, in which case you'll have to load up Contacts outside of Mail and make edits.
Once you've added everyone you want, all you have to do in the future is go to the Mailboxes view and tap VIP to see a filtered inbox.
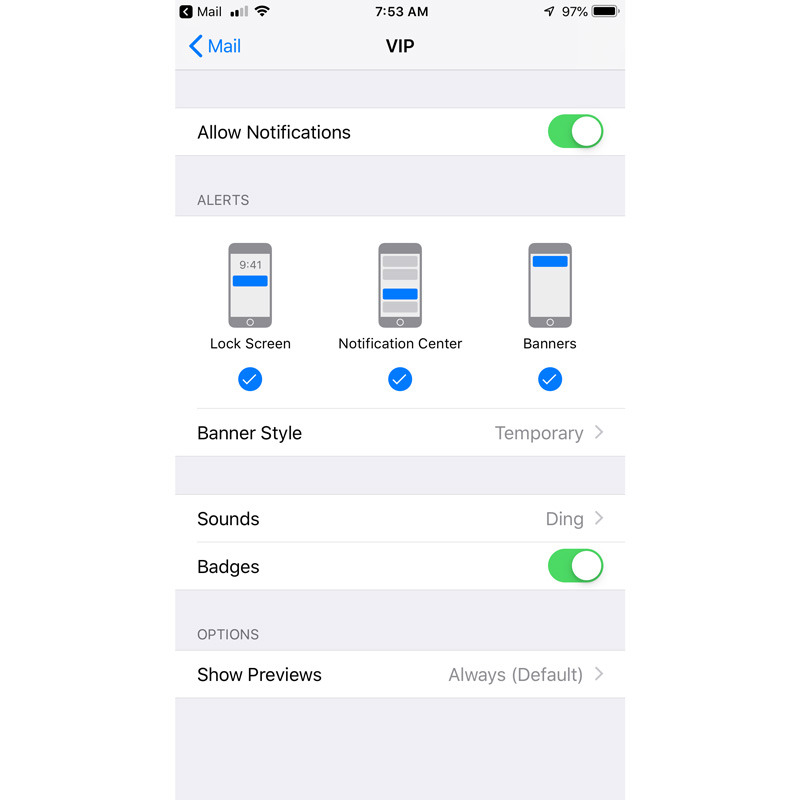
Note that from the VIP List — triggered by hitting that info button — you can jump into a menu for customizing how notifications for VIP messages will appear. You can, for example, give them different sounds to distinguish them from mundane content.
 Roger Fingas



 Wesley Hilliard
 Oliver Haslam

 Marko Zivkovic
 William Gallagher
 Amber Neely

 Sponsored Content
 Christine McKee
 William Gallagher and Mike Wuerthele





There are no Comments Here, Yet
Be "First!" to Reply on Our Forums ->