You've been able to make a PDF out of any document on Macs for years. We take it so much for granted, though, that we don't know what extra options we've got — nor noticed how Apple is trying to change the way we're supposed to make PDFs. AppleInsider walks you through making a PDF, with only the tools that come with macOS.
We just do not appreciate what we've got. After a brief period in the '90s when PDFs could only be generated through costly software, the document format was added a core feature of macOS. For a while after that, it would only be when you had to use a client's PC that you realized how integral PDFs are to Macs, how easy they are to use. And, how exasperating it was that just to print out a PDF on Windows you had to buy extra software — if the client's IT department would let you.
Things have changed, and now Windows 10 has some of the PDF features that we're used to on the Mac. Yet still, our familiarity means we can miss out on some of the finer PDF details and features our Macs can do for us.
There are third-party tools with features that Macs — and especially the Preview app — don't have. But, the giant majority of what you can use a PDF for is covered right there in Mojave.
Making PDFs
For years and years, the way to make a PDF out of any document in any application on the Mac was exactly the same. You printed it. Go to File, Print and click on the PDF button at the bottom left of the Print dialog. It looks like a button but it's a drop-down menu. Choose Save as PDF from the list and then you're shown a regular Save dialog that lets you choose where you're going to put the PDF document.
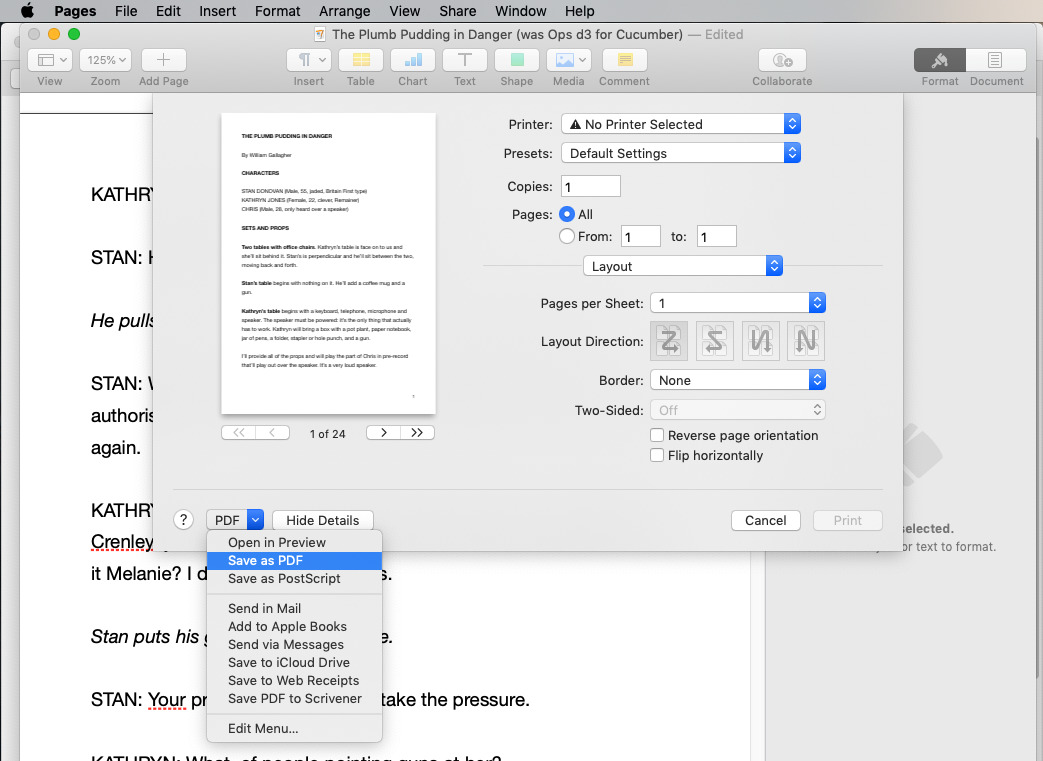
It's easy to miss but every Print dialog has a PDF dropdown menu
That's it. Before you choose that Save as PDF option, you could make some minor adjustments in the print dialog. You could set it to make the PDF out of just pages 10-15, for instance. Or change it from portrait to landscape. Anything that you can adjust for a document printing on paper, you could adjust here for the PDF, but that's all.
Apple would rather you did this another way, however. The company would prefer that your apps offer you something like the File, Export to PDF option that Pages, Numbers and other Apple apps have.
Right now it's anybody's guess whether a particular app will ever adopt this or not. Microsoft Office ignores it, for instance, and sticks to the old way — but there are times when this export approach is useful. True, that's partly just because it saves you a step hunting through that Print dialog but it also gives you the option to save the PDF in different qualities. It's not a precise tool, but Apple's giving you the choice ofGood, Better and Best get you significantly different quality and file sizes of the resulting PDF.
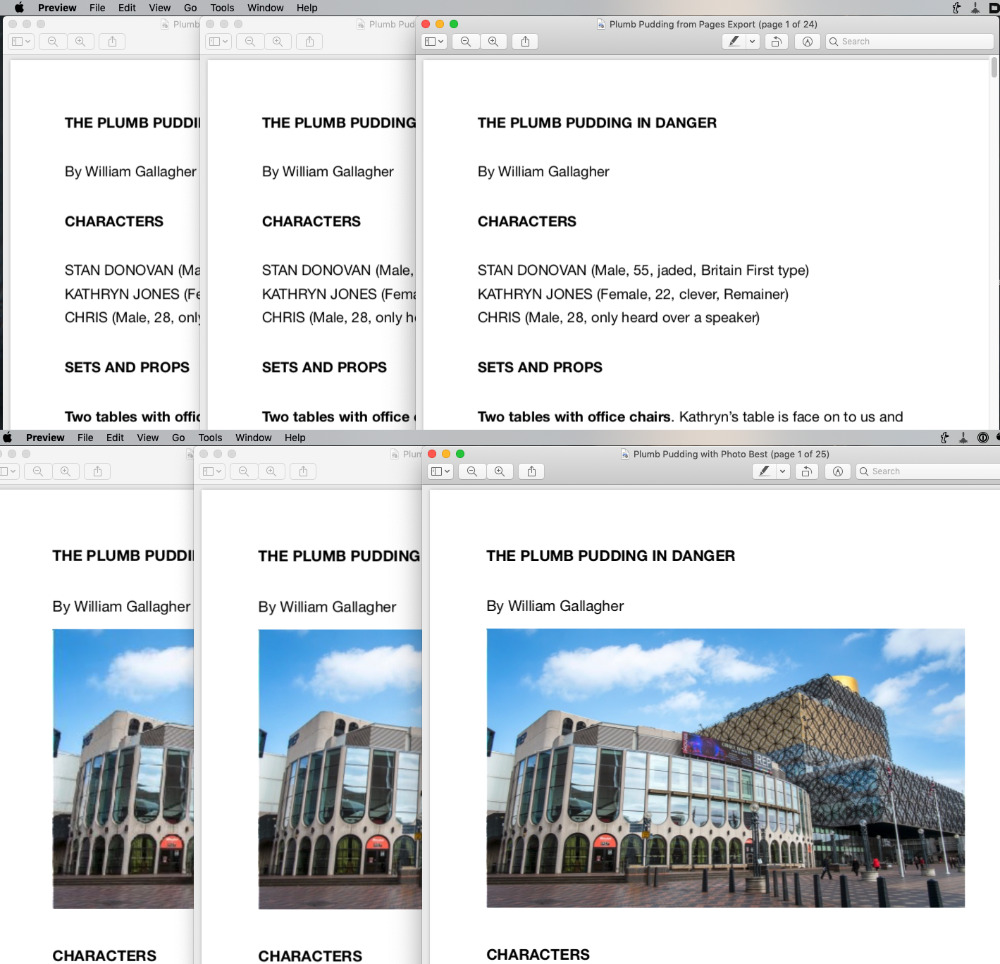
Top L-R: a Good, Better, Best text PDF. Bottom: the same with a photo
You can be hard-pressed to see any difference in text when you've chosen Good, Better or Best quality in Export to PDF. It's not always a dramatic difference when the PDF has photos, too, but it can be. In this example case, the Good quality has slightly distorted the walls of the theater in the first image.
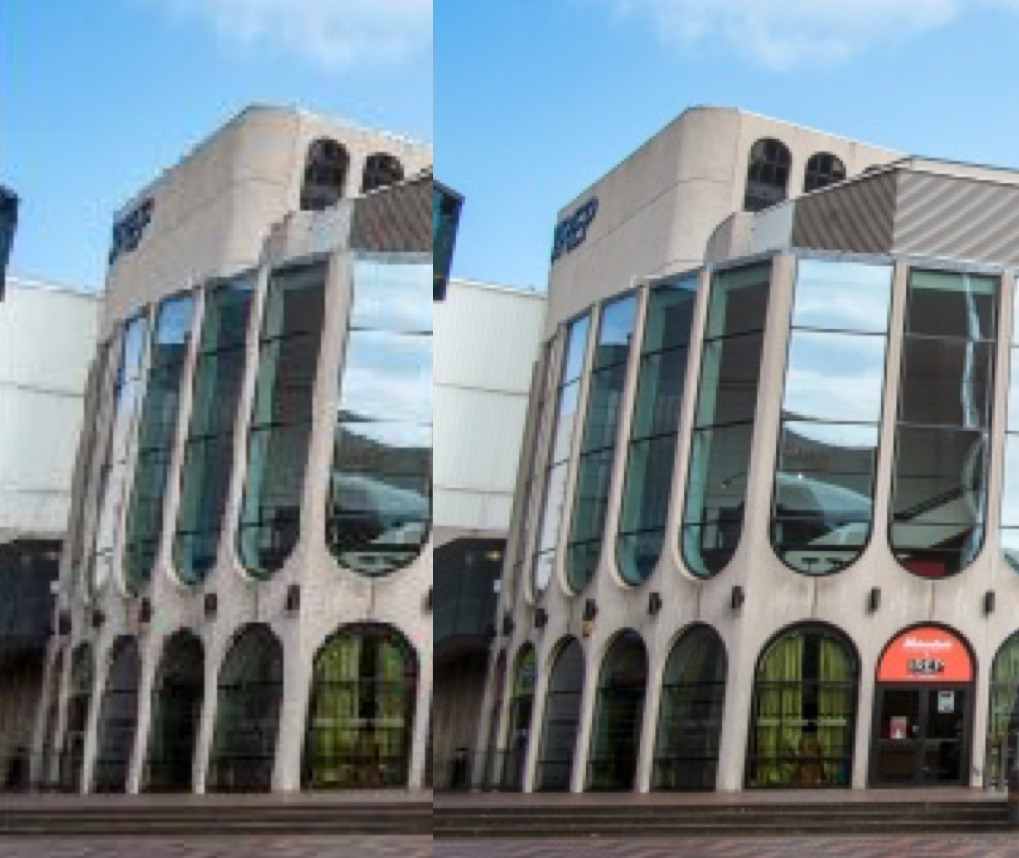
Close up on the difference between Good and Best quality. Notice how the brickwork between the windows is distorted
Similarly, you will get differences when the PDF has charts or illustrations but they may be small. With pen and ink illustrations, you'll see areas of cross hatching look less distinct, for instance.
There's no way to measure how much difference there is going to be, and actually there's not even a way to know in advance how much smaller your file size will be. It depends on the length of your PDF document and the number of photos or illustrations in it. For example, though, the PDF document in the image above is 115KB at Good quality, 168KB at Better and 197KB at Best.
That's not a difference that is going to concern you. Yet with a much larger and complex document, a reduction in file size could be the difference between being able to upload it to a service like MailChimp or not.
Preview isn't just for viewing
The document in the examples above was created in Pages, exported to PDF and then opened in Preview. The Preview app is an excellent PDF reader — but it is also much, much more than that.
Preview has two oddly similar yet importantly different options. In the File menu, you'll see both Export... and Export to PDF.
The first Export... lets you produce a PDF just as the second option does, but it gives you more controls along the way. Choose Export... and Preview will display a regular Save As dialog with certain automatic settings. There's a Format setting, for instance. This lets you save any document as PDF, JPEG, PNG and so on.
Underneath that, though, there are settings that vary depending on what format you've chosen. For PDF, you get an option called Quartz Filter. The name Quartz comes from macOS's internal Core Graphics features and what you're really setting here is how the Mac will render the PDF. You can make a monochrome PDF, you can lighten up the images — and you can reduce the file size.
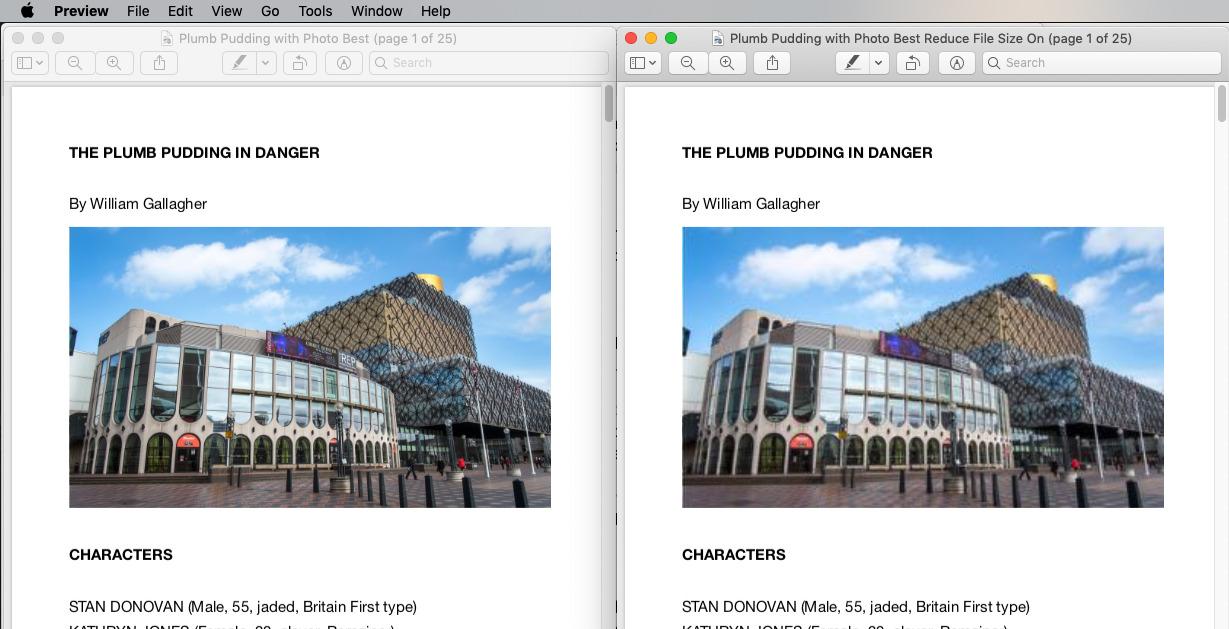
Left: the full-size PDF document. Right: the same after using Preview's Reduce File Size
However, you get no options for specifying the reduction, you can just turn Reduce File Size on or off. You also can't choose two of the Quart Filter options or at least not at the same time. You could produce PDF that was, say, black and white. Then you could open that up and export it again with the Reduce File Size.
Again, there's no way to predict the difference all of this will make to your PDF document's size. However, for example, taking that same Pages document with a photo and using Reduce File Size turned the 197KB original into a 92KB PDF.
Going back to the Pages PDF and choosing to make a black and white version in Preview made an 86KB file. And then using Reduce File Size on that version we ended up with an 87KB document.
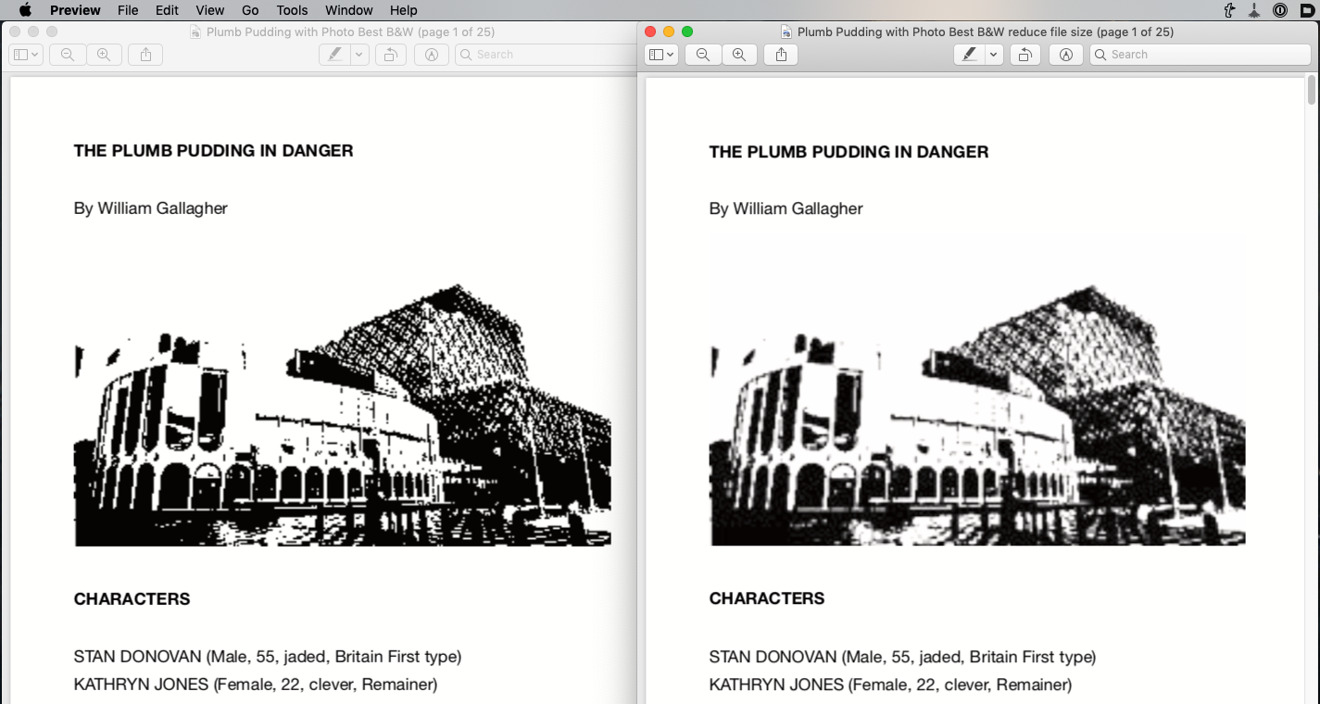
You can really squeeze the life out of your PDF. Left: a monochrome version. Right: that version also put through Reduce File Size
So we made the document as poor as possible and we also increased its size, if just fractionally. Perhaps this is why Apple only allows you to choose one Quartz Filter at a time.
Nonetheless, even though you have to fiddle a little to get a combination of small file size and a document that's acceptable to read, you can do this. You do have more options for PDFs on the Mac before you consider third-party apps.
It's exactly the same with the next issue. Most of the time you will just be reading PDFs and only some of the time will you be making them. And then, there's some smaller amount of time when you'll be editing the PDFs instead of the original document.
You can do some large-scale edits on your Mac such as adding and removing whole pages. And you can annotate or mark up any PDF to within an inch of its life just using what comes with Mojave.
Keep up with AppleInsider by downloading the AppleInsider app for iOS, and follow us on YouTube, Twitter @appleinsider and Facebook for live, late-breaking coverage. You can also check out our official Instagram account for exclusive photos.