As part of its changes to the Photos app in macOS Big Sur, Apple has improved the Retouch tool. Here's how to get to grips with the editing feature to improve your images.
Even the best photographers feel the need to perform edits of their work to create the best photograph possible. While there's a lot they can control about the camera and the subject, sometimes there's things they simply cannot sort out for the photograph itself.
Depending on the type of photograph, these issues can manifest in a variety of different ways. A portrait photographer may want to remove blemishes or spots from a model's face, while a landscape or street photographer may wish to eliminate unsightly bits from buildings, or the occasional photobomber.
Whatever the reason, the problem is always the same: there's something in the photo that needs to be hidden or taken out. In cases where it's not something you could simply crop out the side of the frame, you have to actively edit the image itself.
For most people, that immediately summons thoughts of using Photoshop or another image-editing tool that may be expensive or complicated to use properly. For people using a Mac, the Photos app may be able to do the job.
The Retouch tool in Photos is a common element of image editing apps, where you inform the app of a part of an image you want to be covered, and the app uses a portion of pixels from elsewhere in the image to automatically copy and paste a patch.
Of course, the Retouch tool is handy, but it relies on there being a block of pixels nearby that it can reuse. In earlier forms, it wasn't necessarily smart enough to be easy to use, as it could copy other artifacts from near to the source pixels, which fixes one problem while making it unsightly with another graphical conundrum.
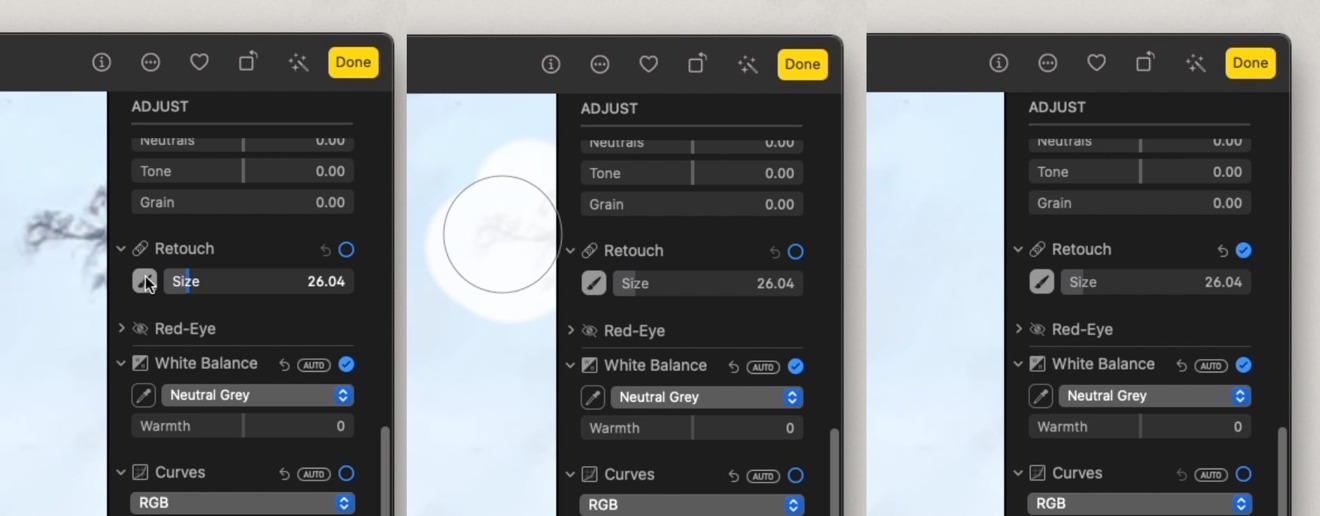
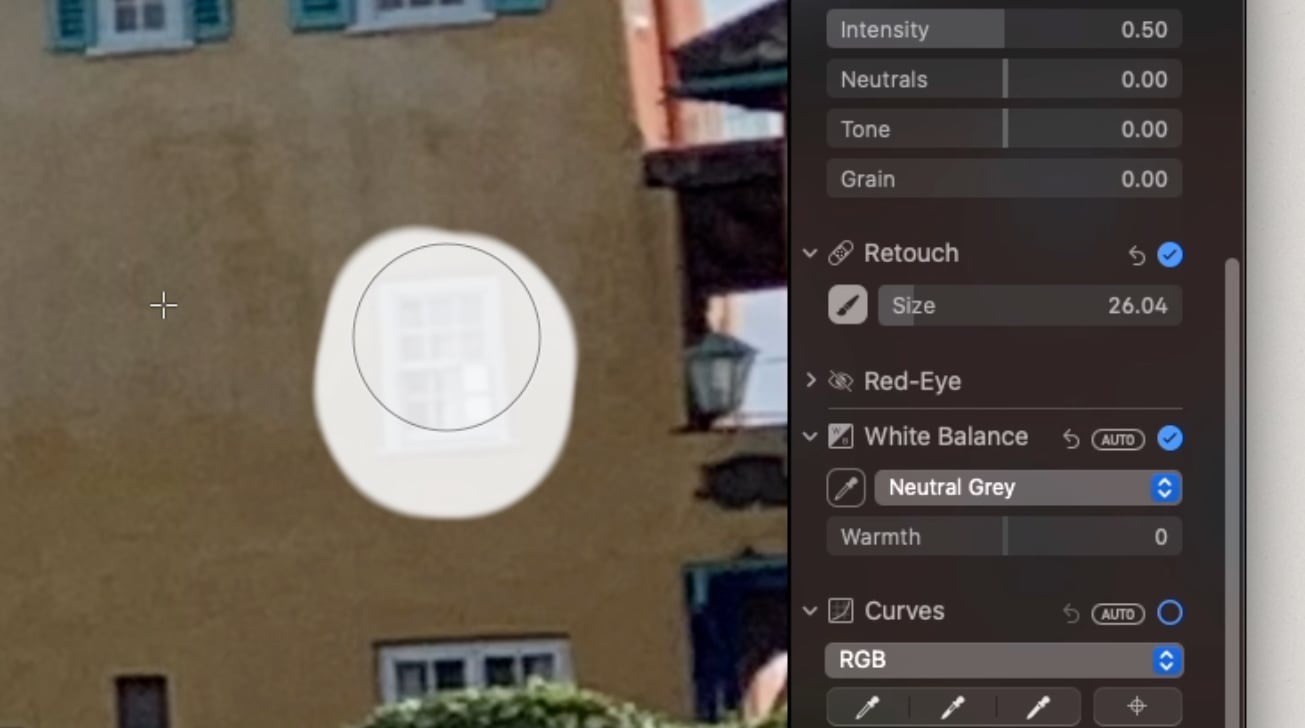
The Retouch tool in practice for Photos in macOS Big Sur
In macOS Big Sur, Apple has updated the Retouch tool to use "advanced machine learning" for the task. While excellent marketing text, it also works quite well in practice, with it being more sensible in sourcing and using neighboring pixels for the patch.
It's also arguably one of the easiest forms of the tool to have been produced.
How to use the Retouch tool in Photos for macOS Big Sur
- Select a photo and click the Edit button in the top-right corner.
- On the Adjust page, click the arrow in the sidebar next to Retouch to show the slider and brush button.
- Click the brush button next to the slider. Use the slider or the left and right square bracket keys to adjust the size of the brush circle.
- Click or click and drag the brush circle over the element you want to remove.
- Once editing of the image is complete, click Done.
This routine will typically suit most retouching tasks, with the Photos app generally being good at determining what pixels to copy over. However, there are some situations where you may want to manually select where the patch pixels are sourced from, such as overly complex images that confuses the automated selection system into making poor patch selections.
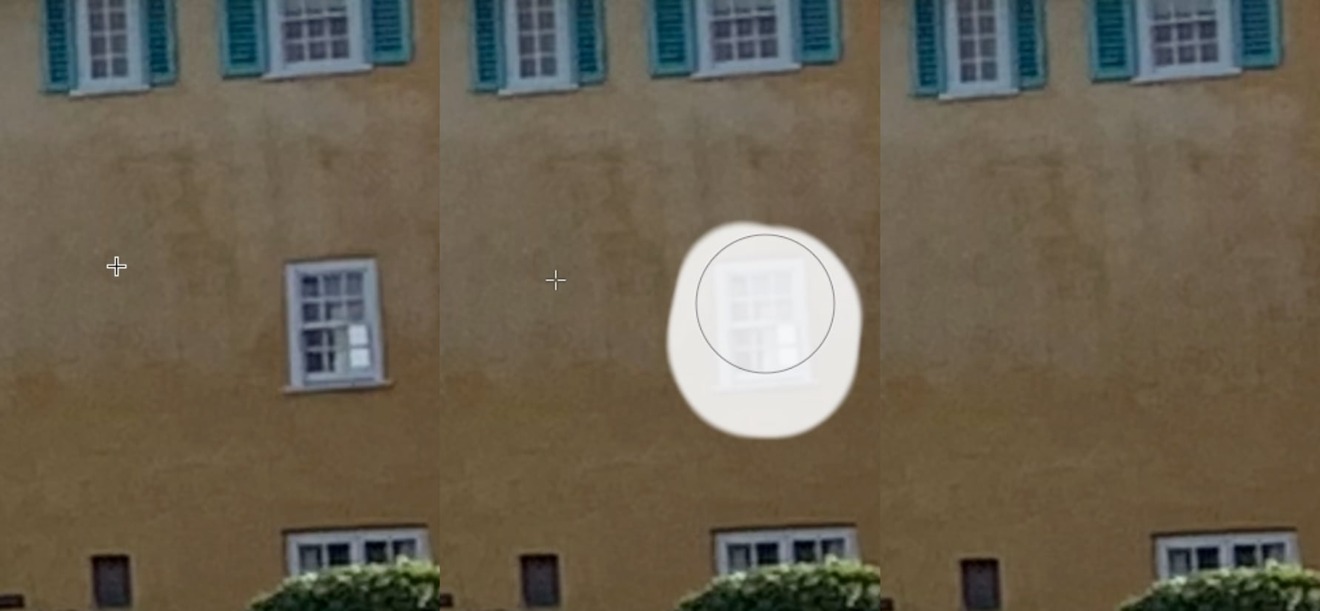
A manually selected source point for the Retouch tool.
How to manually select the source for the Retouch tool in Photos for macOS Big Sur
- Select the photo and click Edit. Open the Adjust page, then click the arrow in the sidebar next to Retouch.
- Click the brush button next to the slider, and use the slider to change the size of the brush.
- Hold the Option key and click an area of the image that you want to use as your source point.
- Release the Option key, and use the brush to paint over the area you want to patch.
- To stop using the selected spot in the photo, Control-click the image and select "Clear manual Retouch source point."
System Requirements
Not all Mac users will be able to take advantage of the updated tool. According to Apple's support pages, the improved tool requires a 15-inch MacBook Pro or 16-inch MacBook Pro released in 2016 or later, a Retina 5K iMac from 2014 or later, a Retina 4K iMac from 2017 or later, an iMac Pro, or a Mac Pro from 2013 or later in order to function.