If you need a repair for your iPhone, iPad, or Mac, it is best to find out if a warranty covers you before seeking a fix. Here's how to find out if your devices are still covered.
Occasionally, owners of Apple's products encounter a problem that needs fixing. Be it a sticking key on a MacBook Pro keyboard, an issue with an iPad display, or something else, it's likely that at some point something goes wrong and needs to be repaired.
In cases where a device is obviously damaged by the user by accident, there's usually little to be done than to take the financial hit for a repair, to claim on insurance, or pay for a replacement. However, if the device stops working properly through normal use, it may be able to be serviced by Apple or an Apple Authorized Service Provider at a low cost, or even free.
Obviously, if there's a warranty still in place, or you paid for AppleCare coverage, you will probably want to take advantage of that to fix the issue, if only to avoid an unexpectedly high expense.
Since warranties and AppleCare coverage only last for specific periods of time, you will want to check the status of your faulty device as soon as possible, rather than after.
There are multiple ways to check your warranty, but the route you take will largely depend on whether or not you can actually use the device in question.
Checking the warranty status on a functional iPhone, iPad, or Mac
The easiest ways to check the warranty status involve being able to use the hardware in question. Apple's ecosystem makes it relatively painless to do so, if everything is working fine.
How to check the warranty status on an iPhone or iPad
- Open the Settings app.
- Tap General.
- Tap About.
- Scroll down the page until you see language about the warranty status.
Depending on the warranty status, it may state "Limited Warranty" or "AppleCare Services" and an expiry date. The option may also show "Coverage Expired," revealing the hardware is no longer covered.
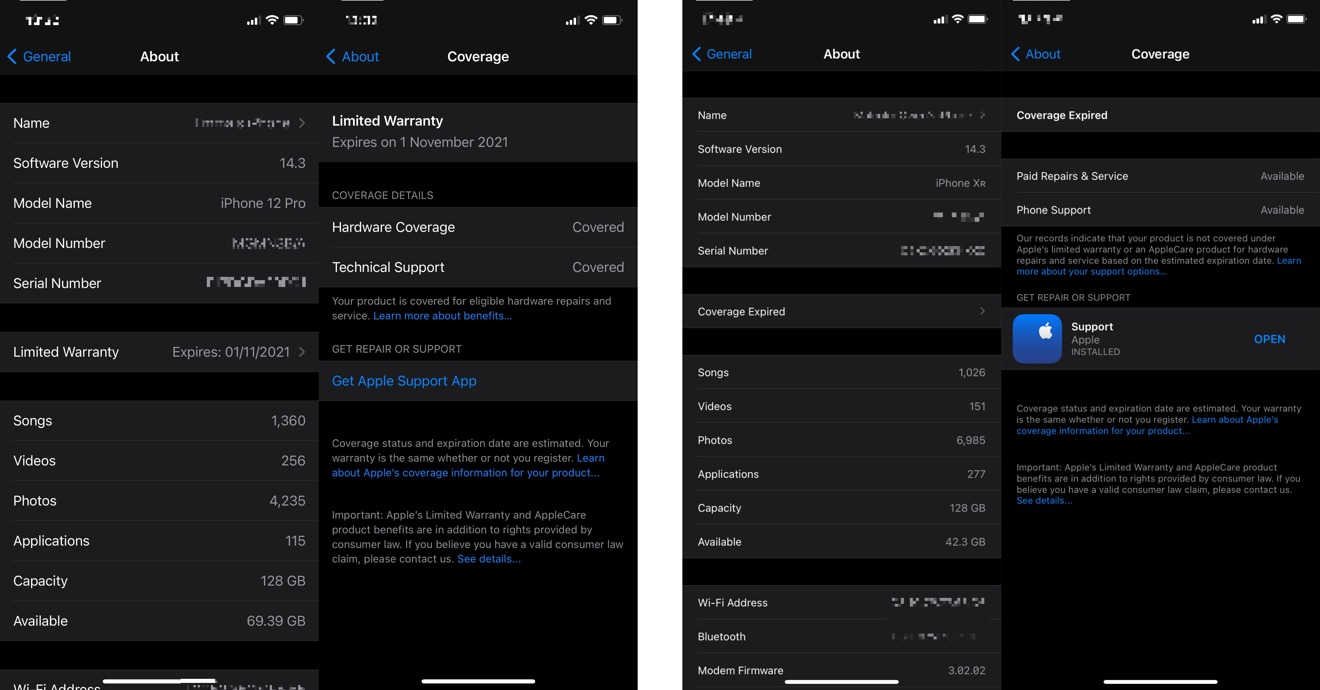
The Settings app shows an iPhone's serial number and its warranty coverage status.
Tapping the option will bring up a Coverage page, giving assistance related to the warranty status, such as the kinds of support you can access.
Checking warranties of Apple account-connected devices
As Apple's products connect to the Internet and are generally linked to a user's account, typically of those who buy the product and first register it, you can also determine your Apple devices' warranty status through your Apple account.
The easiest way without necessarily using the device itself, is to use another iPhone or iPad that is already logged in with your Apple ID, and to look in the Apple Support app.
How to check the warranty status of an Apple product via the Apple Support app for iPhone and iPad
- Open the Support app on an iPhone or iPad.
- Tap Products to bring up a list of products associated with the Apple ID.
- Under My Devices, tap the device you want to check.
- Tap Device Details.
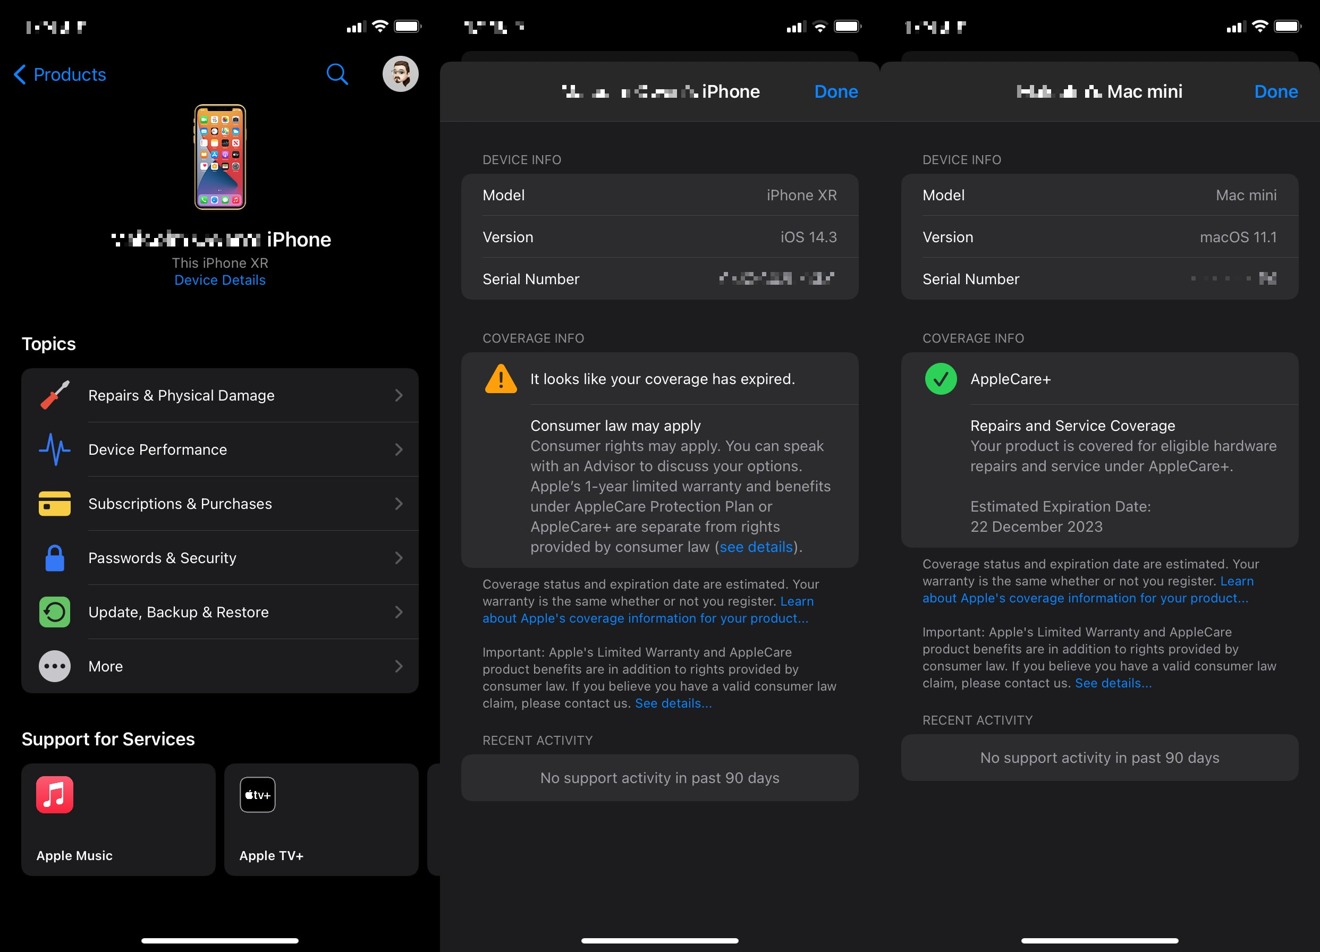
The Support app can also show a product's support coverage.
This screen, which is available for iPhones, iPads, Macs, the HomePod and HomePod Mini, Apple Watch, and other hardware, explains the situation for each particular device.
If coverage is available under a Limited Warranty, it will say what is covered as well as an expiration date and offer a chance to upgrade to AppleCare. If AppleCare is on a device, it will also show what is covered for the device and an expiration date.
The app will also advise if warranty coverage has expired, but that consumer law may apply depending on the situation.
If you don't have access to hardware with the Apple Support app installed, you can also do the same thing within a web browser.
How to check warranty coverage on Apple devices via a browser
- Open the Check Coverage site.
- Enter the serial number for the device, and fill out the captcha. Click Continue.
The page that appears will show if there's coverage for the device under warranty, the kind of warranty coverage it has, what can be done under said warranty, and the expiry date.
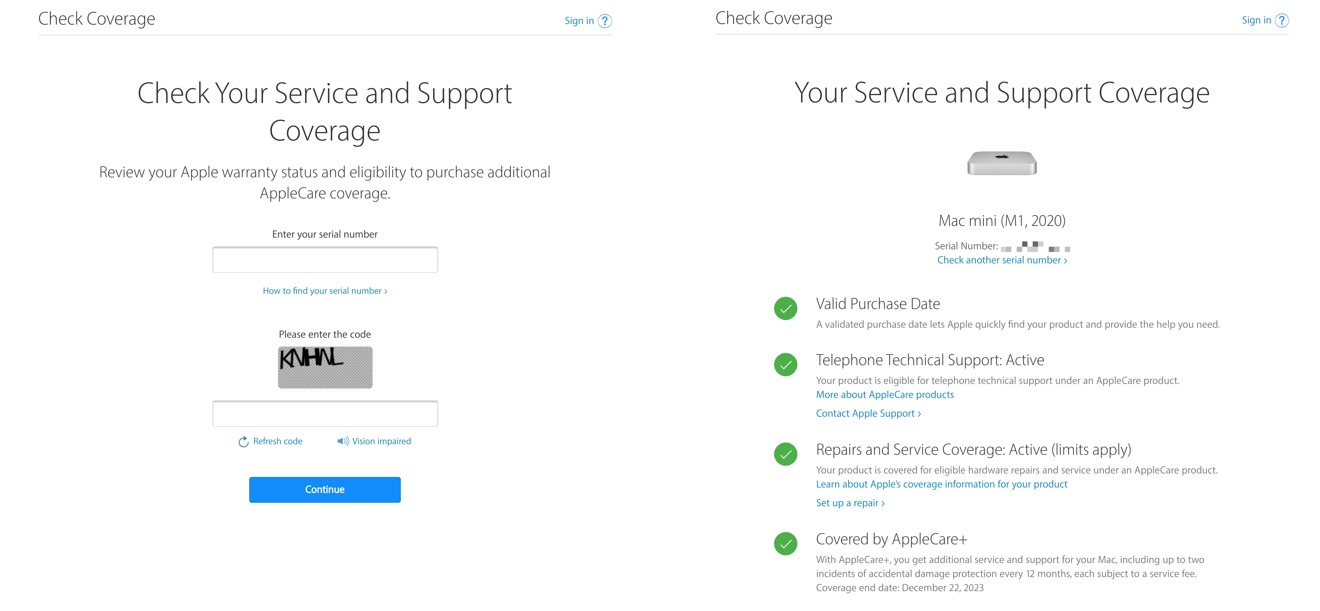
The Check Coverage page works without needing authentication.
This page will also advise if the device is out of warranty and offer links to gain further support.
The beauty of this method is that it can be done without needing to authenticate with Apple. There's an option to log into the page with your Apple ID, but it can provide the details you need with just the serial number and not your account credentials.
Finding your Mac, iPhone or iPad's serial number
One thing that this last method relies on is getting the serial number of the product in the first place. Ideally, you should record the serial number and keep it safe, as a form of proof of ownership, though not everyone does that.
Apple offers a support page dedicated to locating where the serial number is located on a variety of its products, but there are quite a few common places you can look for it.
How to find your serial number on an iPhone, iPad, or iPod touch
- Open the Settings app, tap General then About.
- Alternately, the SIM tray in an iPhone holds an IMEI/MEID that could be used as an alternative to a serial number.
- Search the back of the device for regulatory information, which includes the serial number and also the IMEI on cellular-connected models.
- If you connect your device to a Mac, you can select the device in Finder and see the serial number. On a PC, the option is available in iTunes.
- Lastly, the packaging may also show the serial number on a sticky label.
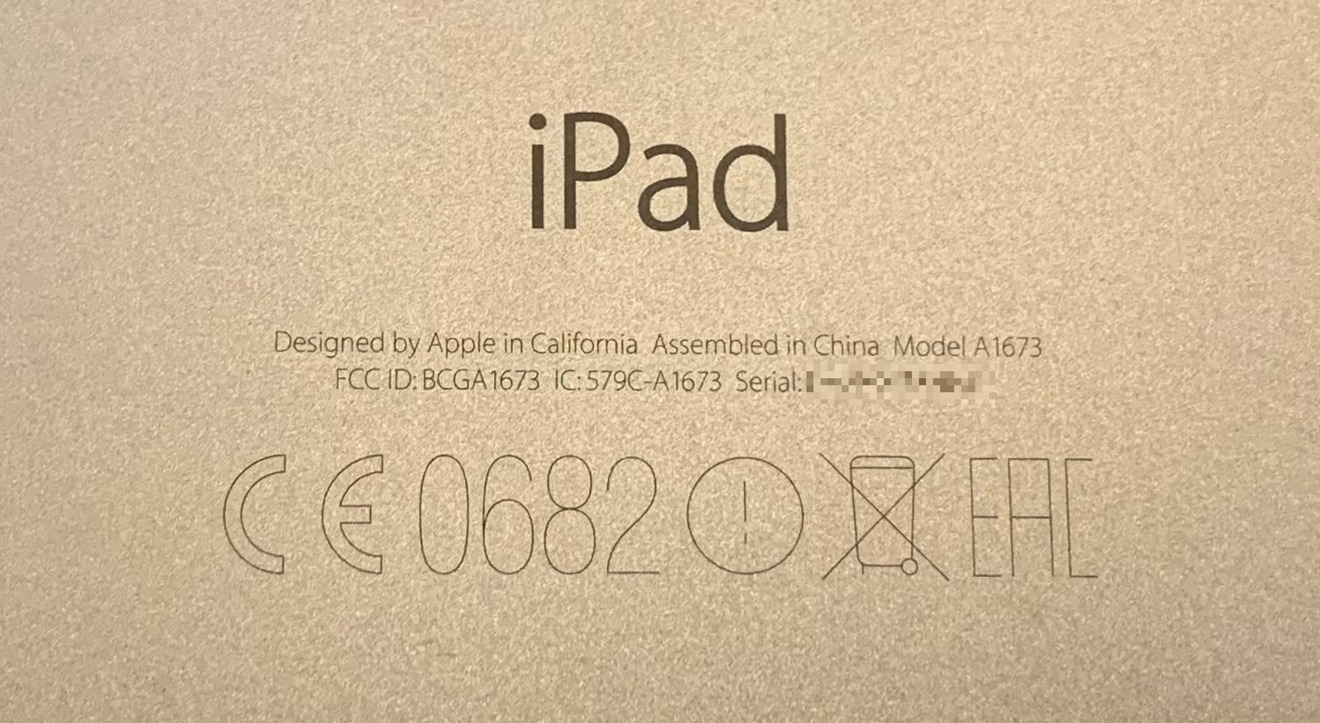
You can find your iPad serial number on the back alongside regulatory information.
How to find your serial number on a Mac or MacBook
- Click the Apple logo in the top-left corner, then About This Mac.
- It can also be found printed on the exterior amongst regulatory markings.
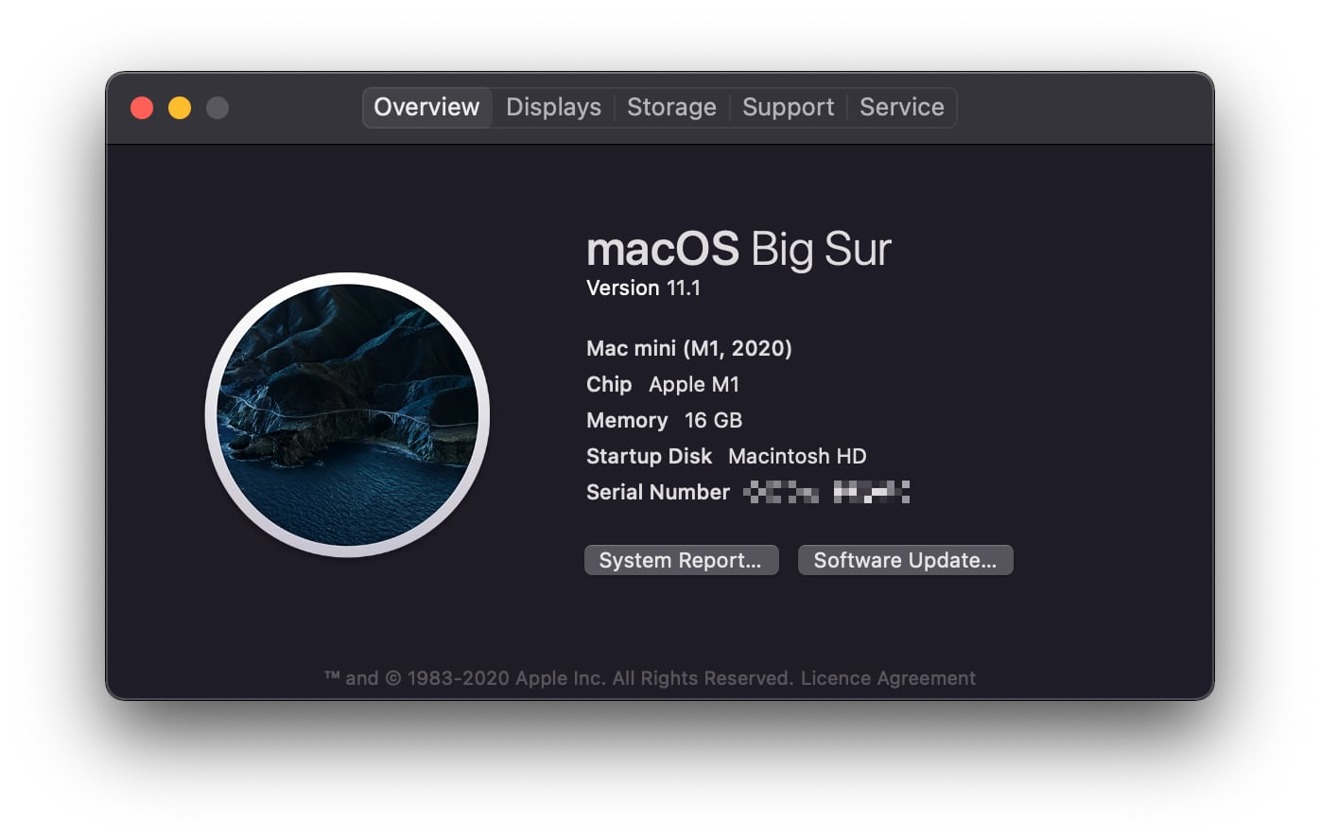
Checking macOS can bring up the serial number, but the Service tab links you to the Check Coverage page instead of giving you direct warranty status data.
How to find your serial number on an Apple Watch
- Open the Watch app on the paired iPhone. Tap General, then About.
- Alternately, look on the back of the original Apple Watch around the sensor. For the Apple Watch Series 1 or later, it is located inside the top band slot.
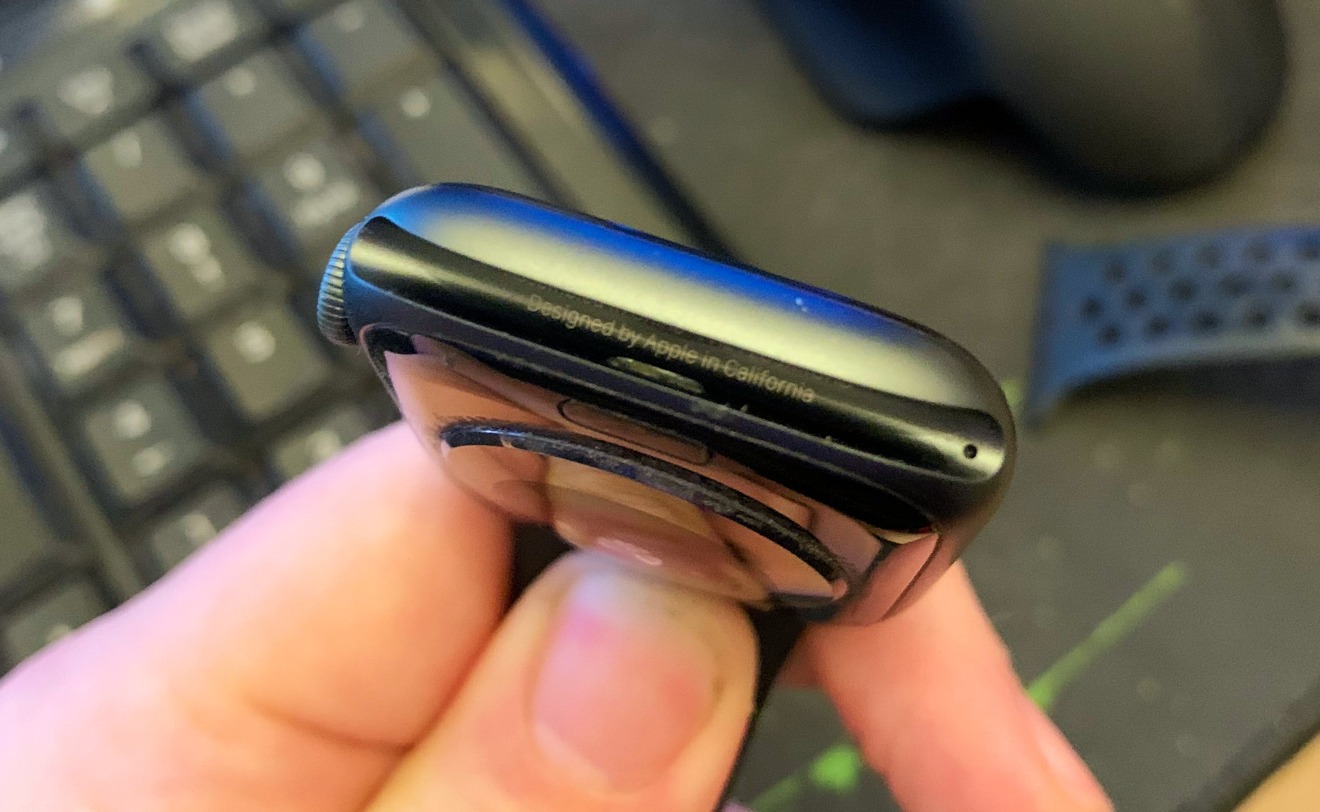
The Apple Watch hides the serial number within a Band slot.
How to find your serial number on an Apple TV
- In tvOS, open the Settings app and select General then About.
- Alternately, check the base of the Apple TV.
How to find your serial number on a HomePod or HomePod mini
- Open the Home app, then press and hold the HomePod. On macOS, double-click the HomePod.
- It is also located on the base of the device.
In many cases, your Apple device's serial number may also be located on your Apple ID page. This could be extremely handy if you don't have physical access to the device at that moment in time, but urgently need the serial number.
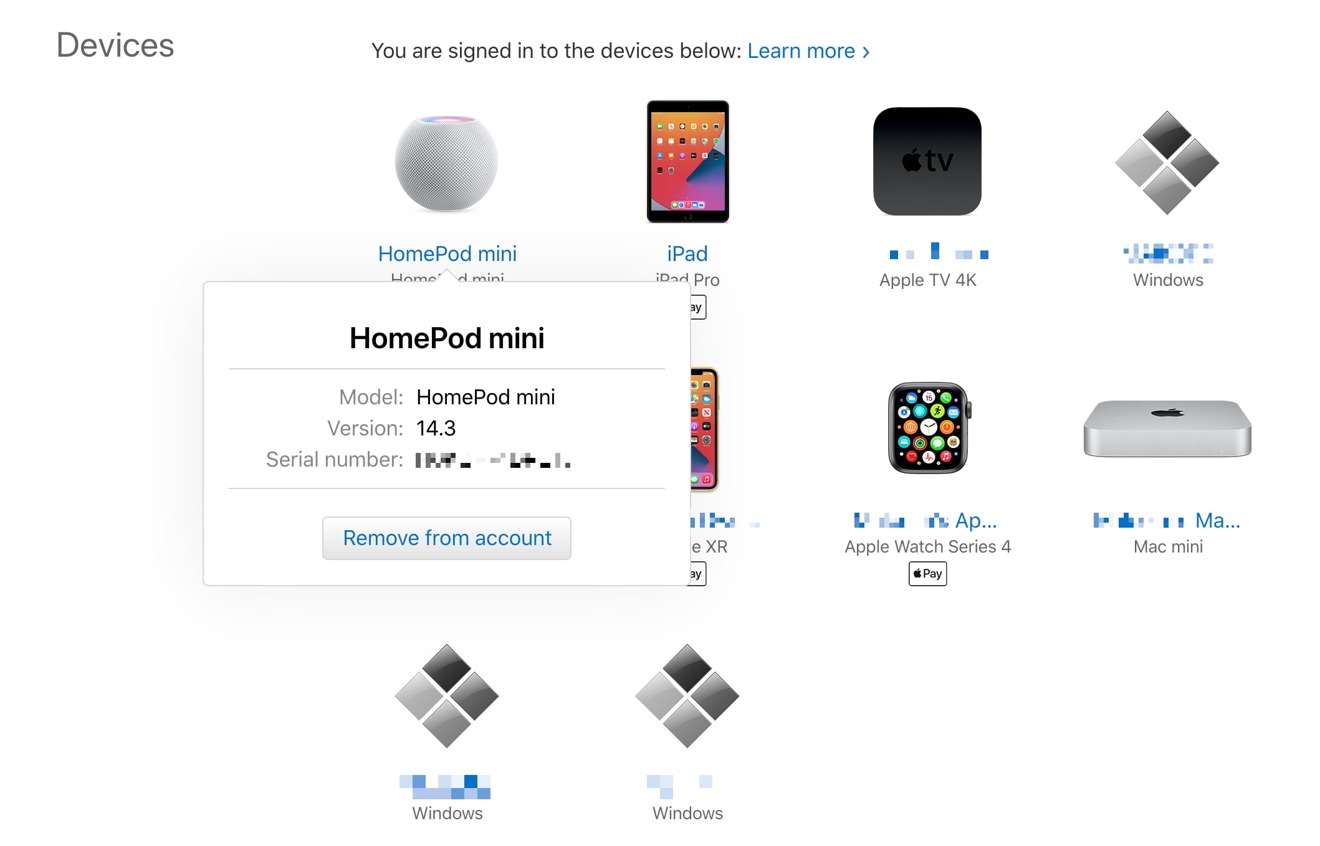
Your Apple ID management page can show the serial number for many logged-in devices.
How to find your device's serial number via your Apple ID
- Open the Apple ID management site. Log in and complete your authentication.
- Scroll down the page to Devices, and click the hardware in question. If a serial number is available, it will be displayed.