You'll get much more control using third-party camera apps, but the iPhone out of the box can take long exposure photographs — and yours may already have done so.
You take long exposure photographs because you want, say, a waterfall to look like a shimmering piece of art. Equally, you could take them because you want a shot of a location without all the people in the way.
Or it could just be for the fun of seeing what it looks like. For the fun side, the iPhone's own Camera app has you covered. For more specific, detailed use, it's true that you are going to need a third-party app such as Shutter Stop, orSpectre, a sister title to Halide.
It's not that the built-in app can't get you beautifully artistic shots, but these apps let you keep the shutter open longer. They let you adjust settings. With the iPhone Camera app, you're giving it a go and hoping the result is good.
How to take long exposure photos on iPhone
- Make sure Live Photos is turned on
- Take a shot where there's plenty of movement
- Open the Photos app
- Go into that image
- Swipe up to reveal options with different preview shots
- Swipe all the way left to Long Exposure
- Tap on that image
- Wait for a moment
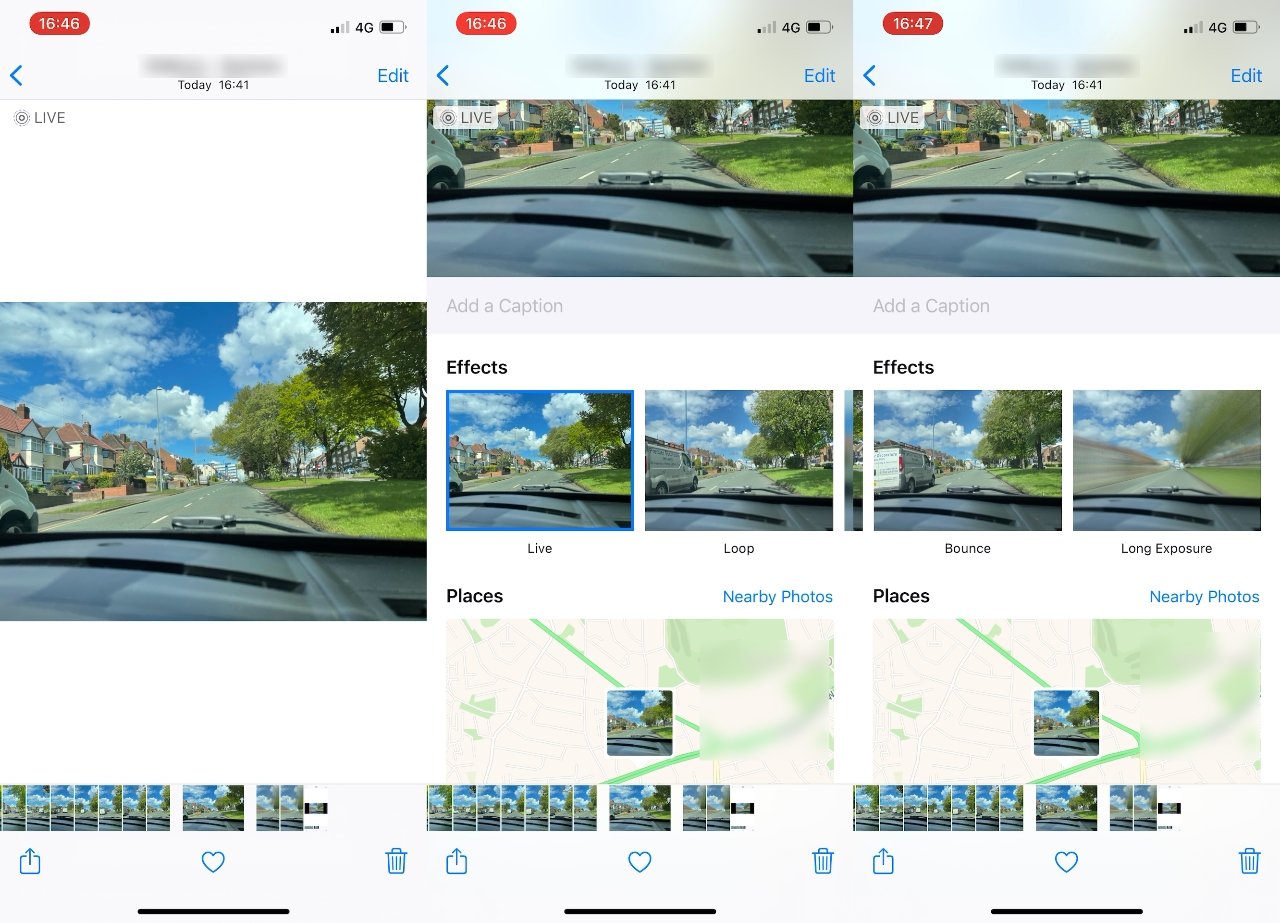
Open a Live Photo and swipe up, then swipe across the effects to Long Exposure
To make sure Live Photos is turned on, check the top of the Camera app. When this feature is on there's an icon of concentric circles at top right. When it's off, there's the same icon, but it has a line through it.
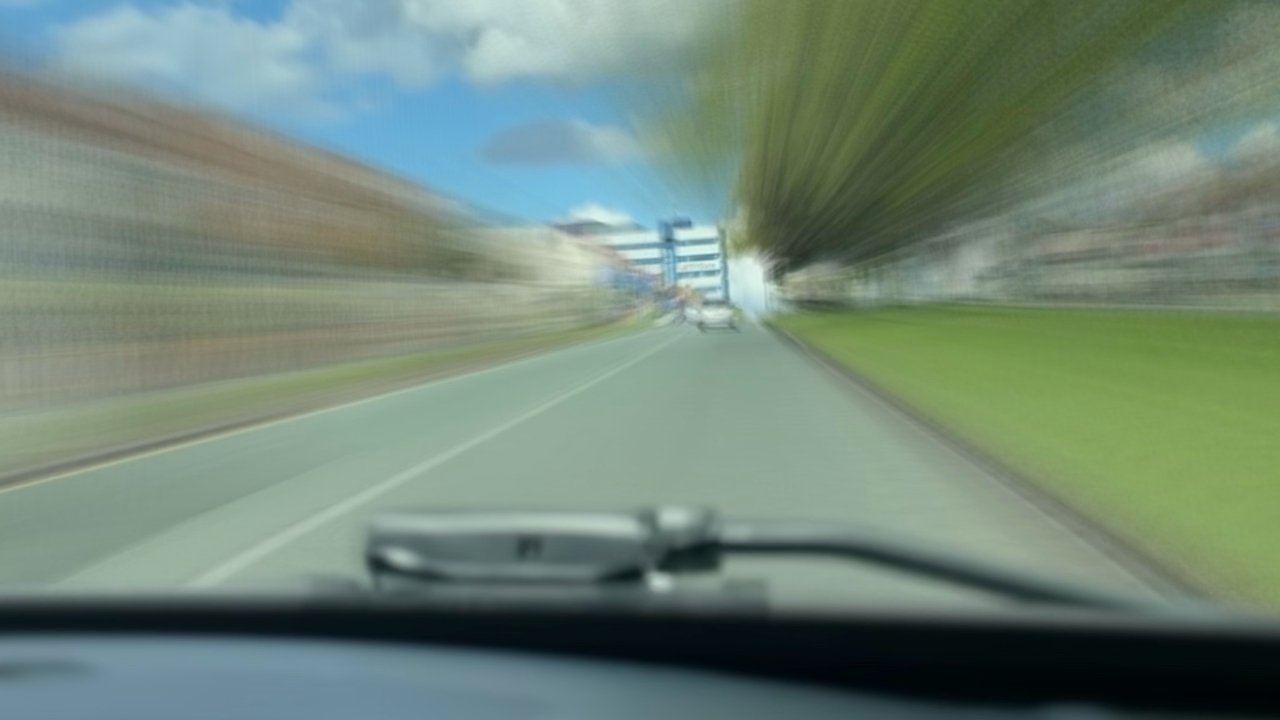
As for taking a shot where there's plenty of movement, you should probably take a few. Generally, shots with people don't work very well because either they vanish from the shot, if you're lucky, or they get distended.
You can get an idea for what's worked by just opening the Live Photo, pressing and holding on the image. Live Photos take shots either side of the image when you press the button, so it's like very short video.
You'll be able to see whether there's sufficient movement to make it worth trying a long exposure.
Then notice that the first time you choose Long Exposure, it may take a noticeable few moments for anything to happen. After that, it's much quicker, to the extent that it had usually done the long exposure calculations before we got to tap on the preview image.
How to keep and revert long exposure photos
If you like the long exposure shot, you're done. Just close the image and that's the one that will show when you next open it up — or when you share that image to someone else.
As it's calculated from multiple shots taken under Live Photo, though, there are two extra benefit. One is that you can undo the long exposure to go back to regular.
And the other is that this works with any Live Photo you've ever taken.

Before and after. Note that we've scaled the Before shot down to match the After - the iPhone shrinks an image a little in this process
To undo long exposure, reverse the steps above. Open the image, swipe to get the image options, then swipe across to go back to where it says Live.
One thing to note is that when the iPhone turns a Live Photo into a long exposure one, it reduces the size of the image. It doesn't crop in close, though, you're not losing visible parts of the frame, but it does make a smaller image.
Follow all the details of WWDC 2021 with the comprehensive AppleInsider coverage of the whole week-long event from June 7 through June 11, including details of all the new launches and updates.
Stay on top of all Apple news right from your HomePod. Say, "Hey, Siri, play AppleInsider," and you'll get latest AppleInsider Podcast. Or ask your HomePod mini for "AppleInsider Daily" instead and you'll hear a fast update direct from our news team. And, if you're interested in Apple-centric home automation, say "Hey, Siri, play HomeKit Insider," and you'll be listening to our newest specialized podcast in moments.