If you have to collect a number of files in the same folder, but want to title them in a more orderly fashion, you need to learn how to master renaming files in macOS.
Sometimes, if you are putting together a collection of documents and files for someone else, or for safekeeping, you'll find that the document names aren't entirely right for the task. This is especially the case when you are pulling in files from multiple sources into a single folder.
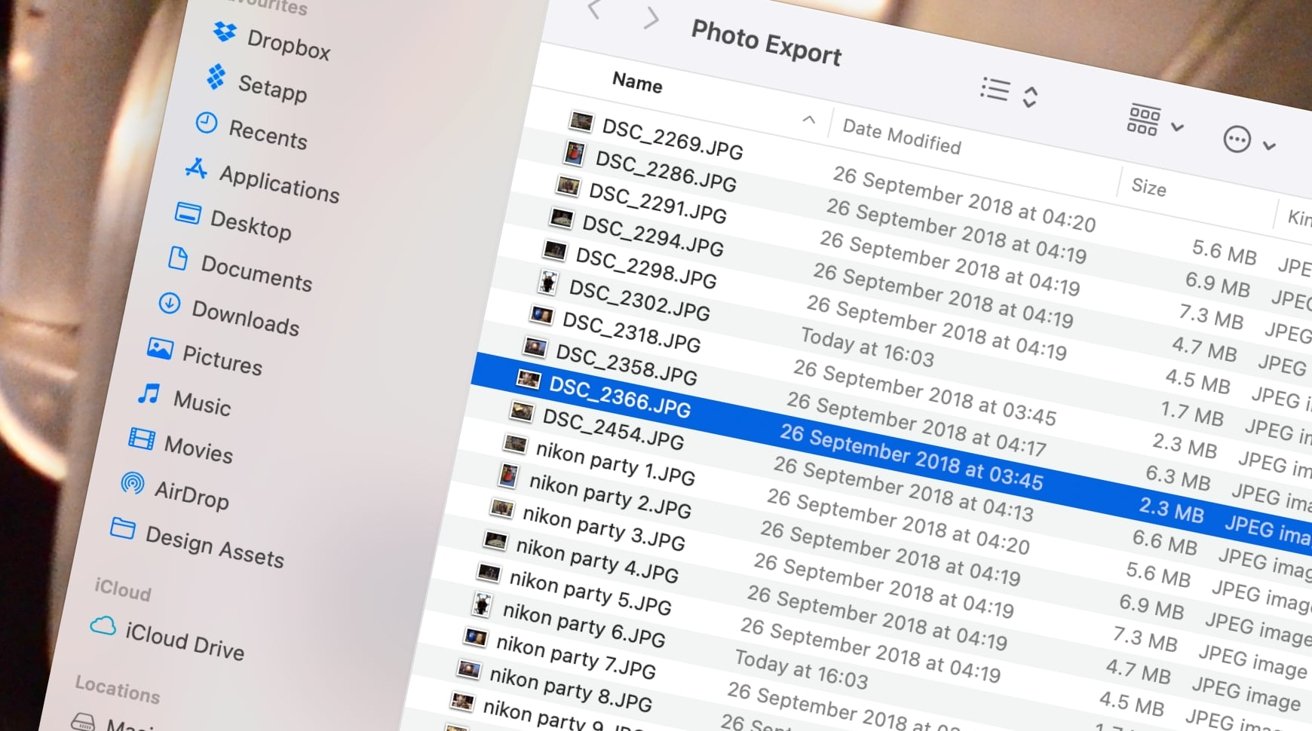
Keen photographers will be familiar with facing a series of files titled something like "DSC_2318.JPG" or similar, which won't tell you what the images are of unless you see the contents of the file, or you had the foresight to give the containing folder a good name. This doesn't help if you then have to share those files onward, as the recipient will have the same problem.
What you should do is either rename or edit the names of the files so that they're more readable. Though you can do that for individual files, Apple actually includes a great dialog for batch-renaming multiple files at once.
Renaming one file
It's trivial to rename a document in macOS in the Finder. The only problem is picking which of the several different ways there are to do it.
How to rename a single file in Finder in macOS
- Click the file name twice, but with a long gap between the two clicks. This will make the filename editable. Change the name, then click elsewhere to finish.
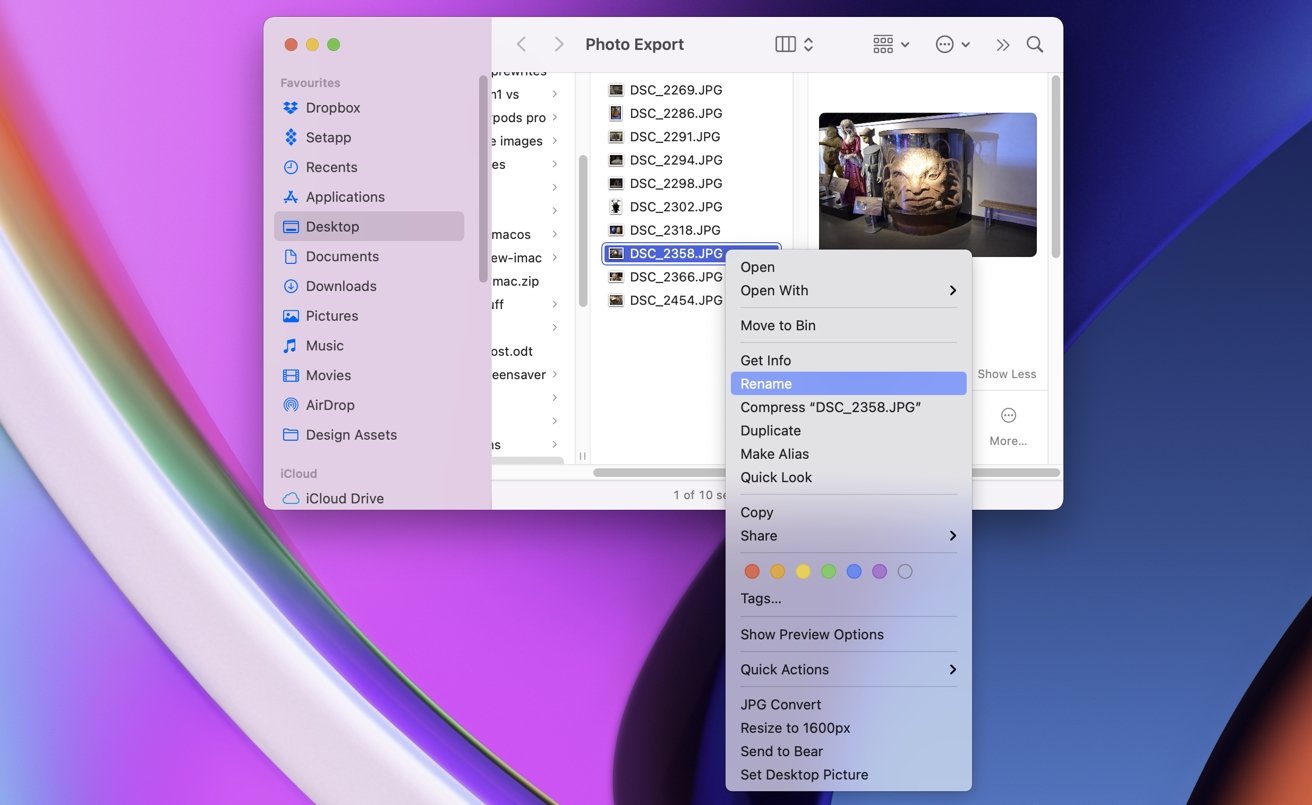
- Alternately, right-click the file and select Rename. Edit the name, then click elsewhere to finish.
- Or, select the file, then click File then Rename in the Menu. Edit the name, then click elsewhere to finish.
- Or click once to select the file, then press Return on your keyboard
The Rename option is only a right-click away.
Things are simple when it's just one file, but when you have numerous files to contend with, this method won't be quick. It will, however, allow you to uniquely name files.
Batch renaming multiple files
Dealing with multiple files isn't massively different than renaming a single file, to start with, but it quickly becomes a more complex task once you've started.
How to batch-rename multiple files in Finder in macOS
- Within a Finder window, select the files you want to rename. You can drag the cursor to select multiple with a box, or shift-click or Command-click the files, or in the Menu, select Edit then Select All.
- With the files selected, either right-click the selected files and select Rename, or go to File then Rename in the Menu.
- Use the dialog box to rename your files.
- Once complete, click Rename.
On clicking Rename, all of the selected files will be renamed according to the settings within the Rename Finder Items dialog box. The trick is in deciding which of the possible settings you want to configure.
Configuration options
The Rename Finder Items pop-up gives you a few ways to rename the files you've selected. Rather than explicitly naming each file, you're instead giving macOS a set of rules to use to rename them all.
There are broadly three categories of renaming you can use: Replace Text, Add Text, and Format.
Replace Text
This option is quite straightforward, as it is similar to the "Find and Replace" tools you may have used for text documents. Here, it's used for the text string that is the filename.
You have two text boxes to fill in, with the Find box covering the text string you want to replace, and the Replace With box for what you want to put there instead.
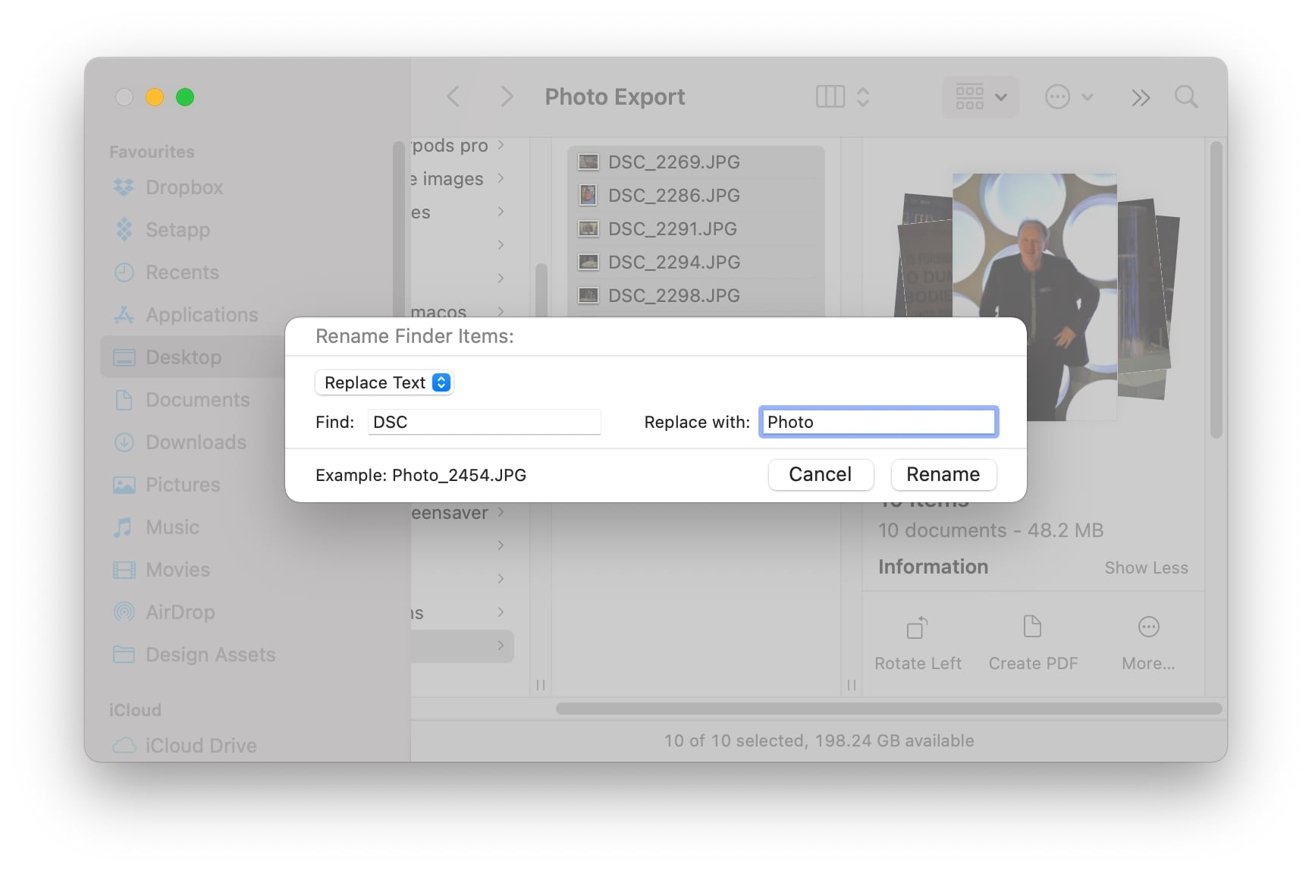
The Replace Text option lets you change bits of a file name.
This can be really useful as an option where you have a lot of similarly-named files, but you want to change a prefix, or a suffix, or a word with another. If you leave the Replace With box empty, it'll remove the text string instead of replacing it.
For example, if you have the filename "DSC_2454.JPG" in the list and you set Find to "DSC" and Replace With to "Photo", it will rename the file to "Photo_2454.JPG" by changing the found text. Leave Replace With empty, and it becomes "_2454.JPG" instead.
For photographers, this is a great way to give a batch of files meaning, while retaining the file numbering implemented by the camera. This is also handy to tweak formatting, such as changing instances of "INVOICE" to "Invoice" or shortening "December" to "DEC."
Add Text
Rather than changing elements of the file name, Add Text instead introduces more to the filename. Specifically, you have options to add a text string before or after the file name, which can be selected using the far-right dropdown box.
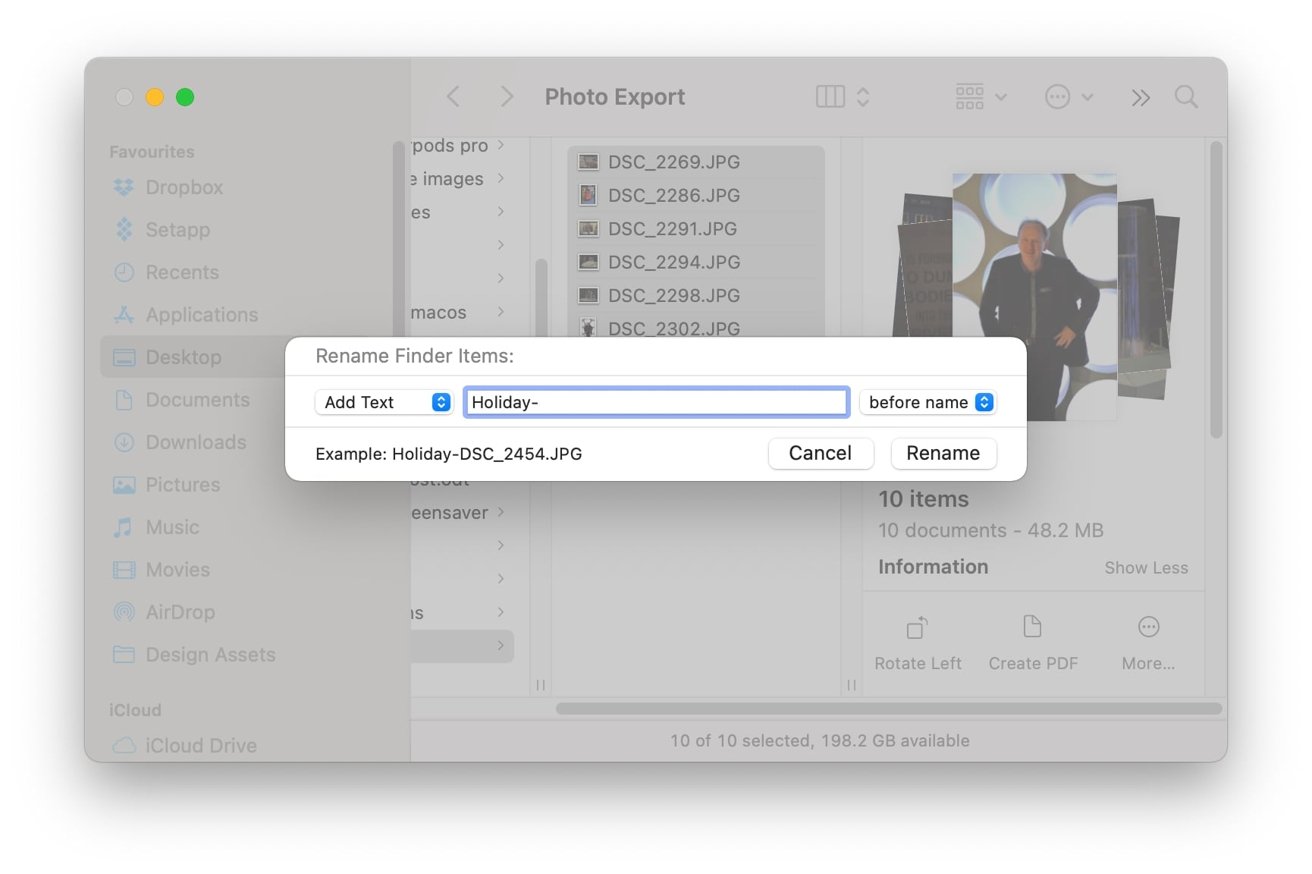
Add text allows you to add a string before or after the existing file name.
For example, if the text box contains "Holiday-" and it is set "before name," that same photo filename would become "Holiday-DSC_2454.JPG" or for after the name, "DSC_2454-Holiday.JPG". You could include spaces, a dash, or other punctuation to separate the added text from the filename, if you wish.
This is handy as it is arguably the least-destructive way to handle the filenames, as it ultimately keeps the original filename intact. If you wanted to revert a batch of similarly-named files at a later time, you could use the Replace Text version to remove the added element.
Format
Arguably the nuclear option, this will completely wipe the file names and instead gives you free reign to put your own in, without any concern for what the files were previously called.
You have four elements to control in this case, with Name Format arguably being the most important. It gives you three options, covering Name and Index, Name and Counter, or Name and Date.
Name and Index, as well as Name and Counter, will combine the text you include in the Custom Format field with a counter that will slowly count upward. The Start numbers at box will dictate the first number, while subsequent files will increment by one more each time.
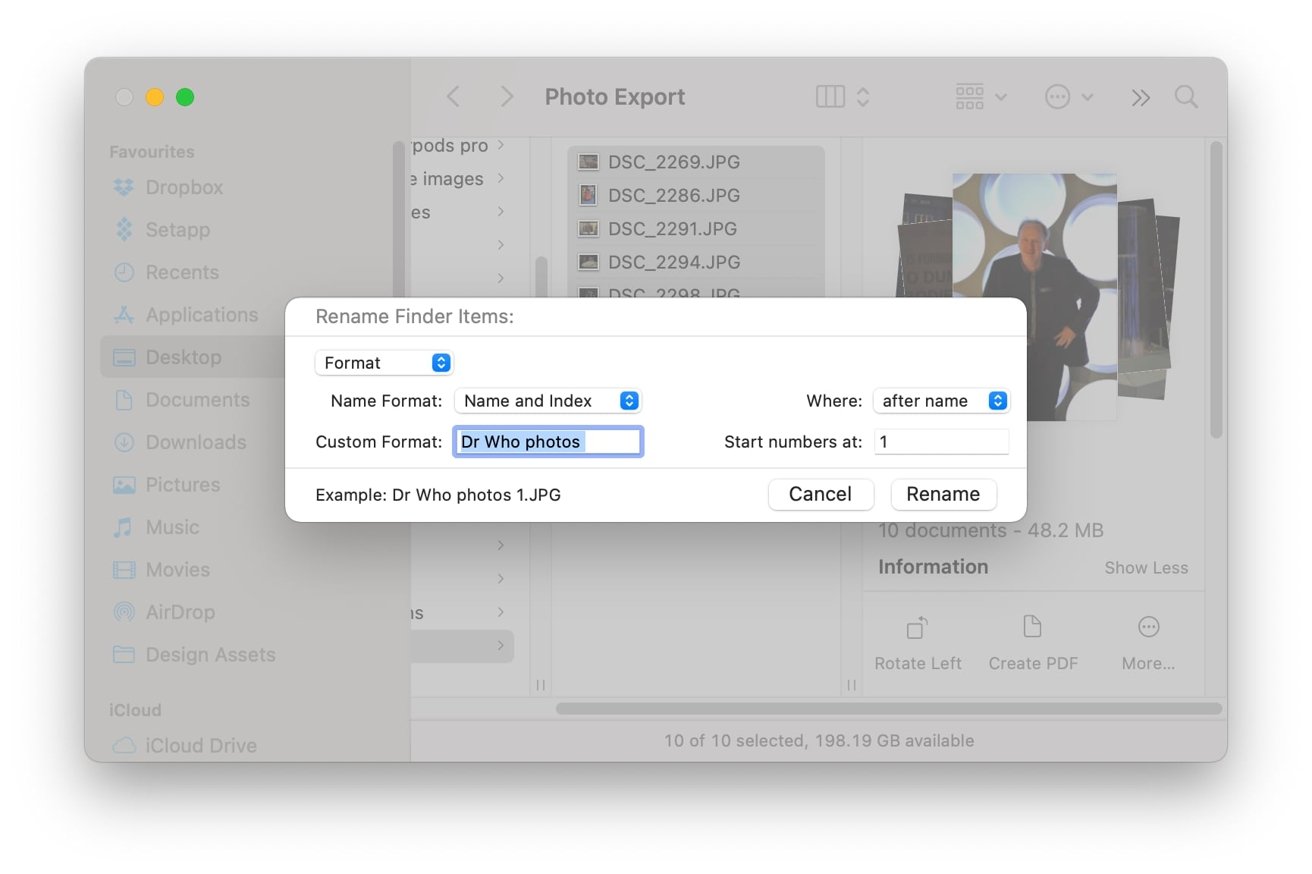
Format lets you choose a descriptive text string and add a counter, or today's date and time.
The difference between Index and Counter lies in how the number element is formatted. For Index, the number will be the integer on its own, with no prefix at all.
For Counter, the number is the integer represented in a five-digit string, which ranges from 00000 to 99999. As the integer rises, it will continue to format the number so it takes up five digits.
The exception to this rule is if you start the counter at a number higher than 99,999. In such cases, the counter will be lengthened to match.
The main benefit from using Counter rather than Index is if you want to preserve the file order when users sort files in a folder view. In some file management tools, sorting by name will sort by the digits as if they are alphabetical order, rather than as an entire number, so a filename suffixed with 2 may appear after another with 10 or 11, for example.
The Where dropdown says whether you want the counter before or after the name.
The Name and Date option will rename the file using the current date and time, prefixed or suffixed by the text in Custom Format. For large numbers of files, this will also include a numerical counter, since you can't give multiple files in a folder the exact same name.
We stress that it will show the current date and time, not the date of creation of the file itself. This may be confusing for those renaming older files, but should be appropriate to use for any new files you have very recently created.
Reverting the name
If you have made a miscalculation in your renaming settings, you can revert the process by selecting Edit then Undo Rename in the Menu, or by pressing Command Z. This will dial back the most recent change.
That's handy for when you've just made the change and spotted that something is wrong. But you can't come back, say, tomorrow, and undo the change then, so you need to be sure to check your changes.
Keep up with everything Apple in the weekly AppleInsider Podcast — and get a fast news update from AppleInsider Daily. Just say, "Hey, Siri," to your HomePod mini and ask for these podcasts, and our latest HomeKit Insider episode too. If you want an ad-free main AppleInsider Podcast experience, you can support the AppleInsider podcast by subscribing for $5 per month through Apple's Podcasts app, or via Patreon if you prefer any other podcast player.