Andrew Orr
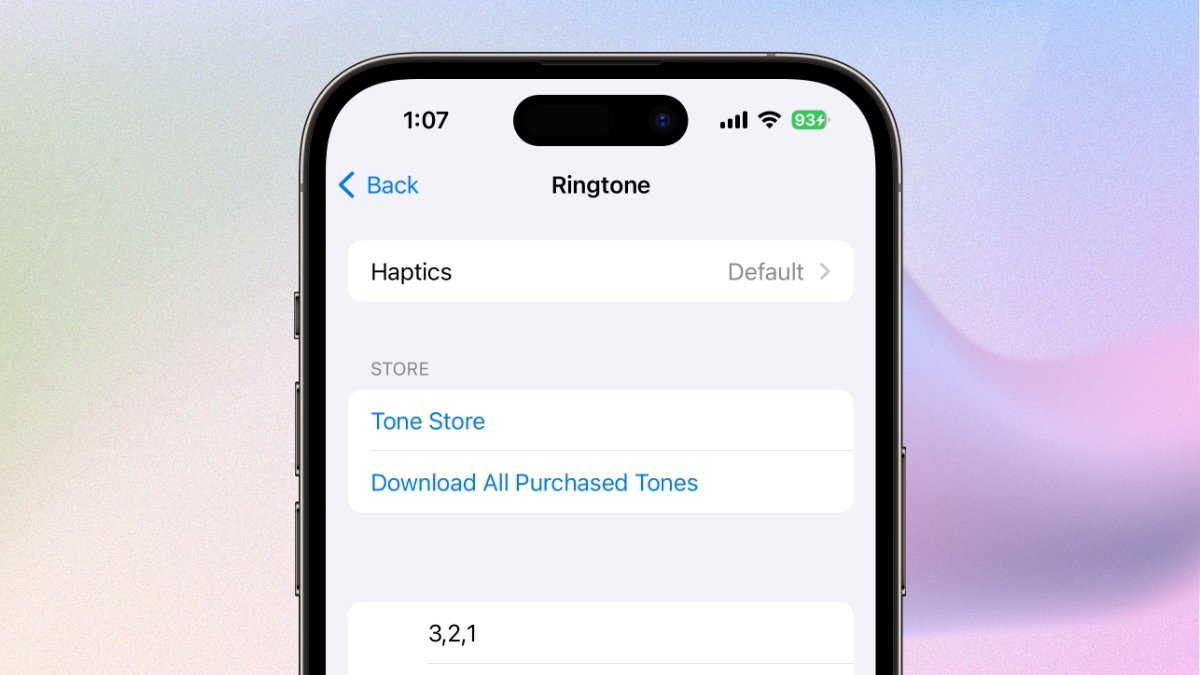
One of the most enjoyable ways to personalize an iPhone is by setting custom ringtones for your calls, but Apple has changed how you do it in iOS 17. Here's what you have to know.
Custom ringtones add a distinctive layer of personalization to iPhones, transforming the simple act of receiving a call into an experience that can evoke emotion, nostalgia, or even humor. The ability to identify callers through unique auditory cues becomes not just a convenience but a form of self-expression.
With the flexibility to create these ringtones through GarageBand, it's easy for people regardless of their technical expertise. That level of customization enriches the overall user experience.
How to create custom ringtones for iOS 17
- Launch GarageBand on an iPhone.
- The "Tracks" option should be tapped and swiped until the "Audio Recorder" section appears.
- Next, the "Loop Browser" icon will import an audio file from the Files app.
- Drag the imported file into the GarageBand workspace and trim it to a maximum of 30 seconds.
- Finally, the downward-pointing arrow in the upper left corner should be tapped to save the project. Then, select "My Songs" followed by the "Share" option to export it as a ringtone.
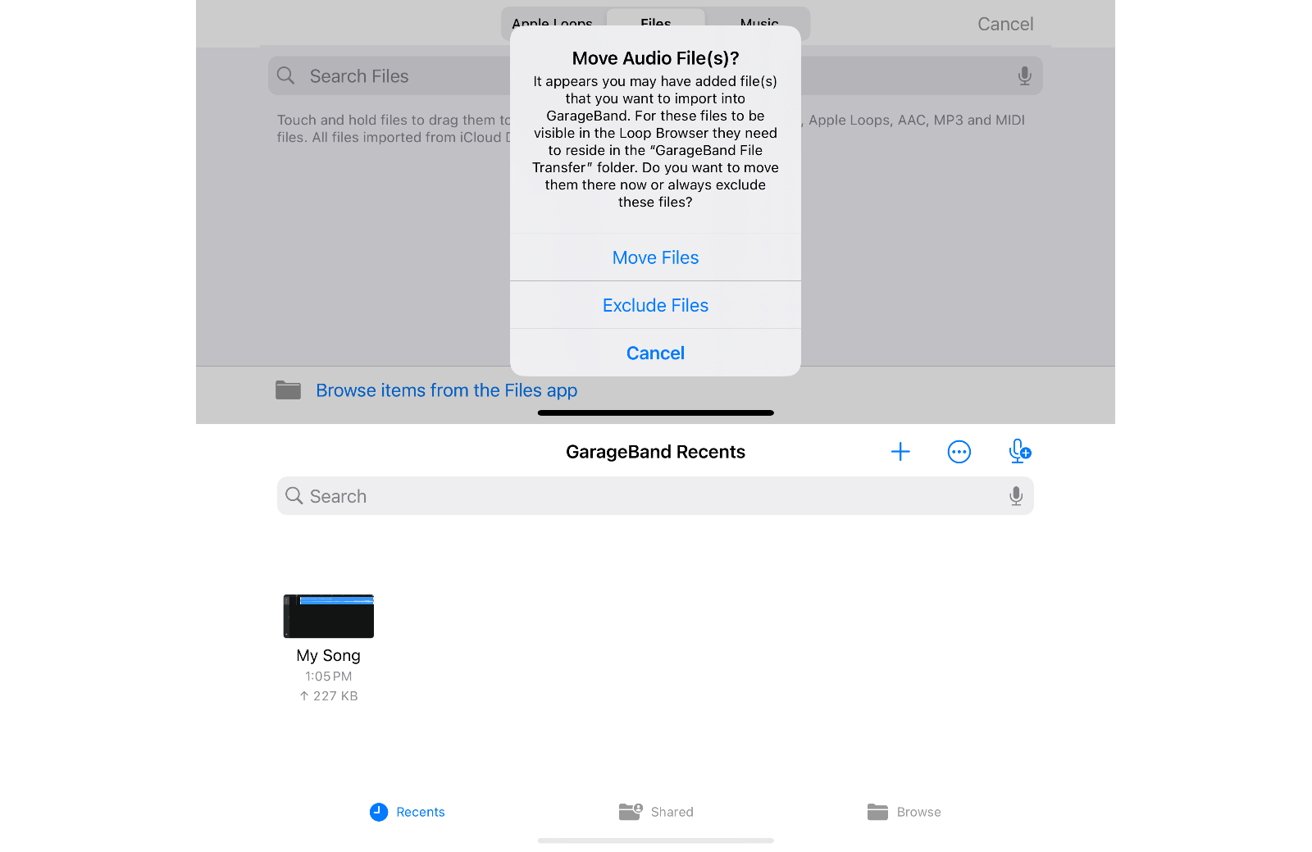 Directly transfering an audio file to iPhone results in an automatic import to GarageBand
Creating a ringtone on a Mac and transferring it to iOS is also possible.
- Craft a ringtone using GarageBand on a Mac. After finishing, select "Share" followed by "Project to GarageBand for iOS." Or, connect the iPhone to the Mac with a cable, then drag and drop the .m4r file in Finder into the Garageband folder under the Files tab.
- Assign a suitable name to the project and save it in iCloud Drive by hitting "Save."
- On the iPhone, launch GarageBand. Press the downward-pointing arrow at the top left, followed by "My Songs."
- Click "Browse" and locate the stored project in iCloud Drive. Press and hold the project, then choose "Share."
- In the "Share Song" menu, opt for "Ringtone." Enter the ringtone's name and hit "Export."
- Navigate to "Settings" and go to "Sound & Haptics." Then, press "Ringtone" and pick the newly created custom ringtone.
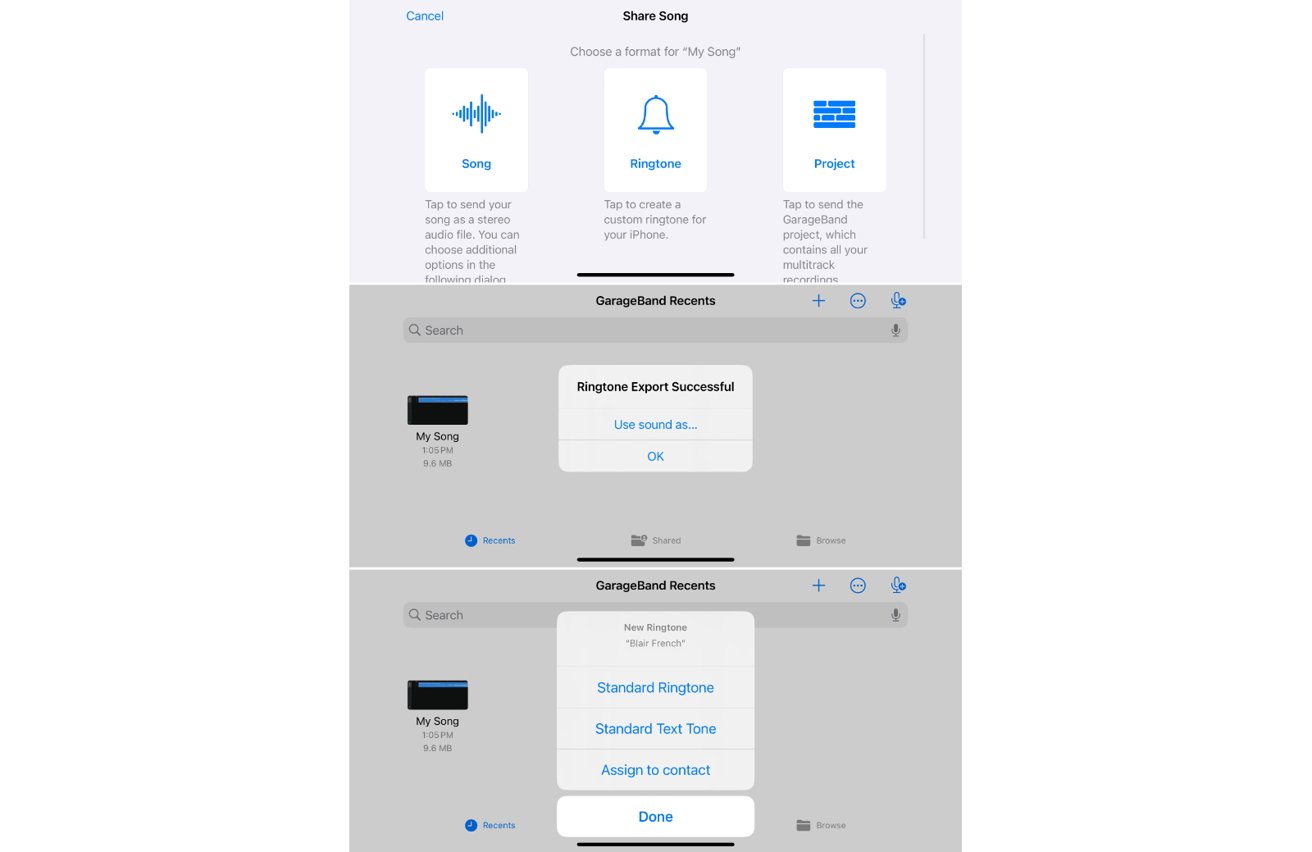 GarageBand on iOS exports it as a ringtone file which appears in Settings
Within the Files app's user interface in GarageBand, you can set a file as your iPhone's default ringtone or assign it to a specific contact.


-m.jpg)


 Chip Loder
 Oliver Haslam
 Malcolm Owen
 William Gallagher
 Amber Neely