There is an incredibly capable Camera and app on the all-new iPhone 14 Pro and iPhone 14 Pro Max. Here's how to get the best shots possible.
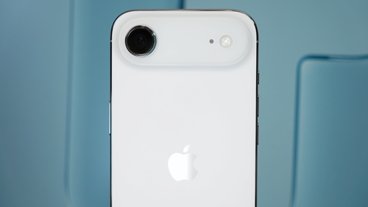
Both iPhone 14 Pro and iPhone 14 Pro Max have a trio of cameras to work with on the back. The primary camera is a 48MP wide angle lens and it is saddled with a 12MP ultra-wide lens and a 12MP telephoto lens.
This year, Apple has bolstered the camera with a reworked Photonic Engine, Action Mode, and more. Let's walk through the ever-growing feature set of Apple's latest pro iPhones.

Volume buttons
If we start with the controls of the Camera app, sometimes tapping the screen isn't ideal. A simple tap can cause the phone to move, inadvertently blurring your photo in the process.
Apple has a solution to this by allowing the volume buttons to double as easily-reachable shutter buttons.
Pressing either the volume up or volume down button will, by default, capture a photo. Holding either button will start recording a video. Once you release the button, the video capture will stop.
If you venture into Settings, you can change this behavior. By heading to Settings > Camera, you can toggle on burst capture.
When this is enabled, holding the volume up button will instead start capturing burst photos. Releasing the button will stop capturing those photos.
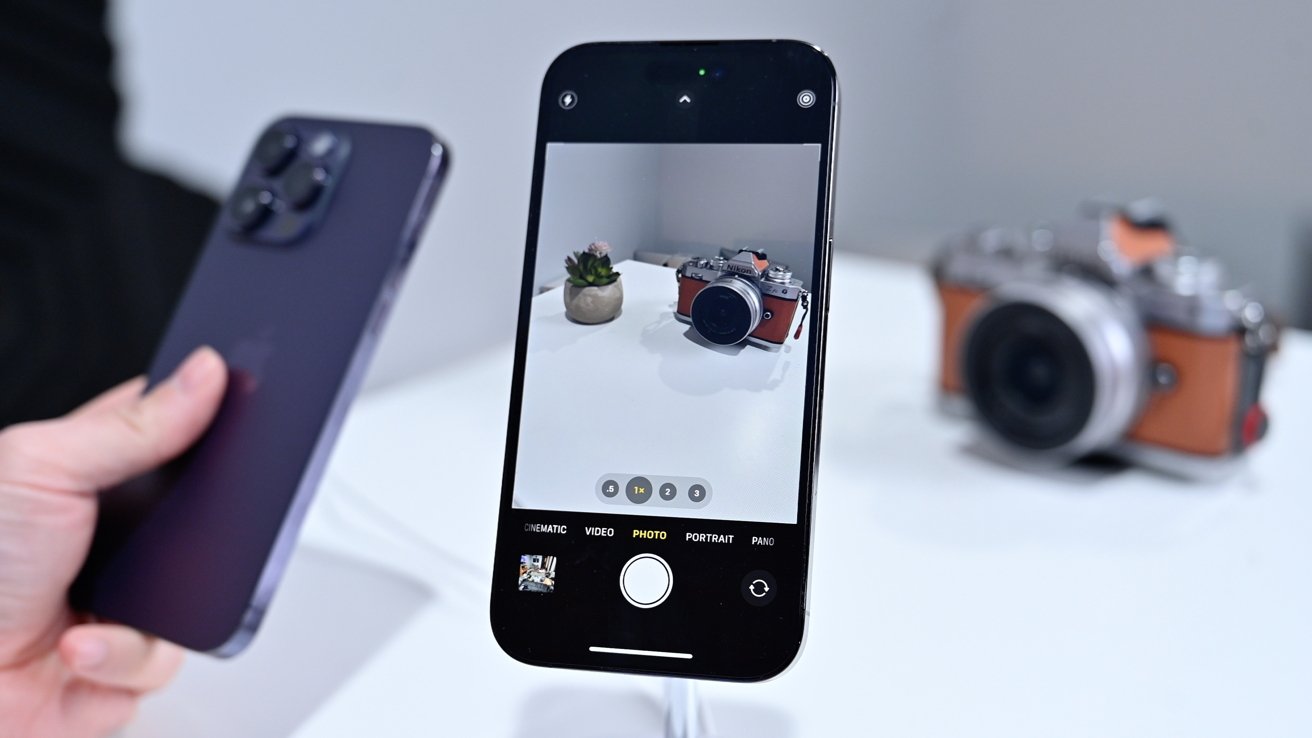
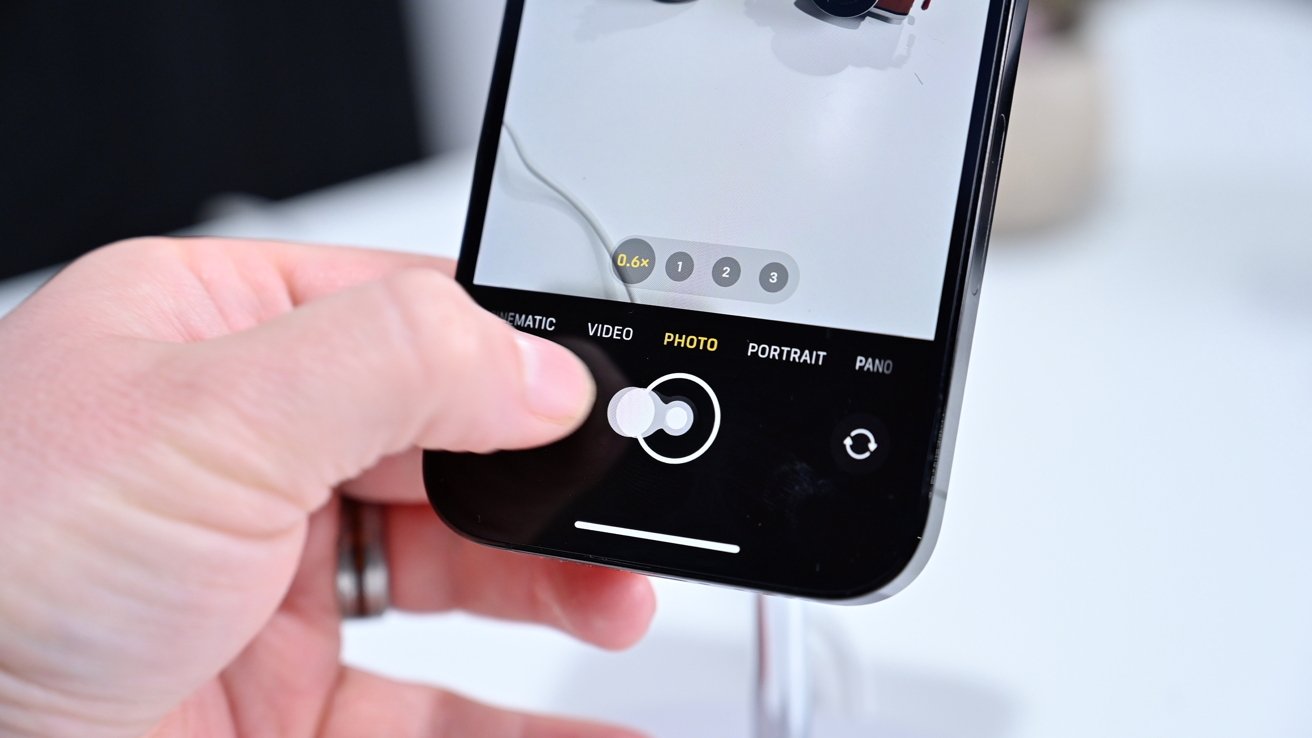
Controlling the zoom
On the iPhone 14 Pro and iPhone 14 Pro Max there are four optical-quality zoom levels to choose. There is .5X that uses the ultra-wide lens, 1X that relies on the primary wide lens, 2X which also uses the primary lens, and 3X that uses the telephoto lens.
The idea is Apple can use the center 12MP from the larger, 48MP sensor to achieve a 2X zoom without any real loss in quality. If we got ultra-technical, there is some loss of quality because Apple can't utilize pixel binning when this happens, meaning the now-smaller pixels capture a bit less light.
That said, it will yield better photos than employing digital zoom. Digital zoom works by cropping the photo instead of adjusting the optics, yielding a lower resolution photo.
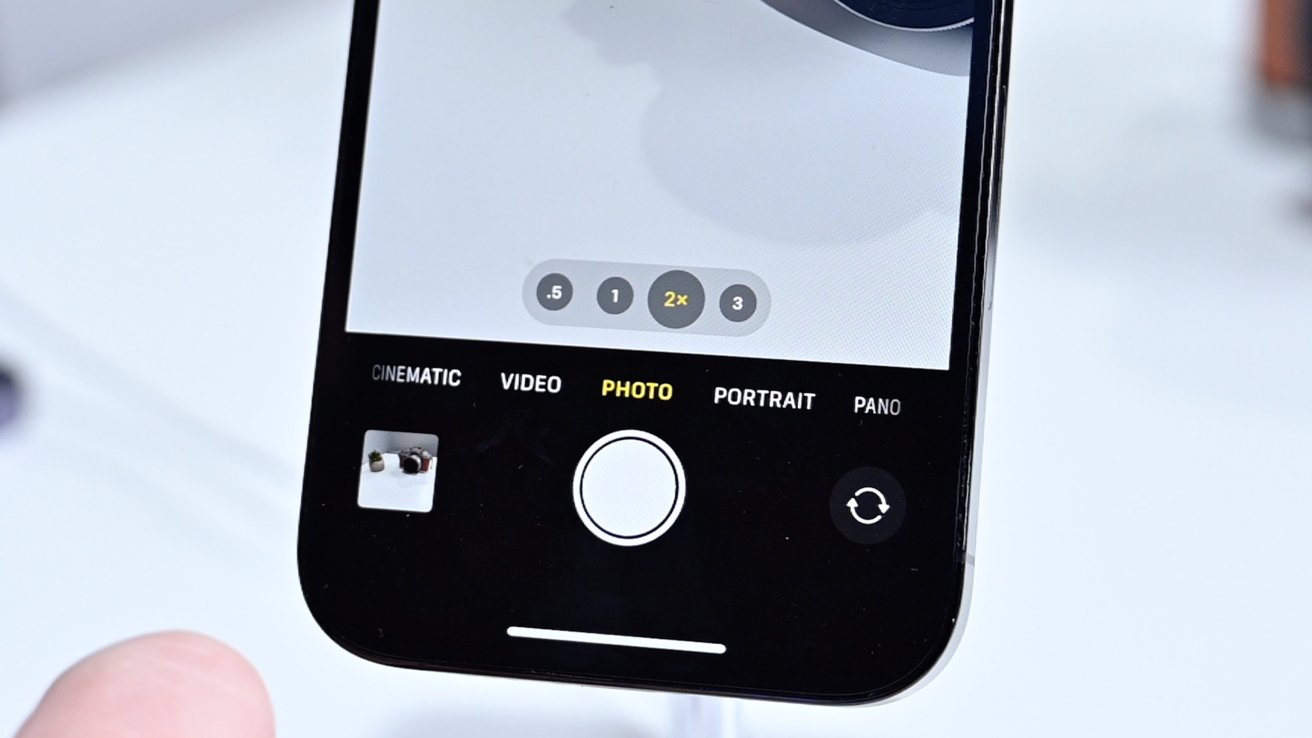
Preset xoom levels
You can scope between these preset zoom levels by tapping the circular indicators above the shutter button. Another little-known trick though is when you tap on any of them, you can hold and slide your finger up or down.
This gesture will surface a wheel where you can dial in the zoom level you're looking for, all the way to 15X digital zoom. The preset zoom levels have the focal length equivalent below the zoom level.
Once done, you can swipe the wheel towards the shutter to rid yourself of it, or wait a few moments for it to disappear on its own. The other option is to pinch in or out, though it isn't as convenient and blocks the screen.
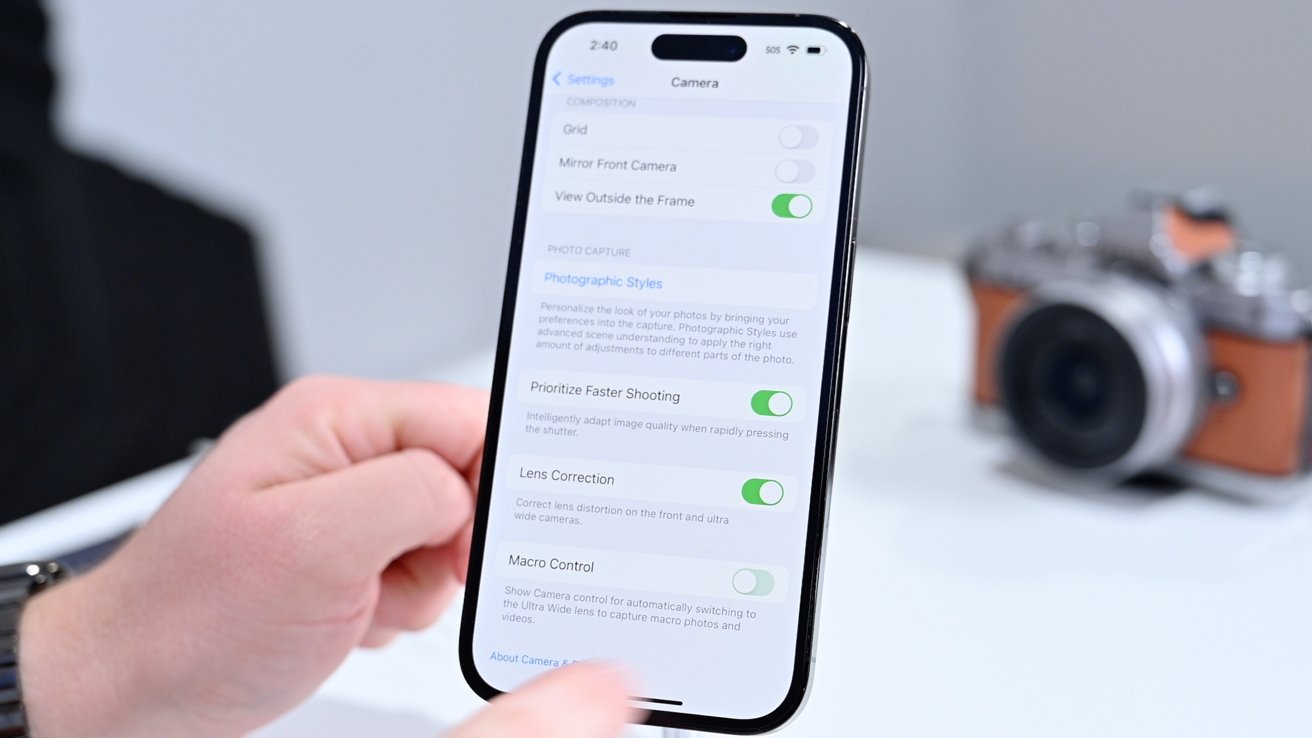
Macro toggle in settings
If you want to shoot in Macro Mode, you can bring your phone very close to your subject at which point Macro Mode will turn on. It can focus mere millimeters from the lens. If you don't want this to happen automatically, you can enable a toggle from within Settings.
Apple QuickTake
QuickTake is effortless to capture photos, videos, or burst shots instantly. Tapping the white shutter button will snap a pic for you, but a video records when you hold it. Without having to swtich to video mode.
Video will continue to be captured as long as you're holding the shutter button and will stop once it is released. if you plan on recording for a while, slide the shutter button to the right, which locks it into video mode and you don't have to hold the button.
Capturing burst photos with QuickTake
If you want to capture burst photos, you can tap the button and immediately pull it to the left. Now it will capture burst photos as long as you hold it. A counter will appear in the original shutter button circle to inform you of how many shots have it captured.
Bonus controls
Near the top of the phone, located on either side of the Dynamic Island, are additional controls that will change based on your shooting situation. You may see the ProRes or RAW indicator, the flash icon, the Night Mode icon, or the Live Photo toggle.
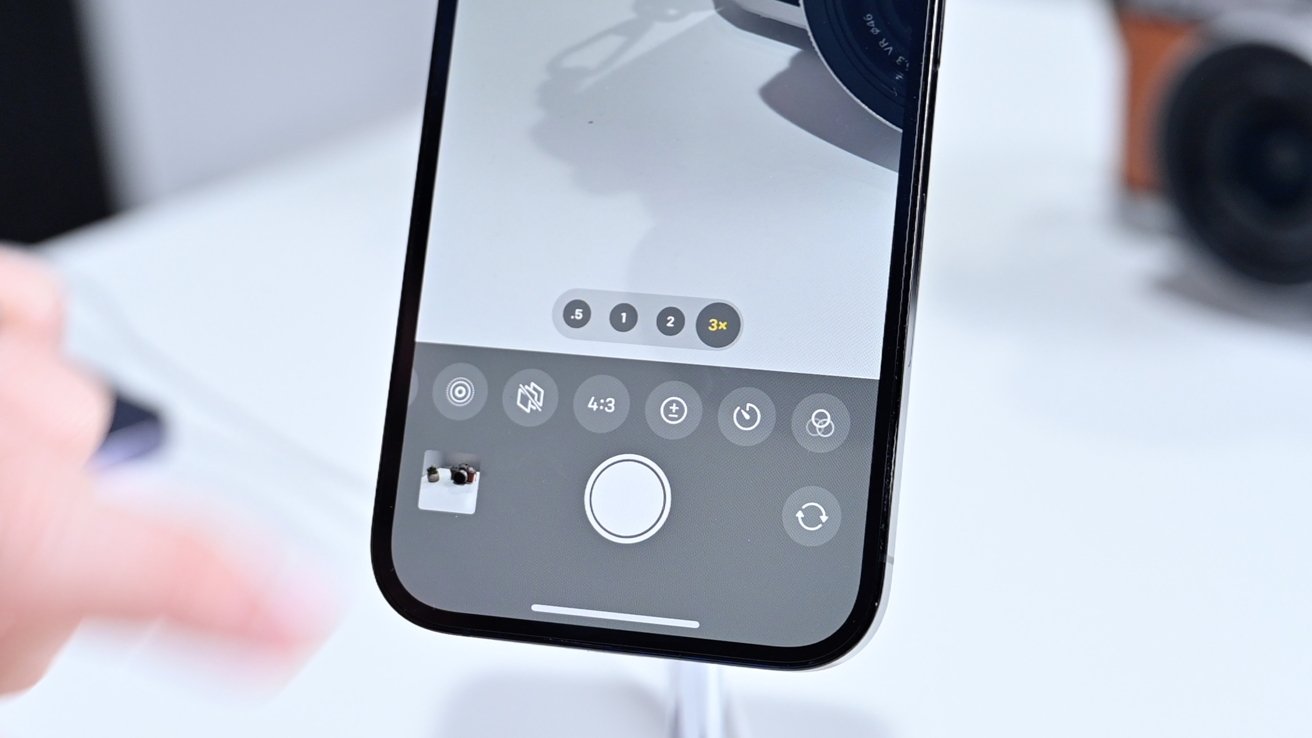
Advanced controls
Besides these, there is a carrot arrow located dead-center that you can tap to unveil several other controls above the shutter. These icons include the flash control (auto, off, on), Night Mode (appears only when dark), Live Photo (on, off), Photographic Styles (choose from five styles), aspect ratio (4:3, 1:1, 16:9), exposure compensation, timer, and filters.
Night Mode is still here with the iPhone 14 Pro and simulates the impact of a slow shutter speed. On a traditional camera, leaving the camera shutter open longer will allow more light to hit the sensor, allowing you to take photos in dim settings. The trick is you just can't move the camera while the photo is being taken.
Night Mode will kick on automatically when it detects a low-light scene. It will adjust the shutter duration based on how much the phone and subject move. Freehand, the iPhone may limit it to a two or three-second shutter. When propped up on a tripod, the shutter can stay open for as long as 30 seconds.
By tapping the Night Mode icon, you can adjust this shutter length manually by sliding it left and right. Again though, it won't give you an option for 10, 15, or 30 seconds if the phone is moving too much.
You can apply filters after you take a photo, but Photographic Styles are new with the iPhone 13 line. These are added at the time of capture and can be customized to your shooting preference. If you made changes and don't like them, you can reset them by tapping the undo arrow on the right edge.
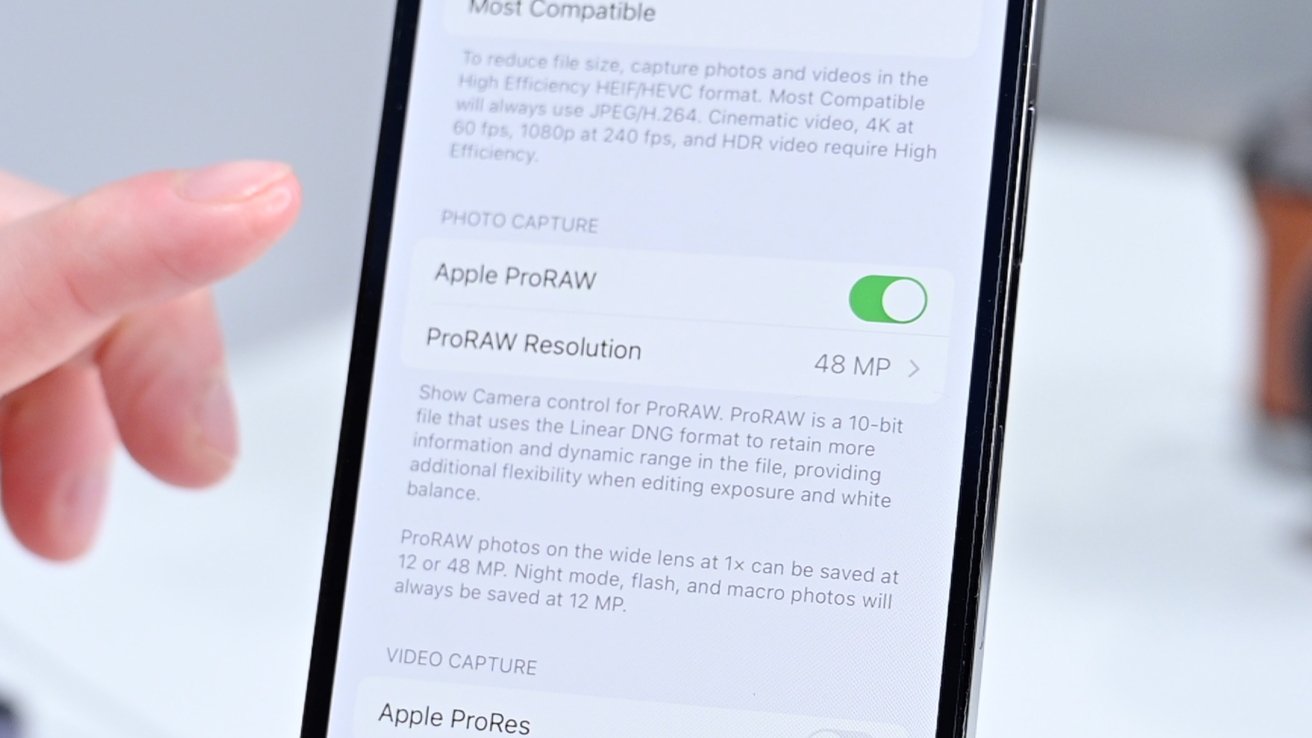
RAW settings
There are some situations where you may want to shoot in RAW. These uncompressed photos take up much more space but allow more detail into the image, especially in the highlights and shadows.
With iPhone 14 Pro, you can capture 12MP RAW photos or using the entire 48MP sensor. When using the whole sensor, you may see more grain in the image. So only rely on RAW mode if you know what you're getting into.
Video recording on iPhone 14 Pro
Apple has provided users with four video modes on the iPhone 14 Pro — kinda. There is timelapse, slo-mo, Cinematic, and your standard video mode.
When you switch to video mode, the resolution and frame rate will show in the top-left corner. Tap either of the numbers to change. Depending on your video mode, different recording resolution and framerates will be available, based on what the phone can capture.
This year, Apple upgraded Cinematic Mode on the iPhone 14 Pro to capture video at up to 4K. It was previously limited to 1080P HD. When shooting in 4K, you can record at 24 or 30 frames per second.
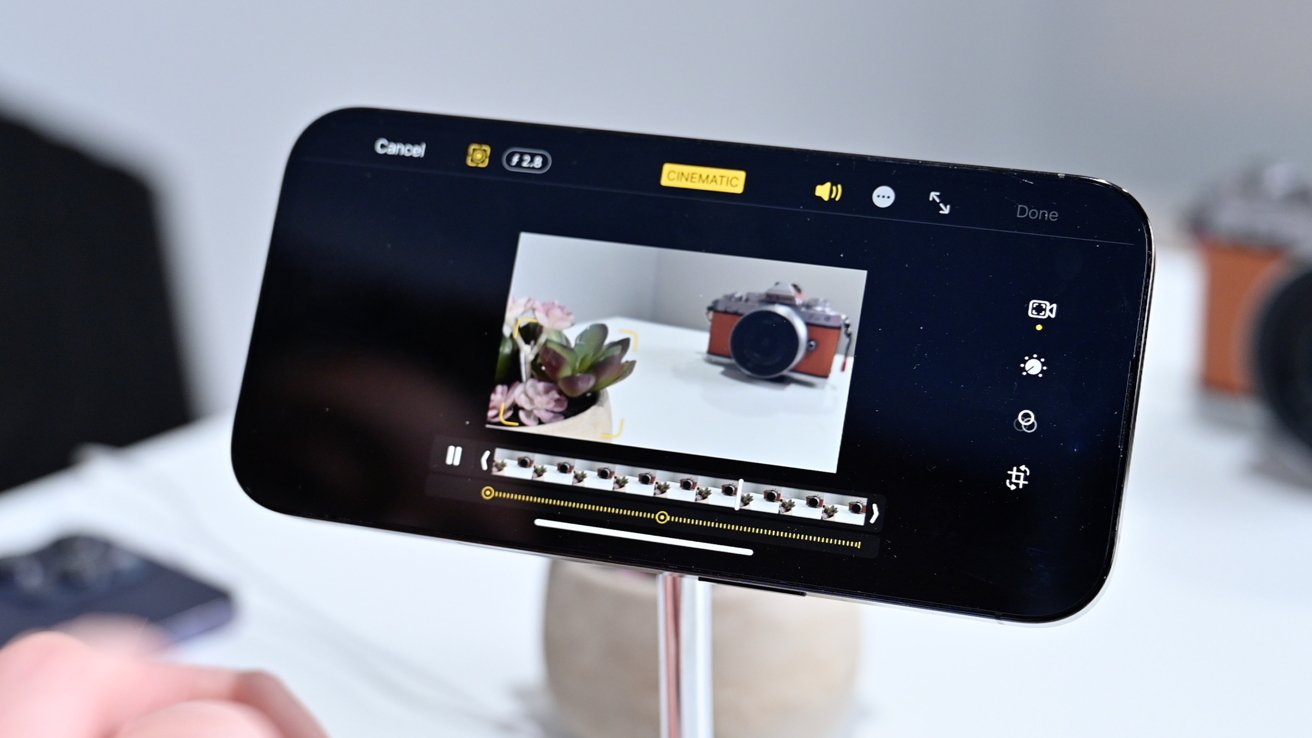
Editing a Cinematic Mode video
If you haven't heard of Cinematic Mode before, it mimics Portrait Mode but for video. It will keep your subject in focus while blurring out the rest of the scene. Once you're done shooting, you can adjust the focus as necessary based on what you want to emphasize.
During the editing process, you have control over the subject and the simulated aperture. By adjusting the aperture, you can change how much the background is blurred, just like with Portrait Mode.
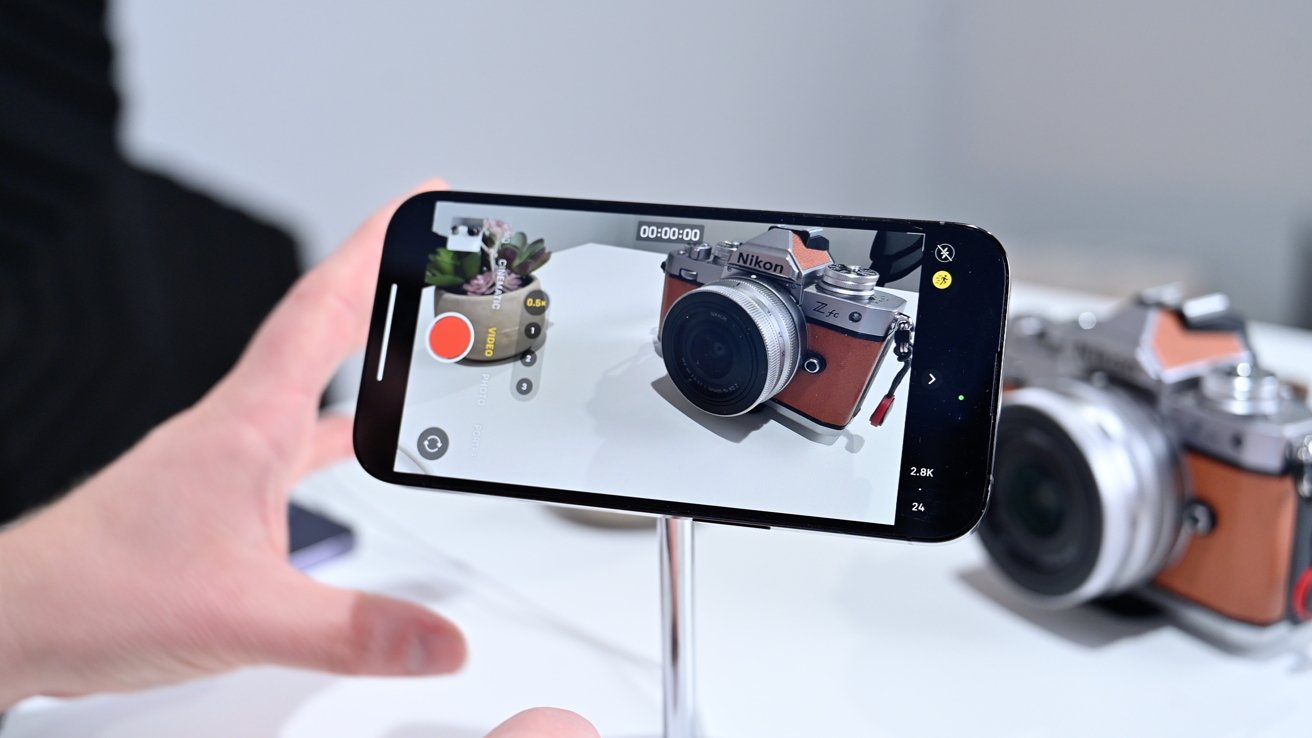
New for iPhone 14 Pro users, is Action Mode. Action Mode lets you capture smooth video while moving rapidly. Think of it as a highly stabilized video you would normally capture with a gimbal using solely your iPhone.
To enable this mode, just put your phone into video mode and you'll see a new icon appear at the top. It looks like a man running and when enabled, you can move about and still capture smooth video.
Action Mode enabled
Action Mode can record at 2.8K and does have a slight crop to the video. The crop is necessary for the post-shooting stabilization your phone applies.
You need a lot of light for Action Mode, but there is a setting that will enable low-light support. With this on, the stabilization effect won't be as effective.
Get shooting
Third-party camera apps are always an option for iPhone users but many still stick with Apple's stock options. It's for that reason it is so important for Apple to continue adding features to the default Camera app.
Whether you're shooting in Portrait Mode, capturing live photos, or filming a stylized Cinematic Mode video, the Camera app has you covered.