
Apple has not made giant changes to dictation in macOS Sonoma, but yet again the small improvements it has introduced will significantly help users. Here's what's new in Dictation and how to make the most of it.
Apple includes its improvements to dictation as one of the key benefits of upgrading to macOS Sonoma, but it's one that you can easily miss. That's because on the surface, dictation appears to be exactly the same as before.
It's identical in how you turn on the feature, right down to the one toggle you need to click in System Settings. But what happens now when you click Dictation to on is subtly different.
With macOS Sonoma, you can dictate and type at the same time. That doesn't sound different, and it also doesn't sound especially useful.
You're not, for instance, going to be dictating one paragraph while you're typing another below it, even if your mind could cope with that.
However, you are going to be dictating, then spotting a dictation error or simply changing your mind about a sentence, and fixing it. You can now turn to the keyboard and type a correction, a new sentence, or anything you like — without turning off dictation.
Now you can dictate something, make typing corrections, then sit back and carry on dictating.
Enabling dictation now lets you keep it running even when you pause speaking to type something
Previously, you had to enable dictation, then for each time you wanted to dictate, call up the feature. It would then listen until the moment you touched the keyboard, like the way your car's cruise control switches off when you touch the gas.
So you would start dictation, stop it, then have to start it again. Dictation was therefore either a choppy kind of start/stop operation, or you would put up with mistakes until you'd dictated a lot of text and could go back over it.
How to enable dictation
- Open System Settings
- Scroll down to Keyboard
- In the pane that appears, scroll down to Dictation
- Click the switch next to the description beginning "Use Dictation wherever..."
- When prompted, click Enable to confirm
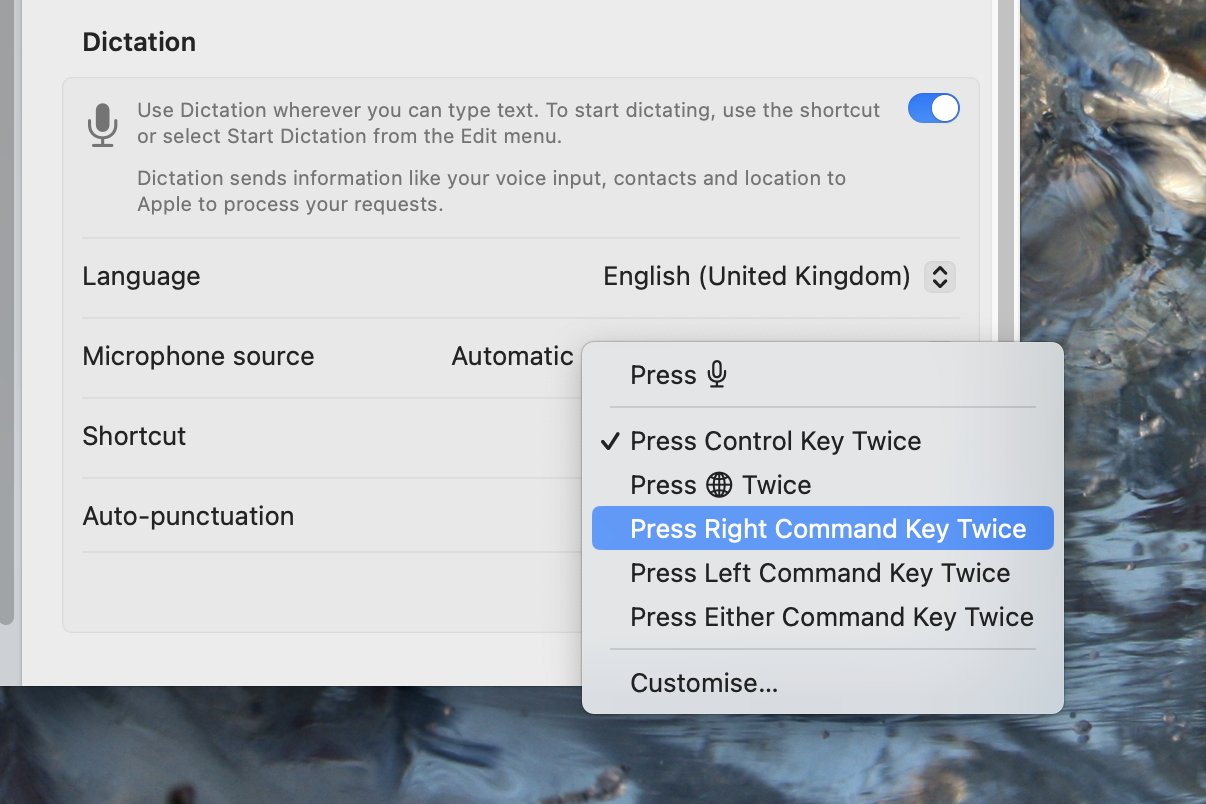
In this same section of System Settings, you can decide what microphone the dictation engine should listen to. This is also where you specify what language you want to be able to dictate into.
This section is also where you can set whether dictated text will automatically be punctuated or not, and you can set up how to invoke dictation.
By default, you invoke dictation by pressing F5 on your Mac's keyboard. There are other options, such as pressing the Control Key twice, but curiously whatever you select, you appear to still be able to use F5.
Making dictation mainstream
Apple also says that macOS Sonoma's Dictation benefits from "accuracy improvements through next-level speech recognition." It's the same speech recognition that is being used to drive the improved auto-correction features across the Mac and iOS 17.
So Dictation is now more likely to correctly transcribe what you're saying. And if it doesn't, you can now type a correction without instantly turning off Dictation.
Consequently, Apple is making Dictation better and easier to use. Small improvements, small changes, are making a big difference.