 Chip Loder
Disk Jockey is an app that allows you to create disk image files for a variety of retro computers and emulators. Here's how to use it.
Retro computing is popular these days, and one aspect of vintage computing is managing the various disk and file formats one has to deal with when using these machines.
Jean-Michel Durand of Belgium has created a disk image formatter called Disk Jockey for retro computers.
Using Disk Jockey, you can create disk images for a variety of retro computers. You can also inspect the contents of existing disk image files for foreign file systems on your Mac or Windows computer.
There's also a command line tool called Disk Jockey Jr, and a version for older versions of Mac OS X called Disk Jockey 1999.
Using Disk Jockey, you can also create image files for many of today's modern emulators such as Basilisk II, Mini vMac, the SP2SD device for Apple II, and the WinUAE Amiga emulator.
Disk Jockey also has support for the BlueSCSI and PiSCSI SCSI drive replacement devices, and the Floppy Emu device from Big Mess 'o Wires.
AKAI music sampler formats are also supported.
Supported computers
Disk Jockey allows you to create disk image files for the following computers and formats:
- Macintosh HFS, HFS+, MFS, Disk Copy 4.2, .iso, and Toast images
- BlueSCSI, PiSCSI, RaSCSI
- Basilisk and Mini vMac
- Apple II DOS 3.3 and ProDOS images
- Apple II SP2SD SD card reader devices
- Atari ST TOS .ST and .MAS formats and ST Pi emulators
- Commodore Amiga ADF floppy and HDF WinUAE images
- Commodore Amiga partitions using HDInstTools and Workbench
- AKAI Sample disk images
Retro computer timeline
Before the Mac appeared in 1984, two other major companies competed in the 1980's computer space: Atari and Commodore. Apple sold a computer called the Apple II in the early 1980's.
The Apple II was designed more for business users, and is considered the machine that started the personal computer revolution. But gaming on the Apple II quickly caught on and became a huge market.
Apple II used two disk image formats for 5.25-inch floppy disks: DOS 3.3 and ProDOS.
Atari had a series of personal home computers starting with the Atari 400 and 800, the XL line, and the Atari ST, which was the first Atari home computer featuring a graphical user interface.
Commodore was a Canadian company that began as a calculator company. It also got into the personal computer space with the VIC-20, Commodore 64, and the Amiga.
The Amiga was considered one of the best computers of the era due to its specifications, but it was soon eclipsed by the Macintosh. Commodore ceased Amiga production in 1992 - a full eight years after the first Mac was released in Jan. 1984.
Before the Mac, Apple released the Apple III, which was considered a commercial failure:
 Apple III
Like the early Macs, the Amiga was also based on the Motorola 68000 family of CPUs. Each of these machines used its own disk and file formats, and they were largely incompatible with each other.
Today, there are many ways you can read and write these disk formats on modern computers - and then reuse the images on older machines, or on modern emulators which mimic the original hardware.
Older Mac disk volume formats
The original Mac used a file system called Macintosh File System (MFS) which was a bit like current Mac file systems, except that it didn't support folders. Everything was kept at one level in the filesystem.
MFS was itself derived from the OS used on the Mac's predecessor, the Apple Lisa.
When the Mac Plus was released in 1986, Apple also released the Hierarchical Filesystem or HFS. Later in the 1990s, an extended version of HFS was released called HFS+ (Mac OS Extended) which allowed for larger volume sizes and more files.
Most older Macs from pre-2000 use HFS+ - and you can still format disks as HFS+ in macOS's Disk Utility app today.
Many of today's Mac emulators such as Basilisk II, Sheepshaver, and Mini vMac use one or more of these formats. Mini vMac is an emulator which mimics the original version of the Mac OS which shipped with the Mac Plus (called System 6.0.8):
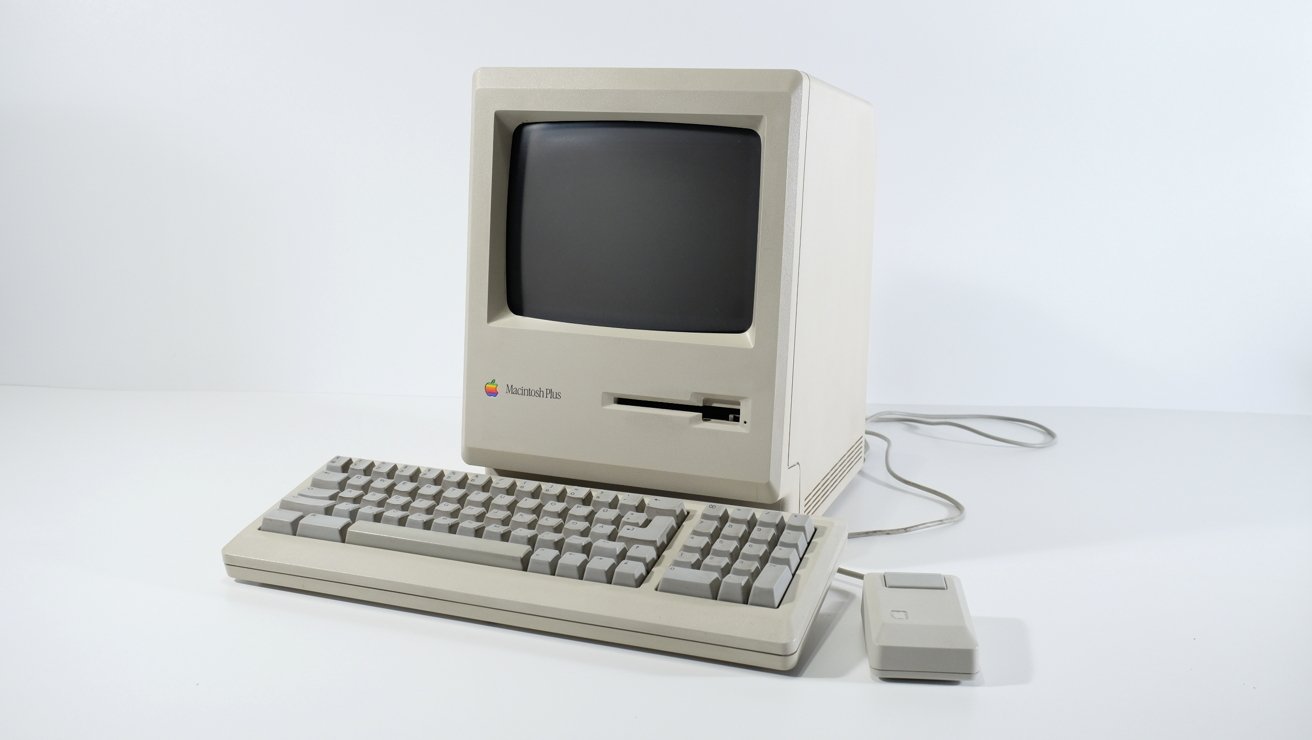 Mac Plus
Original Macs and some late Apple IIGS computers used a disk bus standard called SCSI (Small Computer System Interface). Today, devices such as BlueSCSI, PiSCSI, and RaSCSI allow you to replace your original Mac's SCSI disk with a modern SD card-based solution which is smaller and faster.
The original Mac OS had a component in the operating system called SCSI Manager 4.3 which implemented most of the SCSI device command software in Mac OS 8.5 through 9.x.
You can purchase some of the SCSI replacement devices on Durand's online web shop at onegeekarmy.eu
Other cool Disk Jockey tricks
Disk Jockey can also perform a host of other drive replacement/conversion operations such as:
- Convert Basilisk II iimages to BlueSCSI, PiSCSI, or RaSCSI
- Replace vintage Mac OS LIDO SCSI drivers with a classic driver for better performance
- Copy or extract drive partitions between devices
- Extract files and folders from disk images to your Mac
- Create JSON descriptions of your disk images
Lido 7.x was a hard disk formatter app for Mac OS 9 back in the day from Surf City Software which was similar to other disk formatters such as FWB's Hard Disk ToolKit, Anubis, Disk Tools, and others. Using Lido or other disk formatters, you could format hard drives, floppy disks, and removable media in the same way you use Apple's Disk Utility today.
Download and run Disk Jockey
Durand understands simple design and Disk Jockey features a single utility window for disk operations. To install Disk Jockey on your Mac, download it from diskjockey.onegeekarmy.eu
If you're running an older version of MacOS X or macOS from Tiger 10.4 through 10.12 Sierra, and only want to create images for Basilisk II, Sheepshaver, FloppyEmu, or BlueSCSI use the Disk Jockey 1999 version of the app. Disk Jockey 1999 even supports older PowerPC Macs running 10.4 Tiger built for PowerPC processors.
 Disk Jockey 1999 for early Mac OS X.
Motorola PowerPC was the original CPU architecture used on mid-to-late 1990's Macs before Apple made the switch to Intel x86 CPUs.
Once you've downloaded Disk Jockey, just double-click it in the Finder to launch it. You'll see the main window appear:
 Disk Jockey's main window.
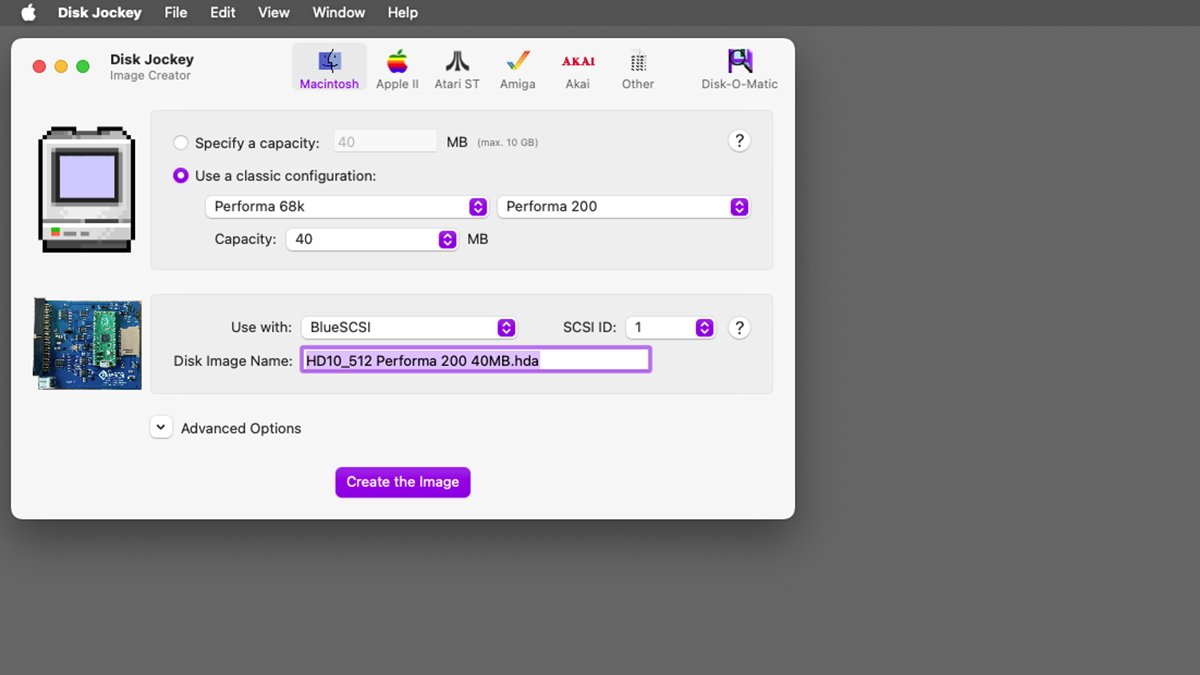
To create a disk image, first click the computer type in the tab bar at the top. When you do the UI changes for that machine type.
For all supported computer types the UI provides settings for disk name, capacity, and file system type.
Under the Macintosh tab there are additional options for preconfigured disks for several classic 1980's and early 90s Macs which you can select from a popup menu.
Older removable media is also supported such as the iOmega Zip 100 and Imation SuperDisk drives, although most of these used standard HFS+ partitions in their day.
In the second pane under the Macintosh tab in Disk Jockey, you can set which replacement drive device you want to use the disk image for, or which emulator you will be using it with. You can even set its SCSI device ID number.
Each device on a SCSI bus has a number ranging from 0-7.
There's also an Advanced Options tab where you can choose which disk driver to use. On some older SCSI devices, the Mac OS disk driver was stored on the device itself, not in the operating system.
This allowed device drivers to be replaced and kept with the device as it was moved between computers.
Once you have all the settings the way you want them, click the Create the Image button. A standard Mac save sheet will appear where you can select a name and location to save the new disk image file to.
Disk-O-Matic
On the far right side of the Disk Jockey toolbar is a button named Disk-O-Matic. Clicking this button opens a disk image analyzer window.
If you drop a disk image into the window or open one using the Open button, Disk-O-Matic will show you the contents of the image. This is a quick and cool way to see disk image formats on your Mac without having to use them on actual hardware or in an emulator.
Disk-O-Matic displays Partition Map type, info on the installed SCSI driver for the disk, and volume formats.
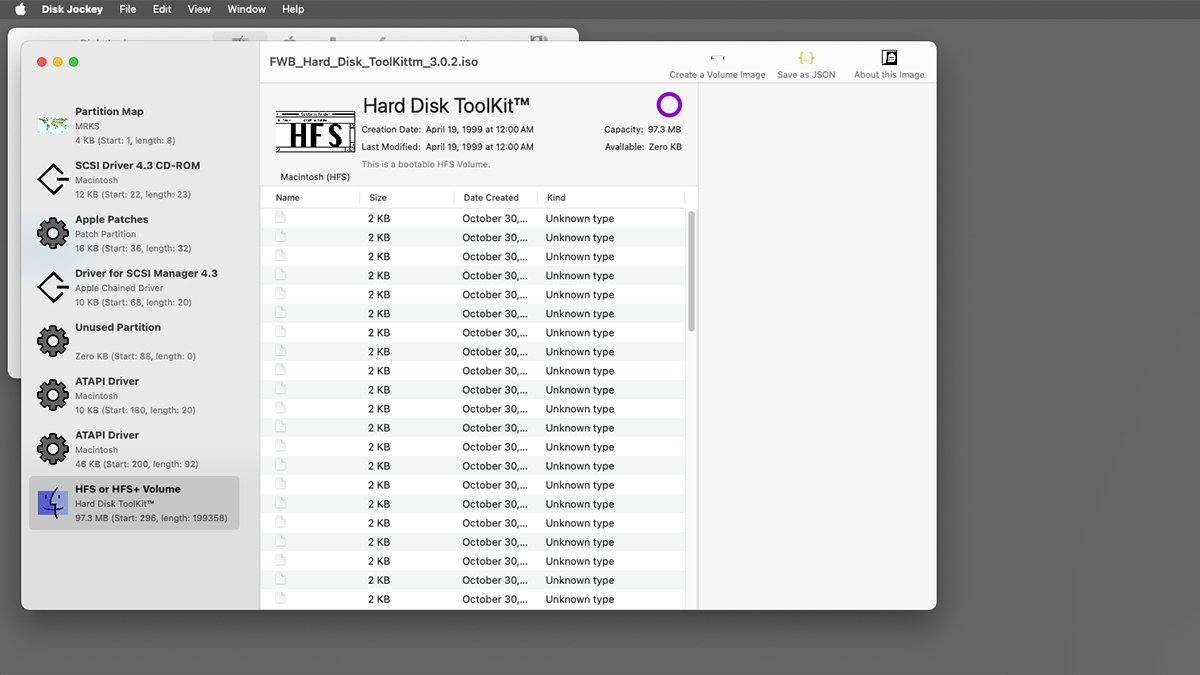 The Disk-O-Matic window in Disk Jockey.
If the device also contains an ATAPI driver, its details are shown as well. ATAPI is a packetized version of ATA that is mostly used for optical drives such as CD//DVD-ROM and Blu-Ray.
In some cases, a special auxiliary Apple "patch" driver may be installed on a disk. This is because Apple's original disk drivers included some features that were proprietary, which third-party drivers couldn't replicate.
Durand has done a great job with Disk Jockey and it's simple and easy to use. In this day of bloated software and feature creep, it's a welcome throwback to the early days of Mac software - but for modern Macs.
If you're into retro computing, Disk Jockey is great. There's also a very concise and easy-to-read help document on the Disk Jockey website.
For more informaton on retro computing and emulators, see our previous articles on how to use classic Mac, Lisa, NeXT, Apple II software on a Mac, how to make a working 3D printed mini Macintosh.
For details on how to use foreign file systems on your modern Mac see How to use foreign file systems in macOS.


-m.jpg)

 Brian Patterson
 Charles Martin


 Malcolm Owen
 William Gallagher
 Christine McKee
 Marko Zivkovic


7 Comments
I had to read this just because of the Zip disk drive picture. I probably have 3 Zip disks lurking somewhere, but no drive!
After 25 years I finally downloaded my Mac Zip drives to my new iMac. I have some additional disks I think are MSDOS disks but can’t seem to read them.
PowerPC was IBM, not Motorola.