 Chip Loder
The Erase Assistant in macOS allows you to restore your Mac to its original state. Here's how to use it and get back to a fresh desktop.
If you want to reset your Mac to its original state to start from scratch, you can use the macOS Erase Assistant to do it. Apple also created this app to make it easy for anyone who wants to sell, give away, or trade in their Mac to erase it using minimal steps.
Running Erase Assistant directly
As a standalone app, it lives hidden away on your Startup Disk at /System/Library/Core Services. However, it also gets run by the system via the System Settings app, via instructions at the end of this article.
If your Startup Disk isn't visible on the Finder's Desktop in macOS, you can show it by using the Finder->Settings menu item and then checking Show these items on the desktop under the General tab.
Also, see Apple's page titled What to do before you sell, give away, trade-in, or recycle your Mac for more info on the Erase Assistant.
That page lists the requirements to use the Erase Assistant, namely that the Mac must be an Apple Silicon-based Mac, or a Mac with a T2 Security chip in it. It also must be running macOS Monterey or later.
You can also simply open the Core Services folder on your Mac's Startup Disk and double-click the Erase Assistant app directly to run it:
 The Erase Assistant app in Core Services.
When you first launch the Erase Assistant, you'll be asked for the default admin's password. Enter it and click Unlock.
If you're on macOS Monterey, there is no Erase Assistant - instead the System Preferences menu item on the Apple menu in the menu bar has a submenu named Erase All Content and Settings.
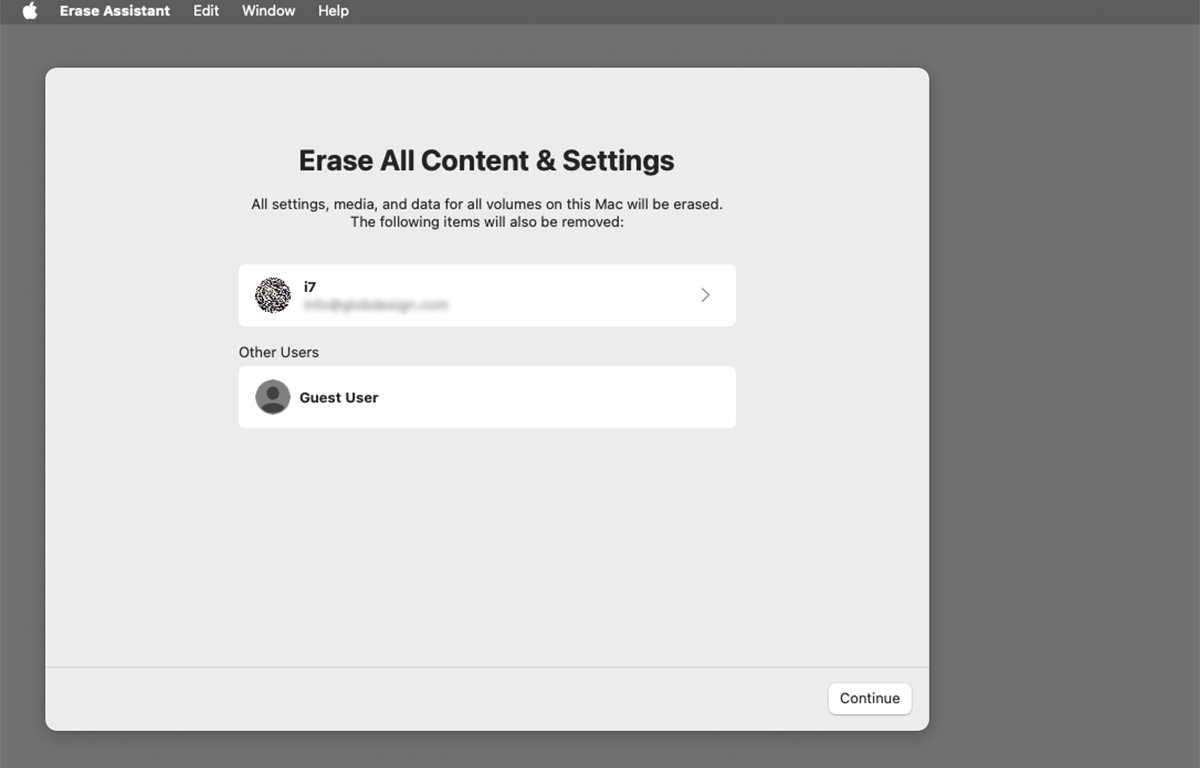
Once the Erase Assistant opens, you'll see its initial screen informing you all data, settings, and media will be erased. It also tells you which users will be removed from your Mac.
You can click the Continue button to go to the next step, or you can click the default admin user at the top of the window.
 Initial Erase Assistant window.
Be sure to back up first
As the name strongly hints, the Erase Assistant will wipe your Mac clean. Before you proceed, you'll want to be sure to back up all your drives to a backup drive, unplug it, and store it away somewhere safely.
This includes backing up any macOS system settings, preferences, bookmarks, configuration, or other important files. The Erase Assistant doesn't just reset the user settings - it erases everything - as if your Mac was brand new and just out of the box.
So, if you have any valuable data on your Mac, be sure to back it up first. If you don't, you'll lose everything.
Back in the Erase Assistant
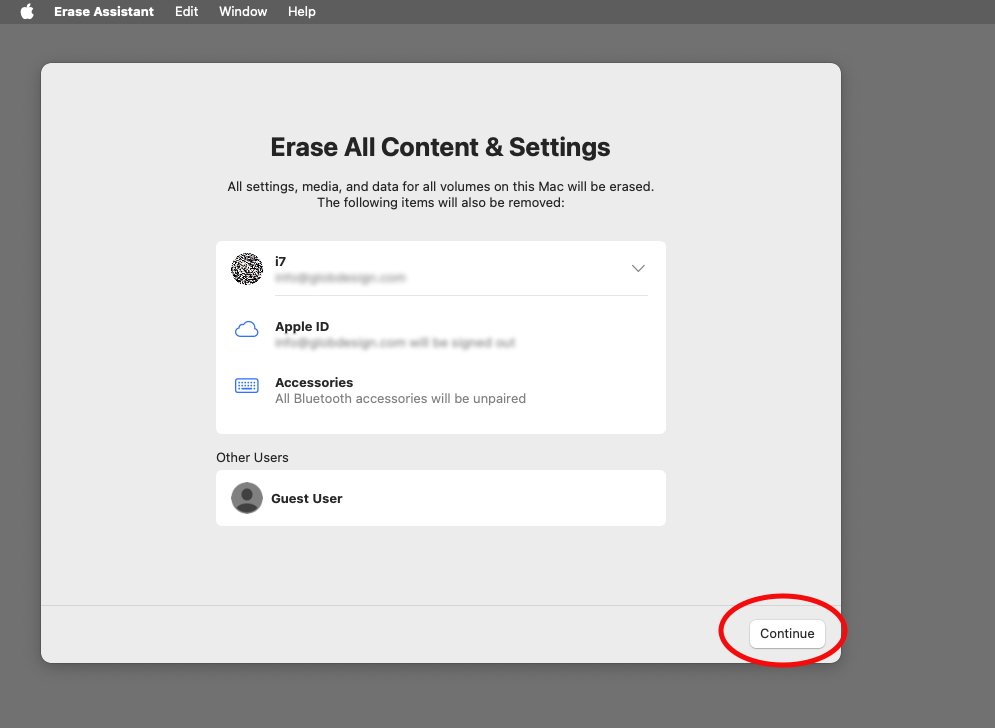
On the Erase Assistant's first pane, you'll see the list of users currently on your Mac. If you click the default user shown, the app will also inform you that its Apple ID, if any, will be signed out, and all connected Bluetooth devices will be unpaired.
 Additional user info.
These are purely informational items, and you don't need to do anything with them. The default user with the turnable arrow just hides additional info Apple thought might be important to know - it doesn't really affect what gets erased.
If you're ready to erase everything, click the Continue button in the lower right corner of the window.
You'll be prompted with the final warning before the erase happens. If you definitely want to reset your Mac to its factory condition and erase everything, go ahead and click the Erase All Content & Settings button.
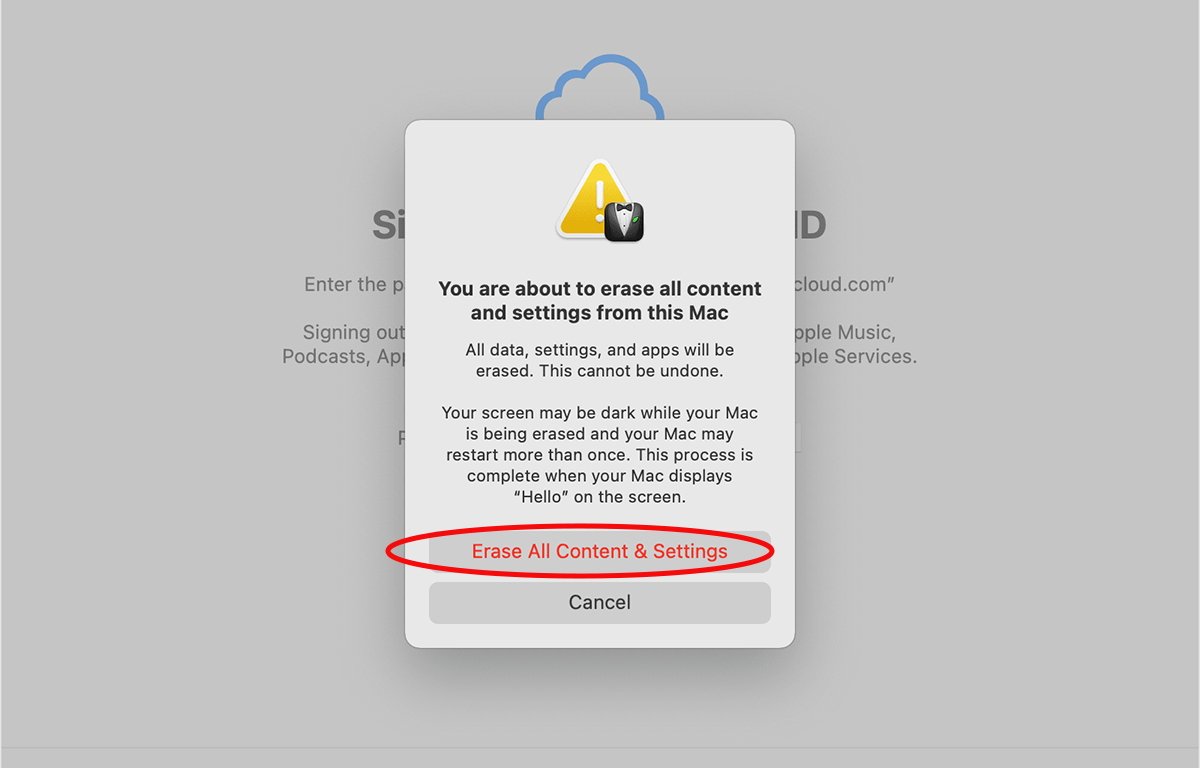 The final warning.
The final reboot
Your Mac will restart, and you'll see a progress bar on the screen after reboot.
Depending on which Mac you have, you may or may not see a black screen with the smiling Mac logo, and a message saying "Your Mac is activated". If you click the Restart button from here, your Mac will restart again and run the macOS Setup Assistant just as if it was brand new.
If you're not keeping your Mac, at this point you can press and hold the power button to power it down, and you're done. If you do want to keep it and set it up again as if it were new, follow the steps in the Setup Assistant to finish setting it back up.
Running the Assistant from System Settings app
To open the Erase Assistant from the macOS System Settings app, open System Settings from the Apple->System Settings menu item in the menu bar, then click the General tab on the left, then Transfer or Reset:
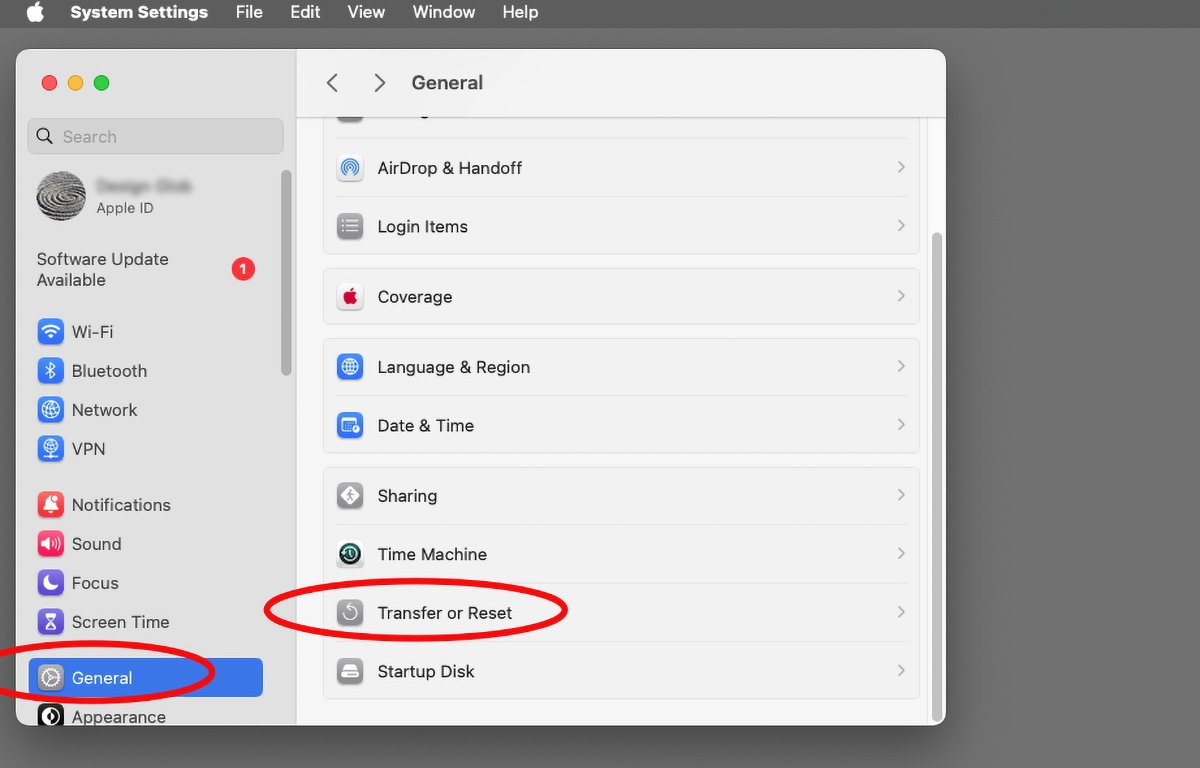 The "Transfer or Reset" item.
On the next pane, click the Erase All Content and Settings button, and System Settings will open the Erase Assistant. From here the steps are the same as described above.
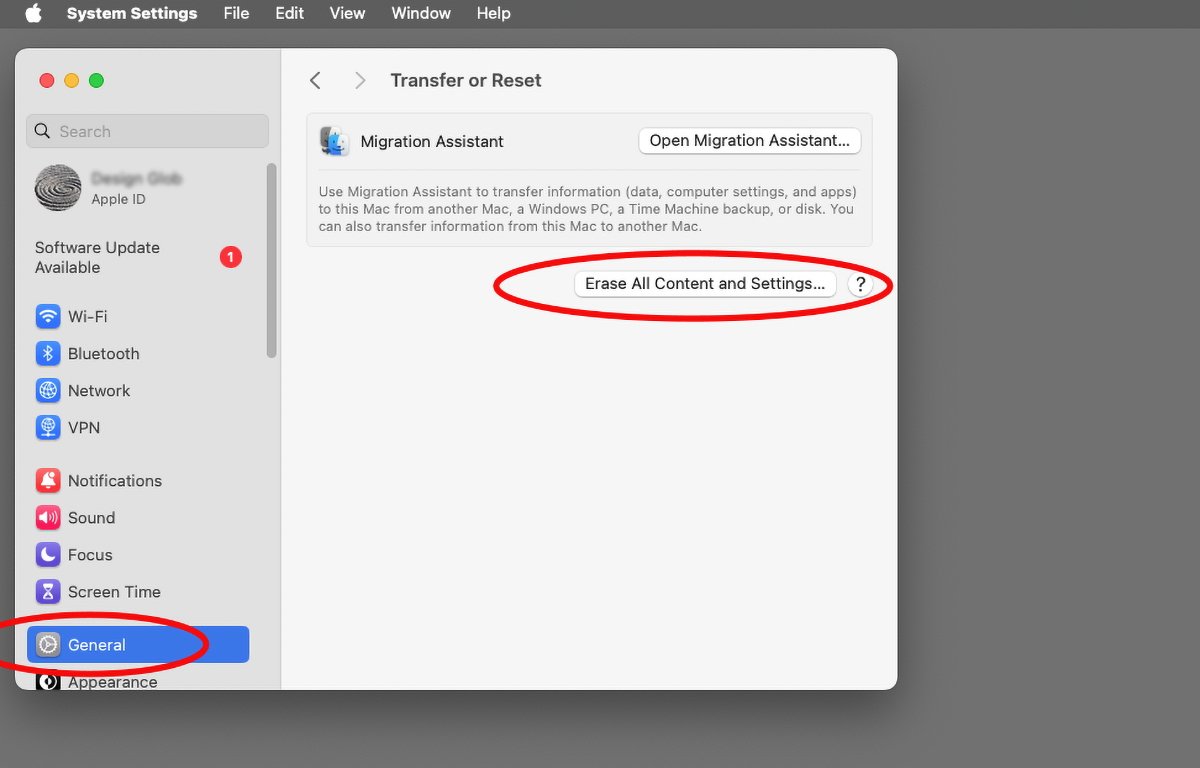 Erase All Contetn and Settings.
Once you click the button, the Erase Assistant runs just as if you had double-clicked it in the Finder. Use the same steps as above to Erase your Mac.
Apple has an additional page Erase your Mac and reset it to factory settings which details all the steps involved when using the macOS Erase Assistant.


-xl-m.jpg)


 Amber Neely
 Andrew Orr
 William Gallagher


 Christine McKee

 Thomas Sibilly


1 Comment
Very helpful, thanks!!