When you've written your manuscript, you can use other design apps and online services to make a paperback that is indistinguishable from a book from a regular mainstream publisher.
Writing the book is the longest part of the process, and last time we left you to do that part. Ultimately, though, you will have written a book manuscript and that's when we can talk about making an e-book and especially a paperback out of it.
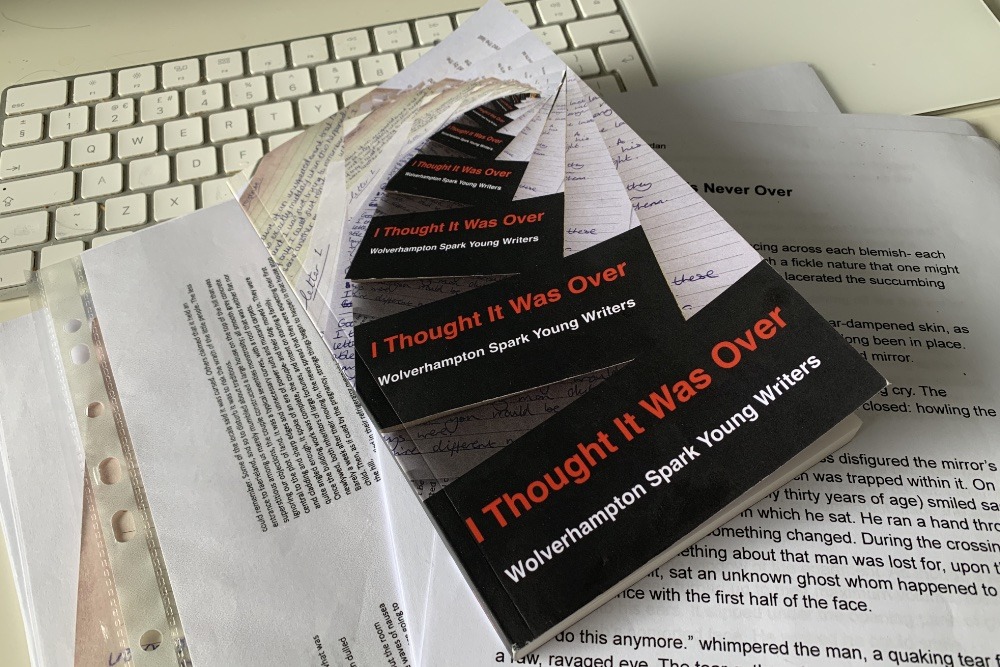
We're going to use an app called Vellum to make a book, in this case a collection of stories and poems by young writers, called "I Thought It Was Over." We used the Mac-only Vellum app because it is gorgeously designed, it is extremely easy, and it's also fast.
It's not a casual purchase, however. Vellum used to have a per-book cost, but now it's a one-time purchase for making as many titles as you want.
The only consideration is whether to go for the $199.99 version that solely produces e-books, or the $249.99 one that does those plus paperbacks. Go for the paperback one as while it's not quite the case that having that version means producing a paperback is one more click after you've done the e-book, it's very close.
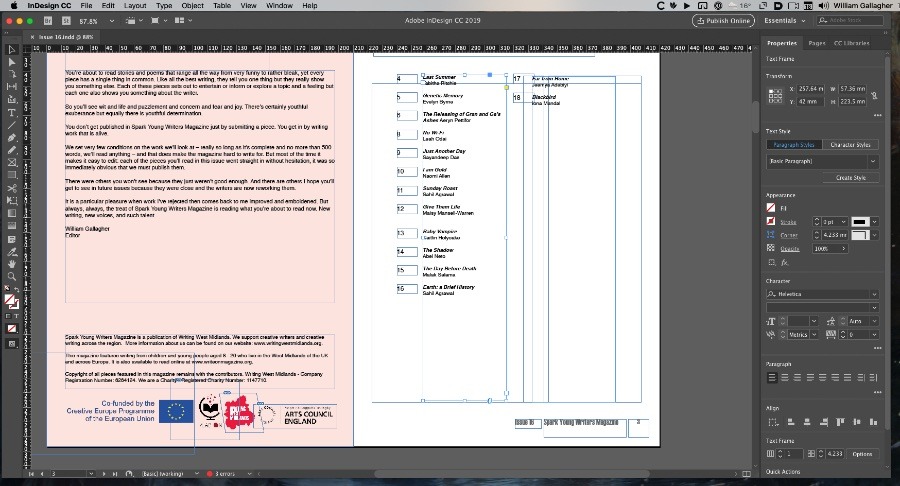
Adobe InDesign does give you extraordinary control over ever detail of every page
You could instead go for Adobe InDesign orQuarkXPress. Both are more full-featured design apps and both give you vastly more control over how your book looks. However, both are complex tools and much of that complexity has nothing to do with book design. Vellum can only produce books, and it's easier to use for that.
Importing
Vellum is also easy to use because it comes with only a very few templates for e-books and print. There are options for whether you're making an e-book for Apple's Books Store or a Nook, and there are options for different paperback trim sizes.
Beyond that, Vellum gives you just eight choices for how your book will look. They differ in the fonts used, the way chapter headings are done, and so on. To this day, we've only ever used the default one, called Meridian, because it looks so good.
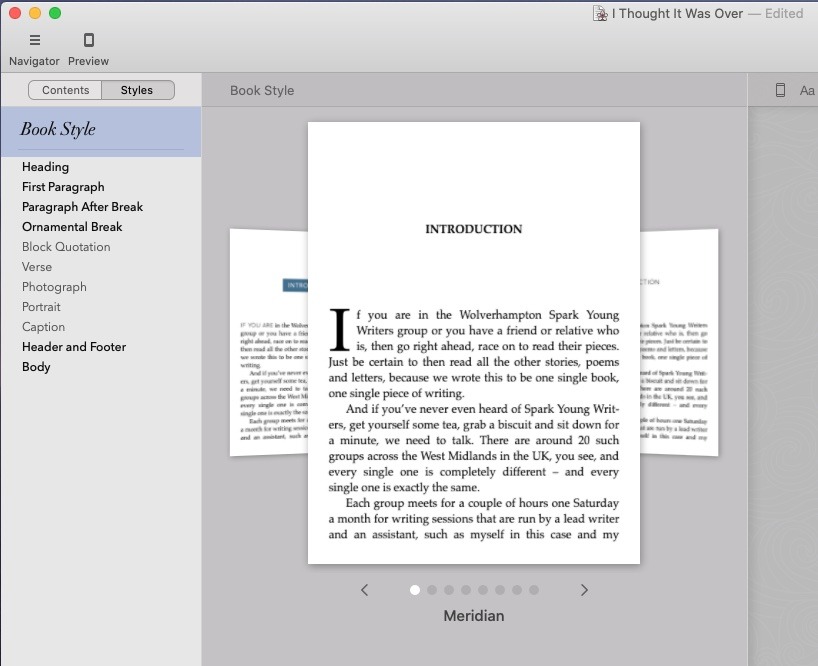
Vellum has just eight templates — but they're great and we've only ever used the first one
At any point, you can change between the eight, you can alter the trim size, and you can see what it is all going to look like on any e-reader. So get your text in first and then experiment to see what options you like the look of for the potential finished product.
Scrivener now includes a feature for preparing text specifically for Vellum, but it's really a version of the writing app's Word export. You get Scrivener's typically powerful and huge range of options, but ultimately you're producing a Microsoft Word document that is formatted best for Vellum.
Import it into Vellum and then check it over and over again. We have never had an issue with the import but we have often had problems with the Word document.
What's most likely to go wrong at this stage is that a chapter in Scrivener will break into two for some unfathomable reason. All you do is copy and paste until the text is where you want it, though.
Fine-tuning
In the book we did to write this article, we had a long series of short stories and an introduction. We wanted Chapter 1 to be the first story, not the introduction. So we selected that introduction in Vellum's contents navigation bar.
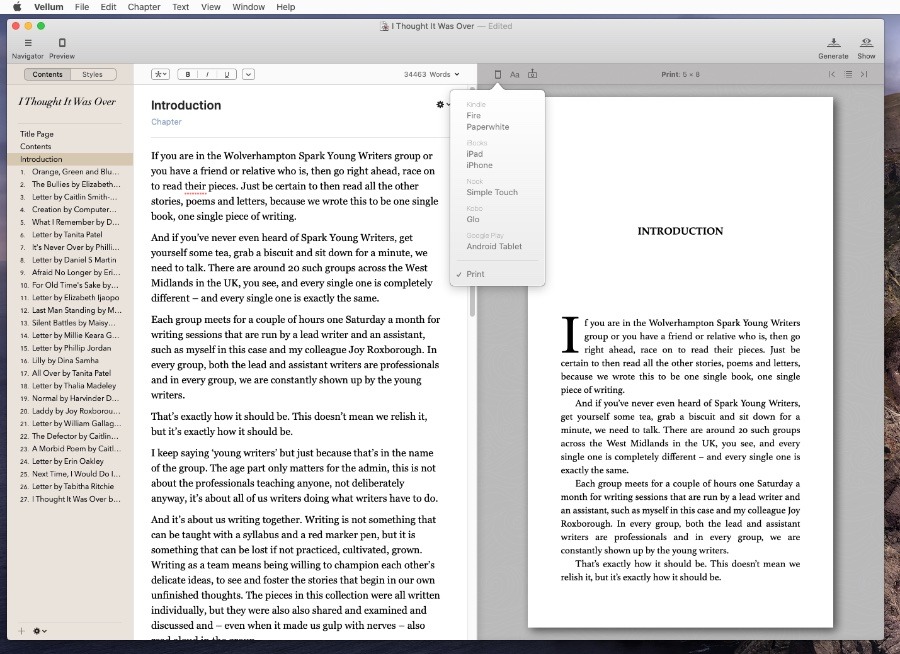
You shouldn't write your book in Vellum, but you can edit. And you can preview how the book will look in e-book readers or print
Then we clicked on the gear icon at the top of the introduction's preview page. By default, the Numbers option is ticked. Untick it. And you're done, the introduction has its own un-numbered section and chapter 1 is the first story.
Do the same with any end matter like afterwords, if you need.
Table of Contents
Our one criticism of Vellum is to do with the table of contents. If you're producing an e-book, Vellum automatically produces this ToC for you. In Vellum itself, you just see a line saying that it will be produced, and then when you export to whichever e-book formats you want, it creates the correct ToC for that device.
That's very good and it removes a complexity we used to have when doing e-books in Adobe InDesign. And Vellum will do exactly the same thing when you choose to produce a paperback — except this time you have to explicitly tell it to.
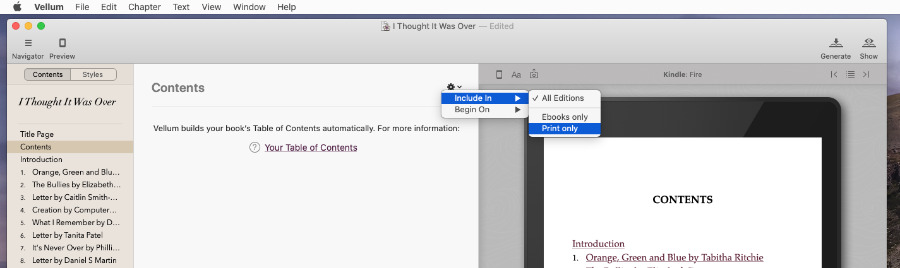
We do keep missing where those gear icon controls are
To get a contents page in your paperback, you have to click on the Contents in the navigation pane. Then click on the gear icon at the top of the page that appears, now choose Include In and select All Editions or Paperback Only.
The reason it's not a default is presumably because you could use Vellum to produce paperbacks for any publishing or printing service and with some you'll want to separately create the ToC.
However, it's fiddly enough to set that we have to look up the online help every single time.
Finishing up
We're most interested in making paperbacks, but it's barely any more effort to make e-books too. And this stage, when your manuscript is ready, is the first place where there's anything else to do make an e-book.
It's the cover. All books have covers but you put the e-book one into Vellum. You don't put the paperback one in there.
Click on the title of your book in the navigation pane. In the page that appears, fill out the author name and any other details you want, then click on Ebook Cover.
Now drag a JPG or PNG into the page that appears. Vellum will not complain if the image is landscape.
However, it will object if the image is too small. There's nothing in the Vellum app that tells you what the sizes should be, but if you drag in an image that's too small, you'll get a warning that specifies "2560 x 1440 or larger is recommended."
We used Pixelmator Pro for this and were able to begin with a new blank document to exactly those dimensions so that we knew we were going to produce a correctly-sized image.
Export
Next, click the Generate button. You can choose then to produce solely, say, an e-book for a Nook, or every possible option. Choose the lot.
In each case, Vellum produces a folder that contains two files. One is the interior of the book in PDF and the other is the front cover image.
These two are all the materials you need to create an e-book in any service, including Amazon's Kindle Direct Publishing.
You will also need to write a description — a blurb — which will go Amazon's store and you'll need to pick a categories for the book.
That's true for the paperback, too, but the print edition needs something that Vellum does not produce.
Paperback cover
You should use the same design for the front over your paperback as you do for the e-book version. That means you've got the cover image already done — but there are two more elements you need.
The comparatively easy one is the back cover. That could even be a single plain color with your blurb written on it.
Designing the front, back and spine of the book in Pixelmator Pro
What's just a little tricker is the spine of the book. You have to prepare one single PDF which has both the front and the back on it, plus artwork for the spine. Again, that can be a plain color with your title on, but you've still got to prepare it.
And right now you cannot know how wide that spine has to be. Make the artwork too narrow and Amazon's service will reject it. Make it too wide and Amazon might reject it, but might also just print it out with the spine spilling over to the front and back.
Amazon is the solution, however, because you can use its cover template calculator.
Open your Vellum PDF to see how many pages are in it, then go to that page and enter the number. The calculator works with every print size that Amazon supports so make sure you've selected the same one you had in Vellum.
Then you need to make a decision about the color of paper that you'll have in the final book. This is more significant than you'd imagine, because choosing White, Cream or Color affects the paper stock that gets used. That makes a tiny difference to the width of the paper, but over the length of a book, it adds up.
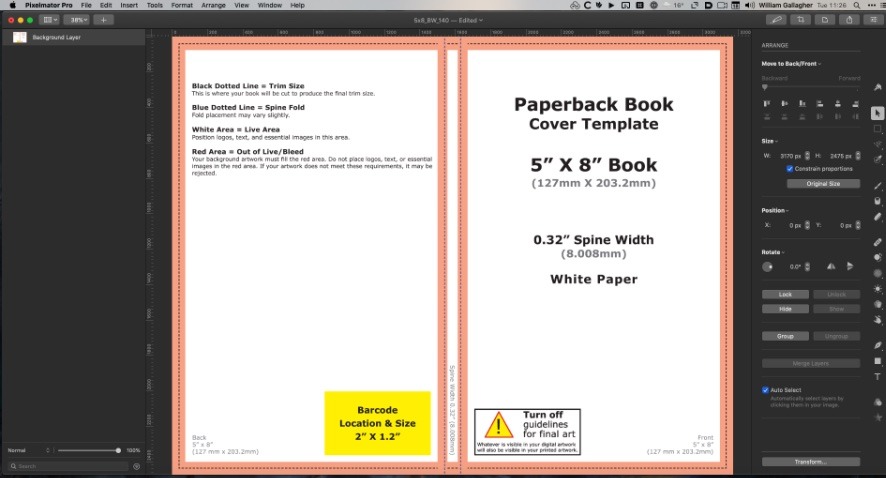
If you feed Amazon's publishing service with the page count, trim size and type of paper in your book, it will make this cover template for you.
Unless you have some reason to know you want something else, pick White. Then click Download cover template.
When you do this, you get two template files. One is a PDF and one is a PNG. Other than that, they are identical, so pick whichever you prefer and open it in an image editor.
The templates are clear and very well designed. You see exactly what size everything is and, most importantly, what parts of the template will get printed. For instance, if you put your title too far outside the area marked for printing, it may get cut off.
Add your front cover image, design the back and the spine, then export it as a PDF.
Production
Any online service, including the Amazon Kindle Direct Publishing service that we used for the book we made for this article, needs certain things in a certain order.
First you're going to enter the details of the book, such as its title and the blurb. Then you're going to upload the interior of the book in PDF — as Vellum as created for you — and the PDF of the cover.
What we like about Amazon's service is that it creates an online preview of the book. Don't rely on it solely, though. Go through it to correct any errors it finds such as image problems or blank pages, but then also order a proof copy.
This is one copy of the paperback which is produced at cost and sold to you before it's made publicly available. Go through that proof, correct your cover and your interior PDF, then re-upload it to Amazon.
If the slowest part of the job is writing the book, the second slowest can be waiting for Amazon. Each title gets checked over and the company says it can take a day. It also says that it can then take up to a further 72 hours for your title to be available on the site.
However, we found throughout producing "I Thought It Was Over" that Amazon was much faster.
And that's the case for every step in producing your own paperback, apart from the writing. Self-publishing is not better than the alternative, but it is faster and you do have far more control. Plus, now the right Mac apps and your own skill can potentially produce a book perfectly.
Keep up with AppleInsider by downloading the AppleInsider app for iOS, and follow us on YouTube, Twitter @appleinsider and Facebook for live, late-breaking coverage. You can also check out our official Instagram account for exclusive photos.